


android数据库开源库
长期以来,我一直在考虑创建一个开放源代码的android库。 我坚信为开放源代码做出贡献并阅读开放源代码可以使一个更好的工程师成为事实。 但是我从来没有亲身体验创建自己的库。
我着迷于如何将Android库发布到JCenter以及如何通过在gradle中放置一行来下载它的方法,我想到了发布一个简单的Android库。
由于这是我第一次编写开源android库,因此我认为最好使其尽可能简单。 我想真正快速地创建一个库并发布它,以便掌握整个过程。
我知道创建某种SDK会花费很多时间。 因此,我决定摆弄UI。 我想创建一个简单的动画视图。 这是我在工作中遇到的用例,要求我将用户的注意力吸引到按钮上。
我想到要添加一些动画 。 脉冲动画(增长和收缩)似乎是最有效和最快的。 因此,我决定继续使用我的图书馆。 创造一些我可以在日常工作中使用的东西。
另外,我在某种程度上意识到我可以通过使用ValueAnimator简单地做到这一点。 顶上的樱桃😉
我用空白活动创建了一个新的Android Studio项目。
创建项目后,我创建了一个名为Pulsating Button的类,并从LinearLayout对其进行了扩展。 这将是我要制作动画的CustomView / Button。
 class PulsatingButton : LinearLayout {
     constructor(context: Context?) : super (context) {
         init(context)
     }
     constructor(context: Context, attrs: AttributeSet, defStyle: Int) : super (context, attrs, defStyle) { constructor(context: Context, attrs: AttributeSet, defStyle: Int) : (context, attrs, defStyle) {
         parseAttributes(context, attrs)
         init(context)
     }
     constructor(context: Context, attrs: AttributeSet) : super (context, attrs) { constructor(context: Context, attrs: AttributeSet) : (context, attrs) {
         parseAttributes(context, attrs)
         init(context)
     }  }
从那以后,我必须为按钮赋予属性,例如脉冲速度/脉冲率。 脉冲大小,重复次数等是多少?
我想知道是否可以为其使用属性,事实证明我可以。 花了一些时间学习如何添加自定义xml属性后,我继续为按钮创建了7个自定义属性:
- 心率
- 脉冲计数
- 水平偏移
- 垂直偏移
- 文本
- 文字颜色
- 背景
我在值包中创建了一个名为:attributes.xml的文件,并将其属性放在其中。
 <?xml version= "1.0" encoding= "utf-8" ?>  <resources>
     <declare-styleable name= "PulsatingButton" >
         <attr name= "pulseDuration" format= "integer" />
         <attr name= "horizontalOffset" format= "integer" />
         <attr name= "verticalOffset" format= "integer" />
         <attr name= "pulseCount" format= "integer" />
         <attr name= "buttonColor" format= "color" />
         <attr name= "textColor" format= "color" />
         <attr name= "text" format= "string" />
</declare-styleable> </resources> 有了适当的属性后,就该将这些属性应用于Button了。 我添加了一些全局变量,并解析了属性。
现在是时候为按钮创建布局文件了。 布局文件包含一个作为子按钮。 这将是根视图。
我将在全局变量中提取按钮。 完成后,在脉动按钮的init方法内,我继续设置属性。 还添加了一些通过代码动态设置这些变量的方法。
 class PulsatingButton : LinearLayout {
     private var buttonText: CharSequence? = var buttonText: CharSequence? = ""
     private var textColor: Int = ContextCompat.getColor(context, android.R.color.black)
     private var buttonColor: Int = ContextCompat.getColor(context, R.color.colorAccent)
     private var verticalOffset: Int = 40
     private var horizontalOffset: Int = 40
     private var repeatCount: Int = Int.MAX_VALUE
     private var animationDuration: Int = 1000
     val set = AnimatorSet()
     constructor(context: Context?) : super (context) {
         init(context)
     }
     constructor(context: Context, attrs: AttributeSet, defStyle: Int) : super (context, attrs, defStyle) { constructor(context: Context, attrs: AttributeSet, defStyle: Int) : (context, attrs, defStyle) {
         parseAttributes(context, attrs)
         init(context)
     }
     constructor(context: Context, attrs: AttributeSet) : super (context, attrs) { constructor(context: Context, attrs: AttributeSet) : (context, attrs) {
         parseAttributes(context, attrs)
         init(context)
     }
     private fun init(context: Context?) {
         LayoutInflater.from(context).inflate(R.layout.pulsating_button, this , true )
         setColors()
         setText(buttonText)
     }
     private fun parseAttributes(context: Context, attributes: AttributeSet) {
         val attrs = context.theme.obtainStyledAttributes(attributes, R.styleable.PulsatingButton, 0 , 0 )
         try {
             this .animationDuration = attrs.getInt(R.styleable.PulsatingButton_pulseDuration, 100 )
             this .verticalOffset = attrs.getInt(R.styleable.PulsatingButton_verticalOffset, 4 )
             this .horizontalOffset = attrs.getInt(R.styleable.PulsatingButton_horizontalOffset, 4 )
             this .repeatCount = attrs.getInt(R.styleable.PulsatingButton_pulseCount, Int.MAX_VALUE)
             this .buttonColor = attrs.getColor(R.styleable.PulsatingButton_buttonColor, ContextCompat.getColor(context, R.color.colorAccent))
             this .textColor = attrs.getColor(R.styleable.PulsatingButton_textColor, ContextCompat.getColor(context, R.color.colorAccent))
             this .buttonText = attrs.getText(R.styleable.PulsatingButton_text)
         } finally {
             attrs.recycle()
         }
     }
     fun setHorizontalOffset(horizontalOffset: Int) {
         this .horizontalOffset = horizontalOffset
     }
     fun setVerticalOffset(verticalOffset: Int) {
         this .verticalOffset = verticalOffset
     }
     fun setRepeatCount(count: Int) {
         this .repeatCount = count
     }
     fun setAnimationDuration(duration: Int) {
         this .animationDuration = duration
     }
     private fun setColors() {
         button.setBackgroundColor(buttonColor)
         button.setTextColor(textColor)
     }
     fun setButtonDrawable(drawable: Drawable) {
         button.background = drawable
     }
     fun setText(text: CharSequence?) {
         if (!TextUtils.isEmpty(text)) {
             button.text = text
         }
     }  }
现在该创建实际的动画了。 我计划使用ValueAnimator重复生成将用于更改按钮的宽度和高度的值。
我创建了一个名为startAnimation的函数和两个用于水平和垂直缩放的值动画器对象:
 class PulsatingButton : LinearLayout {  ...
     fun startAnimation() {
         val animator = ValueAnimator.ofInt( 0 , verticalOffset)
         animator.interpolator = AccelerateDecelerateInterpolator()
         animator.duration = animationDuration.toLong()
         val animator2 = ValueAnimator.ofInt( 0 , horizontalOffset)
         animator2.interpolator = AccelerateDecelerateInterpolator()
         animator2.duration = animationDuration.toLong()
     }  ...  }
接下来,向其中添加更新侦听器,这些侦听器将接收中间值,并将为每个值更新按钮的边界。
 class PulsatingButton : LinearLayout {  ...
     fun startAnimation() {
         val animator = ValueAnimator.ofInt( 0 , verticalOffset)
         animator.repeatMode = ValueAnimator.REVERSE
         animator.interpolator = AccelerateDecelerateInterpolator()
         animator.duration = animationDuration.toLong()
         val animator2 = ValueAnimator.ofInt( 0 , horizontalOffset)
         animator2.repeatMode = ValueAnimator.REVERSE
         animator2.interpolator = AccelerateDecelerateInterpolator()
         animator2.duration = animationDuration.toLong()
         val originalheight = button.layoutParams.height
         val originalWidth = button.layoutParams.width
         animator.addUpdateListener { valueAnimator ->
             val params = button.layoutParams
             val animatedValue = valueAnimator.animatedValue as Int
             params.height = (originalheight + animatedValue)
             button.layoutParams = params
         }
         animator2.addUpdateListener { valueAnimator ->
             val params = button.layoutParams
             val animatedValue = valueAnimator.animatedValue as Int
             params.width = (originalWidth + animatedValue)
             button.layoutParams = params
         }
     }  ...  }
然后,我检查是否设置了重复计数。 如果不是,则默认为无限重复。 最后,是时候将这两个动画对象组合在一起并一起播放了。 为此,我使用了AnimatorSet。
它应该工作正常吗? 我希望一切都看起来不错,但令我惊讶的是,发生了什么事:
使用ValueAnimator有一个陷阱 。 在花了几个小时研究堆栈溢出和Android官方文档后,我才知道值动画器中的一个属性repeatMode。 必须将其设置为ValueAnimator.REVERSE
这是怎么回事:
默认情况下,valueAnimator会从0到40发出值,例如0、1、2、3……..40,然后它将再次恢复为0并发出0、1,……40。
我想要的是0、1、2……40,然后是40、39、38……..1,0。这是使收缩的动画正常工作所必需的,否则它会在眨眼间缩小。
这可能是该库开发中最紧张,最耗时的步骤。 但是最后,我终于有了:
好的,现在我已经完成了我的书架。 可是等等! 它实际上不是一个库,而是我创建的一个普通的Android Studio项目。
我需要弄清楚如何轻松地将Android Studio项目迁移到库中,否则我将不得不创建一个新的库项目并复制代码。
我需要做的只是在app / build.gradle文件中更改一行。 我需要删除com.android.application并添加com.android.library。
请注意,在那之后您将无法运行项目,因为它是一个库。
完成后,我想弄清楚如何在某个在线平台上发布该库,以便Android开发人员可以轻松使用它。 最简单的方法是使用JitPack.io
您需要做的就是从“发布”选项卡中创建GitHub存储库的发布。
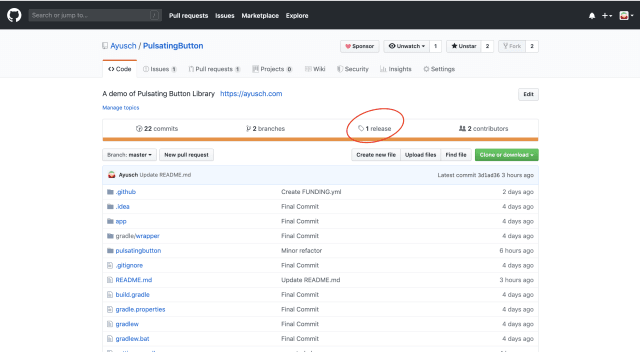
然后继续复制仓库的URL,并将其粘贴到JitPack.io的文本框中。这将生成实现“”链接,以添加到gradle中。
实际上,直到我弄清楚,还必须在项目级别的build.gradle文件中包含jitpack的Maven网址。
Android项目默认情况下不具有此功能,而仅包含google()和jcenter()。 因此,为了减少摩擦,我决定在JCenter上发布我的库。
我如何在JCenter上发布我的android库? 本身就需要完整的文章。 因此,请继续关注第2部分。
结论
本文概述了创建我的第一个开源android库的过程。 最好的学习方法就是做事。 开始编写更好的代码的最佳方法是开始阅读和编写更多开放的源代码,供他人使用!
因此,我敦促您继续为这个简单的开源android项目做出贡献。 它可以像更新文档一样简单。 这是开始使用开源程序的第一步。
翻译自: https://www.javacodegeeks.com/2019/11/how-i-created-my-first-open-source-android-library.html
android数据库开源库


 被折叠的 条评论
为什么被折叠?
被折叠的 条评论
为什么被折叠?
 到【灌水乐园】发言


