


 本文详细介绍了如何在VSCode中安装GCC并配置C/C++开发环境,包括插件安装、c_cpp_properties.json配置、tasks.json和launch.json文件的生成与修改,以及调试代码的步骤。
GCC的安装
# 安装gcc
$ sudo apt-get install gcc
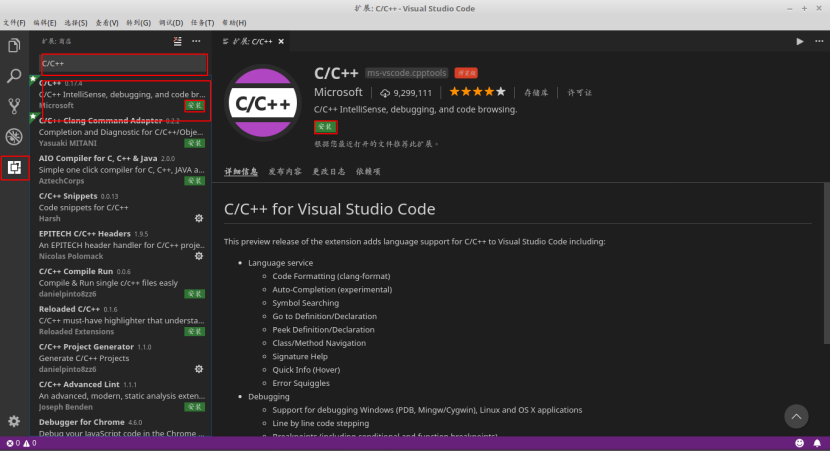
安装插件
在VSCode编写和调试程序是需要安装相关的插件才能进行的。
在这里我们选择安装C/C++、C++ Intellisense、Code Runner 和Include Autocomplete这四插件。
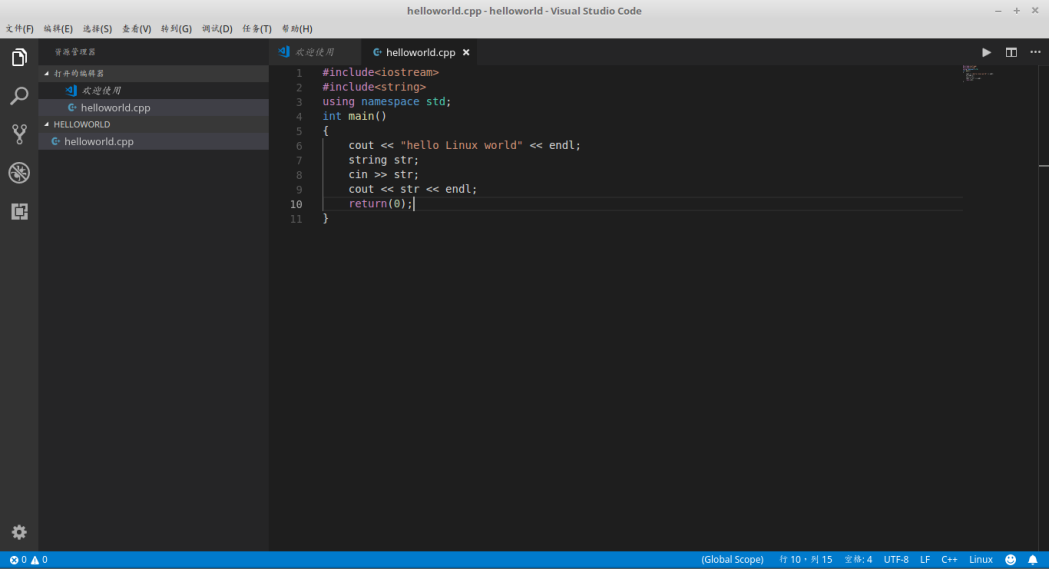
Hello world
新建一个helloworld.cpp源文件
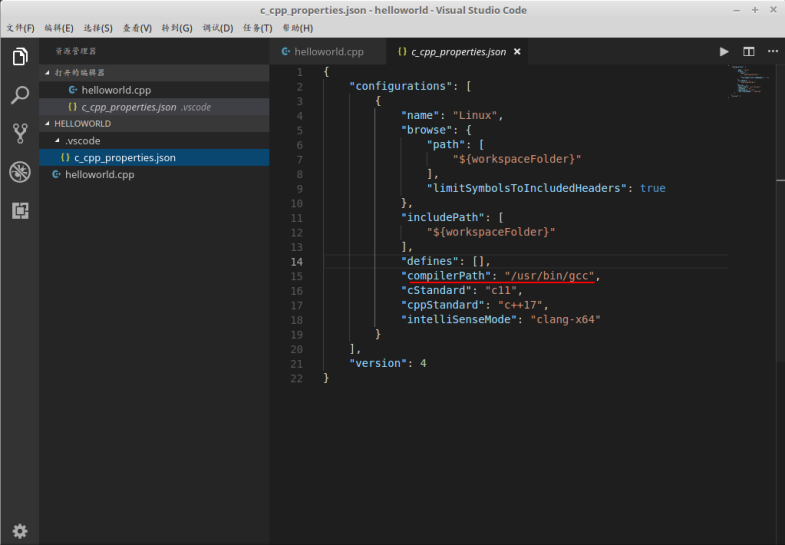
配置智能感知
Ctrl+Shift+P运行C/CPP: Edit configuration ...命令生成c_cpp_properties.json文件。

在Linux系统中,主要是注意"compilerPath": "/usr/bin/gcc",如果你的gcc路径不是这个的话就需要在终端里使用whereis gcc去查看gcc的路径。
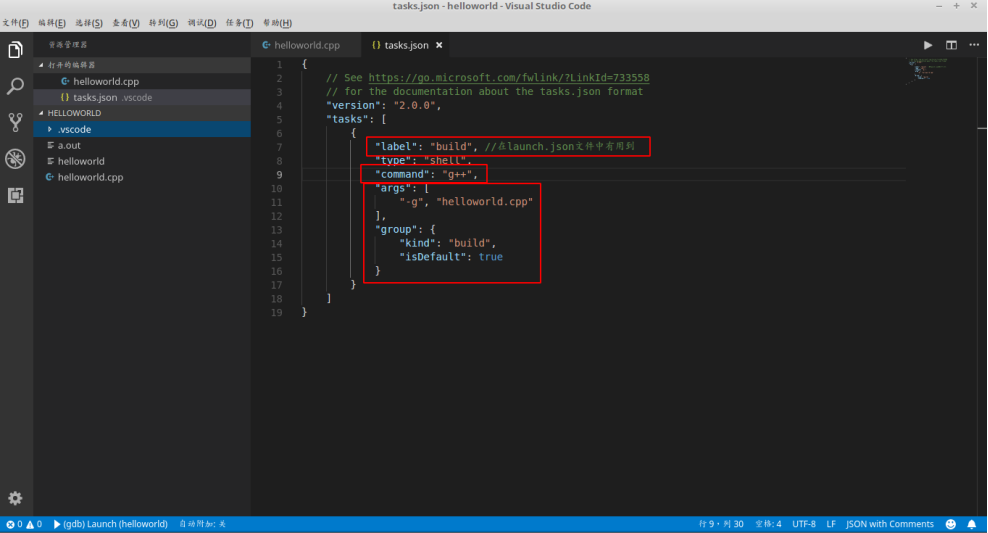
构建代码
如果你想从VS Code构建你的应用程序,你需要生成一个tasks.json文件,打开命令面板(Ctrl + Shift + P)。选择 Tasks:Configure Tasks ...命令,选择 从模板创建tasks.json文件,选择Others。

最终生成tasks.json文件,将文件内容修改如下:
调试代码
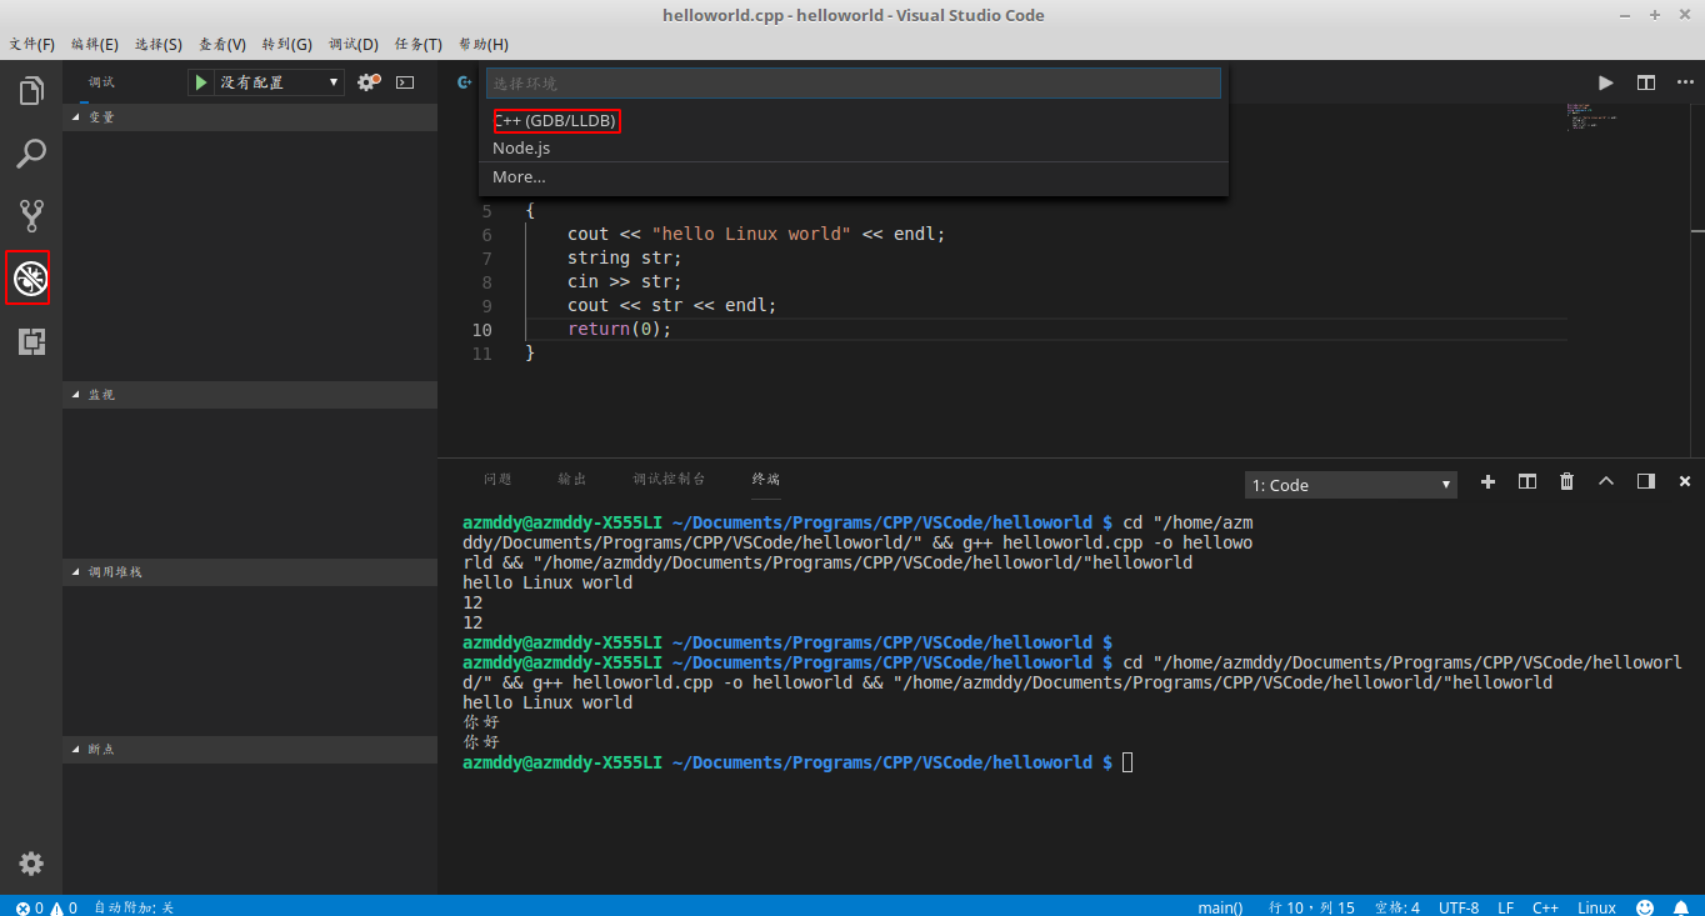
为了能够调试,我们还需要生成launch.json文件。
浏览到调试的窗口,去添加配置。选择C++(GDB/LIDB),生成launch.json文件。
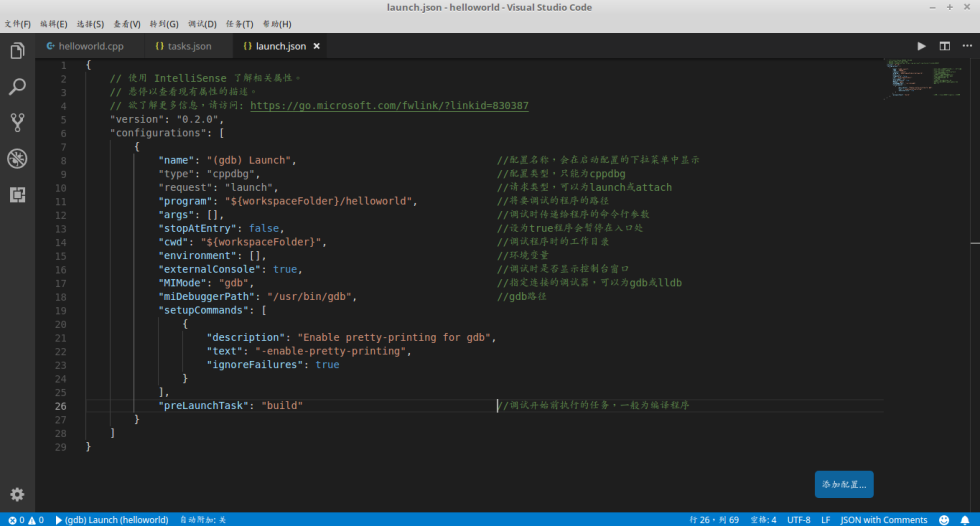
将launch.json文件内容更改如下:
在进行调试(F5)的时候,一定要将当前页面调整到我们的源程序编辑页面。不然会出错。
附:json文件源码
//tasks.json
{
// See https://go.microsoft.com/fwlink/?LinkId=733558
// for the documentation about the tasks.json format
"version": "2.0.0",
"tasks": [
{
"label": "build", //在launch.json文件中有用到
"type": "shell",
"command": "g++",
"args": [
"-g", "helloworld.cpp"
],
"group": {
"kind": "build",
"isDefault": true
}
}
]
}
//launch.json
{
// 使用 IntelliSense 了解相关属性。
// 悬停以查看现有属性的描述。
// 欲了解更多信息,请访问: https://go.microsoft.com/fwlink/?linkid=830387
"version": "0.2.0",
"configurations": [
{
"name": "(gdb) Launch", //配置名称,会在启动配置的下拉菜单中显示
"type": "cppdbg", //配置类型,只能为cppdbg
"request": "launch", //请求类型,可以为launch或attach
"program": "${workspaceFolder}/a.out", //将要调试的程序的路径
"args": [], //调试时传递给程序的命令行参数
"stopAtEntry": false, //设为true程序会暂停在入口处
"cwd": "${workspaceFolder}", //调试程序时的工作目录
"environment": [], //环境变量
"externalConsole": true, //调试时是否显示控制台窗口
"MIMode": "gdb", //指定连接的调试器,可以为gdb或lldb
"miDebuggerPath": "/usr/bin/gdb", //gdb路径
"setupCommands": [
{
"description": "Enable pretty-printing for gdb",
"text": "-enable-pretty-printing",
"ignoreFailures": true
}
],
"preLaunchTask": "build" //调试开始前执行的任务,一般为编译程序
}
]
}


 5854
5854

 被折叠的 条评论
为什么被折叠?
被折叠的 条评论
为什么被折叠?
 到【灌水乐园】发言


