


 通过7Stacks软件,用户可以轻松地在Windows系统上创建类似MacOSX中的Stacks功能。该软件支持多种堆栈类型,如垂直堆栈、网格堆栈和菜单堆栈等,并能与任务栏或快速启动栏无缝集成。

z-stack添加用户任务
Do you love how Stacks look in Mac OS X and want to add that kind of functionality to your Windows system? Here we look at 7Stacks which gives you a similar experience.
您是否喜欢Stacks在Mac OS X中的外观,并希望将这种功能添加到Windows系统中? 在这里,我们看一下7Stacks,它为您提供类似的体验。
Note: Stacks attach to the Taskbar in Windows 7 and to the Quick Launch Toolbar in Vista and XP.
注意:堆栈连接到Windows 7中的任务栏以及Vista和XP中的快速启动工具栏。
Setting Up Your New Stacks
设置新堆栈
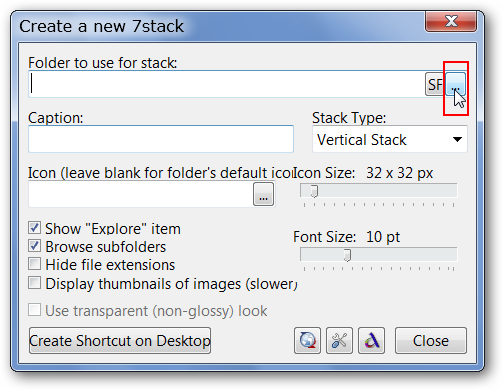
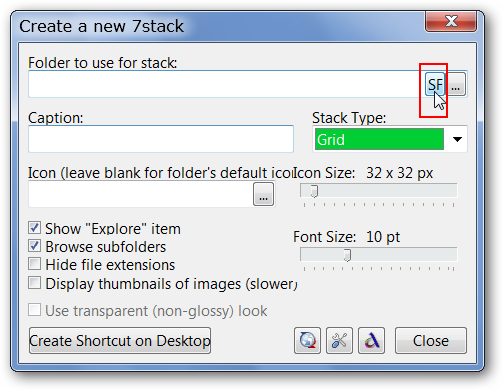
Installation of 7Stacks is simple and straightforward. As soon as you start the app you can immediately begin creating stacks using this window. Notice that you will need to choose between two browsing options to “add” the appropriate folder for your new stack.
7Stacks的安装非常简单明了。 启动应用程序后,您可以立即使用此窗口开始创建堆栈。 请注意,您将需要在两个浏览选项之间进行选择,才能为新堆栈“添加”适当的文件夹。
The “SF Button” is for “special folders” and the “… Button” is for adding any regular folder that you desire. We decided to begin with a regular folder first.
“ SF按钮”用于“特殊文件夹”,“…按钮”用于添加所需的任何常规文件夹。 我们决定首先从常规文件夹开始。
Note: The default “Stack Type” is “Vertical Stack”.
注意:默认的“堆栈类型”是“垂直堆栈”。
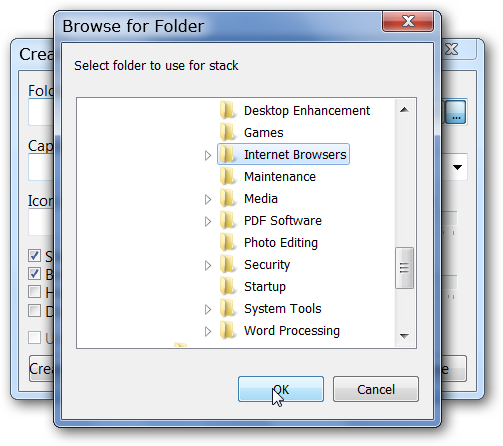
We browsed until we found the Internet Browsers folder from our start menu, selected it, and clicked “OK”.
我们浏览直到从开始菜单中找到Internet Browsers文件夹,然后选择它,然后单击“ OK”。
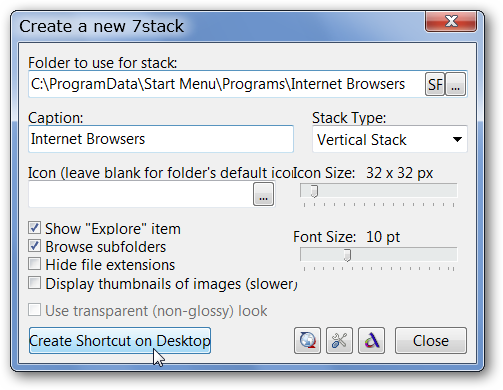
As you can see more details are filled in now such as “Target Path” and the “Caption/Name” for this particular stack. Once you have things sorted click on “Create Shortcut on Desktop”.
如您所见,现在将填写更多详细信息,例如此特定堆栈的“目标路径”和“标题/名称”。 排序后,单击“在桌面上创建快捷方式”。
Note: You may want to deselect the “Show Explore Item” option if you do not want to access the “stack’s originating folder” using Windows Explorer and wish to cut down on “clutter” in your stacks.
注意:如果您不想使用Windows资源管理器访问“堆栈的原始文件夹”,并希望减少堆栈中的“混乱”,则可能要取消选择“显示浏览项”选项。
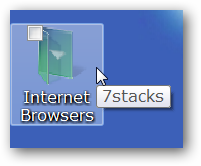
Here is our new “Stack Shortcut” on the Desktop…
这是我们在桌面上的新“堆栈快捷方式”…
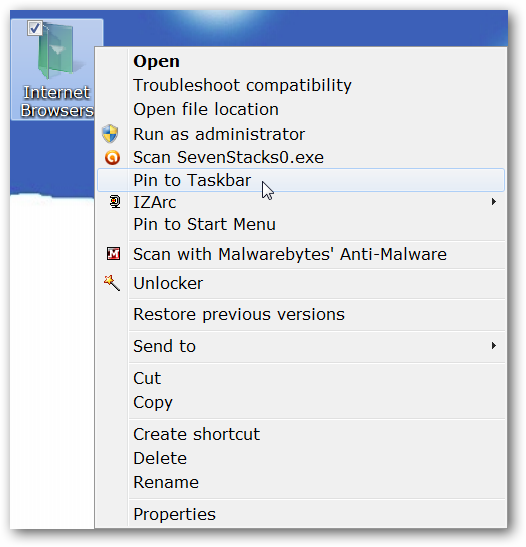
In Windows 7 right click on the shortcut and select “Pin to Taskbar”. For those using Windows Vista and XP drag the shortcut to your “Quick Launch Toolbar”.
在Windows 7中,右键单击快捷方式,然后选择“固定到任务栏”。 对于使用Windows Vista和XP的用户,将快捷方式拖动到“快速启动工具栏”。
There is our first stack full of browser shortcut goodness.
我们的第一个堆栈充满了浏览器快捷方式的优点。
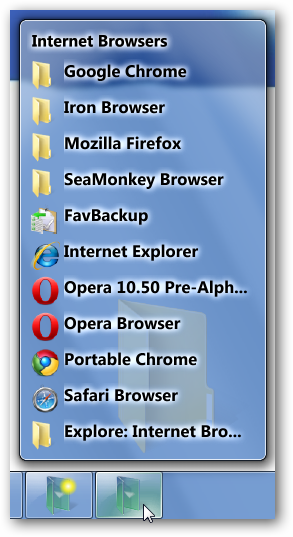
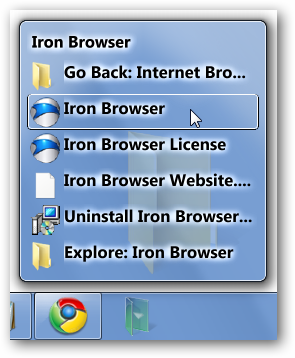
If you want access to the shortcuts in one of the folders in the stack click on it and it will open (“shift into focus”) as shown here.
如果要访问堆栈中一个文件夹中的快捷方式,请单击它,它将打开(“移入焦点”),如下所示。
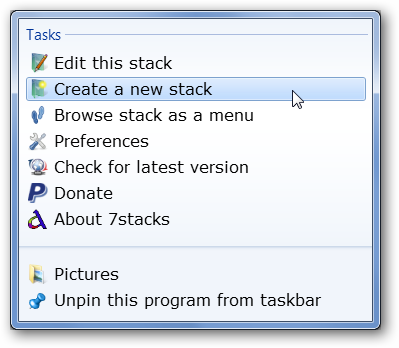
Whenever you are ready to create a new stack right click on any existing “stack icons” and select “Create a new stack”.
每当您准备创建新堆栈时,右键单击任何现有的“堆栈图标”,然后选择“创建新堆栈”。
This time we decided to create a stack for a “special folder” and use “Grid” as the “Stack Type”.
这次我们决定为“特殊文件夹”创建一个堆栈,并使用“网格”作为“堆栈类型”。
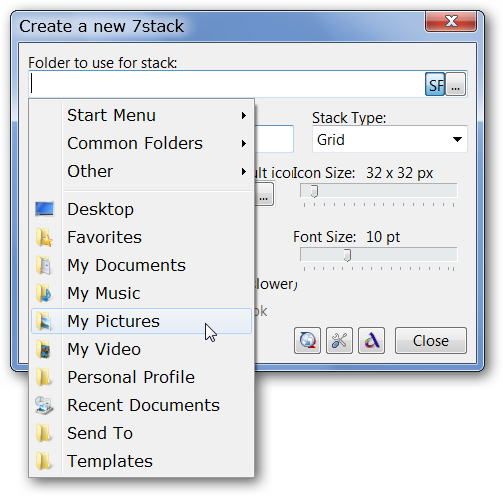
When you click on the “SF Button” you will see a “classic start menu styled” menu. You can choose one of the preset choices in the main area or browse through the “Start Menu, Common Folders, & Other” sub-areas. Here we chose “My Pictures”…
当您单击“ SF按钮”时,您将看到“样式经典的开始菜单”菜单。 您可以在主区域中选择一种预设选项,也可以浏览“开始菜单,公用文件夹和其他”子区域。 在这里,我们选择了“我的图片”…
Once again click on “Create Shortcut on Desktop” to finish your new stack and add it to your “Taskbar or Quick Launch Bar”.
再次单击“在桌面上创建快捷方式”以完成新堆栈,并将其添加到“任务栏或快速启动栏”。

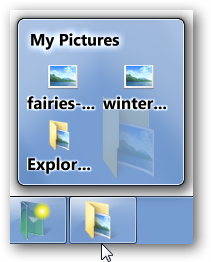
Here is our “Pictures Stack” using the “Grid Setting”. Looking good…
这是使用“网格设置”的“图片堆栈”。 看起来不错…
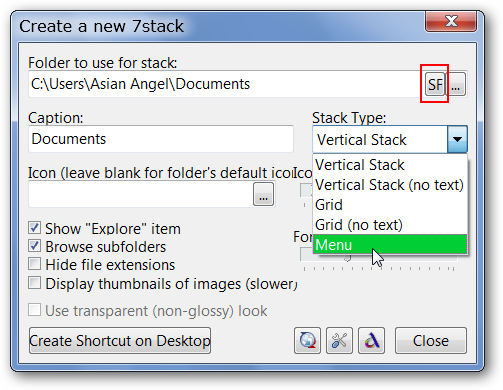
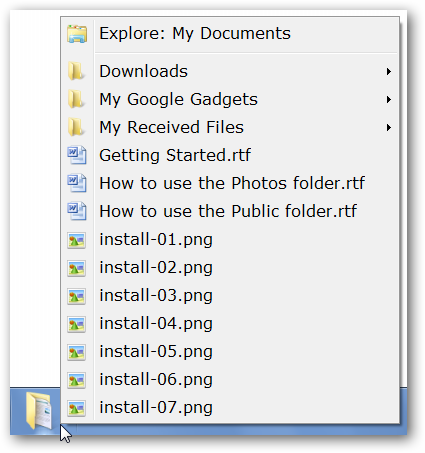
For our final addition we created a stack for “My Documents” using the “Menu Stack Type”.
对于最后添加的内容,我们使用“菜单堆栈类型”为“我的文档”创建了一个堆栈。
Not bad at all. Notice how the folders are set up for easy content browsing.
一点也不差。 请注意如何设置文件夹以方便内容浏览。
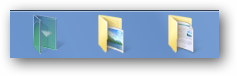
A look at our three stacks pinned to the “Taskbar”.
看一下固定在“任务栏”上的三个堆栈。
Preferences
首选项
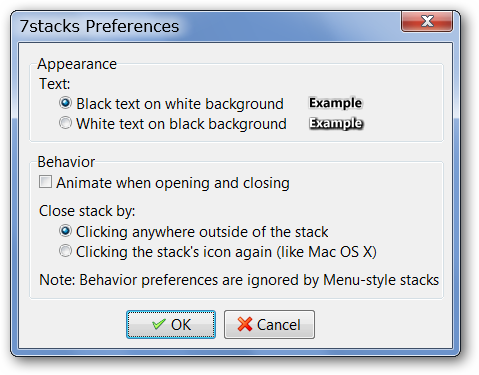
There are only a few preferences to sort through for 7Stacks…”Text Appearance, Behavior, & Stack Closing Style”.
只有少数几个首选项可以对7Stacks进行排序…“文本外观,行为和堆栈关闭样式”。
Conclusion
结论
If you have been wanting Mac OS X Stacks style functionality in your Windows system then 7Stacks is definitely worth taking a look at.
如果您一直想要Windows系统中的Mac OS X Stacks样式功能,那么7Stacks绝对值得一看。
Thanks to HTG reader Realitizer for the great tip!
感谢HTG阅读器Realitizer的提示!
Links
链接
Note: Download link has been updated to reflect changes at the 7Stacks homepage.
注意:下载链接已更新,以反映7Stacks主页上的更改。
翻译自: https://www.howtogeek.com/howto/9977/add-os-x-styled-stacks-to-your-computer-with-7stacks/
z-stack添加用户任务


 被折叠的 条评论
为什么被折叠?
被折叠的 条评论
为什么被折叠?
 到【灌水乐园】发言


