


 本文介绍如何使用TensorFlow Object Detection API实现摄像头实时物体识别。通过安装配置必要的库文件,如OpenCV,并利用预训练模型,搭建了一个能够从摄像头捕获画面并进行物体检测的应用程序。
基于上篇基于谷歌开源的TensorFlow Object Detection API视频物体识别系统搭建自己的应用(一),实现摄像头物体识别
下载opencv的cv2包
在Python官网即可下载opencv相关库,点击此处直接进入。
pip install opencv-python安装完成后,进入IDLE输入命令
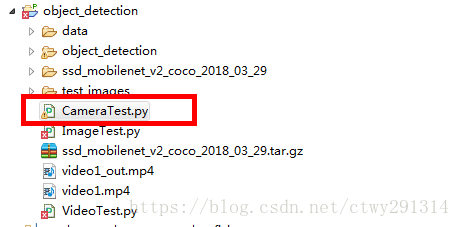
import cv2基于上篇新建CameraTest.py
目录结构如下:
直接上代码:
# coding: utf-8

# # Object Detection Demo
# Welcome to the object detection inference walkthrough!  This notebook will walk you step by step through the process of using a pre-trained model to detect objects in an image. Make sure to follow the [installation instructions](https://github.com/tensorflow/models/blob/master/object_detection/g3doc/installation.md) before you start.

# # Imports

# In[1]:

import numpy as np
import os
import six.moves.urllib as urllib
import sys
import tarfile
import tensorflow as tf
import zipfile

from collections import defaultdict
from io import StringIO
from matplotlib import pyplot as plt
from PIL import Image

import cv2                  #add 20170825
cap = cv2.VideoCapture('rtsp://admin:admin@172.19.12.193/cam/realmonitor?channel=1&subtype=1')   #add 20170825

# ## Env setup

# In[2]:                                  #delete 20170825
# This is needed to display the images.    #delete 20170825
#get_ipython().magic('matplotlib inline')   #delete 20170825

# This is needed since the notebook is stored in the object_detection folder.
sys.path.append("..")


# ## Object detection imports
# Here are the imports from the object detection module.

# In[3]:

from object_detection.utils import label_map_util

from object_detection.utils import visualization_utils as vis_util


# # Model preparation

# ## Variables
#
# Any model exported using the `export_inference_graph.py` tool can be loaded here simply by changing `PATH_TO_CKPT` to point to a new .pb file.
#
# By default we use an "SSD with Mobilenet" model here. See the [detection model zoo](https://github.com/tensorflow/models/blob/master/object_detection/g3doc/detection_model_zoo.md) for a list of other models that can be run out-of-the-box with varying speeds and accuracies.

# In[4]:

# What model to download.
MODEL_NAME = 'ssd_mobilenet_v2_coco_2018_03_29'
MODEL_FILE = MODEL_NAME + '.tar.gz'
DOWNLOAD_BASE = 'http://download.tensorflow.org/models/object_detection/'

# Path to frozen detection graph. This is the actual model that is used for the object detection.
PATH_TO_CKPT = MODEL_NAME + '/frozen_inference_graph.pb'

# List of the strings that is used to add correct label for each box.
PATH_TO_LABELS = os.path.join('data', 'mscoco_label_map.pbtxt')

NUM_CLASSES = 90


# ## Download Model

# In[5]:

#opener = urllib.request.URLopener()
#opener.retrieve(DOWNLOAD_BASE + MODEL_FILE, MODEL_FILE)
tar_file = tarfile.open(MODEL_FILE)
for file in tar_file.getmembers():
  file_name = os.path.basename(file.name)
  if 'frozen_inference_graph.pb' in file_name:
    tar_file.extract(file, os.getcwd())


# ## Load a (frozen) Tensorflow model into memory.

# In[6]:

detection_graph = tf.Graph()
with detection_graph.as_default():
  od_graph_def = tf.GraphDef()
  with tf.gfile.GFile(PATH_TO_CKPT, 'rb') as fid:
    serialized_graph = fid.read()
    od_graph_def.ParseFromString(serialized_graph)
    tf.import_graph_def(od_graph_def, name='')


# ## Loading label map
# Label maps map indices to category names, so that when our convolution network predicts `5`, we know that this corresponds to `airplane`.  Here we use internal utility functions, but anything that returns a dictionary mapping integers to appropriate string labels would be fine

# In[7]:

label_map = label_map_util.load_labelmap(PATH_TO_LABELS)
categories = label_map_util.convert_label_map_to_categories(label_map, max_num_classes=NUM_CLASSES, use_display_name=True)
category_index = label_map_util.create_category_index(categories)


with detection_graph.as_default():
  with tf.Session(graph=detection_graph) as sess:
    while True:
      ret, image_np = cap.read()

      # 扩展维度,应为模型期待: [1, None, None, 3]
      image_np_expanded = np.expand_dims(image_np, axis=0)
      image_tensor = detection_graph.get_tensor_by_name('image_tensor:0')
      # 每个框代表一个物体被侦测到
      boxes = detection_graph.get_tensor_by_name('detection_boxes:0')
       #每个分值代表侦测到物体的可信度.
      scores = detection_graph.get_tensor_by_name('detection_scores:0')
      classes = detection_graph.get_tensor_by_name('detection_classes:0')
      num_detections = detection_graph.get_tensor_by_name('num_detections:0')
      # 执行侦测任务.
      (boxes, scores, classes, num_detections) = sess.run(
          [boxes, scores, classes, num_detections],
          feed_dict={image_tensor: image_np_expanded})
      # 检测结果的可视化
      vis_util.visualize_boxes_and_labels_on_image_array(
          image_np,
          np.squeeze(boxes),
          np.squeeze(classes).astype(np.int32),
          np.squeeze(scores),
          category_index,
          use_normalized_coordinates=True,
          line_thickness=8)
      cv2.imshow('object detection', cv2.resize(image_np,(800,600)))
      if cv2.waitKey(25) & 0xFF ==ord('q'):
        cv2.destroyAllWindows()
        break
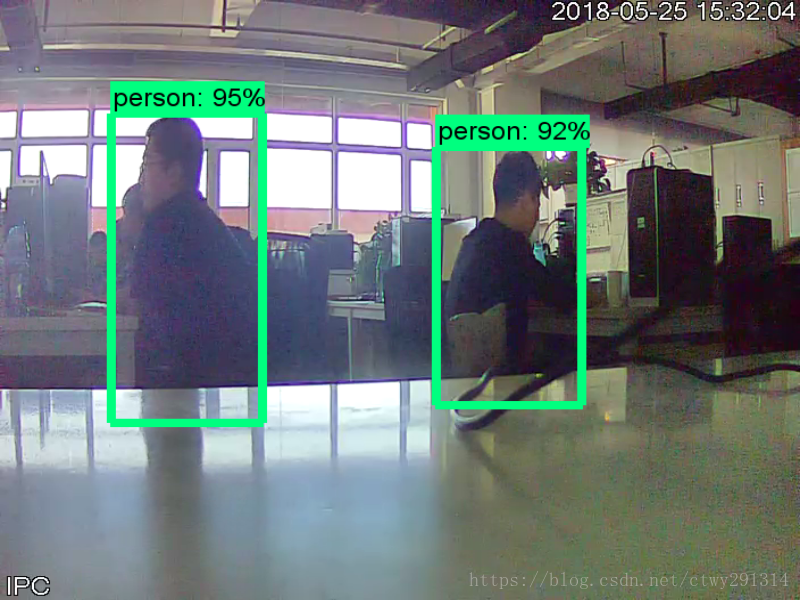
效果:


 902
902

 被折叠的 条评论
为什么被折叠?
被折叠的 条评论
为什么被折叠?
 到【灌水乐园】发言


