


 本文详细介绍了Hive中的分区表操作,包括创建、加载数据、查询、分区管理、重命名表、修改列信息以及数据导入导出等。通过案例展示了如何创建和管理分区表,提高查询效率,并提供了各种操作的命令示例。
分区表
分区表实际上就是对应一个HDFS文件系统上的独立的文件夹,该文件夹下是该分区所有的数据文件。Hive中的分区就是分目录,把一个大的数据集根据业务需要分割成小的数据集。在查询时通过WHERE子句中的表达式选择查询所需要的指定的分区,这样的查询效率会提高很多。
案例实操
分别创建部门和员工外部表,并向表中导入数据。
(1)原始数据
(2)建表语句
创建部门表
create external table if not exists dept(
deptno int,
dname string,
loc int
)
row format delimited fields terminated by ‘\t’;
创建员工表
create external table if not exists emp(
empno int,
ename string,
job string,
mgr int,
hiredate string,
sal double,
comm double,
deptno int)
row format delimited fields terminated by ‘\t’;
(3)查看创建的表
hive (default)> show tables;
OK
tab_name
dept
emp
(4)向外部表中导入数据
导入数据
hive (default)> load data local inpath ‘/opt/module/datas/dept.txt’ into table default.dept;
hive (default)> load data local inpath ‘/opt/module/datas/emp.txt’ into table default.emp;
查询结果
hive (default)> select * from emp;
hive (default)> select * from dept;
(5)查看表格式化数据
hive (default)> desc formatted dept;
Table Type: EXTERNAL_TABLE
分区表基本操作
1.引入分区表(需要根据日期对日志进行管理)
/user/hive/warehouse/log_partition/20190902/20190902.log
/user/hive/warehouse/log_partition/20190903/20190903.log
/user/hive/warehouse/log_partition/20190904/20190904.log
创建分区表语法
create table dept_partition(
deptno int, dname string, loc string
)
partitioned by (month string)
row format delimited fields terminated by ‘\t’;
加载数据到分区表中
load data local inpath ‘/opt/mod/dept.txt’ into table default.dept_partition partition(month=‘201907’);
查询分区表中数据
单分区查询
select * from dept_partition where month=‘201907’;
多分区联合查询
select * from dept_partition where month=‘201908’
union
select * from dept_partition where month=‘201907’
union
select * from dept_partition where month=‘201909’;
增加分区
创建单个分区
alter table dept_partition add partition(month=‘201806’) ;
同时创建多个分区
alter table dept_partition add partition(month=‘201805’) partition(month=‘201804’);
注:增加多个分区之间用空格" “隔开,删除多个分区用”,"隔开
删除分区
删除单个分区
alter table dept_partition drop partition (month=‘201804’);
同时删除多个分区
== alter table dept_partition drop partition (month=‘201805’), partition (month=‘201806’);==
查看分区表有多少分区
hive>show partitions dept_partition
查看分区表结构
== hive>desc formatted dept_partition;==
分区表注意事项
创建二级分区
create table dept_partition2(
deptno int, dname string, loc string
)
partitioned by (month string, day string)
row format delimited fields terminated by ‘\t’;
正常的加载数据
(1)加载数据到二级分区表中
load data local inpath ‘/opt/module/datas/dept.txt’ into table default.dept_partition2 partition(month=‘201809’, day=‘13’);
(2)查询分区数据
select * from dept_partition2 where month=‘201809’ and day=‘13’;
把数据直接上传到分区目录上,让分区表和数据产生关联的两种方式
(1)方式一:上传数据后修复
上传数据
dfs -mkdir -p /user/hive/warehouse/dept_partition2/month=201809/day=12;
dfs -put /opt/module/datas/dept.txt /user/hive/warehouse/dept_partition2/month=201809/day=12;
查询数据(查询不到刚上传的数据)
select * from dept_partition2 where month=‘201809’ and day=‘12’;
执行修复命令
msck repair table dept_partition2;
再次查询数据
elect * from dept_partition2 where month=‘201809’ and day=‘12’;
(2)方式二:上传数据后添加分区
上传数据
dfs -mkdir -p /user/hive/warehouse/dept_partition2/month=201809/day=11;
dfs -put /opt/module/datas/dept.txt /user/hive/warehouse/dept_partition2/month=201809/day=11;
执行添加分区
alter table dept_partition2 add partition(month=‘201809’, day=‘11’);
查询数据
select * from dept_partition2 where month=‘201809’ and day=‘11’;
(3)方式三:上传数据后load数据到分区
创建目录
dfs -mkdir -p /user/hive/warehouse/dept_partition2/month=201809/day=10;
上传数据
load data local inpath ‘/opt/module/datas/dept.txt’ into table dept_partition2 partition(month=‘201809’,day=‘10’);
查询数据
select * from dept_partition2 where month=‘201809’ and day=‘10’;
重命名表
(1)语法
ALTER TABLE table_name RENAME TO new_table_name
(2)实操案例
hive (default)> alter table dept_partition2 rename to dept_partition3;
增加/修改/替换列信息
语法
更新列
ALTER TABLE table_name CHANGE [COLUMN] col_old_name col_new_name column_type [COMMENT col_comment] [FIRST|AFTER column_name]
增加和替换列
ALTER TABLE table_name ADD|REPLACE COLUMNS (col_name data_type [COMMENT col_comment], …)
注:ADD是代表新增一字段,字段位置在所有列后面(partition列前),REPLACE则是表示替换表中所有字段。
实操案例
(1)查询表结构
desc dept_partition;
(2)添加列
alter table dept_partition add columns(deptdesc string);
(3)查询表结构
desc dept_partition;
更新列
alter table dept_partition change column deptdesc pid int;
(5)查询表结构
desc dept_partition;
(6)替换列
alter table dept_partition replace columns(deptno string, dname string, loc string);
(7)查询表结构
desc dept_partition;
删除表
drop table dept_partition;
向表中装载数据(Load)
语法
load data [local] inpath ‘/opt/module/datas/student.txt’ [overwrite] into table student [partition (partcol1=val1,…)];
(1)load data:表示加载数据
(2)local:表示从本地加载数据到hive表;否则从HDFS加载数据到hive表
(3)inpath:表示加载数据的路径
(4)overwrite:表示覆盖表中已有数据,否则表示追加
(5)into table:表示加载到哪张表
(6)student:表示具体的表名
(7)partition:表示上传到指定分区
实操案例
(0)创建一张表
hive (default)> create table student(id string, name string) row format delimited fields terminated by ‘\t’;
(1)加载本地文件到hive
hive (default)> load data local inpath ‘/opt/module/datas/student.txt’ into table default.student;
(2)加载HDFS文件到hive中
上传文件到HDFS
hive (default)> dfs -put /opt/module/datas/student.txt /user/itstar/hive;
加载HDFS上数据
hive (default)>load data inpath ‘/user/itstar/hive/student.txt’ into table default.student;
(3)加载数据覆盖表中已有的数据
上传文件到HDFS
hive (default)> dfs -put /opt/module/datas/student.txt /user/itstar/hive;
加载数据覆盖表中已有的数据
hive (default)>load data inpath ‘/user/itstar/hive/student.txt’ overwrite into table default.student;
注:load hdfs的数据相当于mv文件到另一个目录中,原目录文件消失
通过查询语句向表中插入数据(Insert)
创建一张分区表
hive (default)> create table student(id int, name string) partitioned by (month string) row format delimited fields terminated by ‘\t’;
基本插入数据
hive (default)> insert into table student partition(month=‘201907’) values(1,‘wangwu’);
基本模式插入(根据单张表查询结果)
hive (default)> insert overwrite table student partition(month=‘201908’)
select id, name from student where month=‘201907’;
多插入模式(根据多张表查询结果)
hive (default)> from student
insert overwrite table student partition(month=‘201909’)
select id, name where month=‘201907’
insert overwrite table student partition(month=‘201910’)
select id, name where month=‘201908’;
查询语句中创建表并加载数据(As Select)
根据查询结果创建表(查询的结果会添加到新创建的表中)
create table if not exists student3
as select id, name from student;
这种方式不能创建外部表。
external
CREATE-TABLE-AS-SELECT cannot create external table
创建表时通过Location指定加载数据路径
创建表,并指定在hdfs上的位置
hive (default)> create table if not exists student5(
id int, name string
)
row format delimited fields terminated by ‘\t’
location ‘/user/hive/warehouse/student5’;
上传数据到hdfs上
hive (default)> dfs -put /opt/module/datas/student.txt /user/hive/warehouse/student5;
*查询数据
hive (default)> select * from student5;
Import数据到指定Hive表中
注意:先用export导出后(导出的数据目录里面附带有元数据),再import数据导入。同在HDFS上是Copy级操作
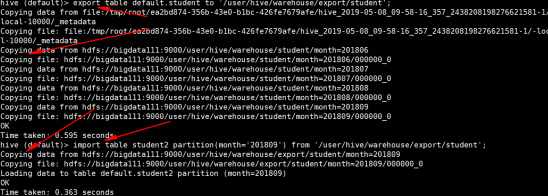
hive (default)> export table default.student to ‘/user/hive/warehouse/export/student’;
hive (default)>create table student5(
> id int, name string
> )
> partitioned by (month string)
> row format delimited fields terminated by ‘\t’;
hive (default)> import table student5 from ‘/user/hive/warehouse/export/student’;
Insert导出
将查询的结果导出到本地,数据之间无间隔
hive (default)> insert overwrite local directory ‘/opt/module/datas/export/student’
select * from student;
将查询的结果格式化导出到本地,数据之间"\t"间隔
hive (default)> insert overwrite local directory ‘/root/student2’
ROW FORMAT DELIMITED FIELDS TERMINATED BY ‘\t’ select * from student;
注:虽然同是HDFS,但不是copy操作
Hadoop命令导出到本地
dfs -get /user/hive/warehouse/student/month=201809/000000_0 /opt/module/datas/export/student3.txt;
Hive Shell 命令导出
基本语法:(hive -f/-e 执行语句或者脚本 > file(自己创建))
hive -e ‘select * from default.student;’ > /opt/module/datas/export/student4.txt;
Export导出到HDFS上
hive (default)> export table default.student to ‘/user/hive/warehouse/export/student’;
清除表中数据(Truncate)
注意:Truncate只能删除管理表,不能删除外部表中数据
hive (default)> truncate table student;
全表和特定列查询
全表查询
hive (default)> select * from emp;
选择特定列查询
hive (default)> select empno, ename from emp;
注意:
(1)SQL 语言大小写不敏感。
(2)SQL 可以写在一行或者多行
(3)关键字不能被缩写也不能分行
(4)各子句一般要分行写。
(5)使用缩进提高语句的可读性。


 1085
1085

 被折叠的 条评论
为什么被折叠?
被折叠的 条评论
为什么被折叠?
 到【灌水乐园】发言


