


摘要
如果你是做web前端,那么不可避免早晚都会用到iframe的。其实博主很久前用过,但最近又要有项目用了,由于年代久远对iframe的注意事项都有点忘记了,然后想着总结一下比较需要注意的几个重点事项,除了便于高效工作还能分享给有需要用到iframe的小伙伴。
一、iframe基于父窗口大小自适应宽高
简述: 这是iframe最常见的需求了,有时候我们用iframe嵌入一个页面时,不想固定宽高想跟随父系统屏幕大小动态变化,从而大大提高适配性。
实现思路: iframe标签绑定:style 来动态设置宽高,监听父窗口宽高变化时动态获取并且绑定到:style,但监听变化需要考虑到初始化和窗口缩放的情况,并且记得移除事件监听器防止内存泄漏。
<template>
  <div class="box" @resize="iframeResize">
    <iframe :src="iframeSrc" :style="{ width: '100%', height: frameHeight + 'px' }" ref="myRef"></iframe>
  </div>
</template>

<script setup>
import { onMounted, onUnmounted, ref, watchEffect } from 'vue';

const myRef = ref(null);
const iframeSrc = 'https:******.com';
const frameHeight = ref(0);

// 调整iframe的高度的方法
function initHeight() {
  if (myRef.value) {
    frameHeight.value = window.innerHeight;
  }
}

// 窗口大小变化触发
function iframeResize() {
  initHeight();
}

// 移除事件监听器, 防止内存泄漏
onUnmounted(() => {
  window.removeEventListener('resize', iframeResize);
});

// 在组件挂载时先获取一次iframe高度
onMounted(() => {
  initHeight();
  window.addEventListener('resize', iframeResize);
});


// 时刻监听变化,防止iframeRef没有赋值
watchEffect(() => {
  if (myRef.value) {
    initHeight();
  }
});
</script>

<style scoped>
.box {
  position: relative;
  width: 100%;
  height: 100vh;
}
</style>
二、iframe基于内容动态宽高
简述: 例如我们业务需求嵌入的是一个表格而不是一个页面,并且表格高度并不确定时我们不能固定iframe的高度,否则只有一条内容或者没有内容的时候会不好看,这里要根据内容的数量去决定ifram嵌入窗口的高度。
实现思路: 思路是子窗口通信告诉父窗口具体高度,然后父窗口再动态设置高度即可。具体实现是子窗口利用window.postMessage 来发送具体高度,然后父窗口用window.addEventListener('message', 方法)接收内容,从而根据接收到的内容动态调整iframe的高度。
子窗口(被嵌入页面)代码
<script setup>
    window.onload = function() {
        let height = '想要告诉父窗口的高度'
        if (window.parent && window.parent.postMessage) {
            window.parent.postMessage({height: height}, '*');
        }
    };
</script>
父窗口代码
<template>
  <div>
    <iframe :src="iframeSrc" ref="myRef"></iframe>
  </div>
</template>

<script setup>
import { onMounted, ref } from 'vue';

const iframeSrc = 'https:******.com';
const myRef = ref(null);

onMounted(() => {
  window.addEventListener('message', iframeMessage);
});

const iframeMessage = (event) => {
  // 验证消息来源,确保安全性
  if (event.origin !== 'https:******.com') return;

  const newHeight = event.data.height;
  if (newHeight && myRef.value) {
    myRef.value.style.height = `${newHeight}px`;
  }
};
</script>
注意: if (event.origin !== 'https:******.com') return 这行代码记得加上。
三、iframe嵌入页面免登录处理
方法一通过url传:
// 发送方(本地系统):
<div>
    <iframe :src="url" id="childFrame" importance="high" name="demo" ></iframe>
</div>

//被嵌入页面进行接收
url = `http://localhost:8080/dudu?mytoken={mytoken}` //

接收方:直接使用window.location.search接收,然后对接收到的进行处理
- 如果使用这个方法最好把
token加密一下,要不然直接显示在url是非常危险的行为,所以我更推荐下面方法二 - 上面接收方要在在
APP.vue文件的created生命周期接收,在嵌入页面接收是不行的,这里与VUE的执行流程有关就不多说了
方法二通过iframe的通讯方式传(推荐):
// 发送方(本地系统):
 var params = {
    type: "setToken",
    token: "这是伟过去的token"
}
window.parent.postMessage(params, "*");


// 接收方(被嵌入系统):在APP.vue文件的created生命周期接收
window.addEventListener( "message",
    (e)=>{
         if(e.data.type === 'setToken'){
              //这里拿到token,然后放入缓存实在免登录即可
         }
     }
false);
注意: 上面接收方要在在APP.vue文件的created生命周期接收,在嵌入页面接收是不行的,这里与VUE的执行流程有关就不多说了
四、http无法嵌入https
简述: 例如开发环境是HTTP,嵌入的环境是生产环境的HTTPS,这时就会发现这个问题了。其实是现代浏览器的安全机制,会认为是跨域不同源而禁止。因为HTTP协议传输的数据未加密的会有安全风险。
解决思路: 网上五花八门的方法,但其实真正靠谱的就两种,(1)将 HTTP 转换成 HTTPS (2)使用代理服务。
方法一:将 HTTP 转换成 HTTPS(推荐)
1、获取 SSL 证书并安装
方法不止一种,这里就细说啦
2、配置服务器(这里以nginx为例)
下面我把核心部分解释放在注释说明,这是简单版本用于说明HTTP转HTTPS,如果真的上生产其实还有不少其它配置。
server {
  listen 80;   // 监听http默认的80端口
  return 301 https://$host$request_uri; // 把所有http永久重定向到https
  server_name ****.com www.****.com;  // 指定域名,这里视真实情况而定
}

server {
  listen 443 ssl; // 监听https默认的443端口。
  server_name ****.com www.****.com;  // 指定域名,这里视真实情况而定

  // 指定 SSL 证书文件路径。
  ssl_certificate /etc/lets/live/****.com/fullchain.pem;

  // 指定 SSL 私钥文件路径
  ssl_certificate_key /etc/lets/live/****.com/privkey.pem;

  location / {
      index index.html index.htm;
      root /var/w/html;
  }
}
方法二:使用代理服务
用nodejs搭建个简单的代理服务器
npm init -y
npm install express http-proxy
然后再配置对应的代理服务器,主要核心是下面四个模块
express:作用是构建Web应用。http:作用是处理HTTP请求。https:作用是处理HTTPS请求。httpProxy:作用是创建代理服务器。
const express = require('express');
const fs = require('fs');
const https = require('https');
const http = require('http');
const httpProxy = require('http-proxy');

const app = express();
const proxy = httpProxy.createProxyServer();
const port = 3000;

// 读取对应的SSL证书文件
const options = {
  key: fs.readFileSync('/etc/lets/live/proxy.****.com/privkey.pem'),
  cert: fs.readFileSync('/etc/lets/live/proxy.****.com/fullchain.pem')
};

// 设置路由信息
app.all('/proxy/*', (req, res) => {
  const targetUrl = `http://${req.params[0]}`;
  proxy.web(req, res, { target: targetUrl }, (error) => {
    res.status(500).send('Proxy request failed');
  });
});

// 创建HTTPS服务器
const server = https.createServer(options, app);

// 启动代理服务器
server.listen(port, () => {
  console.log(`HTTPS`);
});
五、跨域问题
简述: iframe 页面的跨域问题是因为涉及到浏览器的安全策略,即同源策略。同源策略限制了一个网页脚本不能读写不同源页面的 DOM 与 Cookie之类的信息。即如果 iframe 中的内容与包含它的页面不在同一个源上,那么这两个页面之间会受到跨域限制。
1、使用 window.postMessage 实现跨域通信
父页面代码: 主要用window.addEventListener监听消息用postMessage发送消息。
注意: @load加载完成后再监听和window.removeEventListener取消监听这两个细节。
<template>
  <div>
    <iframe :src="iframeSrc" ref="iframeRef" @load="onIframeLoad" style="width: 100%; height: 400px;"></iframe>
    <button @click="sendMessage">发送消息</button>
  </div>
</template>

<script setup>
import { ref, onMounted } from 'vue';

onMounted(() => {
  window.addEventListener('message', handleMessage);
  // 在组件卸载时移除事件监听器
  return () => {
    window.removeEventListener('message', handleMessage);
  };
});

const iframeSrc = 'http://***.com';
const iframeRef = ref(null);

  // 当 iframe 加载完成后,再设置监听器
const onIframeLoad = () => {
  window.addEventListener('message', handleMessage);
};

const sendMessage = () => {
  const iframe = iframeRef.value;
  if (iframe.contentWindow) {
    iframe.contentWindow.postMessage('Hello!', 'http://***.com');
  }
};

const handleMessage = (event) => {
  // 确保来自想要的源才处理消息
  if (event.origin !== 'http://***.com') return;
  console.log( event.data);
};
</script>
子页面代码:和父页面一样,用window.addEventListener监听消息用postMessage发送消息。
<template>
  <div>
    <button @click="sendMessage">发送消息到父页面</button>
  </div>
</template>

<script setup>
import { ref, onMounted } from 'vue';
onMounted(() => {
  window.addEventListener('message', handleMessage);

  // 在组件卸载时移除事件监听器
  return () => {
    window.removeEventListener('message', handleMessage);
  };
});
const sendMessage = () => {
  const parentWindow = window.parent;
  if (parentWindow) {
    parentWindow.postMessage('Hello!', 'http://****.com');
  }
};

const handleMessage = (event) => {
  if (event.origin !== 'http://****.com') return;
  console.log(event.data);
};

</script>
2、使用 CORS
这里主要是后端的配置了,通过调整服务器响应头中的 Access-Control-Allow-Origin 来控制哪些源是可以安全访问资源。
以为nginx为例,*设置为所有。
http {

  server {
      listen 80;
      server_name yourdomain.com;  # 替换为你的域名

      # 代理 iframe 请求并添加 CORS 头部
      location /iframe-proxy/ {
          # 添加CORS头部
          add_header Access-Control-Allow-Origin *;

          # 其他配置...
      }
  }
}
3、nginx配置代理
算是常见解决方案了,思路是通过 Nginx 反向代理,将请求重定向到想要请求的目标服务器。
http {

  server {
      listen 80;
      server_name yourdomain.com;  # 替换为你的域名

      # 代理 iframe 请求并添加 CORS 头部
      location /iframe-proxy/ {
          # 将请求代理到目标
          proxy_pass http://tty.com/;

          # 其他配置...
      }
  }
}
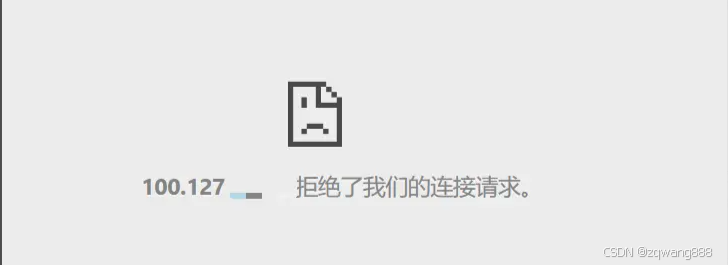
六、iframe嵌入后报拒绝连接请求
不知道你用iframe有没有见过这个页面,这通常是目标页面设置了 X-Frame-Options 响应头来限制内容被嵌入到其他站点的 iframe 中。这个可以找后端看看 X-Frame-Options 。
如果大佬们有什么iframe的“坑”也可以分享一下我同步学习一下~


 1万+
1万+

 被折叠的 条评论
为什么被折叠?
被折叠的 条评论
为什么被折叠?
 到【灌水乐园】发言


