


一、创建Maven项目
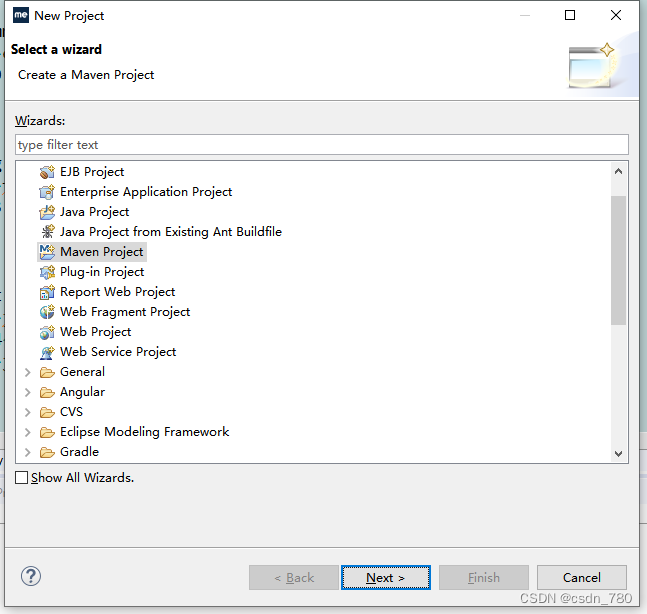
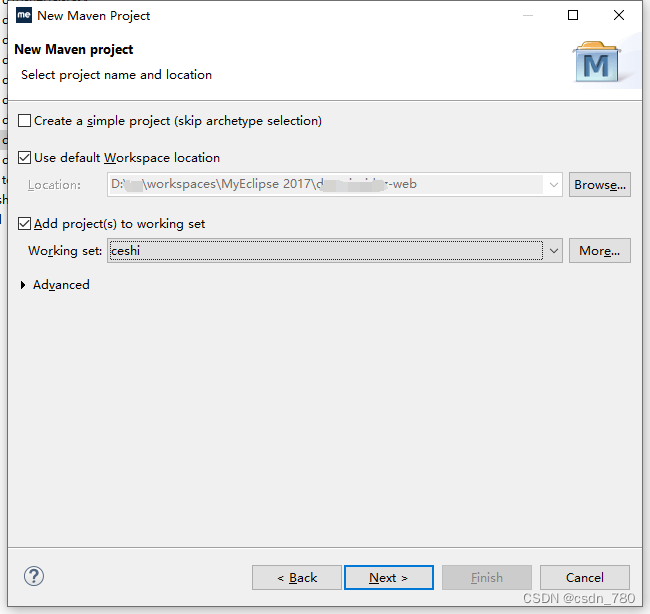
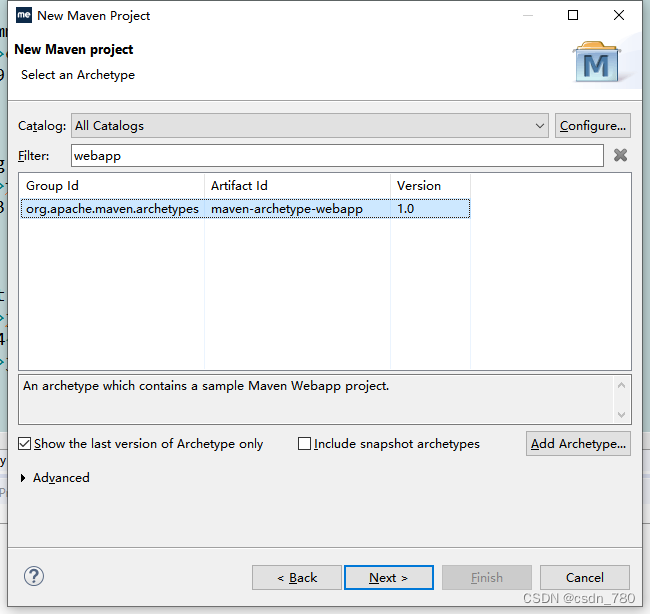
1. 创建 Maven Project
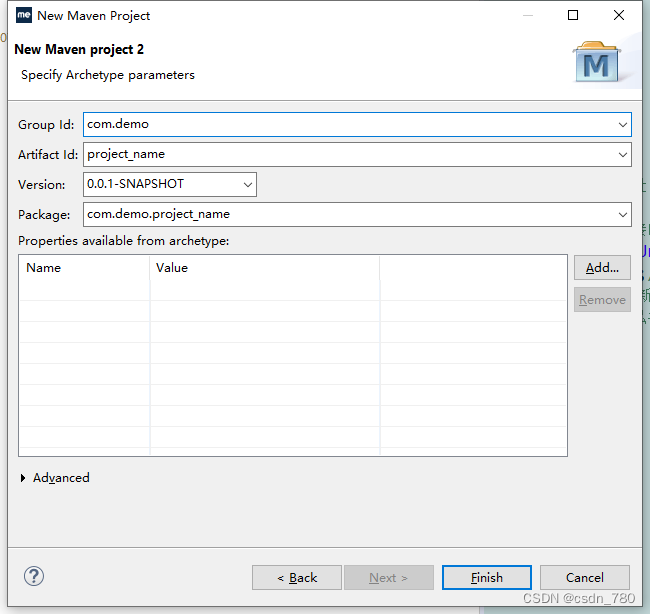
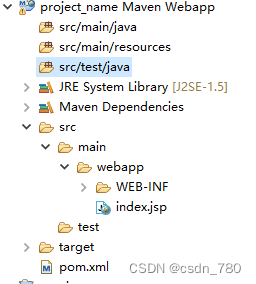
2. 手动创建项目结构
新建项目后只有一个 src/main/resources, 需要手动创建项目结构
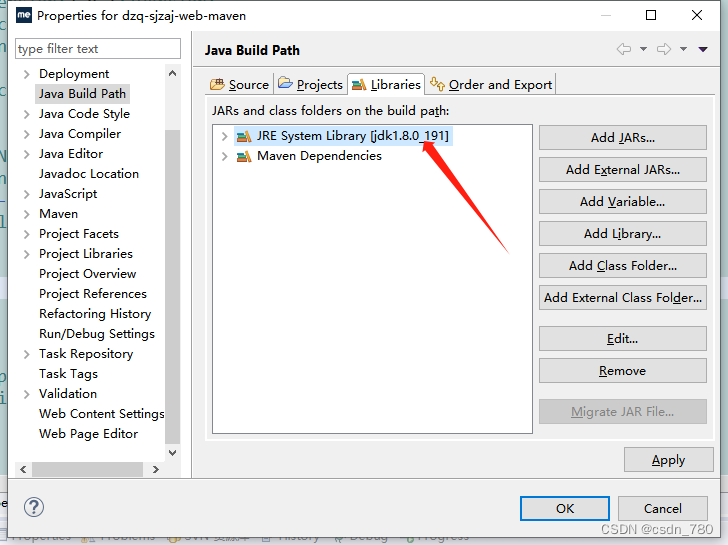
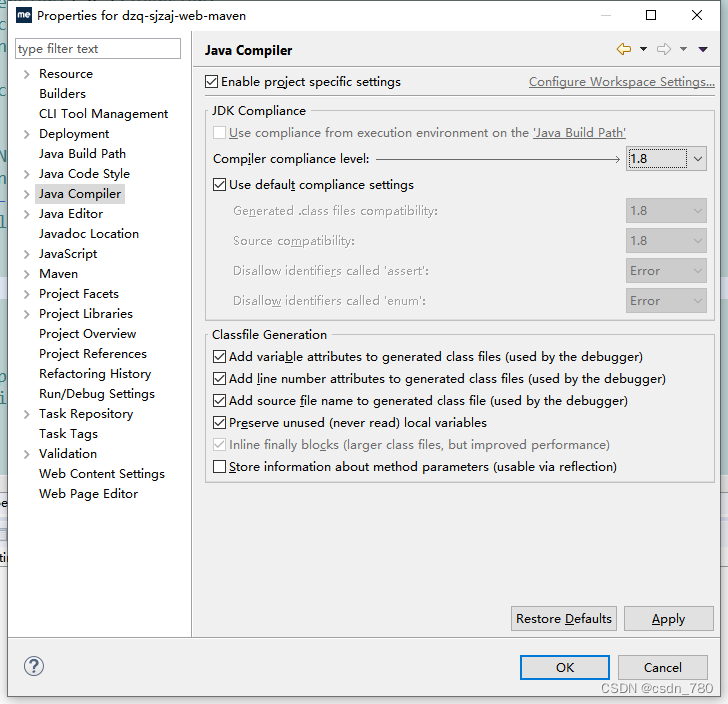
3. 配置jre
修改pom.xml中的配置
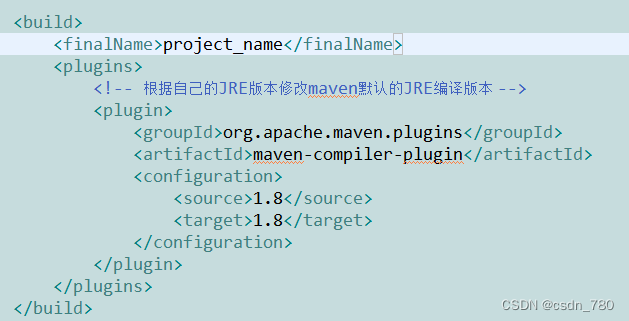
<plugins>
    <!-- 根据自己的JRE版本修改maven默认的JRE编译版本 -->
    <plugin>
        <groupId>org.apache.maven.plugins</groupId>
        <artifactId>maven-compiler-plugin</artifactId>
        <configuration>
            <source>1.8</source>
            <target>1.8</target>
        </configuration>
    </plugin>
</plugins>
如何项目报错, 需要更新maven。右击项目> 点击Maven >点击Update Project…
二、搭建SpringMVC
1. pom.xml文件中添加springmvc依赖
<dependency>
	<groupId>org.springframework</groupId>
    <artifactId>spring-webmvc</artifactId>
    <version>4.2.0.RELEASE</version>
</dependency>
<dependency>
	<groupId>org.springframework</groupId>
	<artifactId>spring-web</artifactId>
	<version>4.2.0.RELEASE</version>
</dependency>
2. 创建springmvc配置文件
在src/main/resource下创建spring-mvc.xml
<?xml version="1.0" encoding="UTF-8"?>
<beans xmlns="http://www.springframework.org/schema/beans"
    xmlns:xsi="http://www.w3.org/2001/XMLSchema-instance" xmlns:p="http://www.springframework.org/schema/p"
    xmlns:mvc="http://www.springframework.org/schema/mvc" xmlns:context="http://www.springframework.org/schema/context"
    xmlns:util="http://www.springframework.org/schema/util"
    xsi:schemaLocation="http://www.springframework.org/schema/beans http://www.springframework.org/schema/beans/spring-beans-3.0.xsd
            http://www.springframework.org/schema/context http://www.springframework.org/schema/context/spring-context-3.0.xsd
            http://www.springframework.org/schema/mvc http://www.springframework.org/schema/mvc/spring-mvc-3.0.xsd
            http://www.springframework.org/schema/util http://www.springframework.org/schema/util/spring-util-3.0.xsd">

    <!-- 开启注解 -->
    <mvc:annotation-driven />

    <!-- Spring MVC不处理静态资源 -->
	<mvc:default-servlet-handler />

    <!-- 视图解析器 -->
    <bean class="org.springframework.web.servlet.view.InternalResourceViewResolver">
        <property name="prefix" value="/back/" />
        <property name="suffix" value=".jsp"></property>
    </bean>
</beans>
三、搭建Spring
1. pom.xml文件中添加spring依赖
<dependency>
	<groupId>org.springframework</groupId>
	<artifactId>spring-core</artifactId>
	<version>4.2.0.RELEASE</version>
</dependency>
<dependency>
	<groupId>org.springframework</groupId>
	<artifactId>spring-context-support</artifactId>
	<version>4.2.0.RELEASE</version>
</dependency>
<dependency>
	<groupId>org.springframework</groupId>
	<artifactId>spring-context</artifactId>
	<version>4.2.0.RELEASE</version>
</dependency>
<dependency>
	<groupId>org.springframework</groupId>
	<artifactId>spring-beans</artifactId>
	<version>4.2.0.RELEASE</version>
</dependency>
2. 创建spring-context配置文件
在src/main/resource下创建spring-context.xml
<?xml version="1.0" encoding="UTF-8"?>
<beans xmlns="http://www.springframework.org/schema/beans"
		xmlns:xsi="http://www.w3.org/2001/XMLSchema-instance"
		xmlns:p="http://www.springframework.org/schema/p"
		xmlns:mvc="http://www.springframework.org/schema/mvc"
		xmlns:context="http://www.springframework.org/schema/context"
		xmlns:util="http://www.springframework.org/schema/util"
		xmlns:aop="http://www.springframework.org/schema/aop"
		xmlns:tx="http://www.springframework.org/schema/tx"
		xsi:schemaLocation="http://www.springframework.org/schema/beans http://www.springframework.org/schema/beans/spring-beans-3.0.xsd
            http://www.springframework.org/schema/context http://www.springframework.org/schema/context/spring-context-3.0.xsd
            http://www.springframework.org/schema/mvc http://www.springframework.org/schema/mvc/spring-mvc-3.0.xsd
            http://www.springframework.org/schema/util http://www.springframework.org/schema/util/spring-util-3.0.xsd
            http://www.springframework.org/schema/tx http://www.springframework.org/schema/tx/spring-tx.xsd
            http://www.springframework.org/schema/aop http://www.springframework.org/schema/aop/spring-aop.xsd">

	<bean class="org.springframework.beans.factory.annotation.AutowiredAnnotationBeanPostProcessor"></bean>
	<!-- 注解支持 -->
    <context:annotation-config/>

	<!-- 设置需要进行Spring注解扫描的类包 -->
    <context:component-scan base-package="com.demo.*"/>
</beans>
3. web.xml中配置spring
这里把spring与springmvc配置到一块了
<!-- 定义前端控制器springmvc -->
	<servlet>
	    <servlet-name>spring-mvc</servlet-name>
	    <servlet-class>org.springframework.web.servlet.DispatcherServlet</servlet-class>
	    <!-- 指定路径 -->
	    <init-param>
	        <param-name>contextConfigLocation</param-name>
	        <param-value>classpath:spring-*.xml</param-value>
	    </init-param>
	    <!-- 随spring启动而启动 -->
	    <load-on-startup>1</load-on-startup>
	</servlet>
	<servlet-mapping>
		<servlet-name>spring-mvc</servlet-name>
		<url-pattern>/</url-pattern>
	</servlet-mapping>
到此可以调用接口及页面了
四、运行Maven项目
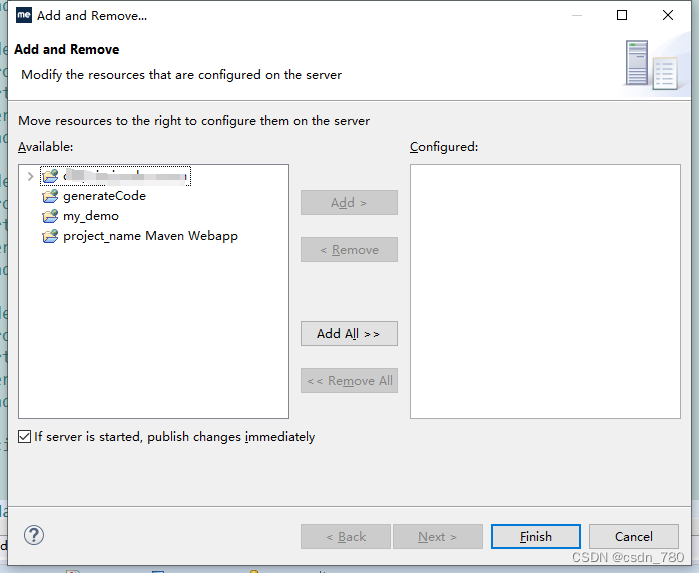
1. MyEclipse 中
直接把项目加载到Tomcat中然后运行就可以

2. 打包发布
右击项目,选择"Debug As"或"Run As",再选择 Maven 命令
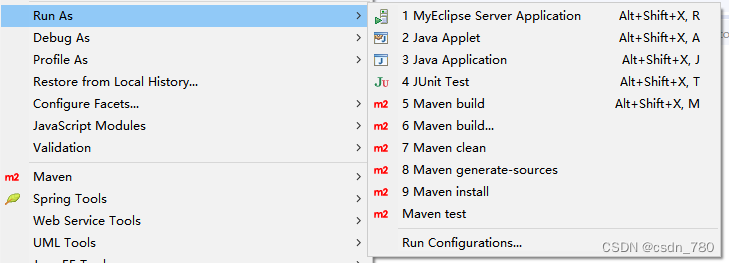
常用maven命令
clean:清除目标目录中的生成结果。
generate-sources:开发环境与代码分离,很少使用,执行这个命令可以通过查看.classpath和.project两个文件来查看变化。
install:在本地库中安装jar
test:运行项目中的单元测试
package:根据项目生成jar文件
tomcat*:run:启动tomcat,前提是在项目的pom.xml文件中添加了tomcat插件
eclipse:eclipse:生成Eclipse项目文件,即.classpath和.project文件
compile:编译源代码
dependency:sources:下载项目依赖的jar包的源码包
五、搭建Mybatis
1. pom.xml中添加Mybatis的依赖jar包
<!-- mybatis -->
<dependency>
	<groupId>org.mybatis</groupId>
	<artifactId>mybatis</artifactId>
	<version>3.2.3</version>
</dependency>
<!-- mybatis-spring//无缝整合mybatis+spring -->
<dependency>
	<groupId>org.mybatis</groupId>
	<artifactId>mybatis-spring</artifactId>
	<version>1.1.1</version>
</dependency>
<!-- cglib代理 -->
<dependency>
	<groupId>cglib</groupId>
	<artifactId>cglib</artifactId>
	<version>2.2.2</version>
</dependency>
2.创建mybatis-config.xml配置文件
<?xml version="1.0" encoding="UTF-8"?>
<!DOCTYPE configuration PUBLIC "-//mybatis.org//DTD Config 3.0//EN" "http://mybatis.org/dtd/mybatis-3-config.dtd">
<configuration>
	<settings>
		<!-- 全局地开启或关闭配置文件中的所有映射器已经配置的任何缓存 -->
		<setting name="cacheEnabled" value="true" />
		<!-- 设置超时时间,它决定驱动等待数据库响应的秒数 -->
		<setting name="defaultStatementTimeout" value="3000" />
		<!-- 是否开启自动驼峰命名规则(camel case)映射 -->
		<setting name="mapUnderscoreToCamelCase" value="true" />
		<!-- 代理 -->
		<!-- 指定 Mybatis 创建具有延迟加载能力的对象所用到的代理工具 -->
		<setting name="proxyFactory" value="CGLIB" />
		<!-- 延迟加载 -->
		<setting name="lazyLoadingEnabled" value="true" />
	</settings>

</configuration>
3. spring-context.xml中配置mybatis
	<!-- 配置mybatis, 绑定c3p0 -->
	<bean id="sqlSessionFactory" class="org.mybatis.spring.SqlSessionFactoryBean">
	    <property name="dataSource" ref="dataSource"></property>
	    <property name="configLocation" value="classpath:mybatis-config.xml"></property>
		<property name="mapperLocations" value="classpath:mapper/*Mapper.xml"/>
	</bean>

	<!-- 扫描生成所有dao层 -->
	<bean class="org.mybatis.spring.mapper.MapperScannerConfigurer">
	    <property name="basePackage" value="com.demo.**.mapper"></property>
	    <property name="sqlSessionFactoryBeanName" value="sqlSessionFactory"></property>
	</bean>
六、连接数据库
1. pom.xml中配置 数据源+数据库 的依赖jar包
	<!-- c3p0 数据库连接池 -->
	<dependency>
		<groupId>com.mchange</groupId>
		<artifactId>c3p0</artifactId>
		<version>0.9.5.2</version>
	</dependency>
	<!-- 数据库 -->
	<dependency>
		<groupId>mysql</groupId>
		<artifactId>mysql-connector-java</artifactId>
		<version>6.0.6</version>
	</dependency>
2.在spring-context.xml配置c3p0数据源
<!-- 配置c3p0 -->
<!-- 连接池 -->
<bean id="dataSource" class="com.mchange.v2.c3p0.ComboPooledDataSource">
<property name="driverClass" value="com.mysql.jdbc.Driver"></property>
<property name="jdbcUrl" value="jdbc:mysql://localhost/demo?characterEncoding=utf8&serverTimezone=UTC"></property>
<property name="user" value="root"></property>
<property name="password" value="123456"></property>
<property name="minPoolSize" value="1"></property>
<property name="maxPoolSize" value="5"></property>
<property name="initialPoolSize" value="1"></property>
<property name="acquireIncrement" value="1"></property>
</bean>
3. 配置spring声明式事务管理,pom.xml中添加 声明式事务的依赖jar包
<!-- spring-tx -->
<dependency>
    <groupId>org.springframework</groupId>
    <artifactId>spring-tx</artifactId>
    <version>4.2.0.RELEASE</version>
</dependency>
<!-- spring-jdbc -->
<dependency>
    <groupId>org.springframework</groupId>
    <artifactId>spring-jdbc</artifactId>
    <version>4.2.0.RELEASE</version>
</dependency>
4. 在spring-context.xml配置事务管理器
<!-- 配置spring声明式事务管理 -->
<!-- 配置事务管理器 -->
<bean id="transactionManager" class="org.springframework.jdbc.datasource.DataSourceTransactionManager">
    <property name="dataSource" ref="dataSource"></property>
</bean>
<!-- 事务注解驱动,标注@Transactional的类和方法将具有事务性 -->
<tx:annotation-driven transaction-manager="transactionManager"/>
七、分页配置
mybatis-config.xml 中添加配置
<properties>
	<property name="dialect" value="mysql" />
	<property name="pageSqlId" value=".*Page$" />
</properties>

<plugins>
	<plugin interceptor="com.cjy.common.mybatis.page.PageInterceptor"></plugin>
</plugins>
从先到后必须是:
properties => settings => typeAliases => typeHandlers =>objectFactory =>objectWrapperFactory => reflectorFactory =>plugins => environments =>databaseIdProvider => mappers
八、JSP依赖
<!--servlet依赖-->
<dependency>
    <groupId>javax.servlet</groupId>
    <artifactId>servlet-api</artifactId>
    <version>2.5</version>
</dependency>
<!--JSP依赖-->
<dependency>
    <groupId>javax.servlet.jsp</groupId>
    <artifactId>javax.servlet.jsp-api</artifactId>
    <version>2.3.3</version>
</dependency>
<!--JSTL表达式的依赖-->
<dependency>
    <groupId>javax.servlet.jsp.jstl</groupId>
    <artifactId>jstl-api</artifactId>
    <version>1.2</version>
</dependency>
<!-- JSTL实现包 -->
<dependency>
	<groupId>org.apache.taglibs</groupId>
	<artifactId>taglibs-standard-impl</artifactId>
	<version>1.2.5</version>
</dependency>
报错: The absolute uri: http://java.sun.com/jsp/jstl/core cannot be resolved in either web.xml…
JSTL 1.0 声明:
<%@ taglib uri=“http://java.sun.com/jstl/core” prefix=“c” %>
JSTL 1.1 之后声明:
<%@ taglib uri=“http://java.sun.com/jsp/jstl/core” prefix=“c” %>
必须有 JSTL实现包
关于${ctx}无效: 在jsp页面头加:<%@ page isELIgnored=“false” %> 问题得以解决。
九、问题处理
1.上传数据乱码问题
在web.xml中添加
<filter>
		<filter-name>encodingFilter</filter-name>
		<filter-class>org.springframework.web.filter.CharacterEncodingFilter</filter-class>
		<init-param>
			<param-name>encoding</param-name>
			<param-value>UTF-8</param-value>
		</init-param>
		<init-param>
			<param-name>forceEncoding</param-name>
			<param-value>true</param-value>
		</init-param>
	</filter>
	<filter-mapping>
		<filter-name>encodingFilter</filter-name>
		<url-pattern>/*</url-pattern>
	</filter-mapping>
2.文件上传失败问题
在spring-context.xml中添加
<!-- 文件上传 -->
	<bean id="multipartResolver" class="org.springframework.web.multipart.commons.CommonsMultipartResolver"
		p:defaultEncoding="utf-8"
		p:maxUploadSize="52428880"
		p:uploadTempDir="upload"
		p:maxInMemorySize="40960"></bean>
pom.xml中添加
	<!-- 文件上传组件 -->
	<dependency>
		<groupId>commons-fileupload</groupId>
		<artifactId>commons-fileupload</artifactId>
		<version>1.2.2</version>
	</dependency>
	<dependency>
		<groupId>commons-io</groupId>
		<artifactId>commons-io</artifactId>
		<version>2.0.1</version>
	</dependency>
3.使用本地jar包问题
pom.xml中引用本地jar包, 需要在build标签中添加插件
<dependency>
    <groupId>QRCode</groupId>
    <artifactId>QRCode</artifactId>
    <version>3.0</version>
    <scope>system</scope>
	<systemPath>${project.basedir}/src/main/resources/lib/QRCode.jar</systemPath>
</dependency>

<plugin>
	<groupId>org.apache.maven.plugins</groupId>
	<artifactId>maven-war-plugin</artifactId>
	<configuration>
		<webResources>
			<resource>
			<!-- 存放本地jar的文件夹 src/main/resources/lib -->
			<directory>${project.basedir}/src/main/resources/lib</directory>
			<!-- 目标lib目录 WEB-INF/lib/ -->
			<targetPath>WEB-INF/lib/</targetPath>
			<includes>
				<!-- 匹配所有jar包 -->
				<include>*.jar</include>
			</includes>
			</resource>
		</webResources>
	</configuration>
</plugin>
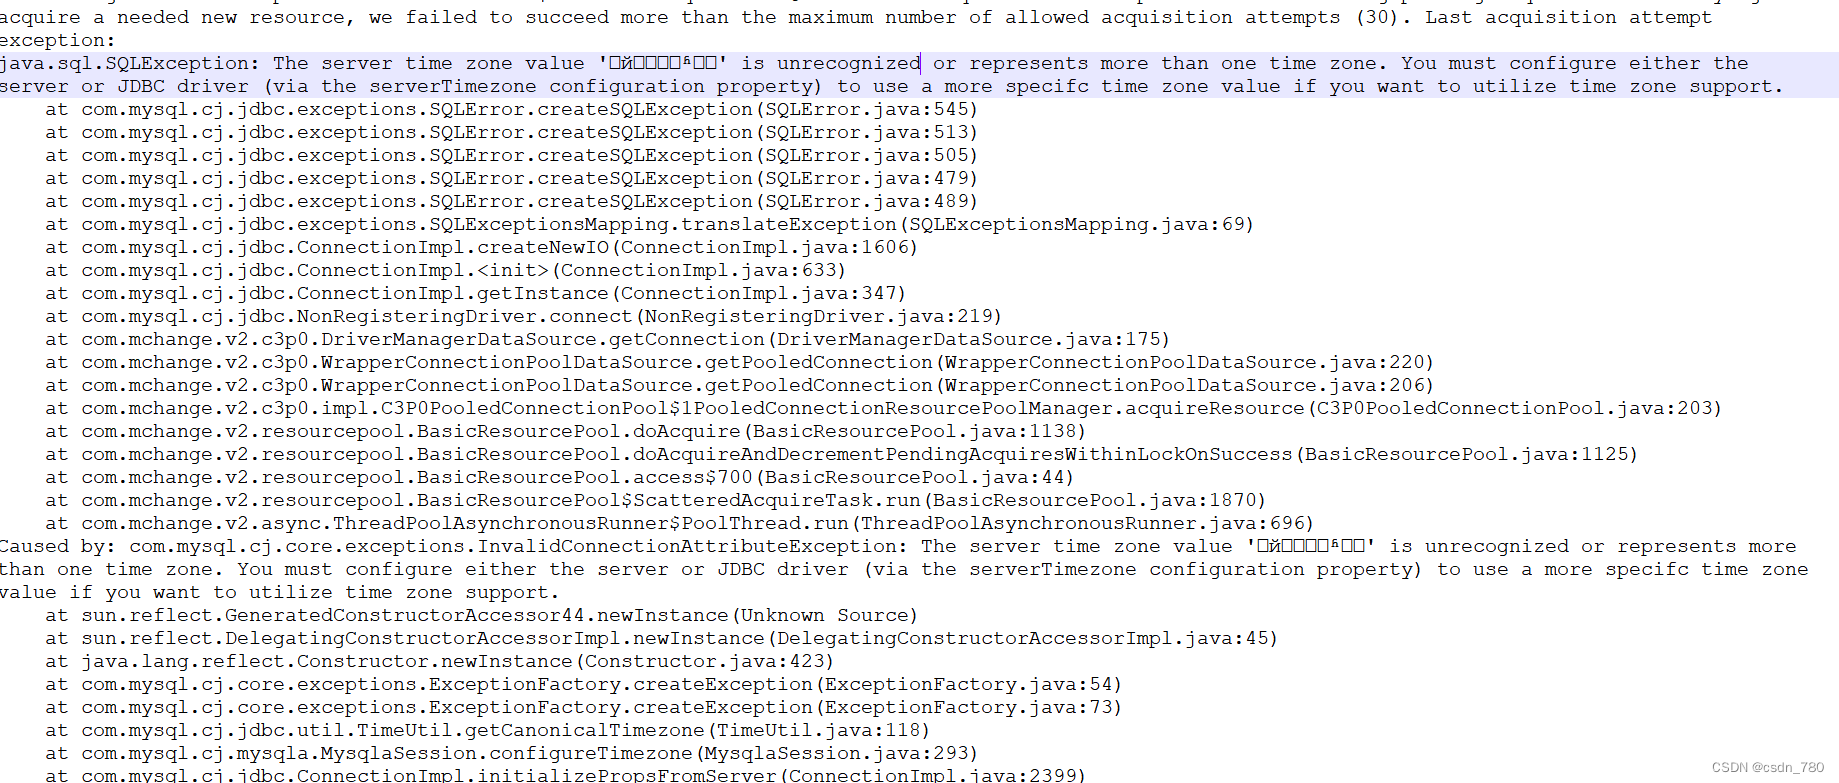
4.项目启动报 java.sql.SQLException 数据库时区设置
在 jdbc.properties url 中加入 &serverTimezone=UTC 设置时区
参考文档
https://blog.youkuaiyun.com/Eternal_Blue/article/details/90400895


 被折叠的 条评论
为什么被折叠?
被折叠的 条评论
为什么被折叠?
 到【灌水乐园】发言


