


 本文详细介绍如何在SpringBoot项目中整合JDBC,通过使用Java 8的Lambda表达式和函数式接口,实现对关系型数据库h2的高效操作,包括创建表、批量插入和查询数据。
1、准备工作
- >=1.8的JDK
- Eclipse(其它任何合适的IDE)
- Maven3.2(官网也有Gradle的构建
2、 POM文件
仍然是一个子模块,父工程的pom https://blog.youkuaiyun.com/csdn86868686888/article/details/103758256
<project xmlns="http://maven.apache.org/POM/4.0.0" xmlns:xsi="http://www.w3.org/2001/XMLSchema-instance" xsi:schemaLocation="http://maven.apache.org/POM/4.0.0 http://maven.apache.org/xsd/maven-4.0.0.xsd">
  <modelVersion>4.0.0</modelVersion>
  <parent>
    <groupId>com.springboot</groupId>
    <artifactId>springboot-parent</artifactId>
    <version>0.0.1-SNAPSHOT</version>
  </parent>
  <artifactId>springboot-JDBC</artifactId>

  <properties>
		<java.version>1.8</java.version>
	</properties>

	<dependencies>
		<dependency>
			<groupId>org.springframework.boot</groupId>
			<artifactId>spring-boot-starter-data-jdbc</artifactId>
		</dependency>

		<dependency>
			<groupId>com.h2database</groupId>
			<artifactId>h2</artifactId>
			<scope>runtime</scope>
		</dependency>
		<dependency>
			<groupId>org.springframework.boot</groupId>
			<artifactId>spring-boot-starter-test</artifactId>
			<scope>test</scope>
			<exclusions>
				<exclusion>
					<groupId>org.junit.vintage</groupId>
					<artifactId>junit-vintage-engine</artifactId>
				</exclusion>
			</exclusions>
		</dependency>
	</dependencies>

	<build>
		<plugins>
			<plugin>
				<groupId>org.springframework.boot</groupId>
				<artifactId>spring-boot-maven-plugin</artifactId>
			</plugin>
		</plugins>
	</build>

</project>
3、工程
工程结构:
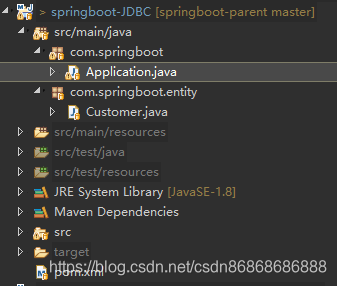
代码:
package com.springboot.entity;

public class Customer {
	  private long id;
	  private String firstName, lastName;

	//省略get,set方法

	public Customer(long id, String firstName, String lastName) {
	    this.id = id;
	    this.firstName = firstName;
	    this.lastName = lastName;
	  }

	  @Override
	  public String toString() {
	    return String.format(
	        "Customer[id=%d, firstName='%s', lastName='%s']",
	        id, firstName, lastName);
	  }
}
package com.springboot;
import java.util.Arrays;
import java.util.List;
import java.util.stream.Collector;
import java.util.stream.Collectors;
import org.slf4j.Logger;
import org.slf4j.LoggerFactory;
import org.springframework.beans.factory.annotation.Autowired;
import org.springframework.boot.CommandLineRunner;
import org.springframework.boot.SpringApplication;
import org.springframework.boot.autoconfigure.SpringBootApplication;
import org.springframework.core.io.buffer.LimitedDataBufferList;
import org.springframework.jdbc.core.JdbcTemplate;
import com.springboot.entity.Customer;
@SpringBootApplication
public class Application implements CommandLineRunner{
private static final Logger log=LoggerFactory.getLogger(Application.class);
@Autowired
JdbcTemplate jdbcTemplate;
public static void main(String[] args) {
SpringApplication.run(Application.class, args);
}
@Override
public void run(String... args) throws Exception {
log.info("creating tables");
jdbcTemplate.execute("DROP TABLE customers IF EXISTS");
jdbcTemplate.execute("CREATE TABLE customers(" +
"id SERIAL, first_name VARCHAR(255), last_name VARCHAR(255))");
List<Object[]> splitUpNames=Arrays.asList("John Woo", "Jeff Dean", "Josh Bloch", "Josh Long")
.stream()
.map(name->name.split(" "))
.collect(Collectors.toList());
splitUpNames.forEach(name->log.info(String.format("Inserting customer record for %s %s", name[0], name[1])));
jdbcTemplate.batchUpdate("INSERT INTO customers(first_name, last_name) VALUES (?,?)", splitUpNames);
log.info("Querying for customer records where first_name = 'Josh':");
jdbcTemplate.query(
"SELECT id, first_name, last_name FROM customers WHERE first_name = ?", new Object[] { "Josh" },
(rs, rowNum) -> new Customer(rs.getLong("id"), rs.getString("first_name"), rs.getString("last_name"))
).forEach(customer -> log.info(customer.toString()));
}
}
4、总结
执行结果是这样的:

主要功能是利用Spring提供的JDBC访问关系型数据库,这里为了演示方便使用的是嵌入内存的关系型数据库h2,插入、查询时候使用了java8以后提供的函数式接口以及Lambda表达式。


 242
242

 被折叠的 条评论
为什么被折叠?
被折叠的 条评论
为什么被折叠?
 到【灌水乐园】发言


