


Netty SSL双向验证
1. 环境说明
- 本例使用windows10 + Win64OpenSSL-3_3_0(完整版,不是lite),netty版本4.1.77.Final,JDK-17
- openssl官方推荐合作下载地址:https://slproweb.com/download/Win64OpenSSL-3_3_0.exe
- ${openssl_home}是openssl的安装目录
- 所有命令在${openssl_home}/bin目录下执行
- windows下openssl的配置文件是${openssl_home}/bin/openssl.cfg,linux下是${openssl_home}/bin/openssl.conf,注意替换后缀名
- 需要手动按照openssl.cfg的配置创建好各种目录、文件
2. 生成证书
2.1. 创建根证书 密钥+证书
openssl genrsa -des3 -out demoCA/private/ca.key 4096

openssl req -new -x509 -days 3650 -key demoCA/private/ca.key -out demoCA/certs/ca.crt
2.2. 生成请求证书密钥
openssl genrsa -des3 -out demoCA/private/server.key 2048

openssl genrsa -des3 -out demoCA/private/client.key 2048
2.3. 生成csr请求证书
openssl req -new -key demoCA/private/server.key -out demoCA/certs/server.csr -config openssl.cfg

openssl req -new -key demoCA/private/client.key -out demoCA/certs/client.csr -config openssl.cfg
2.4. ca证书对server.csr、client.csr签发生成x509证书
openssl x509 -req -days 3650 -in demoCA/certs/server.csr -CA demoCA/certs/ca.crt -CAkey demoCA/private/ca.key -CAcreateserial -out demoCA/certs/server.crt

openssl x509 -req -days 3650 -in demoCA/certs/client.csr -CA demoCA/certs/ca.crt -CAkey demoCA/private/ca.key -CAcreateserial -out demoCA/certs/client.crt
2.5. 请求证书PKCS#8编码
openssl pkcs8 -topk8 -in demoCA/private/server.key -out demoCA/private/pkcs8_server.key -nocrypt

openssl pkcs8 -topk8 -in demoCA/private/client.key -out demoCA/private/pkcs8_client.key -nocrypt
2.6. 输出文件
server端:ca.crt、server.crt、pkcs8_server.key
client端:ca.crt、client.crt、pkcs8_client.key
3. Java代码
3.1. Server端
- ServiceMain.java
public class ServiceMain implements CommandLineRunner {
    @Value("${netty.host}")
    private String host;
    @Value("${netty.port}")
    private int port;

    @Resource
    private NettyServer nettyServer;

    public static void main(String[] args) {
        SpringApplication.run(ServiceMain.class, args);
    }

    @Override
    public void run(String... args) throws Exception {
        InetSocketAddress address = new InetSocketAddress(host, port);
        ChannelFuture channelFuture = nettyServer.bind(address);
        Runtime.getRuntime().addShutdownHook(new Thread(() -> nettyServer.destroy()));
        channelFuture.channel().closeFuture().syncUninterruptibly();
    }
}
- NettyServer.java
package cn.a.service.netty;

import io.netty.bootstrap.ServerBootstrap;
import io.netty.channel.Channel;
import io.netty.channel.ChannelFuture;
import io.netty.channel.ChannelOption;
import io.netty.channel.EventLoopGroup;
import io.netty.channel.nio.NioEventLoopGroup;
import io.netty.channel.socket.nio.NioServerSocketChannel;
import io.netty.handler.ssl.ClientAuth;
import io.netty.handler.ssl.SslContext;
import io.netty.handler.ssl.SslContextBuilder;
import lombok.extern.slf4j.Slf4j;
import org.springframework.context.ApplicationContext;
import org.springframework.stereotype.Component;
import org.springframework.util.ResourceUtils;

import javax.annotation.Resource;
import java.io.File;
import java.net.InetSocketAddress;

@Slf4j
@Component("nettyServer")
public class NettyServer {

    private final EventLoopGroup parentGroup = new NioEventLoopGroup();
    private final EventLoopGroup childGroup = new NioEventLoopGroup();
    private Channel channel;

    @Resource
    ApplicationContext applicationContext;

    /**
     * 绑定端口
     *
     * @param address
     * @return
     */
    public ChannelFuture bind(InetSocketAddress address) {
        ChannelFuture channelFuture = null;
        try {
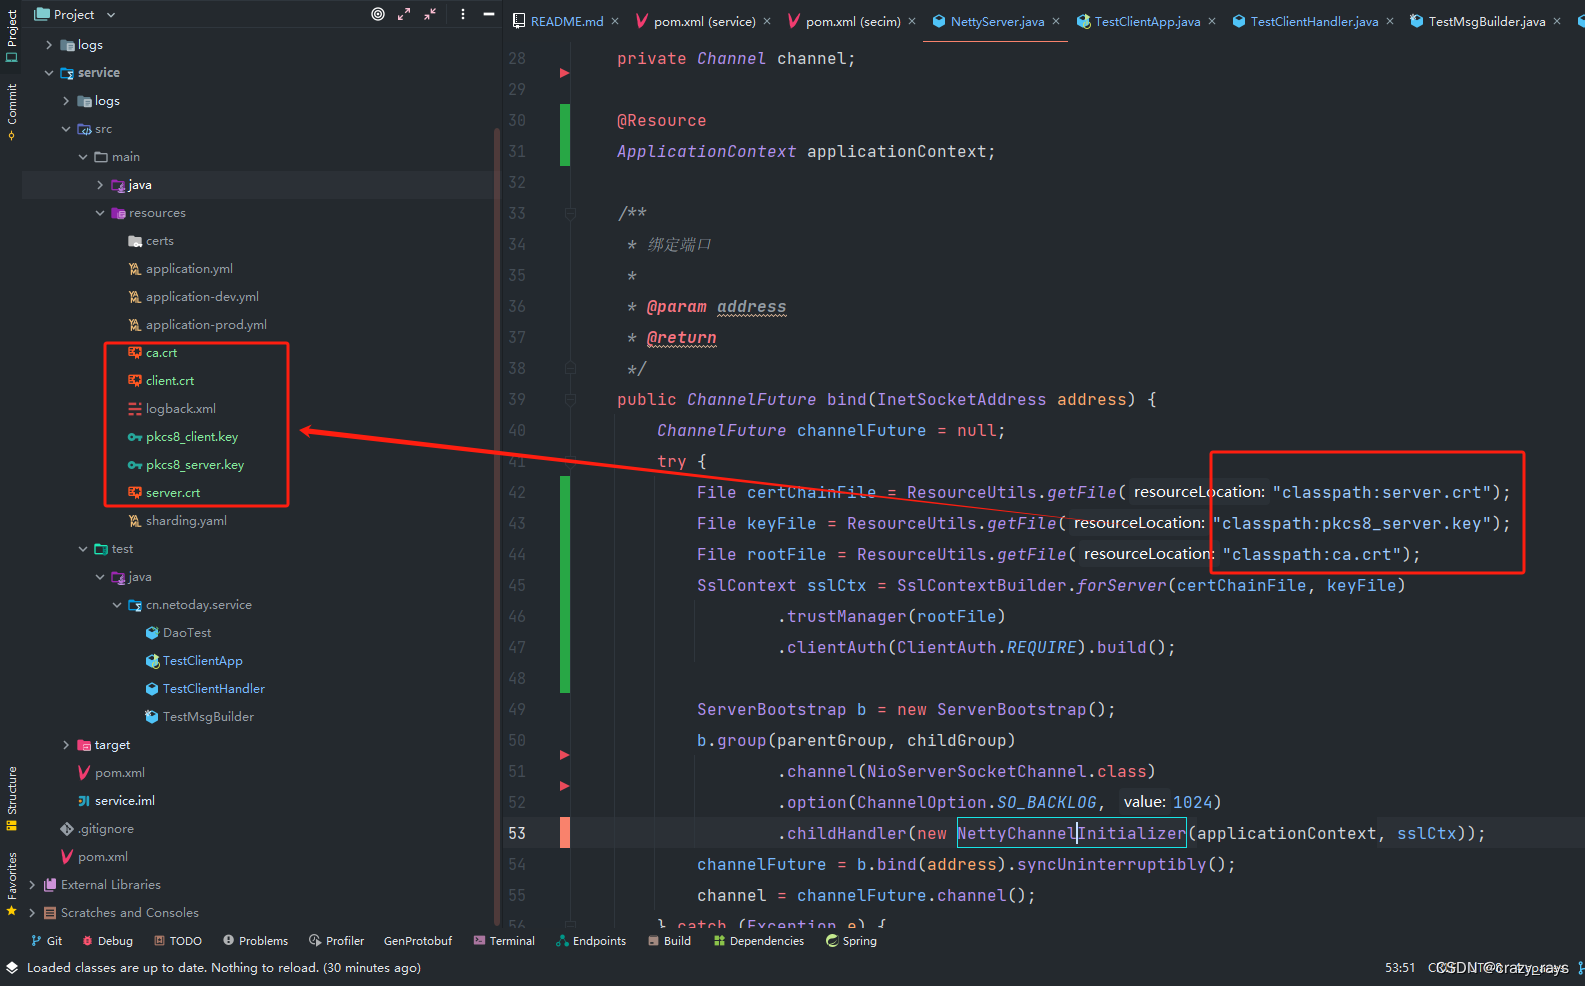
            File certChainFile = ResourceUtils.getFile("classpath:server.crt");
            File keyFile = ResourceUtils.getFile("classpath:pkcs8_server.key");
            File rootFile = ResourceUtils.getFile("classpath:ca.crt");
            SslContext sslCtx = SslContextBuilder.forServer(certChainFile, keyFile)
                    .trustManager(rootFile)
                    .clientAuth(ClientAuth.REQUIRE).build();

            ServerBootstrap b = new ServerBootstrap();
            b.group(parentGroup, childGroup)
                    .channel(NioServerSocketChannel.class)
                    .option(ChannelOption.SO_BACKLOG, 1024)
                    .childHandler(new NettyChannelInitializer(applicationContext, sslCtx));
            channelFuture = b.bind(address).syncUninterruptibly();
            channel = channelFuture.channel();
        } catch (Exception e) {
            log.error(e.getMessage());
        } finally {
            if (null != channelFuture && channelFuture.isSuccess()) {
                log.info("netty server start done.");
            } else {
                log.error("netty server start error.");
            }
        }
        return channelFuture;
    }


    /**
     * 销毁
     */
    public void destroy() {
        if (null == channel) return;
        channel.close();
        parentGroup.shutdownGracefully();
        childGroup.shutdownGracefully();
    }


    /**
     * 获取通道
     *
     * @return
     */
    public Channel getChannel() {
        return channel;
    }
}
- NettyChannelInitializer.java
package cn.a.service.netty;

import io.netty.channel.ChannelInitializer;
import io.netty.channel.socket.SocketChannel;
import io.netty.handler.ssl.SslContext;
import org.springframework.context.ApplicationContext;

public class NettyChannelInitializer extends ChannelInitializer<SocketChannel> {

    private final ApplicationContext applicationContext;
    private final SslContext sslContext;

    public NettyChannelInitializer(ApplicationContext applicationContext, SslContext sslCtx) {
        this.applicationContext = applicationContext;
        this.sslContext = sslCtx;
    }

    @Override
    protected void initChannel(SocketChannel channel) throws Exception {
        // 添加SSL安装验证
        channel.pipeline().addLast(sslContext.newHandler(channel.alloc()));
        //发送时编码
        channel.pipeline().addLast(new FrameEncoder());
        //接收时解码
        channel.pipeline().addLast(new FrameDecoder());
        //业务处理器
        channel.pipeline().addLast(new NettyMsgHandler(applicationContext));
    }
}
3.2. Client端
- TestClientApp.java
package cn.a.service;

import cn.hutool.core.util.IdUtil;
import cn.hutool.core.util.NumberUtil;
import cn.a.service.netty.FrameDecoder;
import cn.a.service.netty.FrameEncoder;
import cn.a.service.netty.NettyMsg;
import cn.a.service.netty.Session;
import io.netty.bootstrap.Bootstrap;
import io.netty.channel.*;
import io.netty.channel.nio.NioEventLoopGroup;
import io.netty.channel.socket.SocketChannel;
import io.netty.channel.socket.nio.NioSocketChannel;
import io.netty.handler.ssl.SslContext;
import io.netty.handler.ssl.SslContextBuilder;
import lombok.extern.slf4j.Slf4j;
import org.springframework.boot.autoconfigure.SpringBootApplication;

import java.io.File;
import java.util.Scanner;

@Slf4j
@SpringBootApplication
public class TestClientApp {

    private static final Session session = new Session().setId(IdUtil.randomUUID());

    public static void main(String[] args) {
        new Thread(new TestThread("127.0.0.1", 7890)).start();
    }

    private static class TestThread implements Runnable {
        private final String serverHost;
        private final int serverPort;

        public TestThread(String serverHost, int serverPort) {
            this.serverHost = serverHost;
            this.serverPort = serverPort;
        }

        @Override
        public void run() {
            EventLoopGroup group = new NioEventLoopGroup();
            try {
                final String certsDir = "D:\\GIT\\secim_service\\service\\src\\main\\resources\\";
                File certChainFile = new File(certsDir + "client.crt");
                File keyFile = new File(certsDir + "pkcs8_client.key");
                File rootFile = new File(certsDir + "ca.crt");
                SslContext sslCtx = SslContextBuilder.forClient().keyManager(certChainFile, keyFile).trustManager(rootFile).build();

                Bootstrap b = new Bootstrap();

                b.group(group)
                        .channel(NioSocketChannel.class)
                        .option(ChannelOption.TCP_NODELAY, true)
                        .handler(new ChannelInitializer<SocketChannel>() {
                            protected void initChannel(SocketChannel ch) throws Exception {
                                // 添加SSL安装验证
                                ch.pipeline().addLast(sslCtx.newHandler(ch.alloc()));
                                ch.pipeline().addLast(new FrameEncoder());
                                ch.pipeline().addLast(new FrameDecoder());
                                ch.pipeline().addLast(new TestClientHandler(session));
                            }
                        });

                // 发起异步连接操作
                ChannelFuture f = b.connect(serverHost, serverPort);
                f.addListener(future -> {
                    startConsoleThread(f.channel(), session);
                }).sync();
                // 等待客户端连接关闭
                f.channel().closeFuture().sync();
            } catch (Exception e) {
                e.printStackTrace();
            } finally {
                // 优雅退出,释放NIO线程组
                group.shutdownGracefully();
            }
        }
    }

    /**
     * 开启控制台线程
     *
     * @param channel
     */
    private static void startConsoleThread(Channel channel, Session session) {
        new Thread(() -> {
            while (!Thread.interrupted()) {
                log.info("输入指令:");
                Scanner scanner = new Scanner(System.in);
                String input;
                while (!"exit".equals((input = scanner.nextLine()))) {
                    log.info("输入的命令是:{}", input);
                    if (!NumberUtil.isInteger(input)) {
                        log.error("输入的指令有误,请重新输入");
                        continue;
                    }
                    NettyMsg nettyMsg;
                    switch (Integer.parseInt(input)) {
                        case 1:
                            nettyMsg = TestMsgBuilder.buildIdentityMsg(session);
                            break;
                        default:
                            log.error("无法识别的指令:{},请重新输入指令", input);
                            nettyMsg = null;
                            break;
                    }
                    if (null != nettyMsg) {
                        channel.writeAndFlush(nettyMsg);
                    }
                }
            }
        }).start();
    }
}
3.3. 证书存放
4. 运行效果
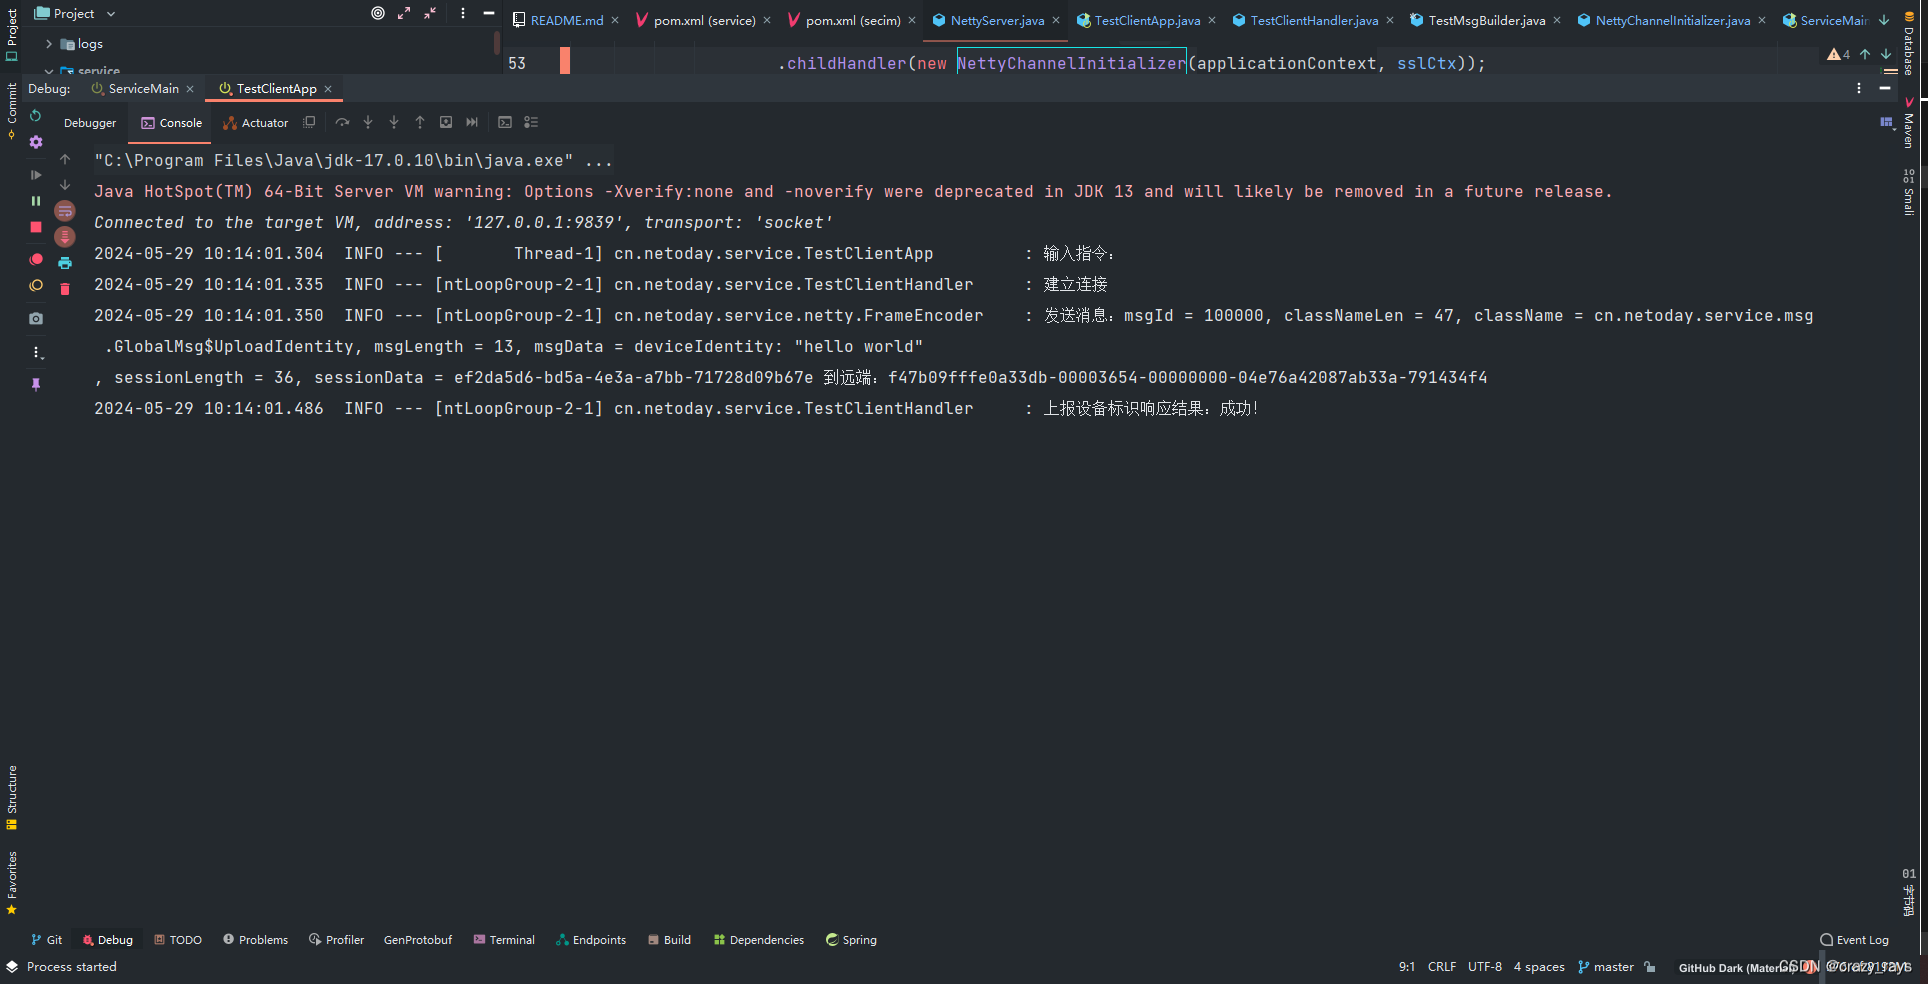
4.1. SSL客户端发送消息:
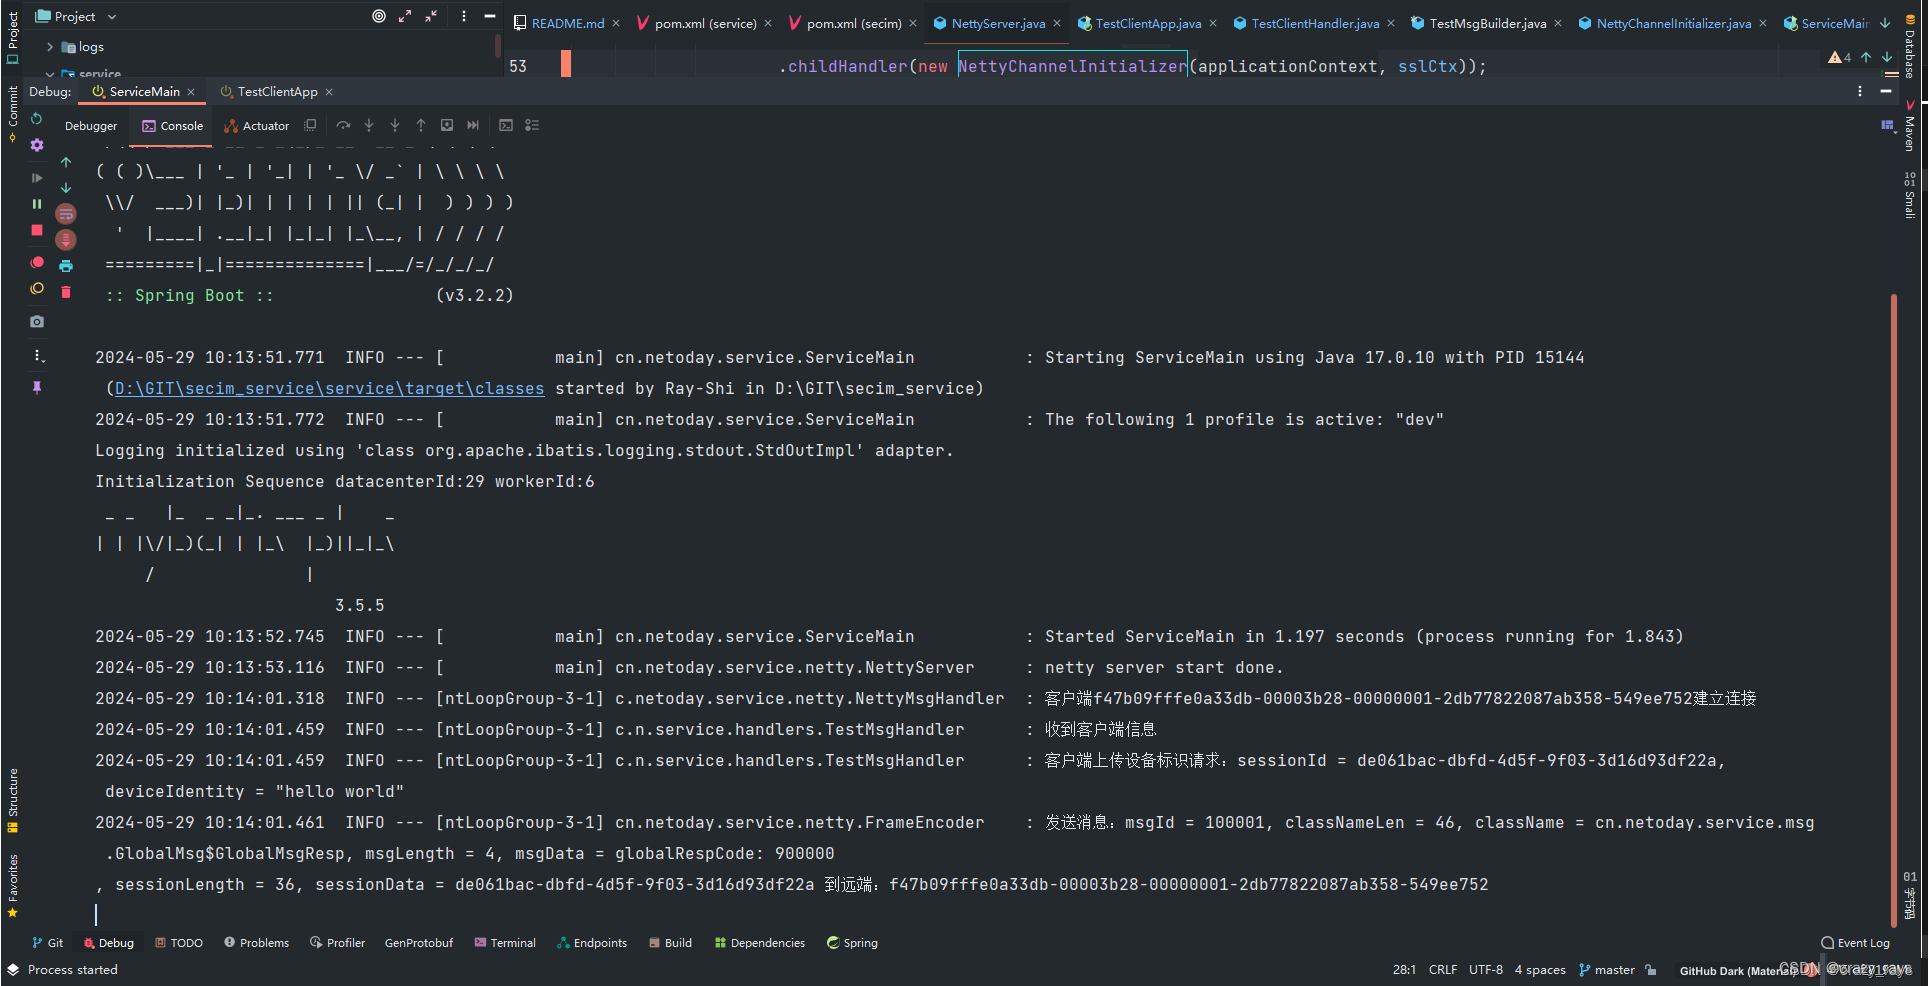
4.2. 服务器收到SSL客户端消息:
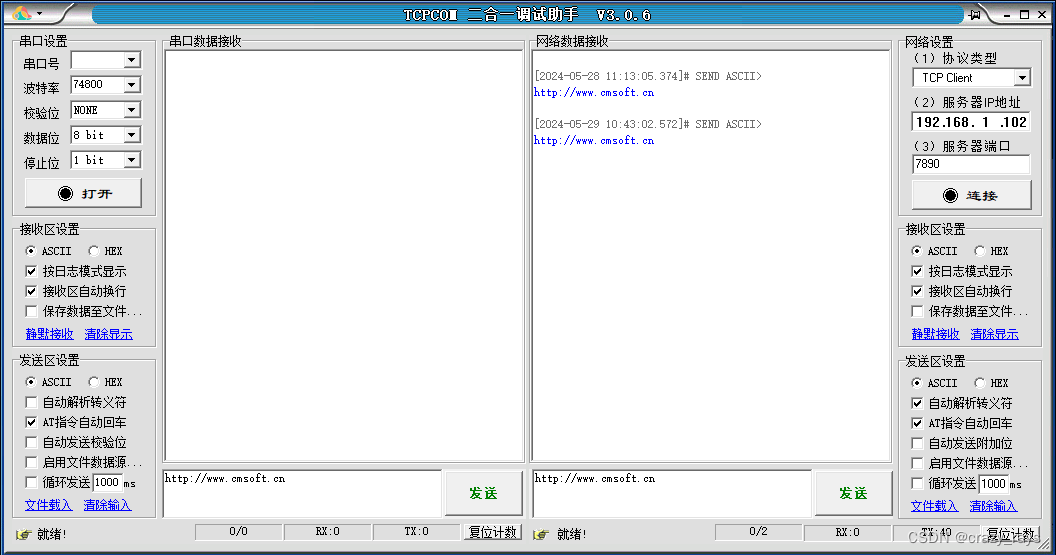
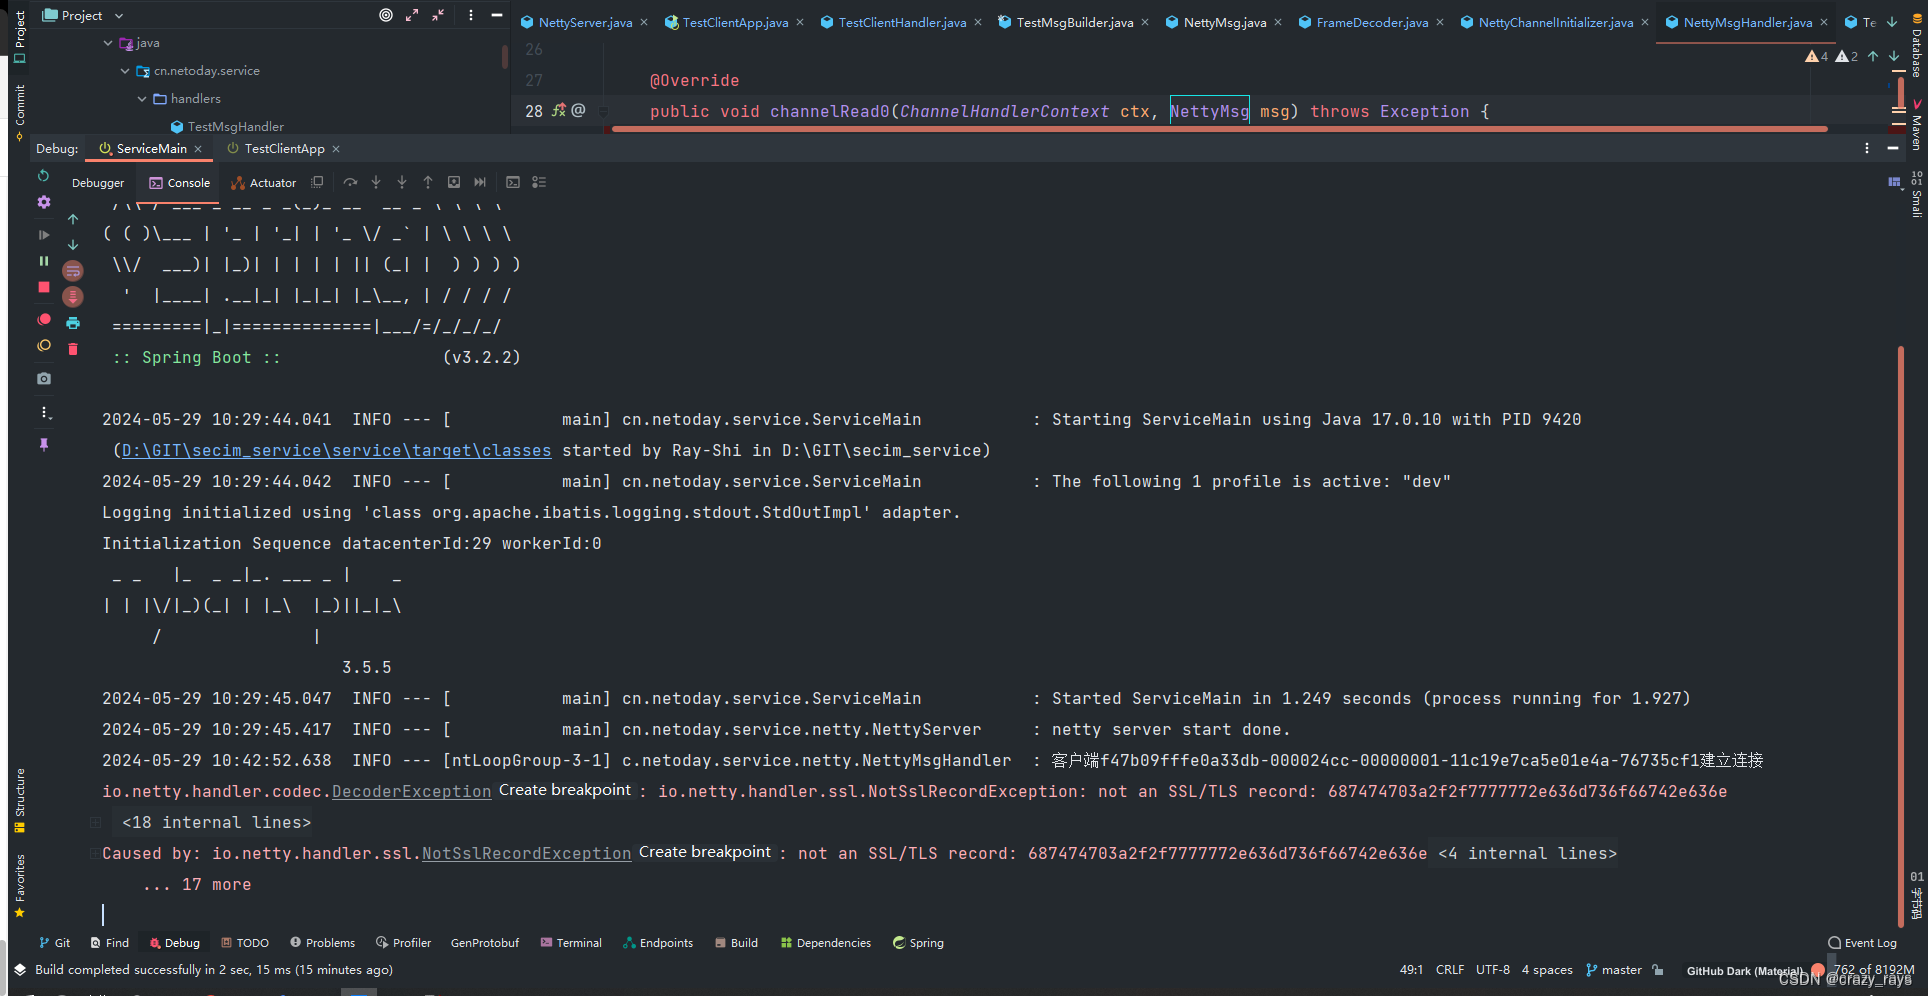
4.3. 非SSL客户端发送消息:
4.4. 服务器收到非SSL客户端消息:
5. References:
2020-07-14 15:01:55 小傅哥:netty案例,netty4.1中级拓展篇十三《Netty基于SSL实现信息传输过程中双向加密验证》
 333


 扫一扫


 被折叠的 条评论
为什么被折叠?
 到【灌水乐园】发言


