


 本文介绍了一系列提升Vim编辑器效率的实用插件,包括Vundle插件管理器、change-colorscheme主题切换、NERDTree目录浏览、SuperTab自动补全、YouCompleteMe智能提示、fzf文件搜索、airline状态栏美化、tabular对齐工具、vim-autopep8代码格式化、indentLine缩进高亮、ctags代码标签生成、taglist代码结构导航等,涵盖代码编辑、搜索、格式化及美化等方面。
Vim个人常用的插件:
1.Vundle
首先使用Vundle来管理插件 https://www.cnblogs.com/inrgihc/articles/7908943.html
使用:
(1)在~/.vimrc中 添加 Bundle或者Plugin
Bundle 'SuperTab'
Bundle 'https://github.com/chxuan/change-colorscheme.git' 添加一个github上的插件
(2)通过 :BundleInstall 或者 :PluginInstall! 来安装上面的插件即可。
查看已安装插件::PluginList 或者 :BundleList
2. chage-colorscheme (可以用fzf中的 :Colors代替)
https://github.com/chxuan/change-colorscheme.git
修改主题 :NextColorScheme
3. NERDTree 树形目录插件
在 .vimrc中添加:
Bundle 'scrooloose/nerdtree'
map <F3> :NERDTreeMirror<CR>
map <F3> :NERDTreeToggle<CR>
上面两句是 F3 来选择关闭或者打开树形目录
(1)F3 关闭或者打开
(2)ctrl + w 在目录和文件两边切换
(3)o 打开文件并且跳转
(4)go 打开文件不跳转
(5):NERDTreeFind + 路径名 打开某个文件夹
4. supertab插件
Bundle 'SuperTab'
简单的自动补全,包含在 YouCompleteMe 插件中
5. YouCompleteMe
https://blog.youkuaiyun.com/qq_33039859/article/details/81490382
很强大的补全插件
首先重新编译安装vim,因为需要支持python:
sudo apt-get install build-essentiral cmake python-dev vim-python-jedi
https://github.com/ycm-core/YouCompleteMe/wiki/Building-Vim-from-source
(有些路径改成自己的)
cd ~
git clone https://github.com/vim/vim.git
cd vim
./configure --with-features=huge \
            --enable-multibyte \
	    --enable-rubyinterp=yes \
	    --enable-pythoninterp=yes \
	    --with-python-config-dir=/usr/lib/python2.7/config \ # pay attention here check directory correct
	    --enable-python3interp=yes \
	    --with-python3-config-dir=/usr/lib/python3.5/config \
	    --enable-perlinterp=yes \
	    --enable-luainterp=yes \
            --enable-gui=gtk2 \
            --enable-cscope \
	   --prefix=/usr/local

make VIMRUNTIMEDIR=/usr/local/share/vim/vim81
make install
然后手动下载好YouCompleteMe,不然老是报错:
git clone https://github.com/Valloric/YouCompleteMe.git ~/.vim/bundle/YouCompleteMe
cd ~/.vim/bundle/YouCompleteMe
git submodule update --init --recursive (需要翻墙,因此可以在本地执行这三句,然后scp到服务器)
接下来cd 到 YouCompleteMe执行:
python install.py
然后在 .vimrc中添加:
Bundle 'Valloric/YouCompleteMe'
let g:ycm_python_binary_path = '/usr/bin/python'
最后 :BundleInstall
Done!
6. fzf
https://segmentfault.com/a/1190000016186540#articleHeader7
特别强大的文件搜索和文本搜索器,非常好用
Bundle 'junegunn/fzf', { 'dir': '~/.fzf', 'do': './install --all' }
Bundle 'junegunn/fzf.vim'
常用命令:
(1):Files 路径名 搜索文件
(2):Buffers <keyword> 用于在存在于buffer中的文件间切换
(3):Lines <keyword> 用于在buffer中的文件进行文本搜索
(4):BLines <keyword> 和Lines类似,只不过它只在当前buffer里查找
(5):Colors 选择主题颜色 ,一共有23个,比第二个插件丰富多了,monokai比较不错,下载好之后,在vimrc中添加: colorscheme molokai
(6):History 查看历史打开文件
(7):History: 查看历史命令
7. airline
状态栏美化神器,只不过会使vim的启动速度慢一点
Bundle 'vim-airline/vim-airline'
Bundle 'vim-airline/vim-airline-themes'
let g:airline_theme = 'badwolf' " 设置主题为badwolf
8. 对齐插件tabular
https://blog.youkuaiyun.com/techfield/article/details/84186402
Bundle 'godlygeek/tabular'
:Tabularize 可简化为 :Tab,以下都省略了选中区域后自动生成的 '<,'>:
- 冒号对齐:
:Tab /: - 逗号对齐
:Tabularize /, - 运行上一个对齐命令
:Tab //对齐(需要 escape)::Tab /\/\/
9. vim-autopep8
https://www.cnblogs.com/linxiyue/p/7834817.html
自动格式化工具,安装后运行:Autopep8就可以自动依照pep8的标准自动格式化代码。
10. indentLine
缩进指示线,地址https://github.com/Yggdroot/indentLine。
安装:
| 1 |
|
11. vim设置透明度
在vimrc中添加:
hi Normal ctermfg=252 ctermbg=none
就可以实现与终端同样的透明度了,然后设置终端透明度即可。
12. ctags 插件
https://blog.youkuaiyun.com/lileiyang12/article/details/50009101
安装时,./configure --prefix=/home/cyt/.local
make
make install
安装之后进入到你的代码根路径下执行:ctags -R *
瞬间就会生成一个tags文件
然后在你的vim配置文件~/.vimrc里边:
set tags=/home/zhouyl/rap/libpcap-1.3.0/tags
set autochdir
出来后source ~/.vimrc使配置文件立刻生效
此时就能用了。
使用:
vim 你的源代码文件,找到某个调用函数的地方,光标停留在函数上边,ctrl+] 就会进入到函数定义的地方,ctrl+t 返回来
13. taglist
https://www.cnblogs.com/willsonli/p/6559705.html
Bundle 'vim-scripts/taglist.vim'
map <silent> <F9> :TlistToggle<cr> " 绑定F9来显示或者不显示
let Tlist_Ctags_Cmd = '/home/cyt/.local/bin/ctags'
let Tlist_Use_Right_Window = 1 " 让taglist窗口出现在Vim的右边
let Tlist_Sort_Type ='name' " Tag的排序规则,以名字排序。默认是以在文件中出现的顺序排序
let Tlist_WinWidth = 32 " 设置窗体宽度为32,可以根据自己喜好设置
最后上一张配置好的vim图片:
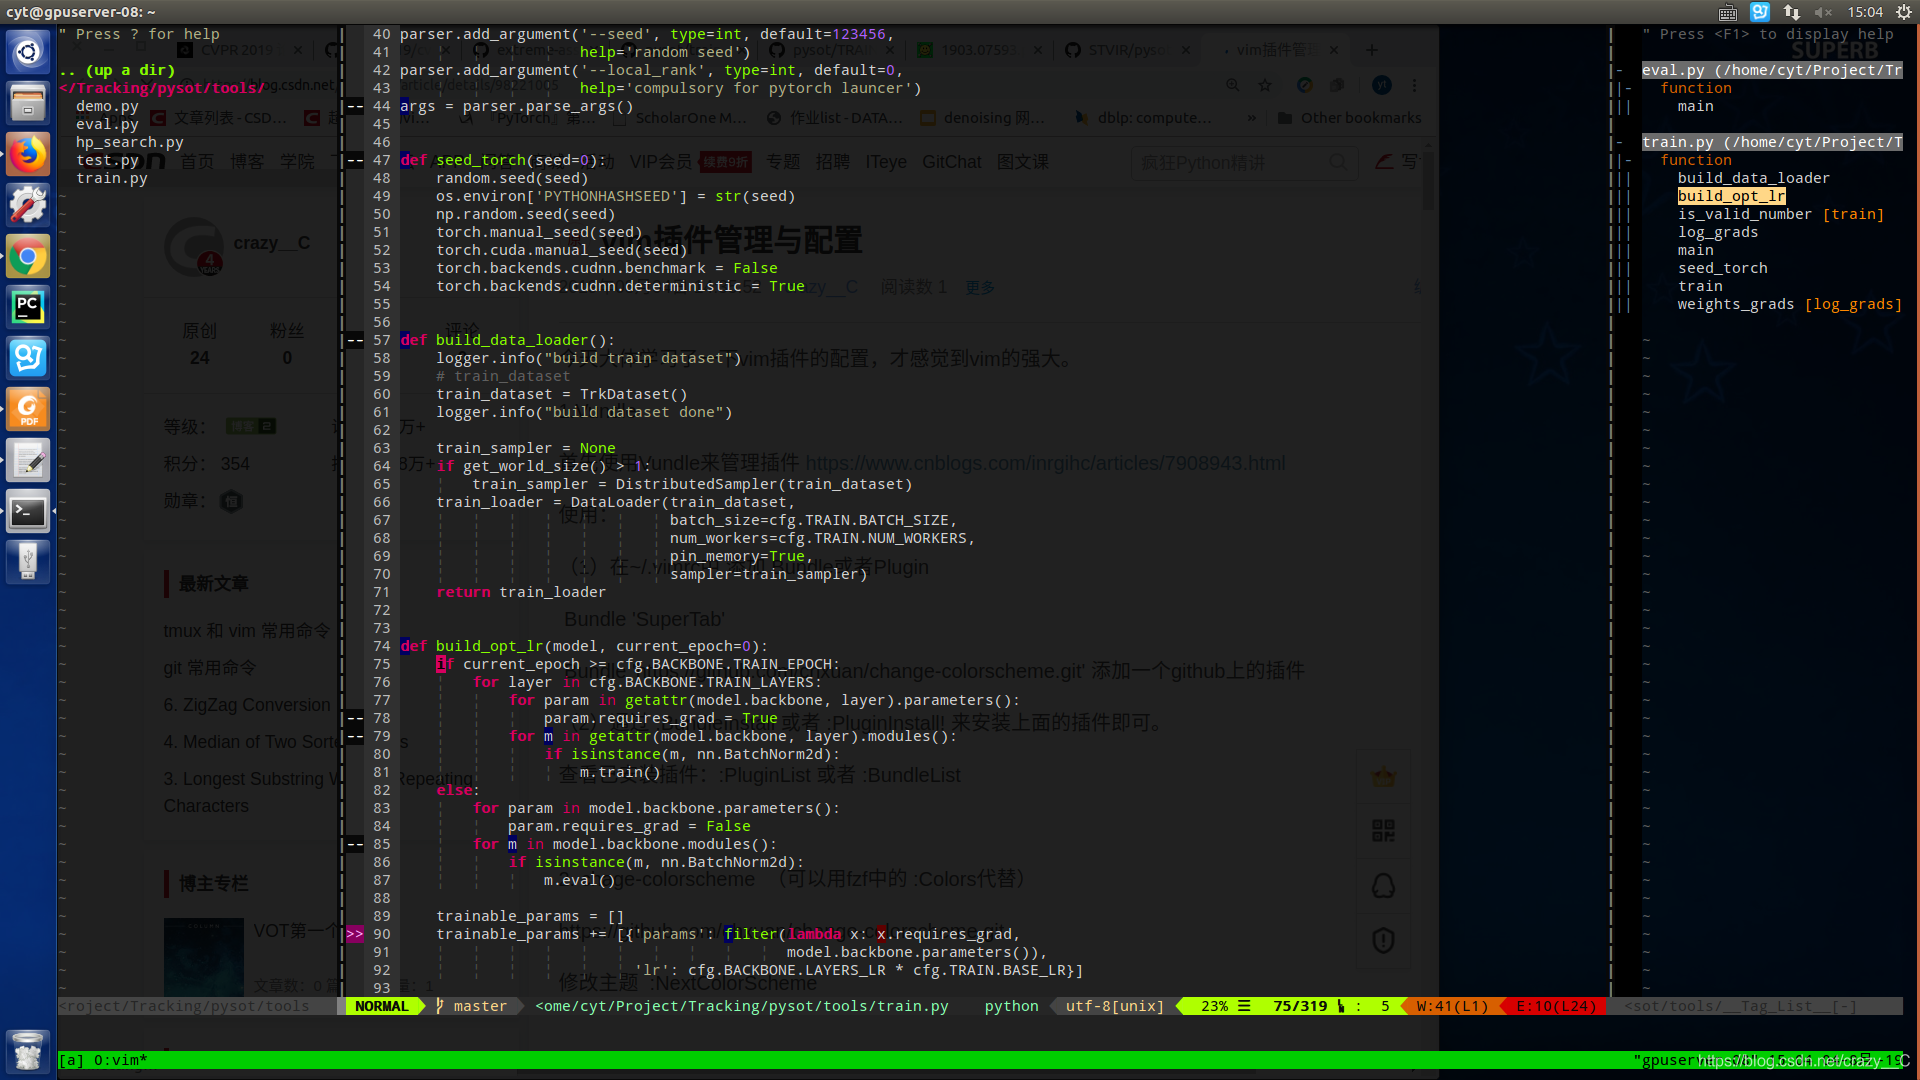


 580
580

 被折叠的 条评论
为什么被折叠?
被折叠的 条评论
为什么被折叠?
 到【灌水乐园】发言


