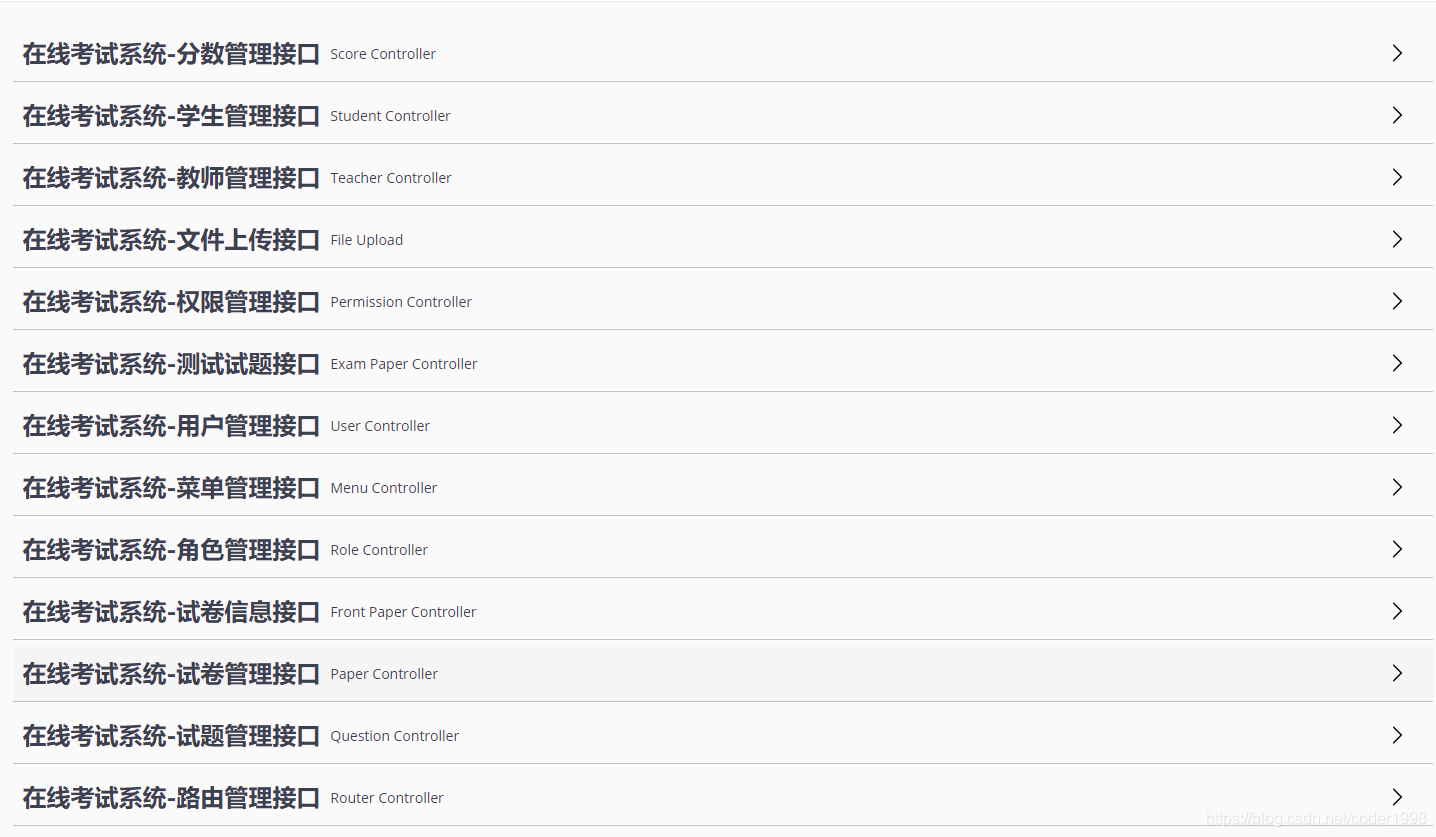
我们在开发过程中,经常需要和别人交流项目,经常和别人对接的时候,就需要我们去写接口文档,如果单纯的是使用手写的方式比较麻烦,而且也费时间,所以说呢,为了方便,今天就把swagger整合到在线考试系统(exam)里面,使用起来很爽; 避免接口文档的书写。
整合的步骤也比较简单, 需要注意的就是需要资源放行一下。下面就来说说整合的步骤
(1) 先在项目的pom.xml里面加入依赖
 <!-- swagger2-->
        <dependency>
            <groupId>io.springfox</groupId>
            <artifactId>springfox-swagger2</artifactId>
            <version>2.9.2</version>
        </dependency>
        <dependency>
            <groupId>io.springfox</groupId>
            <artifactId>springfox-swagger-ui</artifactId>
            <version>2.9.2</version>
        </dependency>
(2) 添加一个配置类,需要注意的是要添加 @Configuration 和 @EnableSwagger2注解
@Configuration
@EnableSwagger2
public class SwaggerConfig {
    @Bean
    public Docket createRestApi() {
        return new Docket(DocumentationType.SWAGGER_2)
                .pathMapping("/")
                .select()
                .apis(RequestHandlerSelectors.basePackage("com.soulcoder.exam.web.controller"))
                .paths(PathSelectors.any())
                .build().apiInfo(new ApiInfoBuilder()
                        .title("Exam整合Swagger2")
                        .description("在线考试系统集成swagger2")
                        .version("9.0")
                        .license("xxxxx")
                        .licenseUrl("www.xxxx.com")
                        .build());
    }
}
(3)记住资源放行
		registry.addResourceHandler("swagger-ui.html")
                .addResourceLocations("classpath:/META-INF/resources/");

        registry.addResourceHandler("/webjars/**")
                .addResourceLocations("classpath:/META-INF/resources/webjars/");
(4) 在类上面进行配置
比如 UserController类
@Controller
@Api(tags = "在线考试系统-用户管理接口")
public class UserController {
    @Autowired
    private IUserService userService;
    @Autowired
    private IRoleService roleService;

    @GetMapping("/user/index")
    @ApiOperation("跳转用户页接口")
    @PreAuthorize("hasRole('管理员')")
    public String index(String menuid,Model model){
        List<Role> roles = queryAllRole();
        model.addAttribute("roles",roles);
        model.addAttribute("menuid",menuid);
        //用户首页
        return "views/user/user_list";
    }
  }
(5)启动项目 输入地址
http://ip:端口号/swagger-ui.html 进行访问

 在线考试系统整合swagger接口文档


 本文档介绍了如何将swagger集成到exam在线考试系统中,以简化接口文档的编写和提高沟通效率。主要步骤包括在pom.xml添加依赖,创建配置类并启用Swagger2,配置资源放行,以及在特定控制器类上进行设置。完成这些步骤后,通过http://ip:端口号/swagger-ui.html可以访问接口文档。


 444
444

 被折叠的 条评论
为什么被折叠?


