


DNS:192.168.0.97
smtp1:192.168.0.36 mail.example.org 域:example.org
smtp2:192.168.0.35 mail.example.com 域:example.com
第一步:域的部署
作用:就可以像163.com域中的test用户向gmail.com的test用户发送信息,
这里做两个域方便理解!test@163.com ---> test@gmail.com
DNS配置:
1. 安装软件:
yum install bind bind-utils -y
2. 配置域example.org
1>vi /etc/named.conf
listen-on port 53 { localhost; };
#listen-on-v6 port 53 { ::1; };
allow-query { any; };
2>vi /etc/named.rfc1912.zones
zone "example.org" IN {
type master;
file "example.org.zone";
allow-update {none; };
};
3>cd /var/named/
cp -p named.localhost example.com.zone
vi example.com.zone
*******************************************************
$TTL 1D
@ IN SOA desktop97.example.org. root.example.org. (
0 ; serial
1D ; refresh
1H ; retry
1W ; expire
3H ) ; minimum
NS desktop97.example.org.
MX 5 mail.example.org.
mail A 192.168.0.36
desktop36 A 192.168.0.36
desktop97 A 192.168.0.97
*******************************************************
注意:MX的作用:用户可以使用(用户名@域名)的格式发送信息,不用指明
邮件服务器的主机名,邮件服务器会自动的查询DNS中的MX记录,找到对应的
主机名及IP地址,从而发送信息
4.添加域example.com与example.org的方法相同
5.启动dns服务:
/etc/init.d/named start
并测试各个域名解析的正确性!
第二步:配置postfix (邮件服务器smtp1)
1. 安装邮件服务器软件postfix 客户端工具mail
yum install postfix mailx -y
/etc/init.d/postfix start
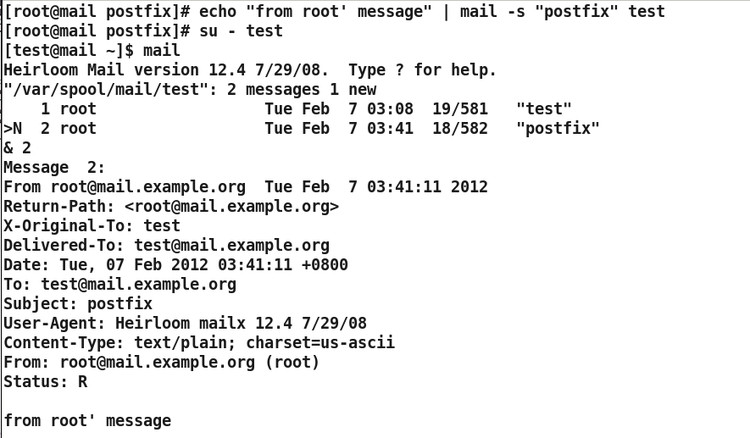
2.简单测试:默认就给可以给本机用户使用(原因:默认只给本地主机中继)
图postfix1
3.中继:转发
收件人所在的域是否是本机负责接受域
vi /etc/postfix/main.cf
myhostname = mail.example.org #本机的主机名
mydomain = example.org #域名
myorigin = $mydomain #发信人所在的域
inet_interfaces = $myhostname, localhost #邮件服务器工作在那些网卡上(服务范围)
inet_protocols = all #协议支持
mydestination = $myhostname,$mydomain,localhost #接受邮件时收件人的域名
mynetworks = 192.168.0.0/24,127.0.0.0/8 #信息目标的作用范围
/etc/init.d/postfix restart
支持域名测试:使用mail test@example.org 发送信息测试
可以跨域发送信息:test@example.org -----> test@example.com
4.匿名功能:
vi /etc/postfix/main.cf
alias_maps = hash:/etc/aliases
vi /etc/aliases
hadoop: test
postalias /etc/aliases
echo "mail to test" | mail -s "test" hadoop@example.com
测试
5.用户限制:
vi /etc/postfix/main.cf
smtpd_client_restrictions = check_client_access hash:/etc/postfix/access
vi /etc/postfix/access
192.168.0.97 REJECT
postmap /etc/postfix/access
图postfix2


 1108
1108

 被折叠的 条评论
为什么被折叠?
被折叠的 条评论
为什么被折叠?
 到【灌水乐园】发言


