


There are many different ways to use Git. The most common are the original command line tools and GUI (Graphical User Interfaces). Here, we will cover the most important commands you should know about when you are working with Git.
The command line is the only place you can run all Git commands. If you know how to run the command-line version you can probably also figure out how to run the GUI version. Also, while your choice of graphical client is a matter of personal taste, all users will have the command-line tools installed and available. You can read more on gits official online book.
Before we start, be sure to know how to use the Terminal in Mac or Command Prompt or Powershell in Windows and have git installed on your system.
Introduction
First, you might ask yourself what is Git actually and what can you do with it? Git is a fast, scalable, distributed revision control system with a rich command set that provides both high-level operations and full access to internals.
In Kolosek, we use Git for every application we create, including Ruby on Rails projects, to make it easier to work as a team and achieve our goal.
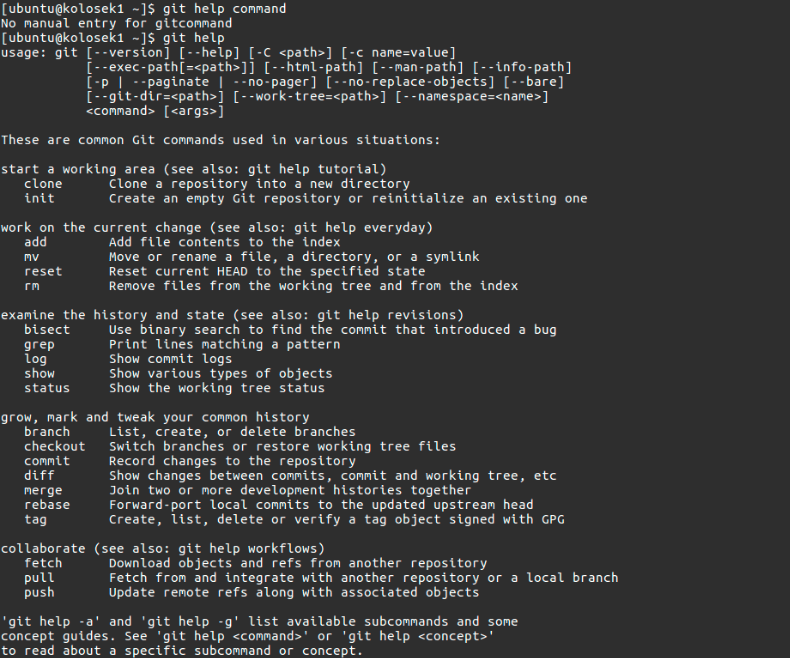
You can learn a lot about individual Git commands by running $git help command in the Terminal. This should appear:
Everything can be added to your git repositories even your Controller tests!
Git Options
We will cover the most commonly used command lines, starting from Git options. This will explain everything you need to know about Git on your local machine:
usage: git [--version] [--help] [-C <path>] [-c name=value]
           [--exec-path[=<path>]] [--html-path] [--man-path]
           [--info-path] [-p | --paginate | --no-pager]
           [--no-replace-objects] [--bare] [--git-dir=<path>]
           [--work-tree=<path>] [--namespace=<name>]
           <command> [<args>]
-
$git --version: Find out your current Git suite version using this command. -
$git --help: Every good programmer should know about this option, it will show you the most used Git Commands, it can also print all available commands with--allor-a. -
$git -C <path>: Instead of running Git from the current working directory, you can run it from the given<path>instead.
-C <path>command affects other options that expect path names like--git-dirand--work-treebecause their path names would be made relative to the working directory caused by the -C option.
-
$git -c <name>=<value>: You can very easily override values from your configuration files. The<name>has to be in the same format as listed by git config, while the<value>is your new parameter value. -
$git --exec-path[=<path>]: This command helps you find the path where your core Git programs are installed. Another way to do this is by setting theGIT_EXEC_PATHenvironment variable. -
$git --git-dir=<path>: Always use this option, whenever you need to set a path to the repository or set theGIT_DIRenvironment variable.
We often used these Git options when we were setting up CarrierWave example to Git. Did you have a similar experience?
-
$git --work-tree=<path>: In this way, you can set the path to the current working tree. You can do this as well by setting theGIT_WORK_TREEenvironment variable. -
$git --namespace=<path>: Set your Git namespace with this command or by usingGIT_NAMESPACEenvironment variable.
And, that's it! For now, to be exact.
This was only the first part of the tutorial! In the next one, we will cover all the other Git commands, be sure to stay tuned.
This post is originally published on Kolosek Blog.


 被折叠的 条评论
为什么被折叠?
被折叠的 条评论
为什么被折叠?
 到【灌水乐园】发言


