


 本文详细介绍Nexus仓库的配置步骤,包括环境搭建、服务安装、端口修改、仓库管理及Maven配置,同时演示了如何发布和使用构件。
一、nexus 版本选择:
下载地址 : http://www.sonatype.org/nexus/archived/
nexus 2.6及以上要求 jdk 1.7 以上版本,可以根据现有的jdk版本来选择nexus的版本,这里我选择 nexus-2.11.0 ,(如果无法下载 ,可将地址栏中的url 复制到迅雷进行下载 ) ,下载完后有个nexus-2.11.0-bundle.tar.gz ( 我的是win版本,如果是mac,下载nexs-2.11.0-bundle.tar.gz )的压缩包,解压该文件到指定的目录 。
二、nexus 配置环境:
NEXUS_HOME=E:\nexus\nexus-2.11.0-02
PATH = %NEXUS_HOME%\bin;...
三、安装 nexus 服务 :
在dos 中执行 nexus install (必须以管理员身份运行)
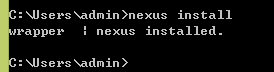
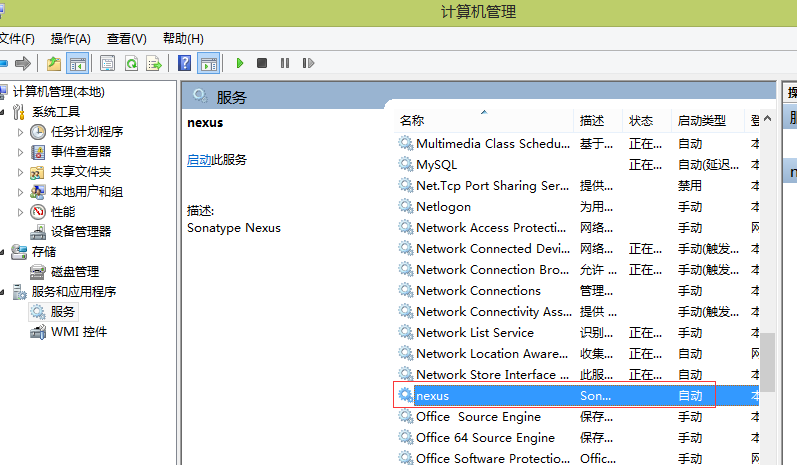
执行上面的命令后,在计算机的服务 中用就有了,如下 :
四、启动 nexus :
在dos 中执行 nexus start
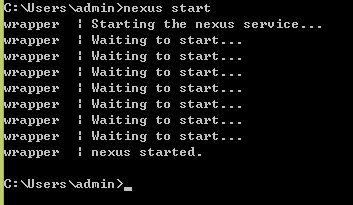
出现以上信息,表示 nexus 启动成功,也可以在服务中直接启动,前提是需要在 dos 中执行 nexus install 或使用 window 的 sc create 命令安装服务。
上面启动成功后,在浏览器是输入 localhost:8081/nexus
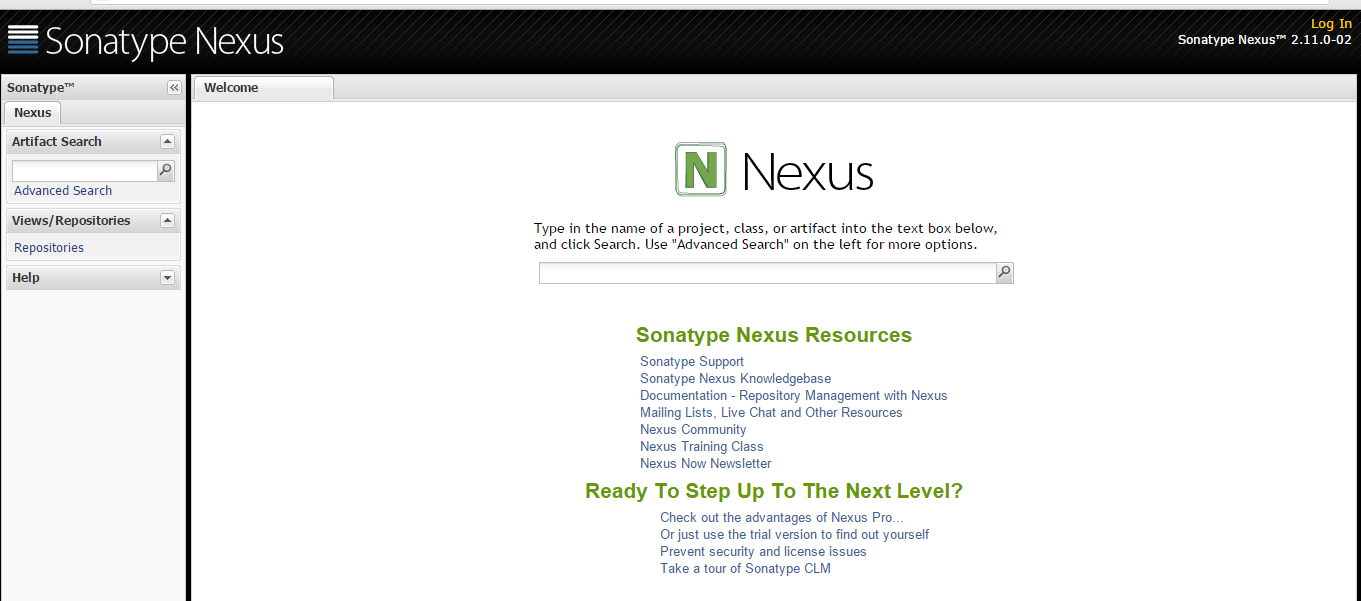
点击右上角的 login In, 登陆 ,默认用户名为 : admin ,密码为 admin123
五、修改nexus 密码:
先停止 nexus 服务 ,打开 %NEXUS_HOME%\sonatype-work\nexus\conf\security.xml ,nexus 的密码采用 SHA1 加密算法 ( 在线加密工具 ), 将加密后的 SHA1 串拷贝覆盖原来的即可。
|
上面是一种方法,使用如下方法:
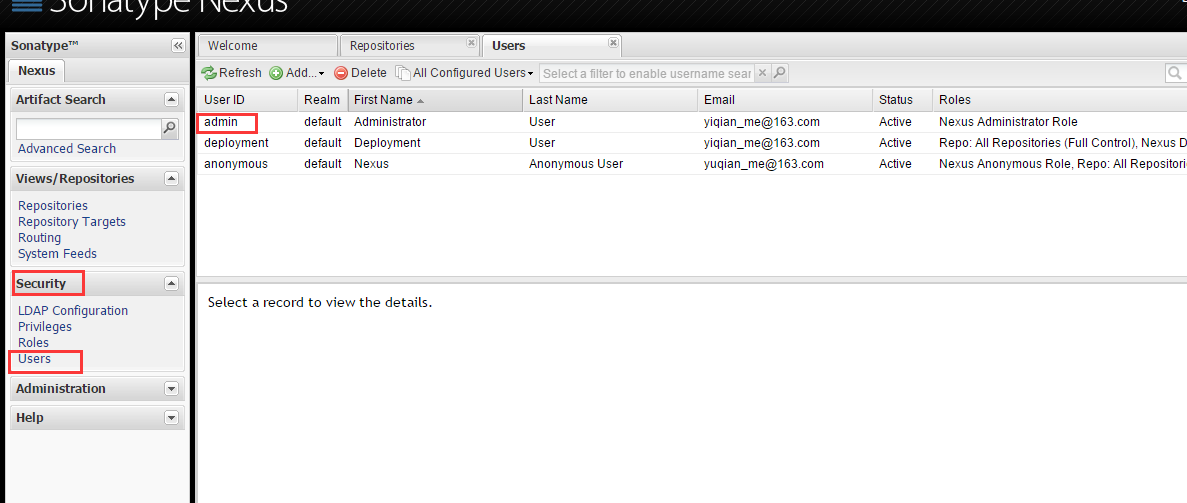
上面选中 某一个用户比如 admin,右键 set password 也可以重新设置密码。
六、修改nexus 端口号:
打开 %NEXUS_HOME%\nexus-2.11.0-02\conf\nexus.properties, 修改 application-port 即可
|
七 、nexus 仓库 :
打开 views -----> Repositories
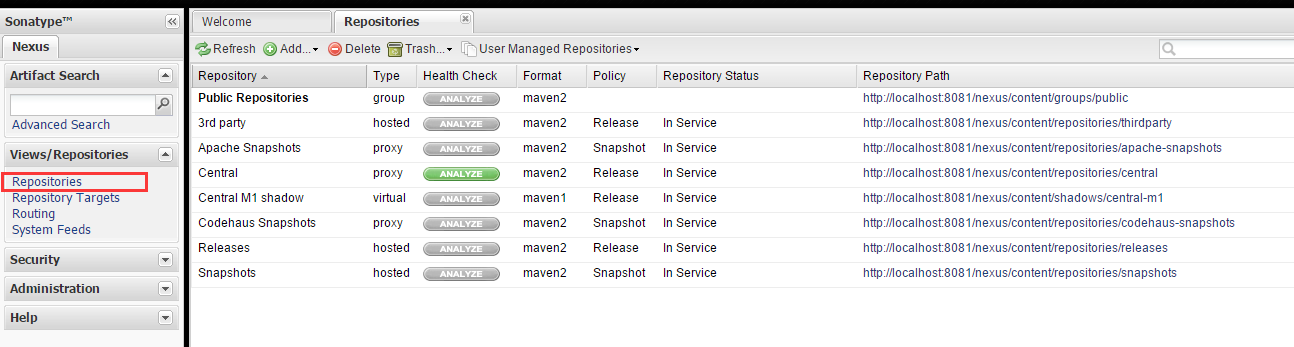
nexus 仓库 分为 4 种 : group (仓库组) ,hosted (本地分仓库) ,proxy(代理仓库 ) ,virtral(虚拟仓库)。
我们自己开发的仓库的构件通常是发布在hosted 仓库中,proxy 用来代理远程的公共仓库 ,一个group可以包含多个hosted/proxy 仓库 。
7.1、配置仓库组:
Repositories ------> Public Repositories -------> Configuration
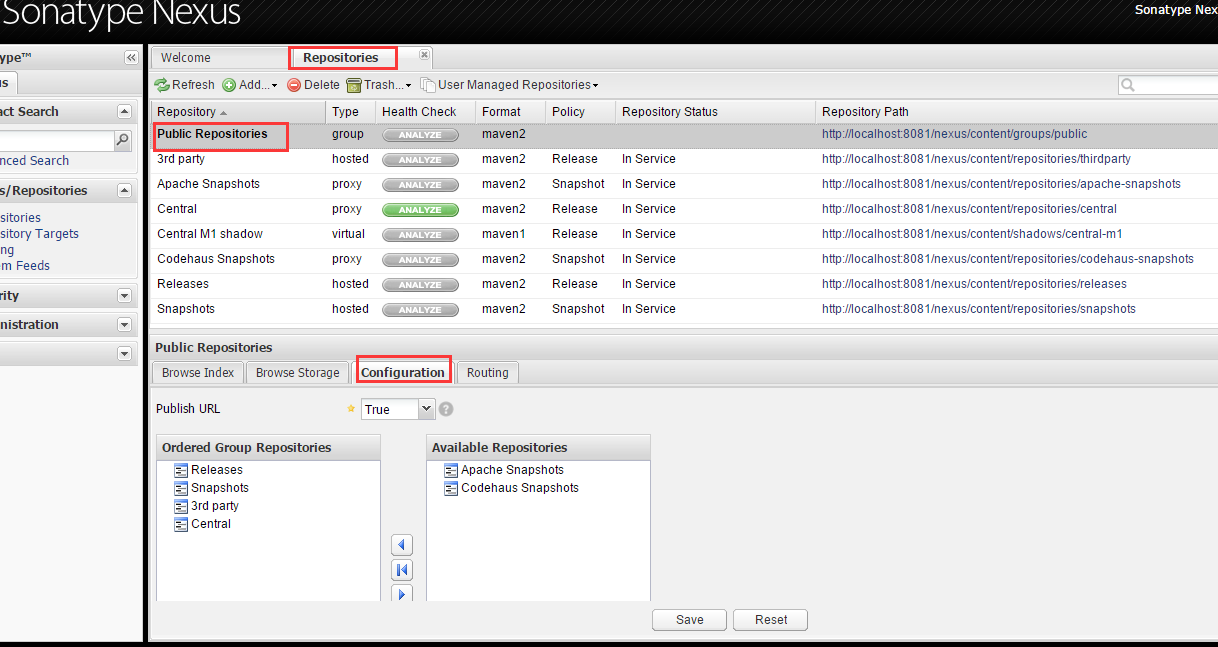
上图的configuration 中, 左边的是组仓库 , 右边的是当前可用的仓库 ,从右边选择你想要加入到组的仓库 ,点 save 保存即可 ,组仓库中仓库的顺序是有用的,它决定 maven 获取 构件 时遍历 nexus 仓库的顺序。
7.2、maven settings.xml 配置:
| <!-- 配置服务器的账户和密码,主要用于发布构件时进行权限的认证,server 中的 id 必须与 repository 的 id 一样。 --> <server> <id>nexus-releases</id> <!-- 此id 要与 项目下的 repository 中的 id 一样 --> <username>deployment</username><!--这里的用户名与密码要与nexus 中的账户名和密码一样,否则会报 401错误 --> <password>deployment</password> </server> <server> <id>nexus-central</id> <username>deployment</username> <password>deployment</password> </server> <server> <id>nexus-thirdparty</id> <username>deployment</username> <password>deployment</password> </server> <server> <id>nexus-snapshots</id> <username>deployment</username> <password>deployment</password> </server> <!-- maven 镜像配置,mirror相当于一个代理,它会拦截去指定远程仓库下载构件的请求,然后从自己这里找出构造送给客户端,配置一个mirror的目的一般是出于网速考虑,可以配置多个 --> <mirrors> <mirror> <id>nexus</id> <!-- mirror 唯一标识 --> <name>nexus public repositories</name> <!-- mirror 说明 --> <mirrorof>*</mirrorf> <!-- 一个镜像的替代位置,例如: * 是匹配所有远程仓库 ,这样所有的pom中定义的仓库都不生效, external:* 是匹配所有远程仓库 ,也就是说,匹配所有不在本机上的远程仓库 , id1 , id2 匹配仓库 id1 和 id2 ,使用逗号分隔多个远程仓库的id . *,!id1 匹配所有远程仓库 ,id1除外 ,使用感叹号将仓库从匹配中排除 。 --> <url>http://localhost:8081/nexus/content/groups/public/</url> </mirror> </mirrors> <!-- profile : 用于指定一系列的profile。profile元素由activation、repositories、pluginRepositories和properties四个元素组成。当一个profile在settings.xml中是处于活动状态并且在pom.xml中定义了一个相同id的profile时,settings.xml中的profile会覆盖pom.xml中的profile--> <profiles> <profile> <id>development</id> <!-- 这个是profile 中最重要的元素,表示激活此profile的条件 ,跟pom.xml中的profile 一样, settings.xml中的 profile 也可以在特定环境下改变一些值 , 而这些值是通过activation元素一指定的。 --> <activation> <!-- jdk 必须为某个版本 ,还可以用一个范围来表示 , 如: [1.5,1.7) 表示jdk版本可以是 1.5、1.6 不包括1.7 ,如果是 [1.5,1.7]表示 jdk 版本可以为 1.5、1.6、1.7 --> <jdk>[1.6,1.7]</jdk> <activeByDefault>true</activeByDefault> <!-- 当其值为true的时候表示如果没有其他的profile处于激活状态的时候,该profile将自动被激活 --> </activation> <!-- 用于定义远程仓库的,当该profile是激活状态的时候,这里面定义的远程仓库将作为当前pom的远程仓库 --> <repositories> <repository> <id>nexus-central</id> <url>http://localhost:8081/nexus/content/repositories/central/</url> <releases> <enabled>true</enabled> </releases> <snapshots> <enabled>false</enabled> </snapshots> </repository> <repository> <id>nexus-thirdparty</id> <url>http://localhost:8081/nexus/content/repositories/thirdparty/</url> <releases> <enabled>true</enabled> </releases> <snapshots> <enabled>false</enabled> </snapshots> </repository> <repository> <id>nexus-releases</id> <url>http://localhost:8081/nexus/content/repositories/releases/</url> <releases> <enabled>true</enabled> </releases> <snapshots> <enabled>false</enabled> </snapshots> </repository> <repository> <id>nexus-snapshots</id> <url>http://localhost:8081/nexus/content/repositories/snapshots/</url> <releases> <enabled>true</enabled> </releases> <snapshots> <enabled>false</enabled> </snapshots> </repository> </repositories> <!-- 用于定义属性键值对的。当该profile是激活状态的时候,properties下面指定的属性都可以在pom.xml中使用。 --> <properties> <maven-compiler-source>1.7</maven-compiler-source> <maven-compiler-target>1.7</maven-compiler-target> <maven-compiler-compilerVersion>1.7</maven-compiler-compilerVersion> </properties> </profile> </profile> |
7.3、项目pom.xml配置:
| <project xmlns= "http://maven.apache.org/POM/4.0.0" xmlns:xsi= "http://www.w3.org/2001/XMLSchema-instance" xsi:schemaLocation="http://maven.apache.org/POM/4.0.0 http://maven.apache.org/xsd/maven-4.0.0.xsd"> <modelVersion >4.0.0 </modelVersion > <!-- parent ,此为所有maven 项目的父类,父类中的<packaging> pom</packaging> 必须这样来写, --> <groupId >com.yiqian </groupId > <artifactId >hk-parent</ artifactId> <version >0.0.1-SNAPSHOT </version > <packaging >pom</packaging> <name >hk-parent</ name> <url >http://maven.apache.org </url > <properties > <!-- 父类中定义属性,可以在子类中使用 ,如在子类中可以这样使用:${project.build.sourceEncoding} --> <project.build.sourceEncoding >UTF-8 </project.build.sourceEncoding > <junit-version >3.8.1 </junit-version > <spring-version >4.1.6.RELEASE </spring-version > </properties > <!-- 在父类中定义,表示父类管理 hk-resoueces 项目,当父类执行编译时会自动 执行子模块的工程 编译 --> <modules > <module >hk-data</ module> <module >hk-core</ module> <module >hk-web</ module> <module >hk-resources</ module> <module >hk-tags</ module> <module >hk-web-console</ module> </modules > <!--
<!-- 发布到私服 --> <distributionManagement > <!-- 发布到releases仓库 ,会根据项目的版本发布到对应的地址 --> <repository > <id >nexus-snapshots</ id> <!-- 此id 要与 maven settings.xml配置是的server 中的id一样 --> <url >http://localhost:8081/nexus/content/repositories/snapshots/ </url > </repository > </distributionManagement > <!-- 父类定义的依赖,是给子类继承,要写在<dependencyManagement> 中,不然父类也会引用这个依赖 , 子类依赖时,只需要写<groupId>和<artifactId> ,不需要写<version>了 --> <dependencyManagement > <dependencies > <dependency > <groupId >junit</groupId> <artifactId >junit</artifactId> <version >${ junit-version}</version > </dependency > </dependencies > </dependencyManagement > </project> |
上面的7.2 和7.3 都配置好后,在eclipse 中右击 7.3所配置的 pom.xml文件,run maven build ----------> 在 Goals 中输入 clean deploy
命令,当出现以下信息时,表示发布
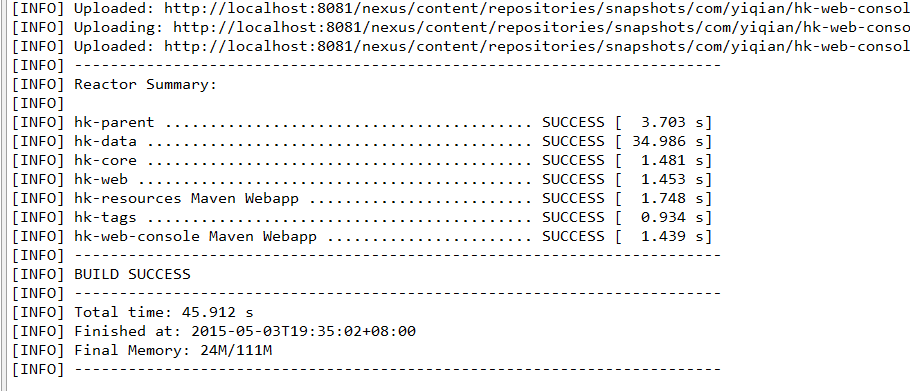
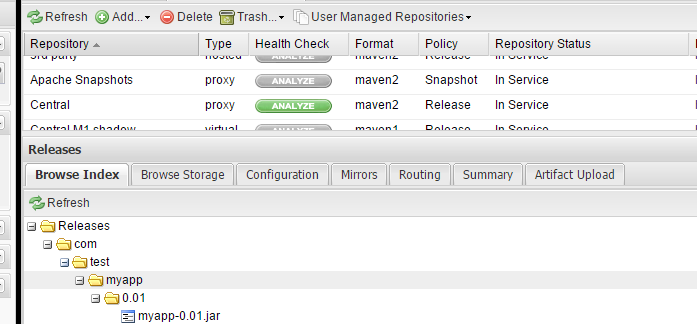
可以在私服中看见刚才发布的工程 :
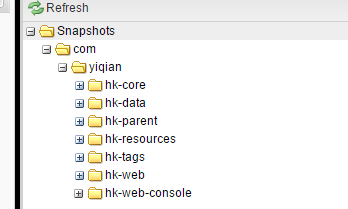
到此,我们的jar 包就发布到 私服上去了,下面来介绍如何使用这个发布的工程。
如果一个项目需要依赖上面的 hk-core ,只需要在这个项目的 pom.xml中作如下配置
| < dependency> <groupId >com.yiqian </groupId > <artifactId >hk-core</ artifactId> <version >0.0.1-SNAPSHOT </version > </dependency > |
在DOS中输入 mvn compile
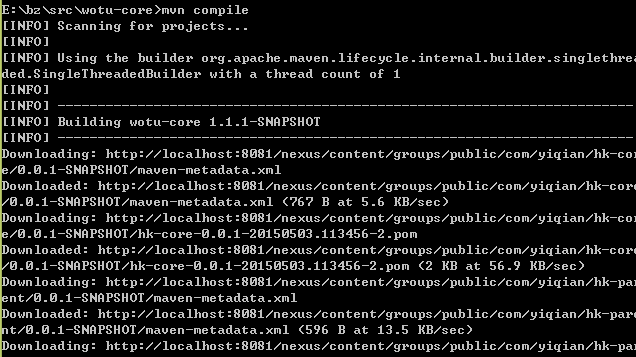
可以看到都是从 nexus 的仓库 中请求所需的构件。
7.4、发布第三方构件到nexus 仓库 :
首先你要准备好你的jar 包,如在我的 E :/br/src/Text 下有 test-0.0.1-SNAPSHOT.jar 包:
在这个目录下创建一个pom.xml文件:
| ... <repositories> <repository> <id>enxus-releases</id> <url>http://localhost:8081/nexus/content/repositories/releases</url> </repository> </repositories> ... |
在命令行执行发布命令:
mvn deploy:deploy-file -DgroupId=com.test2 -DartifactId=myapp2 -Dversion=0.1.1 -Dpackaging=jar -Dfile=test-0.0.1-SNAPSHOT.jar -Durl=http://127.0.0.1:8081/nexus/content/repositories/releases -DrepositoryId=nexus-releases
执行完后,如果出现以下提示, 表示发布成功.

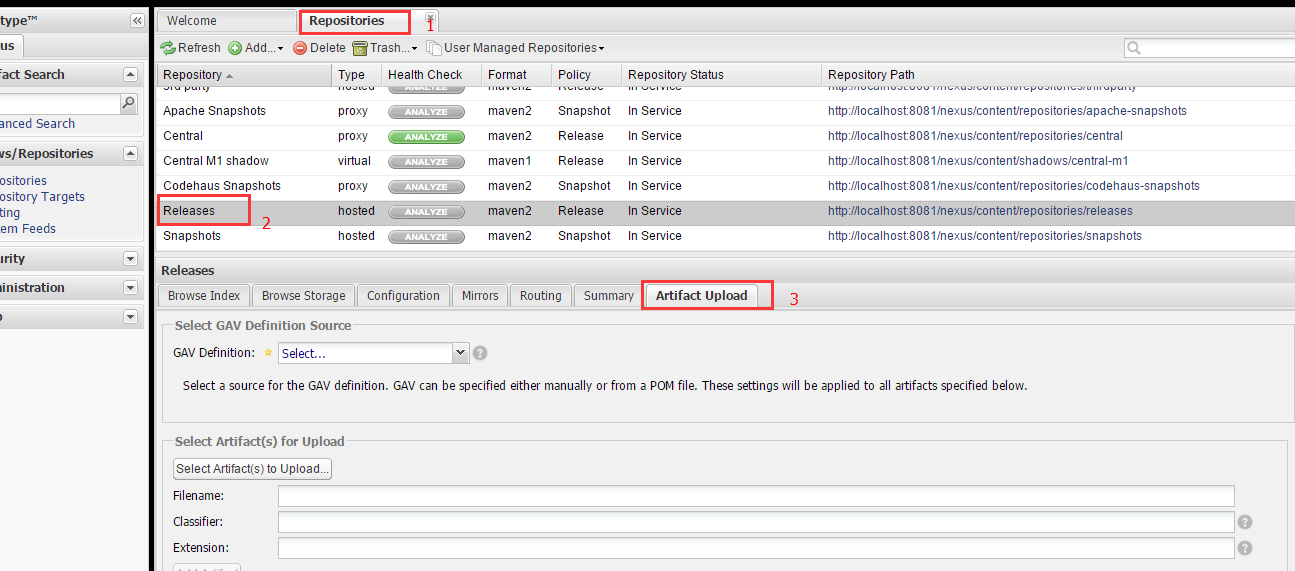
上面是在DOS 中使用命令,可以使用nexus 的图形化界面:
我们可以看到,只有要Releases 中才会有 Artifact Upload ,只有这个仓库才可以上传jar包
选择 GAV Parameters ,并在 aotu guess 中设置好值:
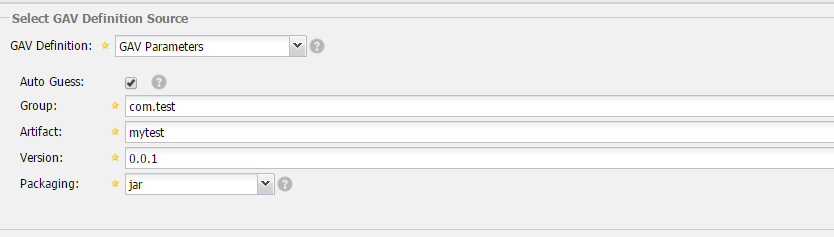
再选择 Select artifact to upload (选择你要上传的jar包文件),选择好后,点击 Add artifict ,可以看到artifacts 中有了你选择的 jar 包,再 点击 upload artifact ,上传成功
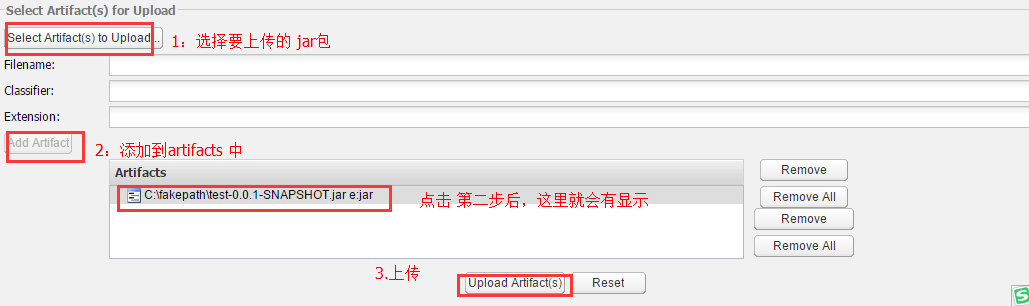
上传完后,在browse index 中就会可以找到了
Centos 私服安装 :
http://www.linuxidc.com/Linux/2016-11/136954.htm


 505
505

 被折叠的 条评论
为什么被折叠?
被折叠的 条评论
为什么被折叠?
 到【灌水乐园】发言


