


 本文介绍了生成并运行第一个Spring Boot项目的步骤,包括使用Spring Initializer生成项目、导入eclipse、添加控制器、运行及访问。还对Spring Boot项目的pom.xml文件进行解析,涉及spring-boot-starter-parent和spring-boot-maven-plugin的作用及使用方法。
一、生成并运行第一个Spring Boot 项目
1. Spring Initializer 生成 Spring Boot 项目
选择 springboot 版本、java版本,填写 maven group 和 artifact,添加依赖的jar包(这里选Web和Actuator)后,点击Generate Project

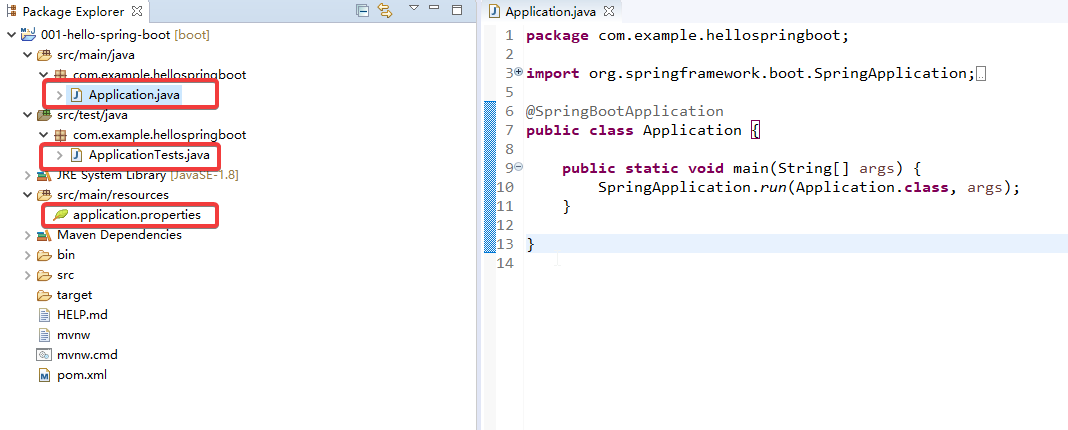
2. 将下载的demo包导入eclipse(这里使用Spring Suit Tool 4)
我们来看下结构
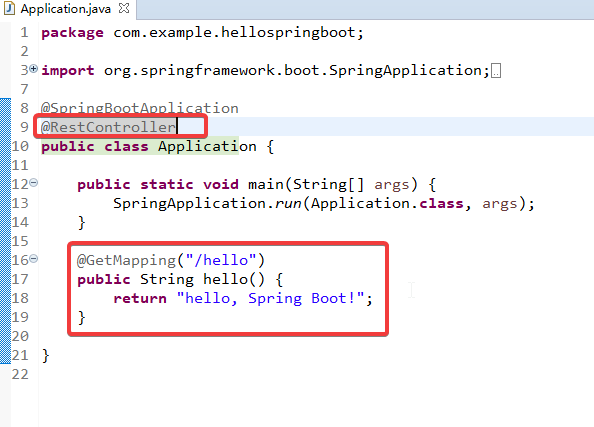
3. 添加控制器 RestController
4. 运行
这里,Spring Boot 启动了Tomcat服务器,8080端口。

5. 访问
浏览器访问 http://localhost:8080/hello
二、Spring Boot 项目 pom.xml
先看一下,Spring Initializer 生成的pom.xml 文件
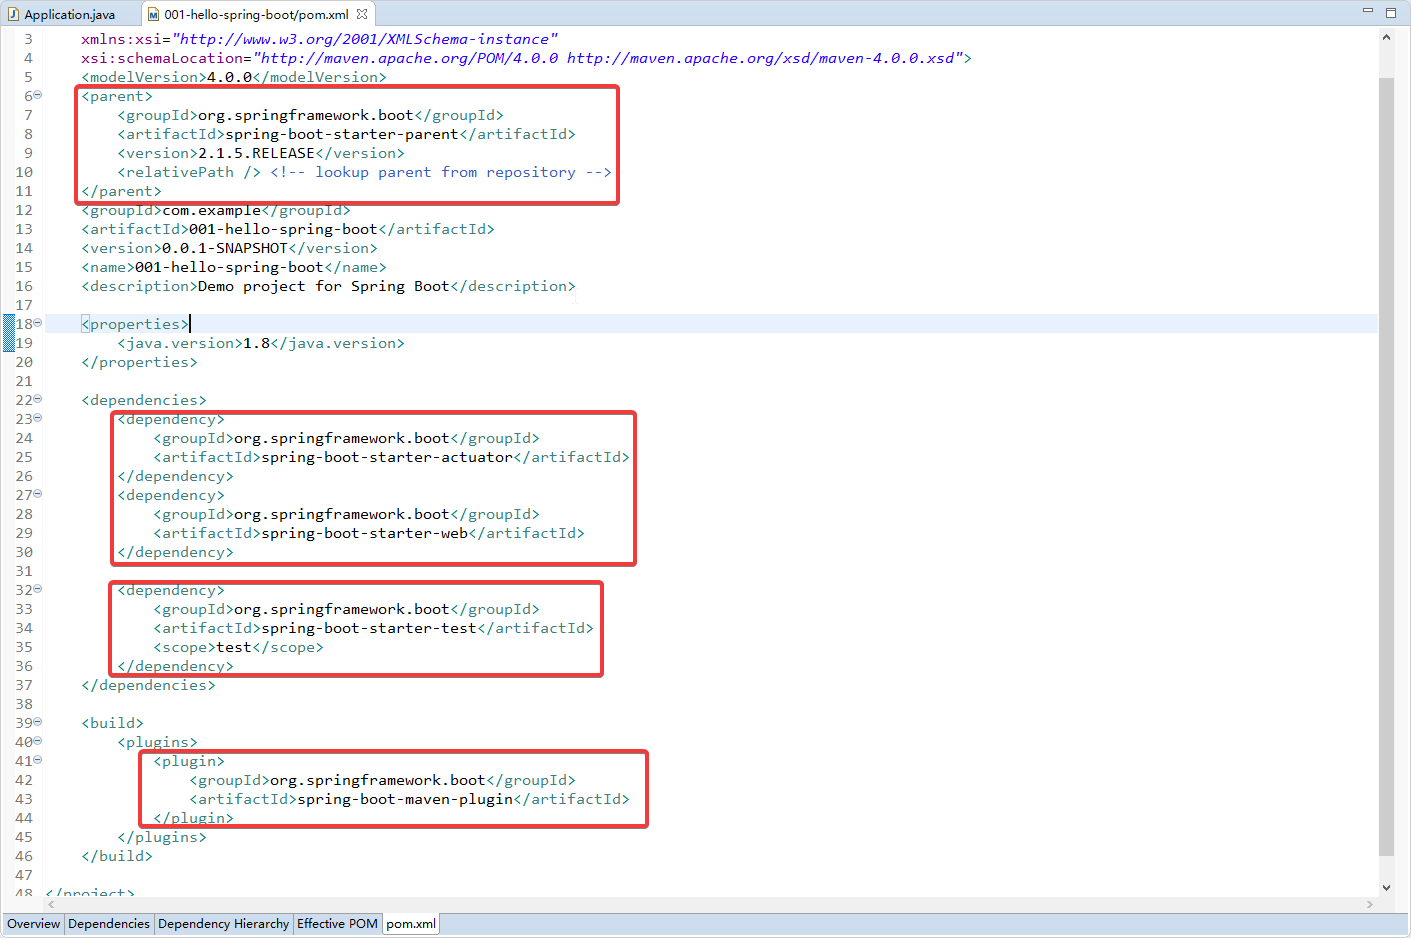
首先,把 spring-boot-starter-parent 作为项目的 parent 。spring-boot-starter-parent 里面定义了大量的依赖。
其次,项目依赖的jar包,就是之前选择的 web 和 actuator。可以看到,这些依赖并没有写版本号,其版本号定义在 spring-boot-starter-parent 中。
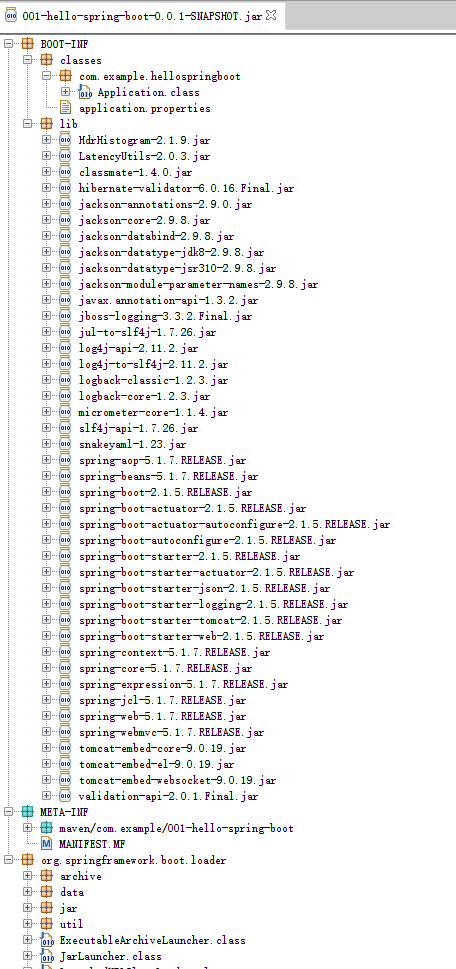
最后,引入插件 spring-boot-maven-plugin。该插件 能将项目打包成可执行jar包,该jar包中会包含所有依赖的jar包。
接下来,针对 spring-boot-starter-parent 和 spring-boot-maven-plugin 展开说明。
1. spring-boot-starter-parent
如果你想有自己的parent项目结构,而不想使用spring-boot-starter-parent 作为项目的parent。可以这样:
	<dependencyManagement>
		<dependencies>
			<dependency>
				<groupId>org.springframework.boot</groupId>
				<artifactId>spring-boot-starter-parent</artifactId>
				<version>2.1.5.RELEASE</version>
				<type>pom</type>
				<scope>import</scope>
			</dependency>
		</dependencies>
	</dependencyManagement>
2. spring-boot-maven-plugin
看下结构
源码


 202
202

 被折叠的 条评论
为什么被折叠?
被折叠的 条评论
为什么被折叠?
 到【灌水乐园】发言


