


nginx概述
- 一款高性能、轻量级web服务软件
- 稳定性高
- 系统资源消耗低
- 对HTTP并发连接的处理能力高
- 单台物理服务器可支持30000~50000个并发请求
正向代理:通过代理服务器来访问资源,这种代理服务成为正向代理
反向代理:客户端与代理是无感知的,客户端不需要任何配置就可以访问,我们将请求发送给代理服务器,由反向代理服务器去选择目标服务器获取数据后返回给客户端,此时反向代理服务器和目标服务器对外就是一个服务器,暴露的是代理服务器地址,隐藏了真实服务器IP地址
负载均衡:将负载分发到不同服务器上
动静分离:把静态页面和动态页面由不同的服务器来解析
nginx高性能、高并发
nginx采用:多进程+异步非阻塞方式(io 多路复用 epoll)
请求的完整过程:
1.建立连接
2.读取请求,解析请求
3.处理请求
4.响应请求
请求的完整过程,对应到底层,就是:读写socket事件
编译安装Nginx服务
1.关闭防火墙,将安装nginx所需软件包传到/opt目录下
root@localhost ~]# systemctl stop firewalld
[root@localhost ~]# systemctl disable firewalld
[root@localhost ~]# setenforce 0
2.安装依赖包
#nginx的配置及运行需要pcre、zlib、openssl等软件包的支持,因此需要安装这些软件的开发包,以便提供相应的库和头文件。
yum -y install pcre-devel zlib-devel openssl-devel gcc gcc-c++ make
3.创建运行用户、组(Nginx 服务程序默认以 nobody 身份运行,建议为其创建专门的用户账号,以便更准确地控制其访问权限)
useradd -M -s /sbin/nologin nginx
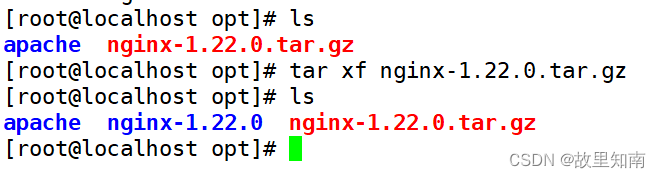
4.编译安装Nginx
[root@localhost opt]# ls
apache  nginx-1.22.0  nginx-1.22.0.tar.gz
[root@localhost opt]# cd nginx-1.22.0/
[root@localhost nginx-1.22.0]# ls
auto  CHANGES  CHANGES.ru  conf  configure  contrib  html  LICENSE  man  README  src

[root@localhost nginx-1.22.0]# ./configure \
> --prefix=/usr/local/nginx \   指定nginx的安装路径
> --user=nginx \                   #指定用户名
> --group=nginx \                 #指定组名
> --with-http_stub_status_module   启用 http_stub_status_module 模块以支持状态统计--


make -j2 && make install   编译安装


ln -s /usr/local/nginx/sbin/nginx /usr/local/sbin/		#让系统识别nginx的操作命令
5.检查、启动、重启、停止 nginx服务
nginx -t #检查配置文件是否配置正确
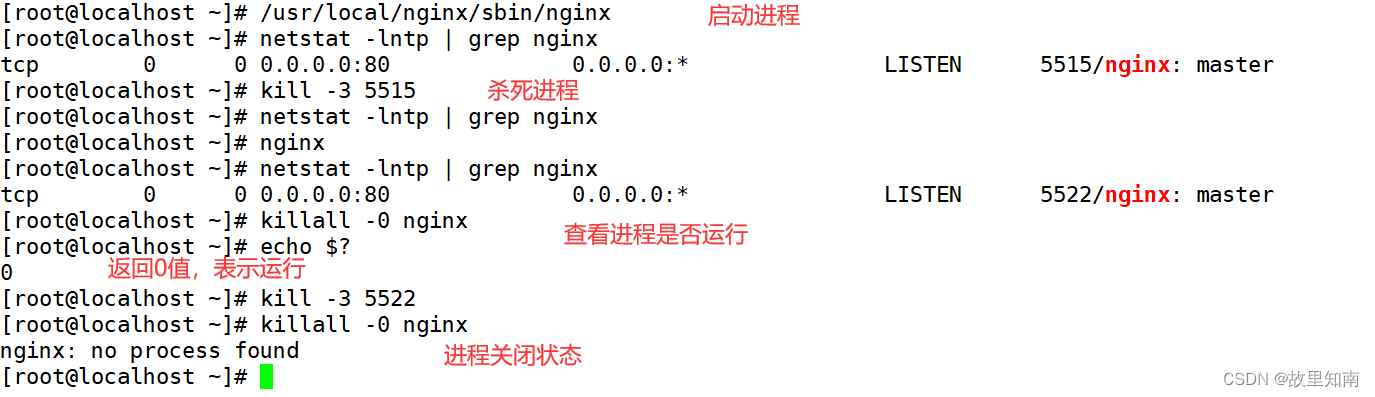
#启动
nginx 或者/usr/local/nginx/sbin/nginx 路径启动服务
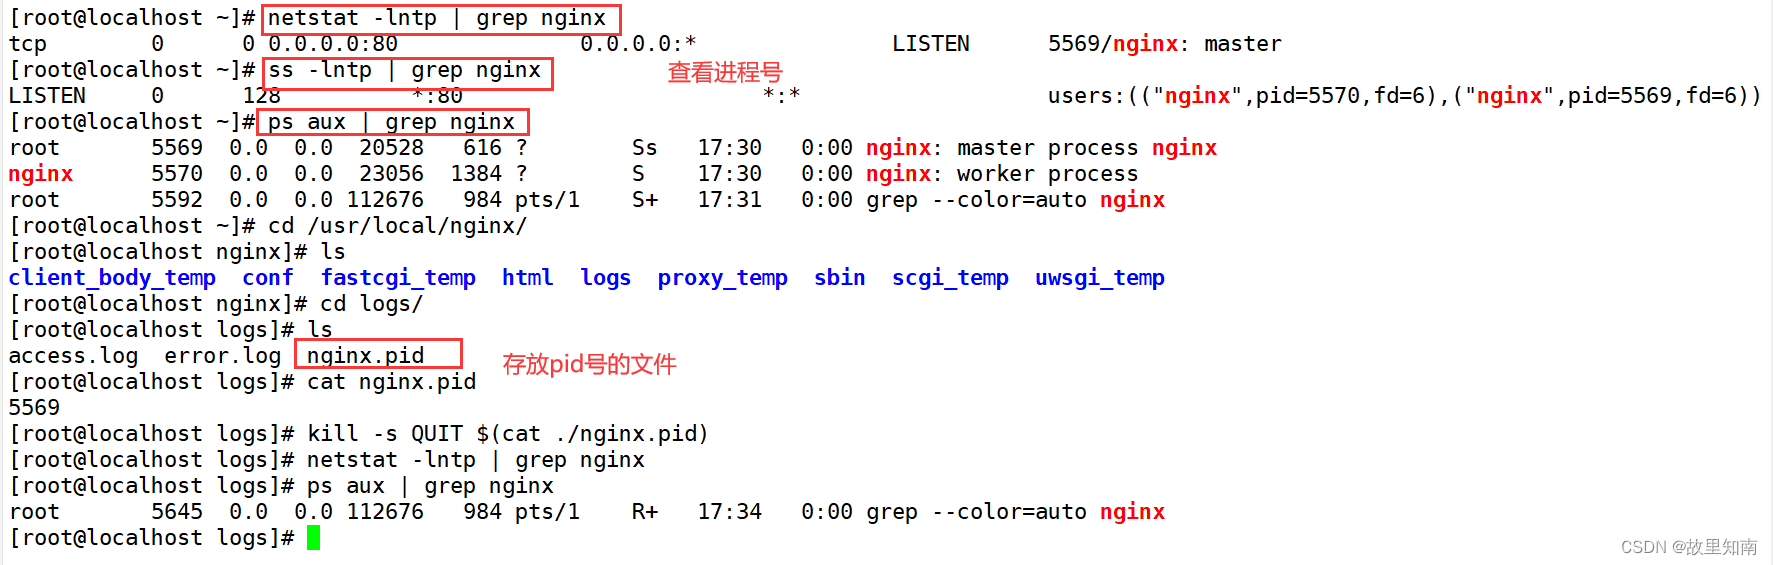
#停止
cat /usr/local/nginx/logs/nginx.pid #先查看nginx的PID号
kill -3 <PID号> 杀掉进程就关闭了
kill -s QUIT <PID号>
killall -3 nginx
killall -s QUIT nginx
#重载
kill -1 <PID号>
kill -s HUP <PID号>
killall -1 nginx
killall -s HUP nginx#检查进程是否在运行
killall -0 进程名
#平滑升级
kill -USR2 <PID号>
新版本升级:
[root@localhost ~]# cd /opt/nginx-1.24.0/

./configure \
> --prefix=/usr/local/nginx \
> --user=nginx \
> --group=nginx \
> --with-http_stub_status_module

make -j2


[root@localhost nginx-1.24.0]# ls
auto     CHANGES.ru  configure  html     Makefile  objs    src
CHANGES  conf        contrib    LICENSE  man       README
[root@localhost nginx-1.24.0]# ls objs/
autoconf.err  nginx    ngx_auto_config.h   ngx_modules.c  src
Makefile      nginx.8  ngx_auto_headers.h  ngx_modules.o
[root@localhost nginx-1.24.0]# cd /usr/local/nginx/sbin/
[root@localhost sbin]# ls
nginx
[root@localhost sbin]# mv nginx nginx.bak
[root@localhost sbin]# ls
nginx.bak
[root@localhost sbin]# cd -
/opt/nginx-1.24.0
[root@localhost nginx-1.24.0]# ls
auto     CHANGES.ru  configure  html     Makefile  objs    src
CHANGES  conf        contrib    LICENSE  man       README

[root@localhost nginx-1.24.0]# cp objs/nginx /usr/local/nginx/sbin/nginx
[root@localhost nginx-1.24.0]# cd /usr/local/nginx/sbin/
[root@localhost sbin]# ls
nginx  nginx.bak
[root@localhost sbin]# nginx -V
nginx version: nginx/1.24.0
built by gcc 4.8.5 20150623 (Red Hat 4.8.5-16) (GCC)
configure arguments: --prefix=/usr/local/nginx --user=nginx --group=nginx --with-http_stub_status_module
[root@localhost sbin]# cd /opt/nginx-1.24.0/

[root@localhost nginx-1.24.0]# ps aux | grep nginx
root      12870  0.0  0.0 112676   984 pts/1    S+   17:50   0:00 grep --color=auto nginx

[root@localhost nginx-1.24.0]# /usr/local/nginx/sbin/nginx.bak  #保证服务开启才能平滑在线升级
[root@localhost nginx-1.24.0]# ps aux | grep nginx
root      12885  0.0  0.0  20528   620 ?        Ss   17:52   0:00 nginx: master process /usr/local/nginx/sbin/nginx.bak
nginx     12886  0.0  0.0  23056  1388 ?        S    17:52   0:00 nginx: worker process
root      12888  0.0  0.0 112676   980 pts/1    R+   17:52   0:00 grep --color=auto nginx
[root@localhost nginx-1.24.0]# make upgrade
/usr/local/nginx/sbin/nginx -t
nginx: the configuration file /usr/local/nginx/conf/nginx.conf syntax is ok
nginx: configuration file /usr/local/nginx/conf/nginx.conf test is successful
kill -USR2 `cat /usr/local/nginx/logs/nginx.pid`
sleep 1
test -f /usr/local/nginx/logs/nginx.pid.oldbin
kill -QUIT `cat /usr/local/nginx/logs/nginx.pid.oldbin`
[root@localhost nginx-1.24.0]# nginx -V  #看版本号
nginx version: nginx/1.24.0
built by gcc 4.8.5 20150623 (Red Hat 4.8.5-16) (GCC)
configure arguments: --prefix=/usr/local/nginx --user=nginx --group=nginx --with-http_stub_status_module
6、添加 Nginx 系统服务
vim /lib/systemd/system/nginx.service

[Unit]
Description=nginx
After=network.target
[Service]
Type=forking
PIDFile=/usr/local/nginx/logs/nginx.pid
ExecStart=/usr/local/nginx/sbin/nginx
ExecReload=/bin/kill -s HUP $MAINPID
ExecStop=/bin/kill -s QUIT $MAINPID
PrivateTmp=true
[Install]
WantedBy=multi-user.target

Unit]:服务的说明
Description:描述服务
After:依赖,当依赖的服务启动之后再启动自定义的服务

[Service]服务运行参数的设置
Type=forking是后台运行的形式,使用此启动类型应同时指定PIDFile=,以便systemd能够跟踪服务的主进程。
ExecStart为服务的具体运行命令
ExecReload为重启命令
ExecStop为停止命令
PrivateTmp=True表示给服务分配独立的临时空间
注意:启动、重启、停止命令全部要求使用绝对路径
设置相关权限
chmod 754 /lib/systemd/system/nginx.service
systemctl start nginx.service
systemctl enable nginx.service
日志格式设定
$remote_addr与$http_x_forwarded_for用以记录客户端的ip地址;
$remote_user:用来记录客户端用户名称;
$time_local: 用来记录访问时间与时区;
$request: 用来记录请求的url与http协议;
$status: 用来记录请求状态;成功是200,
$body_bytes_sent :记录发送给客户端文件主体内容大小;
$http_referer:用来记录从哪个页面链接访问过来的;
$http_user_agent:记录客户浏览器的相关信息;
通常web服务器放在反向代理的后面,这样就不能获取到客户的IP地址了,通过$remote_add拿到的IP地址是反向代理服务器的iP地址。反向代理服务器在转发请求的http头信息中,可以增加x_forwarded_for信息,用以记录原有客户端的IP地址和原来客户端的请求的服务器地址。

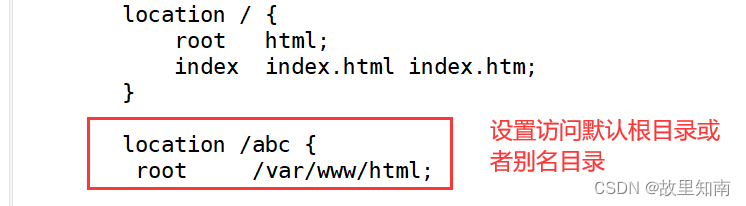
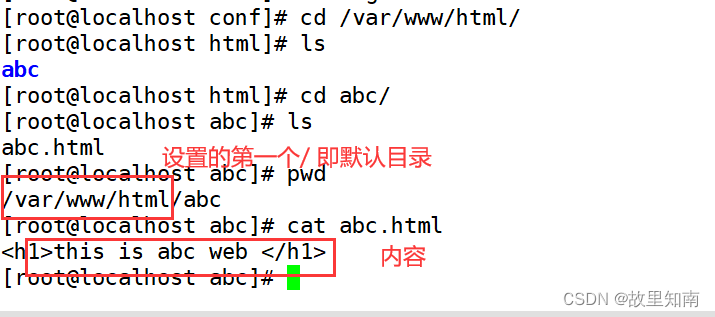
location常见配置指令,root、alias、proxy_pass
root(根路径配置):root /var/www/html
请求www.kgc.com/test/1.html,会返回文件/var/www/html/test/1.htmlalias(别名配置):alias /var/www/html
请求www.kgc.com/test/1.html,会返回文件/var/www/html/1.html

访问状态统计配置
1.先使用命令/usr/local/nginx/sbin/nginx -V 查看已安装的 Nginx 是否包含 HTTP_STUB_STATUS 模块
cat /opt/nginx-1.12.0/auto/options | grep YES #可查看 nginx 已安装的所有模块
想要关闭模块可以使用
configure --without-http-cache
2.修改 nginx.conf 配置文件,指定访问位置并添加 stub_status 配置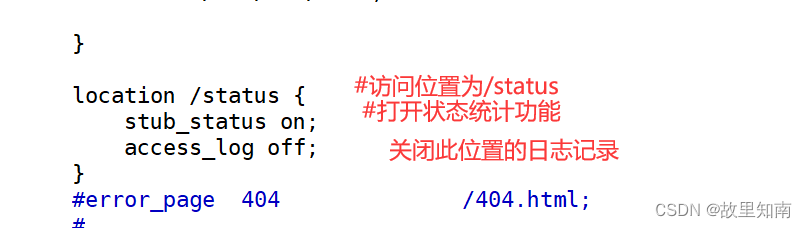
3.重启服务,访问测试
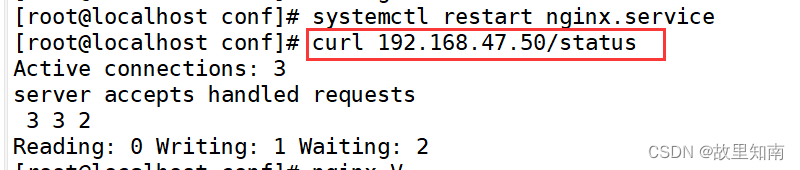
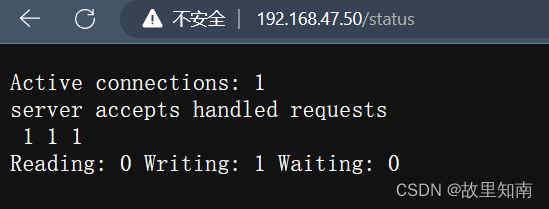
Active connections:表示当前的活动连接数,即当前与 Nginx 服务器建立的连接数。
server accepts handled requests :表示已经处理的连接信息
三个数字依次表示服务器已接收的连接数;服务器成功处理的连接数;服务器累计处理的总请求数(在保持连接模式下,请求数量可能会大于连接数量)
Reading:表示当前正在从客户端读取数据的连接数。
Writing:表示当前正在向客户端写入数据的连接数。
Waiting:表示当前空闲并等待请求的连接数。
可 curl -Ls http://192.168.80.10/status 结合 awk与if 语句进行性能监控。
查看并发量

使用脚本自动查看并发量
#!/bin/bash
while true
do

ACTIVECONN=$(curl -Ls 192.168.102.40/status | awk '/Active connections/{print $3}')

if [ $ACTIVECONN -gt 3 ];then
     echo "告警! 当前并发连接过高! 当前并发数为:$ACTIVECONN"
fi

sleep 10  #每10秒进行查看并发量
done
基于授权的访问控制
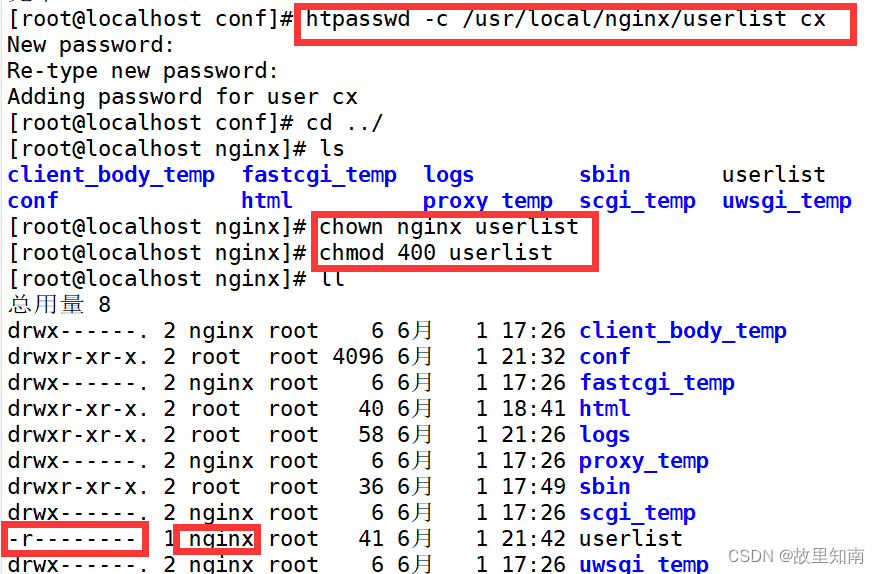
1.生成用户密码认证文件
yum install -y httpd-tools #安装相关软件
htpasswd -c /usr/local/nginx/userlist cx 创建用户
chown nginx /usr/local/nginx/userlist 设置权限
chmod 400 /usr/local/nginx/userlist

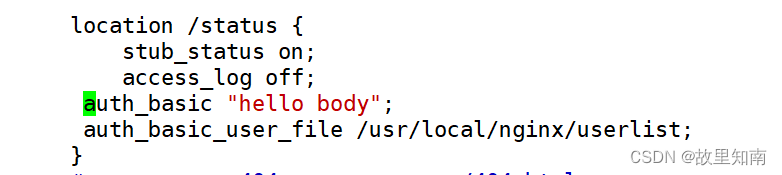
location /status {
stub_status on;
access_log off;
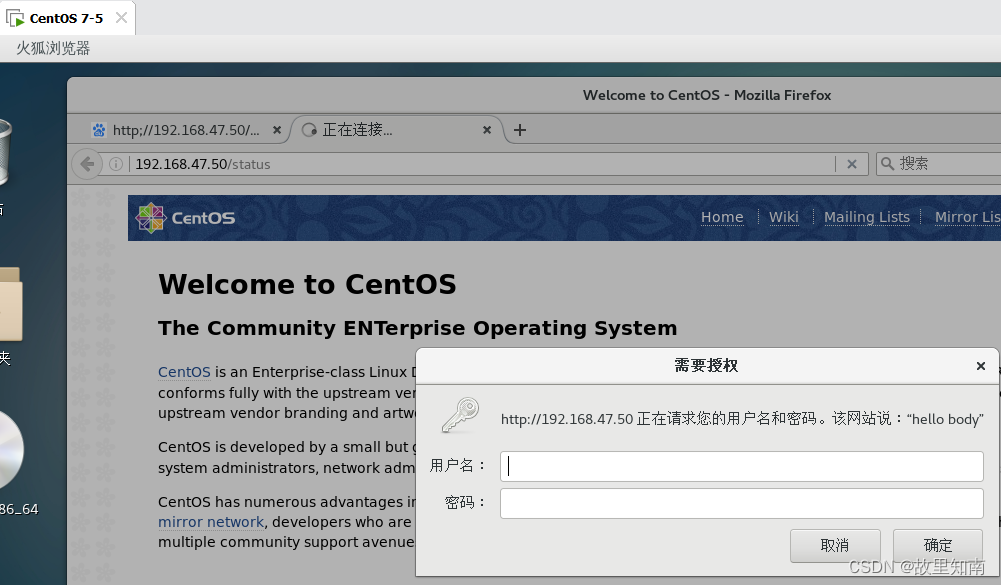
auth_basic "hellow world";
auth_basic_user_file /usr/local/nginx/userlist;
allow 192.168.102.40; ##允许访问的客户端 IP
deny all; #拒绝其它IP客户端访问
}
基于客户端的 Nginx 虚拟主机
 location /status {
             stub_status on;
             access_log off;
             auth_basic "hellow world";
             auth_basic_user_file /usr/local/nginx/userlist;
             allow 192.168.47.50;     ##允许访问的客户端 IP
             deny all;                 #拒绝其它IP客户端访问
        }

基于域名的 Nginx 虚拟主机
1.为虚拟主机提供域名解析
echo "192.168.47.50 www.accp.com www.zzbao.com" >> /etc/hosts

2.为虚拟主机准备网页文档
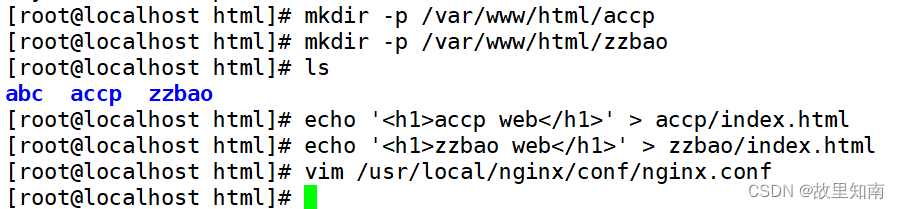
3.修改Nginx的配置文件
vim /usr/local/nginx/conf/nginx.conf
 server {
        listen       80;
        server_name  www.accp.com;

        charset koi8-r;

        access_log  logs/accp.com_access.log  main;

        location / {
            root   /var/www/html/accp;
            index  index.html index.htm;
        }


    server {
        listen       80;
        server_name  www.zzbao.com;

        charset koi8-r;

        access_log  logs/zzbao.com_access.log  main;

        location / {
            root  /var/www/html/zzbao;
            index  index.html index.htm;
        }


注意: 一定要记得查看nginx -t 看是否要改日志格式


基于IP 的 Nginx 虚拟主机
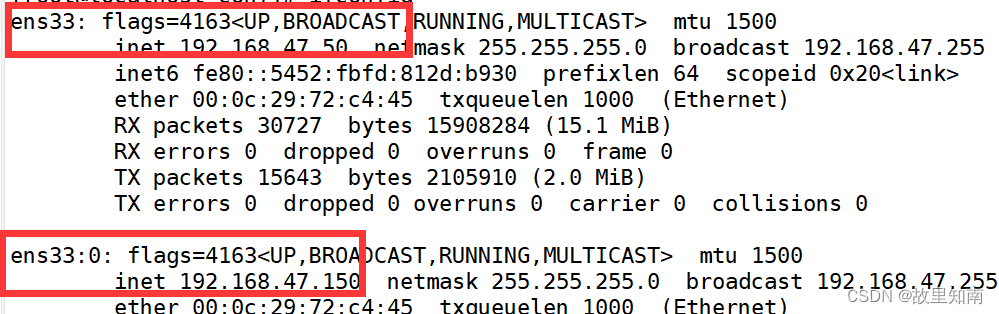
1.创建虚拟网卡
[root@localhost conf]# ifconfig ens33:0 192.168.47.150/24
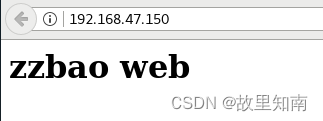
server {
listen 192.168.47.150:80;
server_name www.zzbao.com;
charset koi8-r;
access_log logs/zzbao.com_access.log;
location / {
root /var/www/html/zzbao;
index index.html index.htm;
}
server {
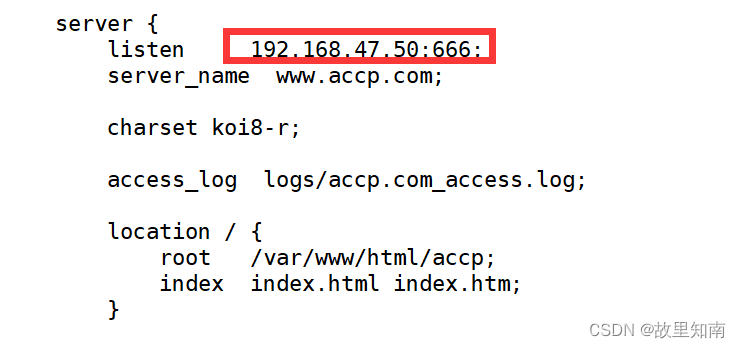
listen 192.168.47.50:80;
server_name www.accp.com;
charset koi8-r;
access_log logs/accp.com_access.log;
location / {
root /var/www/html/accp;
index index.html index.htm;
}


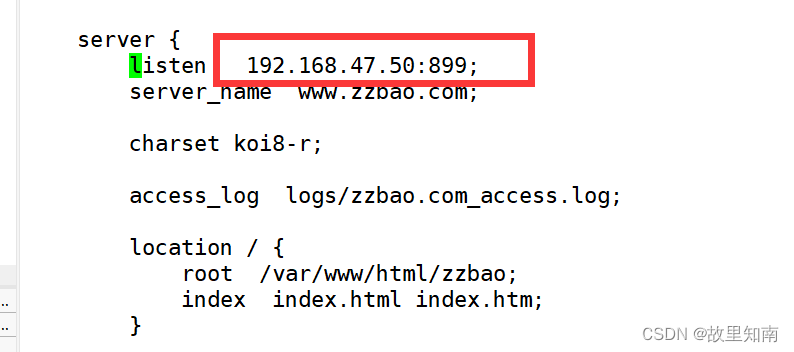
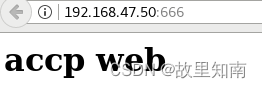
基于端口的 Nginx 虚拟主机
vim /usr/local/nginx/conf/nginx.conf


 1924
1924

 被折叠的 条评论
为什么被折叠?
被折叠的 条评论
为什么被折叠?
 到【灌水乐园】发言


