


 本文档详细介绍了如何在Windows系统上搭建Elasticsearch,并通过SpringBoot进行整合。步骤包括下载Elasticsearch,配置并启动服务,安装并使用Head插件,以及在SpringBoot应用中添加依赖、配置文件、实体类、接口和控制器,实现数据的增删查改。同时,提供了测试接口的方法。
基于windows 系统搭建
1.首先登录到ElasticSearch 官网 去下载 https://www.elastic.co/cn/downloads/elasticsearch
下载对应的系统的版本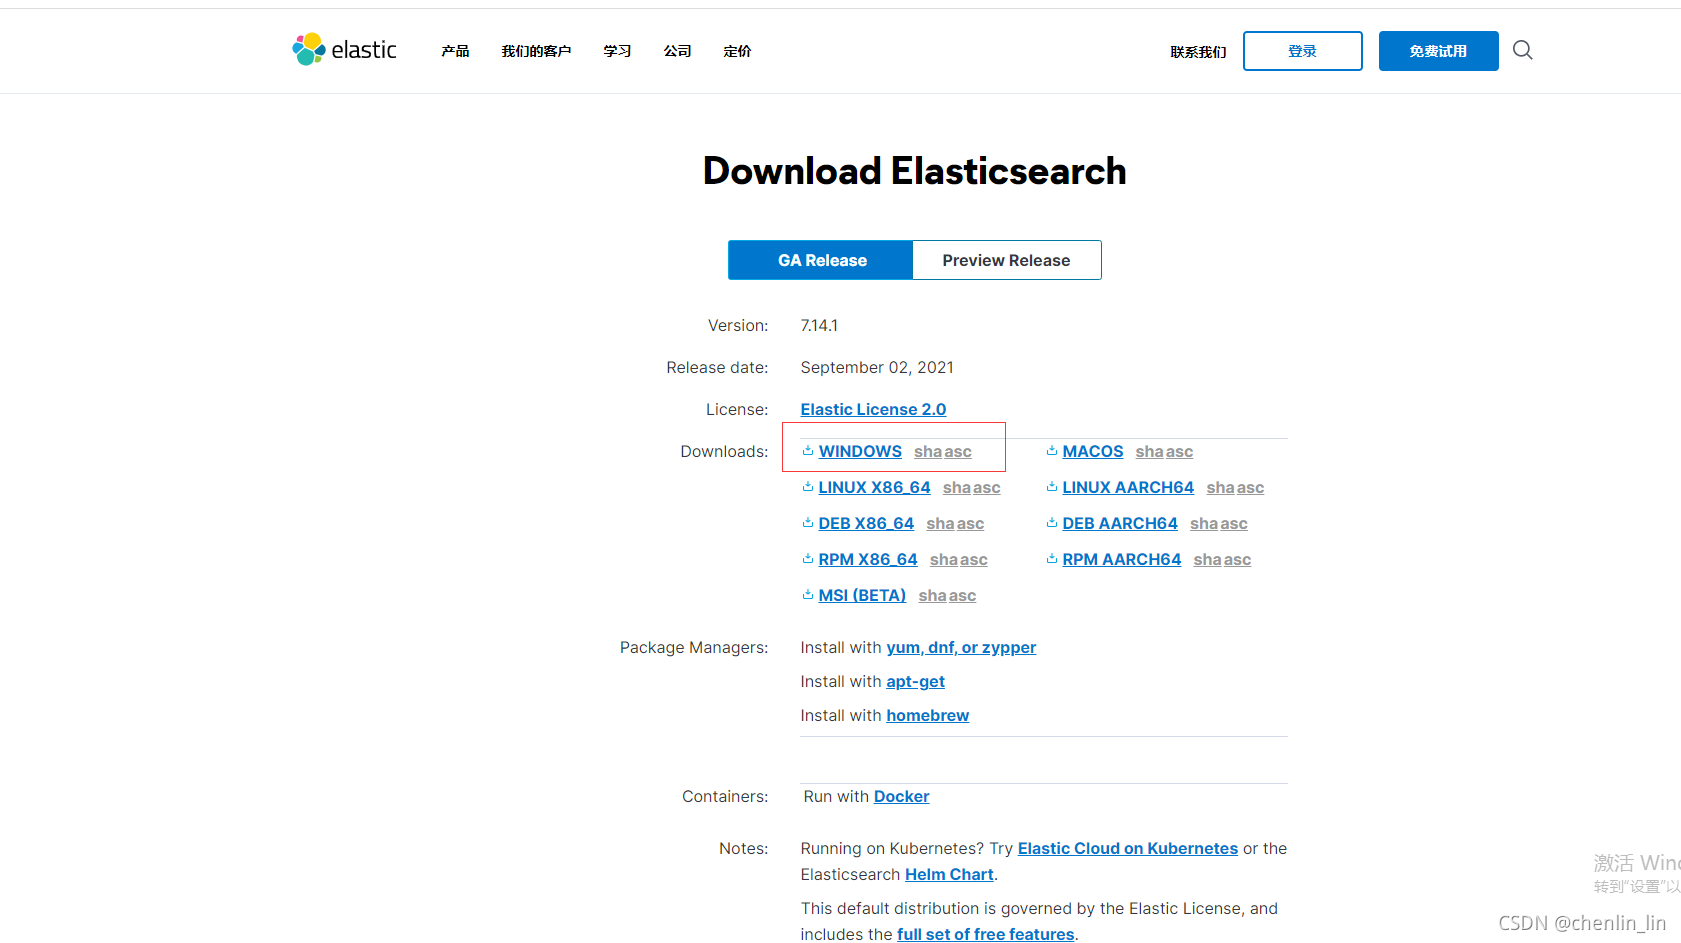
2.下载完毕 然后解压
配置修改文件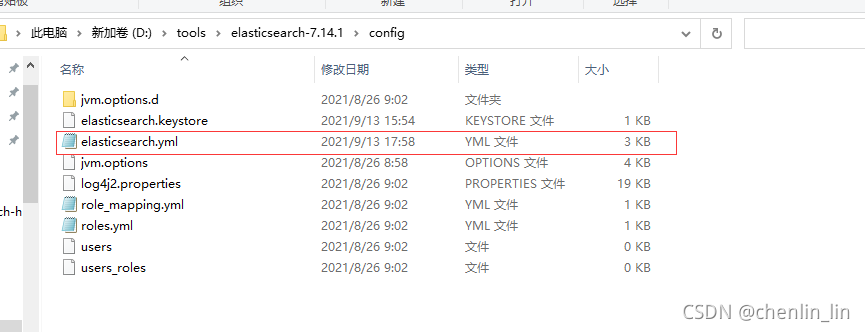
3.需要把圈出来的放开 并且修改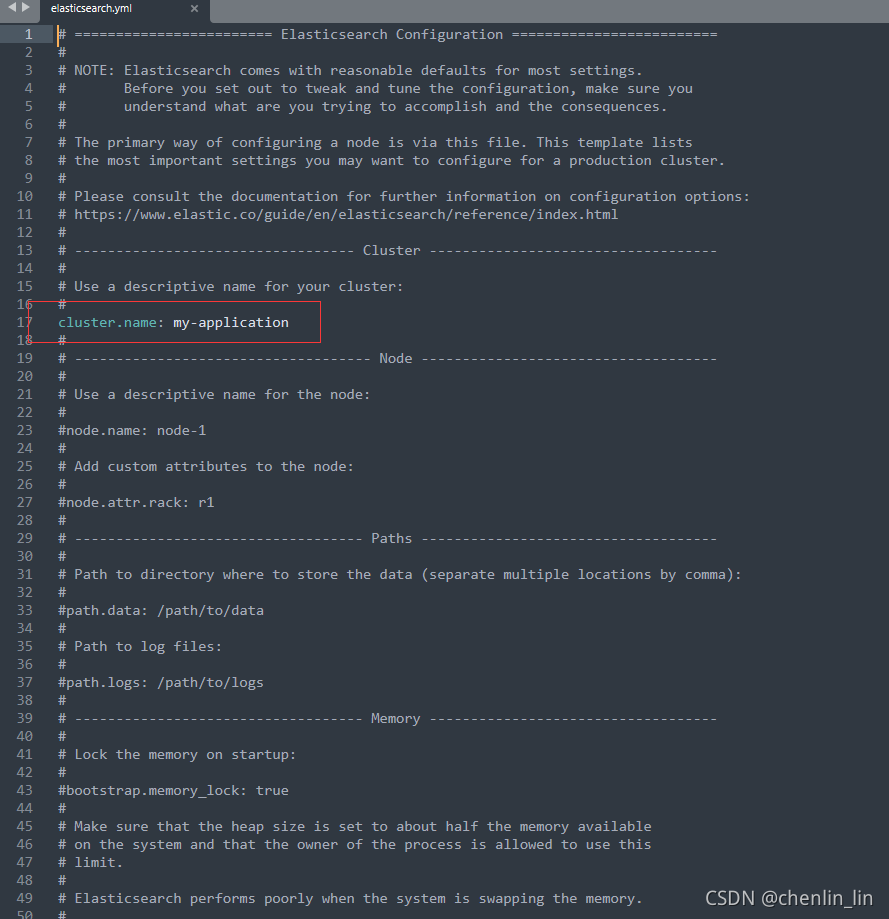
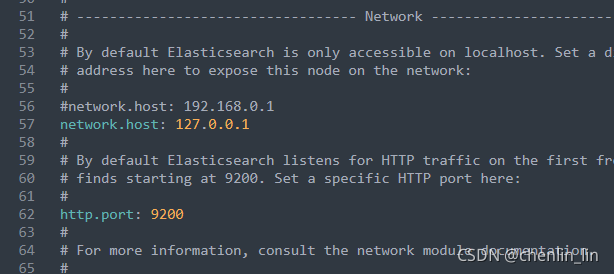
4.在配置文件的最后添加 以下配置信息 主要是用于接下来安装 ElasticSearch head 的显示
http.cors.enabled: true
http.cors.allow-origin: “*”
node.master: true
node.data: true
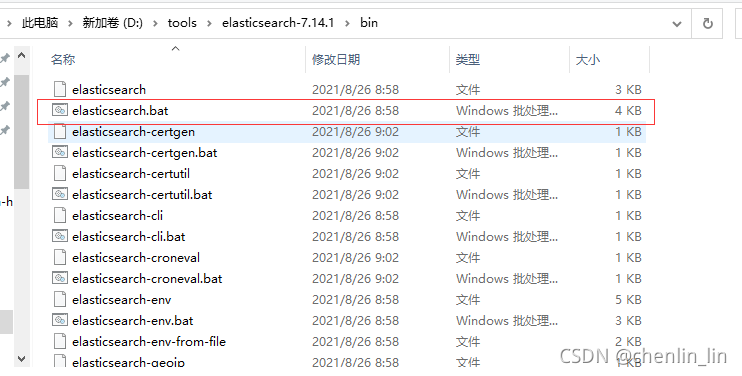
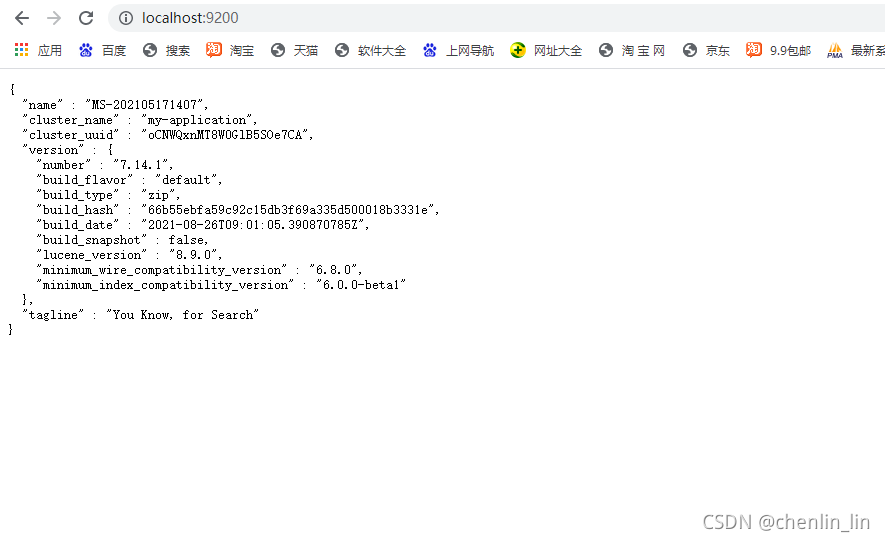
配置完成之后 找到bin 目录 ,选择 后缀为 bat 点击启动 ,启动完成后 访问 localhost:9200
5.出现此界面就证明启动完成
然后用idea 搭建springboot 整合 ElasticSearch
在项目的 pom.xml 文件加入 以下坐标
 <dependency>
            <groupId>org.springframework.boot</groupId>
            <artifactId>spring-boot-starter-data-elasticsearch</artifactId>
            <version>2.5.4</version>
    </dependency>
 <dependency>
            <groupId>org.springframework.boot</groupId>
            <artifactId>spring-boot-starter-web</artifactId>
   </dependency>

配置一下 application.yml 配置文件

```java
server:
  port: 18083
spring:
  application:
    name: elasticsearchdemo
  data:
    elasticsearch:
       eluster-name: my-application
       eluster-nodes: 127.0.0.1:9300
创建一个实体类   加入 elasticSearch 的注解

```java
package com.example.elasticsearchdemo.bean;


import org.springframework.data.annotation.Id;
import org.springframework.data.elasticsearch.annotations.Document;
import org.springframework.data.elasticsearch.annotations.Field;
import org.springframework.data.elasticsearch.annotations.FieldType;

@Document(indexName = "lol")
public class LoLEs {


    @Id
    private Long id;

    @Field(type = FieldType.Text)
    private  String heroName;

     //玩家名字
    private String username;

    public Long getId() {
        return id;
    }

    public void setId(Long id) {
        this.id = id;
    }

    public String getHeroName() {
        return heroName;
    }

    public void setHeroName(String heroName) {
        this.heroName = heroName;
    }

    public String getUsername() {
        return username;
    }

    public void setUsername(String username) {
        this.username = username;
    }

    public String toString() {
        return "LoLEs{" +
                "id=" + id +
                ", heroName='" + heroName + '\'' +
                ", username='" + username + '\'' +
                '}';
    }
}
创建 连接 elasticSearch 的操作接口类
package com.example.elasticsearchdemo.bean;

import org.springframework.data.elasticsearch.repository.ElasticsearchRepository;

public interface LOLEsRespository extends ElasticsearchRepository<LoLEs,Long> {


}
创建 controller 进行测试
package com.example.elasticsearchdemo.controller;


import com.example.elasticsearchdemo.bean.LOLEsRespository;
import com.example.elasticsearchdemo.bean.LoLEs;
import org.springframework.beans.factory.annotation.Autowired;
import org.springframework.web.bind.annotation.PostMapping;
import org.springframework.web.bind.annotation.RequestBody;
import org.springframework.web.bind.annotation.RequestMapping;
import org.springframework.web.bind.annotation.RestController;

import javax.annotation.Resource;

@RestController
@RequestMapping("/lol")
public class LoLController {

    @Resource
    private LOLEsRespository lOLEsRespository;

    @PostMapping(value = "/addLoLEs")
    public String getAiQuality(@RequestBody LoLEs loLEs) {


        return   lOLEsRespository.save(loLEs).toString();


    }

}
然后用postman 或者其他测试工具测试接口
接着 windows下安装ElasticSearch的Head插件
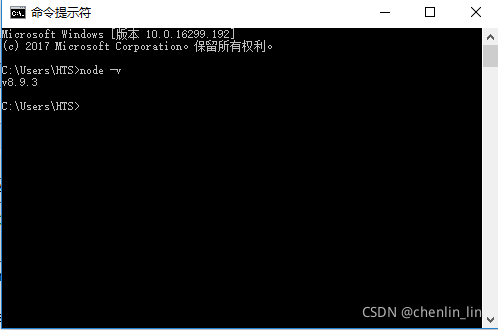
首先要安装node.js (一)从地址:https://nodejs.org/en/download/ 下载相应系统的msi,双击安装。
安装完成用cmd进入安装目录执行 node -v可查看版本号
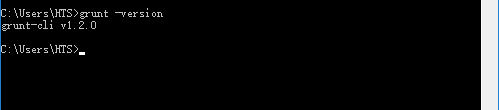
执行 npm install -g grunt-cli 安装grunt ,安装完成后执行grunt -version查看是否安装成功,会显示安装的版本号
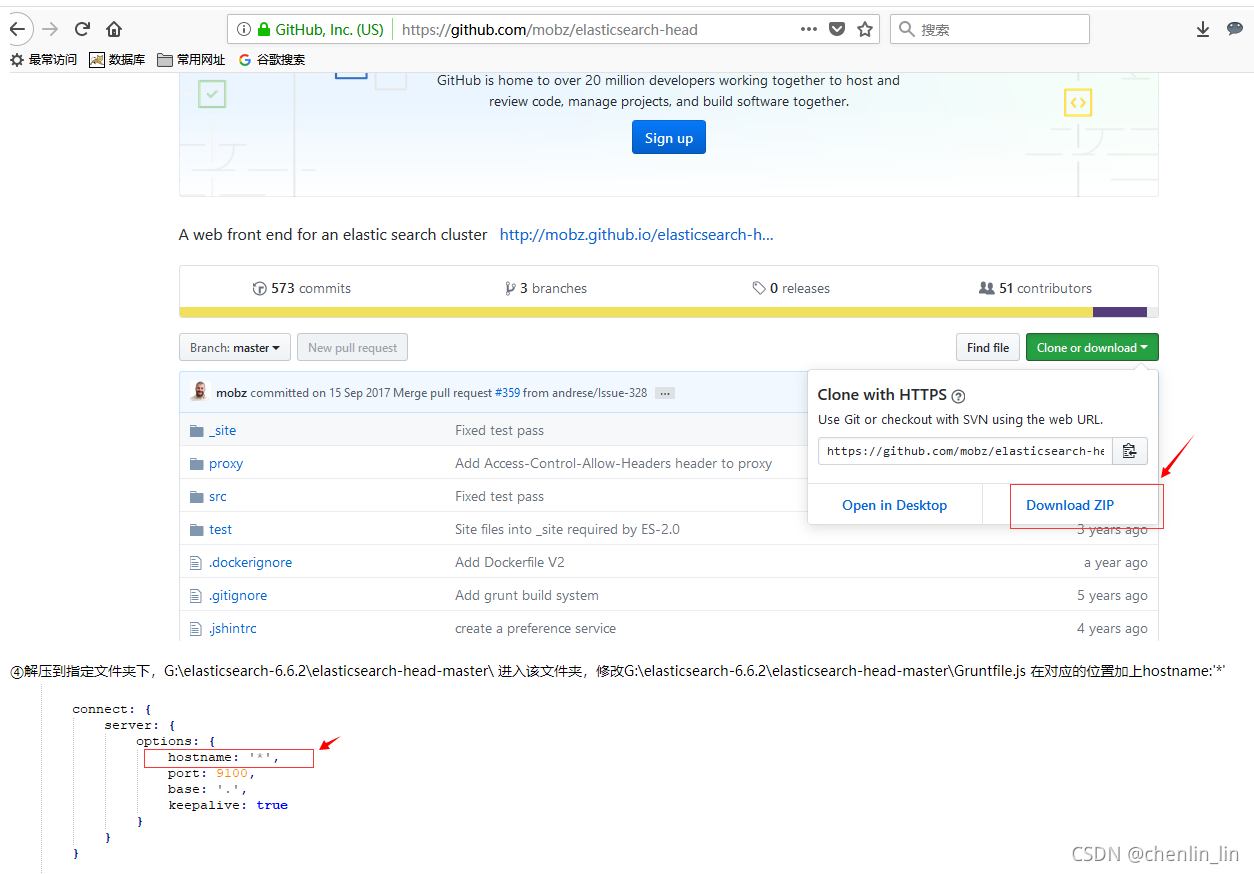
③在https://github.com/mobz/elasticsearch-head中下载head插件,选择下载zip
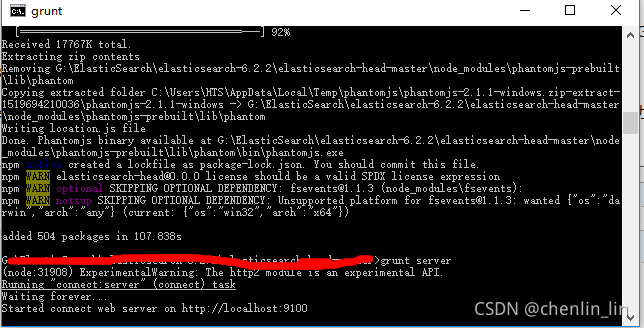
在G:\elasticsearch-6.6.2\elasticsearch-head-master\ 下执行npm install 安装完成后执行grunt server 或者npm run start 运行head插件,如果不成功重新安装grunt。成功如下
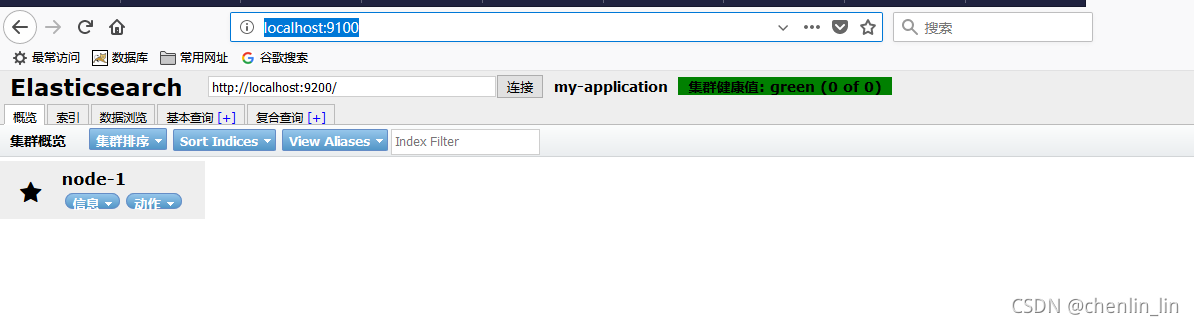
浏览器下访问http://localhost:9100/
这里就能看到自己添加测试的数据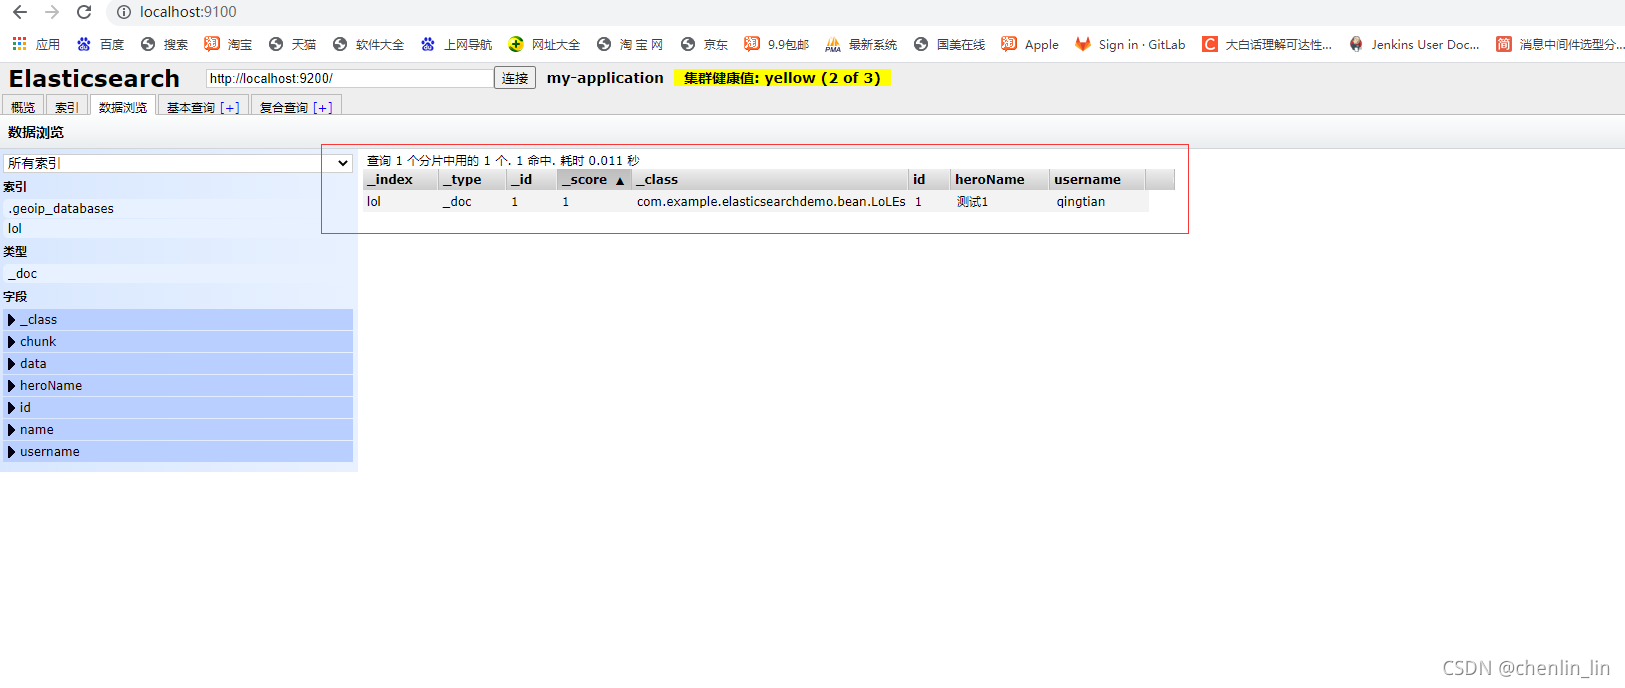
到此就完成了简单整合测试


 3433
3433

 被折叠的 条评论
为什么被折叠?
被折叠的 条评论
为什么被折叠?
 到【灌水乐园】发言


