


一、引言
在当今快速发展的软件开发领域,Spring Boot已成为Java开发者构建高效、可靠应用程序的首选框架之一。随着Spring Boot 3.x的发布,其生态系统进一步丰富和强大,为开发者提供了更多创新和优化的可能性。本文深入探讨Spring Boot 3.x生态中最具实力的组合,剖析它们在不同应用场景下的卓越表现,旨在帮助开发者充分利用这些组合,打造出高性能、可扩展且安全的应用程序。

二、Web开发:高效交互的基石
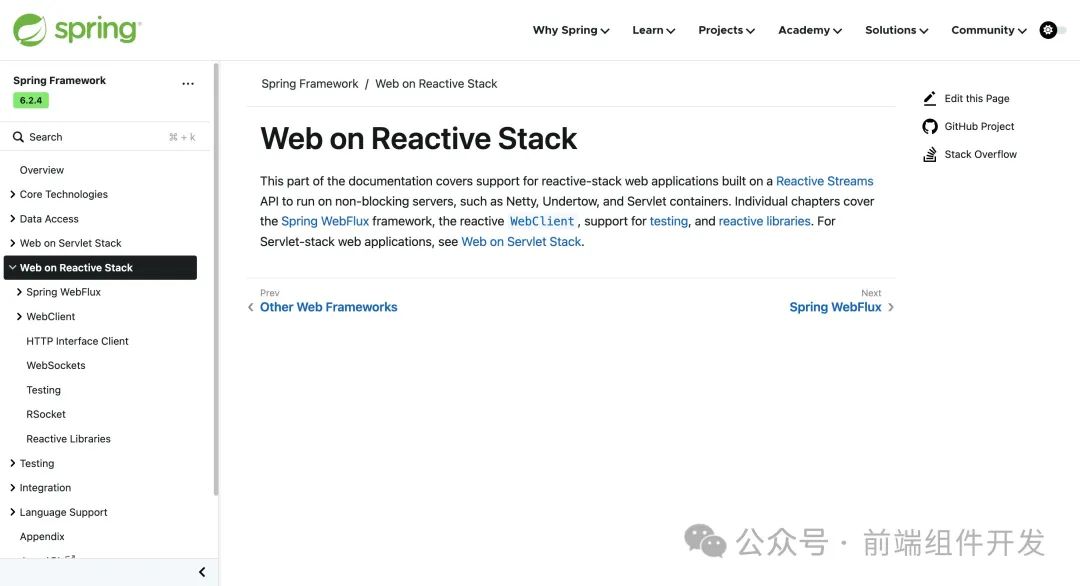
2.1 Spring Boot 3.x + Spring WebFlux:高性能的响应式Web
Spring Boot 3.x对Spring WebFlux的支持日臻完善,WebFlux基于响应式编程模型,彻底改变了传统Web开发对资源的利用方式。在面对海量并发请求时,其非阻塞I/O特性让应用程序能够以惊人的效率运转,显著提升性能与响应速度。例如,在大型电商平台的抢购活动中,大量用户瞬间涌入,WebFlux能够快速处理请求,避免线程阻塞导致的服务瘫痪,确保用户流畅购物体验。
实现上,开发者通过定义RouterFunction和HandlerFunction来构建Web服务。如下是一个简单的示例,创建一个响应式的Hello World服务:
import org.springframework.context.annotation.Bean;
import org.springframework.context.annotation.Configuration;
import org.springframework.http.MediaType;
import org.springframework.web.reactive.function.server.RequestPredicates;
import org.springframework.web.reactive.function.server.RouterFunction;
import org.springframework.web.reactive.function.server.RouterFunctions;
import org.springframework.web.reactive.function.server.ServerResponse;
import reactor.core.publisher.Mono;

@Configuration
publicclass WebFluxConfig {
    @Bean
    public RouterFunction<ServerResponse> helloWorldRouter() {
        return RouterFunctions.route(
                RequestPredicates.GET("/hello").and(RequestPredicates.accept(MediaType.TEXT_PLAIN)),
                request -> ServerResponse.ok().body(Mono.just("Hello, WebFlux!"), String.class)
        );
    }
}
2.2 Spring Boot 3.x + Thymeleaf:打造动态Web界面的利器
Thymeleaf作为流行的服务器端模板引擎,与Spring Boot 3.x的集成无缝且便捷。它支持HTML5语法,使开发人员能够轻松创建具有丰富交互性的动态Web页面。Thymeleaf模板的可读性极高,标签结构清晰,与普通HTML文件无异,大大降低了开发和维护成本。以企业内容管理系统为例,使用Thymeleaf可以根据用户角色动态渲染不同的页面内容,如管理员看到的功能菜单与普通用户截然不同,且整个过程的代码逻辑简洁明了。
在Spring Boot项目中集成Thymeleaf,只需在pom.xml中添加依赖:
<dependency>
    <groupId>org.springframework.boot</groupId>
    <artifactId>spring-boot-starter-thymeleaf</artifactId>
</dependency>
然后在application.properties中进行简单配置,即可在控制器中返回Thymeleaf视图:
import org.springframework.stereotype.Controller;
import org.springframework.ui.Model;
import org.springframework.web.bind.annotation.GetMapping;

@Controller
public class ThymeleafController {
    @GetMapping("/")
    public String index(Model model) {
        model.addAttribute("message", "Welcome to Thymeleaf with Spring Boot");
        return "index";
    }
}
对应的index.html模板:
<!DOCTYPE html>
<html xmlns:th="http://www.thymeleaf.org">
<head>
    <title>Thymeleaf Example</title>
</head>
<body>
    <h1 th:text="${message}"></h1>
</body>
</html>
三、数据库访问:数据持久化的智慧之选
3.1 Spring Boot 3.x + Spring Data JPA:简化数据操作
Spring Data JPA建立在JPA规范之上,为Spring Boot 3.x项目带来了极为简洁的数据访问方式。它通过自动生成实现类,大幅减少了数据持久化所需的样板代码。在一个在线学习平台项目中,使用Spring Data JPA可以快速实现课程、学生、教师等实体的增删改查操作。例如,定义一个课程实体的仓库接口:
import org.springframework.data.jpa.repository.JpaRepository;
import com.example.demo.entity.Course;

public interface CourseRepository extends JpaRepository<Course, Long> {
}
即可在服务层直接使用该接口进行数据操作,如courseRepository.save(new Course("Spring Boot 3.x", "Advanced"));,Spring Data JPA会自动处理底层的数据库交互逻辑。
3.2 Spring Boot 3.x + MyBatis:灵活定制SQL
MyBatis以其灵活的SQL自定义能力著称,与Spring Boot 3.x结合后,优势更加凸显。开发者可以根据业务需求编写复杂而精准的SQL语句,同时借助Spring Boot的自动配置和依赖注入,提升开发效率。在金融行业的数据分析项目中,经常需要复杂的多表联查来生成财务报表,MyBatis允许开发人员编写定制化SQL,精确控制数据查询逻辑。
配置MyBatis与Spring Boot集成时,首先在pom.xml中添加依赖:
<dependency>
    <groupId>org.mybatis.spring.boot</groupId>
    <artifactId>mybatis-spring-boot-starter</artifactId>
    <version>2.2.2</version>
</dependency>
接着定义Mapper接口和XML映射文件,如:
import org.apache.ibatis.annotations.Mapper;
import org.apache.ibatis.annotations.Select;
import com.example.demo.entity.User;

@Mapper
public interface UserMapper {
    @Select("SELECT * FROM users WHERE id = #{id}")
    User findUserById(Long id);
}
对应的UserMapper.xml:
<?xml version="1.0" encoding="UTF-8"?>
<!DOCTYPE mapper
  PUBLIC "-//mybatis.org//DTD Mapper 3.0//EN"
  "http://mybatis.org/dtd/mybatis-3-mapper.dtd">
<mapper namespace="com.example.demo.mapper.UserMapper">
</mapper>
四、微服务架构:构建分布式系统的关键
4.1 Spring Boot 3.x + Spring Cloud:微服务的完美搭档
Spring Cloud构建于Spring Boot之上,为微服务架构提供了全方位的解决方案。通过服务发现(如Eureka、Consul)、配置管理(Spring Cloud Config)、断路器(Hystrix)等组件,Spring Boot 3.x与Spring Cloud的组合能够轻松搭建稳定、可靠的微服务系统。在大型互联网电商平台中,众多服务模块如商品管理、订单处理、用户服务等可以各自独立部署为微服务,通过Spring Cloud进行统一管理和协作,实现高可用、可扩展的架构。
以使用Eureka实现服务发现为例,在服务提供者项目的pom.xml添加依赖:
<dependency>
    <groupId>org.springframework.cloud</groupId>
    <artifactId>spring-cloud-starter-netflix-eureka-client</artifactId>
</dependency>
在application.properties中配置Eureka客户端:
eureka.client.service-url.defaultZone=http://localhost:8761/eureka/
spring.application.name=product-service
在启动类添加@EnableEurekaClient注解开启服务发现功能。
4.2 Spring Boot 3.x + Docker:容器化部署的便捷之道
Docker的出现彻底改变了应用部署的方式,将Spring Boot 3.x应用程序容器化后,能够实现环境的标准化和隔离性。在多团队协作开发或跨环境部署时,Docker确保了应用在开发、测试、生产环境中的一致性。例如,一个全球部署的在线游戏后端服务,通过Docker将Spring Boot应用打包成镜像,在不同地区的服务器上快速部署,极大提高了运维效率和应用的可移植性。
创建一个简单的Dockerfile来打包Spring Boot应用:
FROM openjdk:17
COPY target/demo-0.0.1-SNAPSHOT.jar app.jar
EXPOSE 8080
ENTRYPOINT ["java","-jar","/app.jar"]
通过docker build -t my - spring - boot - app.命令构建镜像,再使用docker run -p 8080:8080 my - spring - boot - app命令运行容器。
五、消息队列:异步通信与系统解耦的桥梁
5.1 Spring Boot 3.x + RabbitMQ:可靠的消息传递
RabbitMQ作为广泛使用的消息队列系统,与Spring Boot 3.x的集成极为简便。通过Spring Boot提供的starter模块,开发者能够快速实现消息的异步处理、系统解耦和流量削峰。在一个物流配送系统中,订单生成后,通过RabbitMQ将订单消息发送到配送服务队列,订单系统无需等待配送服务处理完成,即可快速响应用户,同时保证消息的可靠投递。
在Spring Boot项目中集成RabbitMQ,添加依赖:
<dependency>
    <groupId>org.springframework.boot</groupId>
    <artifactId>spring-boot-starter-amqp</artifactId>
</dependency>
配置application.properties:
spring.rabbitmq.host=localhost
spring.rabbitmq.port=5672
spring.rabbitmq.username=guest
spring.rabbitmq.password=guest
发送和接收消息的代码示例:
import org.springframework.amqp.rabbit.core.RabbitTemplate;
import org.springframework.beans.factory.annotation.Autowired;
import org.springframework.stereotype.Service;

@Service
public class MessageSender {
    @Autowired
    private RabbitTemplate rabbitTemplate;
    public void sendMessage(String message) {
        rabbitTemplate.convertAndSend("myQueue", message);
    }
}
import org.springframework.amqp.rabbit.annotation.RabbitListener;
import org.springframework.stereotype.Component;

@Component
public class MessageReceiver {
    @RabbitListener(queues = "myQueue")
    public void receiveMessage(String message) {
        System.out.println("Received message: " + message);
    }
}
5.2 Spring Boot 3.x + Kafka:大数据量实时处理
Kafka凭借其高吞吐量、低延迟的特性,成为处理大规模实时数据的首选。与Spring Boot 3.x结合,可用于构建实时数据处理和流计算的应用场景。例如,在社交媒体平台中,大量的用户行为数据(如点赞、评论、分享)通过Kafka进行收集和传输,Spring Boot应用程序从Kafka主题中读取数据,进行实时分析和处理,为个性化推荐系统提供数据支持。
在Spring Boot项目中集成Kafka,添加依赖:
<dependency>
    <groupId>org.springframework.kafka</groupId>
    <artifactId>spring-kafka</artifactId>
</dependency>
配置application.properties:
spring.kafka.bootstrap - servers=localhost:9092
spring.kafka.consumer.group - id=myGroup
spring.kafka.consumer.auto - offset - reset=earliest
spring.kafka.producer.retries=0
spring.kafka.producer.batch - size=16384
spring.kafka.producer.buffer - memory=33554432
生产者和消费者代码示例:
import org.springframework.beans.factory.annotation.Autowired;
import org.springframework.kafka.core.KafkaTemplate;
import org.springframework.stereotype.Service;

@Service
publicclass KafkaProducer {
    privatestaticfinal String TOPIC = "myTopic";
    @Autowired
    private KafkaTemplate<String, String> kafkaTemplate;
    public void sendMessage(String message) {
        kafkaTemplate.send(TOPIC, message);
    }
}
import org.springframework.kafka.annotation.KafkaListener;
import org.springframework.stereotype.Component;

@Component
public class KafkaConsumer {
    @KafkaListener(topics = "myTopic", groupId = "myGroup")
    public void receive(String message) {
        System.out.println("Received message: " + message);
    }
}
六、安全框架:守护应用的坚固防线
6.1 Spring Boot 3.x + Spring Security:全面的安全防护
Spring Security是Spring生态中强大的安全框架,在Spring Boot 3.x项目中,通过简单配置即可实现全面的认证和授权功能。支持多种认证方式,如表单认证、HTTP Basic认证、OAuth2认证等,同时提供灵活的授权策略。在企业级应用中,不同用户角色(如管理员、普通员工)需要访问不同的功能模块,Spring Security能够轻松实现权限控制,确保敏感信息的安全。
在pom.xml中添加依赖:
<dependency>
    <groupId>org.springframework.boot</groupId>
    <artifactId>spring-boot-starter-security</artifactId>
</dependency>
配置安全策略,如在配置类中定义用户和权限:
import org.springframework.context.annotation.Bean;
import org.springframework.context.annotation.Configuration;
import org.springframework.security.config.annotation.web.builders.HttpSecurity;
import org.springframework.security.config.annotation.web.configuration.EnableWebSecurity;
import org.springframework.security.config.annotation.web.configuration.WebSecurityConfigurerAdapter;
import org.springframework.security.crypto.bcrypt.BCryptPasswordEncoder;
import org.springframework.security.crypto.password.PasswordEncoder;

@Configuration
@EnableWebSecurity
publicclass SecurityConfig extends WebSecurityConfigurerAdapter {
    @Override
    protected void configure(HttpSecurity http) throws Exception {
        http
           .authorizeRequests()
                .antMatchers("/admin/**").hasRole("ADMIN")
                .antMatchers("/user/**").hasAnyRole("ADMIN", "USER")
                .anyRequest().authenticated()
                .and()
           .formLogin()
                .loginPage("/login")
                .permitAll()
                .and()
           .logout()
                .permitAll();
    }
    @Bean
    public PasswordEncoder passwordEncoder() {
        returnnew BCryptPasswordEncoder();
    }
}
6.2 Spring Boot 3.x + OAuth 2.0:灵活的授权机制
OAuth 2.0与Spring Boot 3.x集成后,为应用提供了灵活的身份验证和授权机制,方便实现第三方登录、单点登录等功能。在社交类应用中,用户可以通过微信、QQ等第三方账号登录,借助OAuth 2.0,应用能够安全地获取用户授权信息,实现便捷登录体验。
在Spring Boot项目中集成OAuth 2.0,添加相关依赖:
<dependency>
    <groupId>org.springframework.boot</groupId>
    <artifactId>spring-boot-starter-oauth2-client</artifactId>
</dependency>
<dependency>
    <groupId>org.springframework.boot</groupId>
    <artifactId>spring-boot-starter-oauth2-resource-server</artifactId>
</dependency>
配置客户端和资源服务器,如在application.properties中:
spring.security.oauth2.client.registration.google.client - id=your - client - id
spring.security.oauth2.client.registration.google.client - secret=your - client - secret
spring.security.oauth2.client.registration.google.redirect - uri={baseUrl}/login/oauth2/code/{registrationId}
spring.security.oauth2.client.registration.google.scope=email,profile
spring.security.oauth2.client.provider.google.authorization - uri=https://accounts.google.com/o/oauth2/v2/auth
spring.security.oauth2.client.provider.google.token - uri=https://oauth2.googleapis.com/token
spring.security.oauth2.client.provider.google.user - info - uri=https://www.googleapis.com/oauth2/v3/userinfo
spring.security.oauth2.client.provider.google.user - name - attribute=email
七、结论
Spring Boot 3.x生态系统中的这些强大组合,为开发者提供了丰富的工具和策略,以应对各种复杂的应用场景。从高性能的Web开发到灵活的数据访问,从健壮的微服务架构到可靠的消息传递与安全防护,每一个组合都蕴含着提升应用质量和效率的巨大潜力。开发者应根据项目的具体需求、性能指标、可维护性等因素,审慎选择合适的组合,充分发挥Spring Boot 3.x生态的优势,构建出更加卓越、高效、安全的应用程序,在激烈的技术竞争中脱颖而出,推动软件行业的持续创新与发展。


 14万+
14万+

 被折叠的 条评论
为什么被折叠?
被折叠的 条评论
为什么被折叠?
 到【灌水乐园】发言


