


 本文详细介绍了在Linux环境下使用二进制文件快速安装MySQL数据库的过程,包括下载、解压、权限配置、初始化数据库、添加开机启动、设置远程访问及防火墙配置等步骤。
Linux使用二进制文件进行安装mysql
原创 想你时的孤独 最后发布于2016-07-18 17:09:28 阅读数 1112 收藏
展开
使用源码安装比较费时间,推荐使用二进制文件进行安装(好想也费下载的时间,不过50M带宽表示无压力)
1、下载
wget https://cdn.mysql.com//Downloads/MySQL-5.6/mysql-5.6.39-linux-glibc2.12-x86_64.tar.gz
没有wget命令使用yum install wget -y 安装
2、解压并copy
tar zxvf mysql-5.6.39-linux-glibc2.12-x86_64.tar.gz
cp mysql-5.6.39-linux-glibc2.12-x86_64 /usr/local/mysql -r
3、进入文件夹
cd /usr/local/mysql/
4、添加系统mysql组和mysql用户
grouped mysql
useradd -r -g mysql mysql
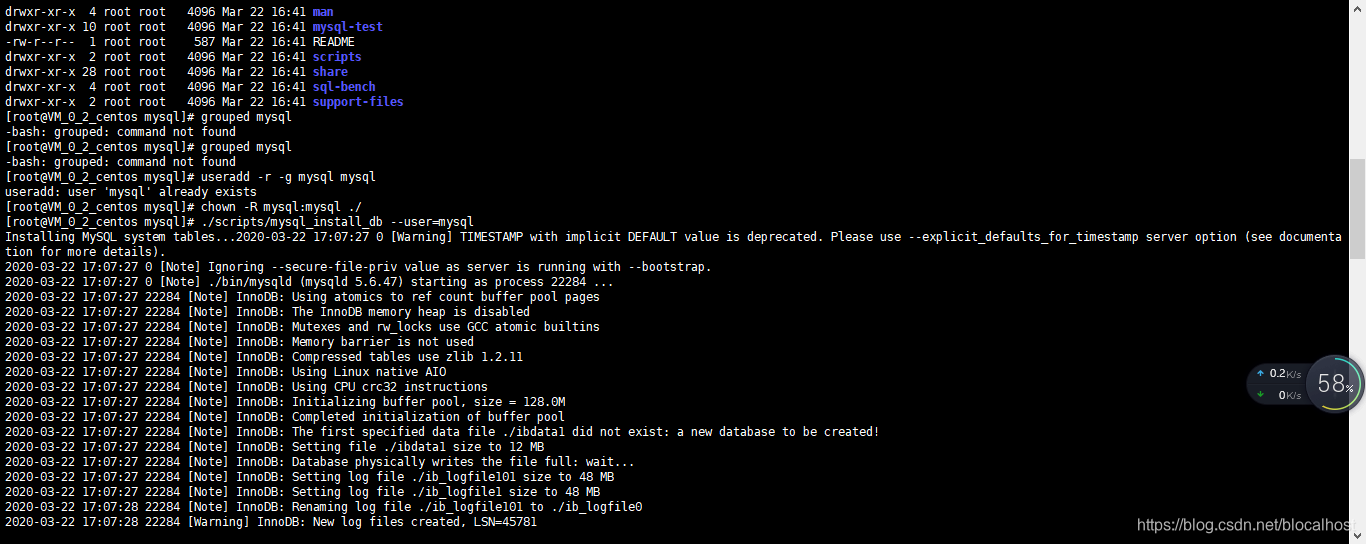
5、修改当前目录拥有者为mysql用户
chown -R mysql:mysql ./
6、安装数据库
./scripts/mysql_install_db --user=mysql
6.1如果出现Installing MySQL system tables..../bin/mysqld: error while loading shared libraries: libaio.so.1: cannot open shared object file: No such file or directory
说明确实依赖包libaio
使用yum 安装
yum install libaio-devel.x86_64 -y
6.2如果出现 FATAL ERROR: please install the following Perl modules before executing /usr/local/mysql/scripts/mysql_install_db:
使用yum安装
yum-y install autoconf
7、修改当前目录拥有者为root用户
chown -R root:root ./
8、修改当前data目录拥有者为mysql用户
chown -R mysql:mysql data
9、添加软连接,这样就可以直接使用msyql
ln -s /usr/local/mysql/bin/mysql /usr/local/bin/mysql
10、添加开机启动
cp support-files/mysql.server /etc/init.d/mysql
11、启动mysql服务
service mysql start
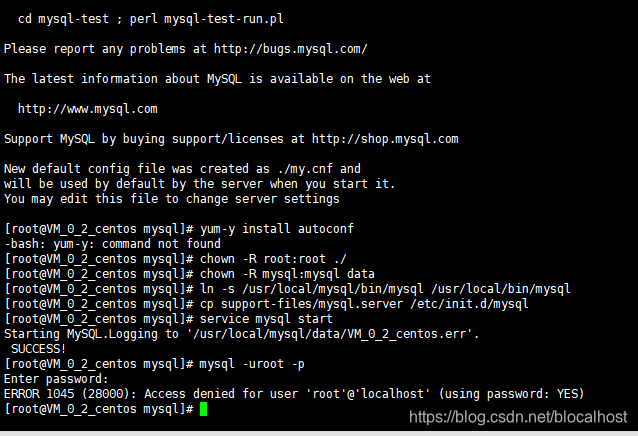
12、测试
mysql -uroot -p
成功
Welcome to the MySQL monitor. Commands end with ; or \g.
Your MySQL connection id is 1
Server version: 5.6.31 MySQL Community Server (GPL)
Copyright (c) 2000, 2016, Oracle and/or its affiliates. All rights reserved.
Oracle is a registered trademark of Oracle Corporation and/or its
affiliates. Other names may be trademarks of their respective
owners.
Type 'help;' or '\h' for help. Type '\c' to clear the current input statement.
mysql>
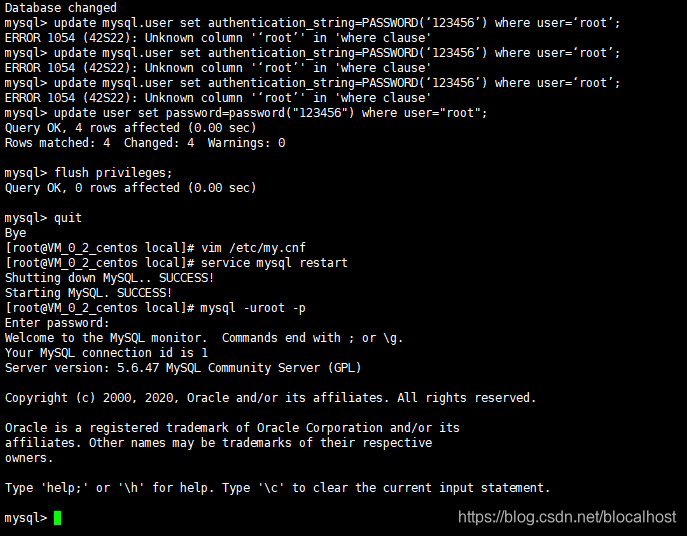
mysql密码找回
方法一:
vi /etc/my.cnf
在[mysqld]下加上 skip-grant-tables,如:
[mysqld]
datadir=/var/lib/mysql
socket=/var/lib/mysql/mysql.sock
skip-grant-tables
重启mysql
service mysqld restart
登陆mysql后就可以修改密码了
mysql -u root
update mysql.user set authentication_string=PASSWORD(‘123456’) where User=‘root’;
flush privileges;
然后改回my.cnf重启mysql。
开启 MySQL 远程访问权限: 在linux系统上登陆mysql服务。
-- root 是用户名
[root@localhost ~]# mysql -u root -p
Enter password: --  输入密码
-- root 是用户名 [root@localhost ~]# mysql -u root -p Enter password: -- 输入密码
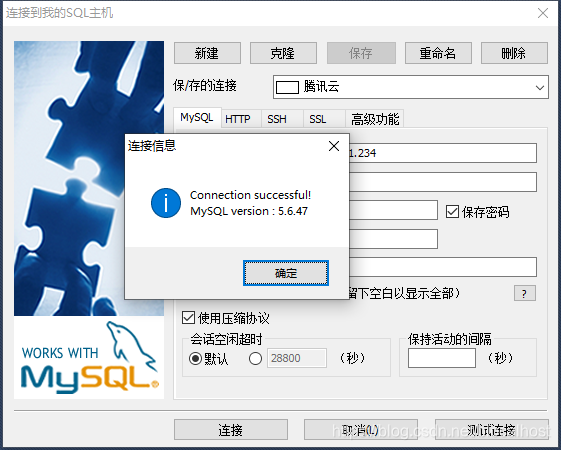
创建远程连接 MySQL 的用户:
-- 创建用户、密码及权限范围 第一个 roo t为用户名 @后为适用的主机,‘%’表示所有电脑都可以访问连接,第二个 root 为密码
mysql> GRANT ALL PRIVILEGES ON *.* TO 'root'@'192.168.0.2' IDENTIFIED BY 'root' WITH GRANT OPTION;
Query OK, 0 rows affected (1.57 sec)

-- 立即生效
mysql> flush privileges;
Query OK, 0 rows affected (0.00 sec)
查看数据库用户:
-- 使用 mysql 库
mysql> use mysql;
Reading table information for completion of table and column names
You can turn off this feature to get a quicker startup with -A

Database changed

-- 查看用户
mysql> SELECT DISTINCT CONCAT('User: [', user, '''@''', host, '];') AS USER_HOST FROM user;
+---------------------------------------+
| USER_HOST                             |
+---------------------------------------+
| User: [root'@'127.0.0.1];             |
| User: [root'@'192.168.0.2];           |
| User: [root'@'::1];                   |
| User: [root'@'localhost];             |
| User: [root'@'localhost.localdomain]; |
+---------------------------------------+
5 rows in set (0.00 sec)
-- 使用 mysql 库
mysql> use mysql;
Reading table information for completion of table and column names
You can turn off this feature to get a quicker startup with -A
Database changed
-- 查看用户
mysql> SELECT DISTINCT CONCAT('User: [', user, '''@''', host, '];') AS USER_HOST FROM user;
+---------------------------------------+
| USER_HOST |
+---------------------------------------+
| User: [root'@'127.0.0.1]; |
| User: [root'@'192.168.0.2]; |
| User: [root'@'::1]; |
| User: [root'@'localhost]; |
| User: [root'@'localhost.localdomain]; |
+---------------------------------------+
5 rows in set (0.00 sec)
创建成功。
查看端口:
mysql> show global variables like 'port';
+---------------+-------+
| Variable_name | Value |
+---------------+-------+
| port          | 3306  |
+---------------+-------+
1 row in set (0.01 sec)
mysql> show global variables like 'port';
+---------------+-------+
| Variable_name | Value |
+---------------+-------+
| port | 3306 |
+---------------+-------+
1 row in set (0.01 sec)
开启3306端口:
[root@localhost ~]# vim /etc/sysconfig/iptables
# Firewall configuration written by system-config-firewall
# Manual customization of this file is not recommended.
*filter
:INPUT ACCEPT [0:0]
:FORWARD ACCEPT [0:0]
:OUTPUT ACCEPT [0:0]
-A INPUT -m state --state ESTABLISHED,RELATED -j ACCEPT
-A INPUT -p icmp -j ACCEPT
-A INPUT -i lo -j ACCEPT
-A INPUT -m state --state NEW -m tcp -p tcp --dport 22 -j ACCEPT
-A INPUT -m state --state NEW -m tcp -p tcp --dport 3306 -j ACCEPT
-A INPUT -j REJECT --reject-with icmp-host-prohibited
-A FORWARD -j REJECT --reject-with icmp-host-prohibited
COMMIT

"/etc/sysconfig/iptables" 14L, 543C
注意:一定要加在后两行的前面。
[root@localhost ~]# vim /etc/sysconfig/iptables
# Firewall configuration written by system-config-firewall
# Manual customization of this file is not recommended.
*filter
:INPUT ACCEPT [0:0]
:FORWARD ACCEPT [0:0]
:OUTPUT ACCEPT [0:0]
-A INPUT -m state --state ESTABLISHED,RELATED -j ACCEPT
-A INPUT -p icmp -j ACCEPT
-A INPUT -i lo -j ACCEPT
-A INPUT -m state --state NEW -m tcp -p tcp --dport 22 -j ACCEPT
-A INPUT -m state --state NEW -m tcp -p tcp --dport 3306 -j ACCEPT
-A INPUT -j REJECT --reject-with icmp-host-prohibited
-A FORWARD -j REJECT --reject-with icmp-host-prohibited
COMMIT
"/etc/sysconfig/iptables" 14L, 543C
重启防火墙:
[root@localhost ~]# service iptables restart
iptables:将链设置为政策 ACCEPT:filter                    [确定]
iptables:清除防火墙规则:                                 [确定]
iptables:正在卸载模块:                                   [确定]
iptables:应用防火墙规则:                                 [确定]
[root@localhost ~]# service iptables restart
iptables:将链设置为政策 ACCEPT:filter [确定]
iptables:清除防火墙规则: [确定]
iptables:正在卸载模块: [确定]
iptables:应用防火墙规则: [确定]
查看服务器ip地址:
[root@localhost ~]# ifconfig
eth0      Link encap:Ethernet  HWaddr 00:0C:29:16:F4:E6
          inet addr:192.168.0.123  Bcast:192.168.0.255  Mask:255.255.255.0
          inet6 addr: hjjj:jjji::iii:oooo:oooo:ioio/64 Scope:Link
          UP BROADCAST RUNNING MULTICAST  MTU:1500  Metric:1
          RX packets:2931 errors:0 dropped:0 overruns:0 frame:0
          TX packets:1631 errors:0 dropped:0 overruns:0 carrier:0
          collisions:0 txqueuelen:1000
          RX bytes:322681 (315.1 KiB)  TX bytes:266043 (259.8 KiB)

lo        Link encap:Local Loopback
          inet addr:127.0.0.1  Mask:255.0.0.0
          inet6 addr: ::1/128 Scope:Host
          UP LOOPBACK RUNNING  MTU:16436  Metric:1
          RX packets:0 errors:0 dropped:0 overruns:0 frame:0
          TX packets:0 errors:0 dropped:0 overruns:0 carrier:0
          collisions:0 txqueuelen:0
          RX bytes:0 (0.0 b)  TX bytes:0 (0.0 b)
连接测试:


 1787
1787

 被折叠的 条评论
为什么被折叠?
被折叠的 条评论
为什么被折叠?
 到【灌水乐园】发言


