


 本文介绍如何使用Hexo结合GitHub Pages快速搭建个人博客,包括安装配置Node.js、Git、Hexo,以及如何部署到GitHub并设置自定义域名。
正在学,小白通过学习建立 Blog 可以学到很多知识,希望今天能学好相关知识,建成自己的
Blog 吧。
教程来自以下 Blog:基于 Hexo + GitHub Pages 免费搭建个人博客最强教程
以下内容根据上面这篇博客精简修改。
安装 Node.js :
- 下载地址: https://nodejs.org/en/download/
- Windows下安装非常简单。其他系统参考:Node.js 安装配置
安装 Git:
- 下载 Git : https://git-scm.com/download/
- 安装 Git : 和 Node.js 相似,Windows下一直下一步。
- Git 入门教程 : Pro Git(中文版)来自码云
安装Hexo :
a. 打开Git Bash
b. 输入命令:
npm install -g hexo-clic. 初始化hexo,选择目录:
hexo init e:\blogd. 进入目录:
cd e:\bloge. 执行命令,安装依赖包
npm installf. 生成部署文件,启动本地服务
hexo generate
hexo server
Hexo 几个常用的命令:
hexo generate (hexo g) 生成静态文件,会在当前目录下生成一个新的叫做public的文件夹
hexo server (hexo s) 启动本地web服务,用于博客的预览
hexo deploy (hexo d) 部署博客到远端服务器
hexo new "postName" #新建文章
hexo new page "pageName" #新建页面
此时打开 http://localhost:4000/ 可以看到搭建的本地博客
使用 GitHub Pages :
- 注册 GitHub 账号
- 创建项目仓库,访问 https://github.com/new 创建仓库
注意仓库名称必须是 username/username.github.io - 配置 SSH :
a. 检查本地是否存在 ssh key,在Git Bash输入指令:
ls -al ~/.ssh如果存在删除 .ssh 文件夹下所有文件
b. 设置 name 和 email
git config --global user.name "<your name>"
git config --global user.email "<your email>"
name 和 email 与 GitHub 无关
生成 ssh 密钥
ssh-keygen -t rsa -C "your GitHub email"一路回车,可设置密码
此步骤在 ~/.ssh/ 下生成 id_rsa 和 id_rsa.pub 文件
获取 Key
$ cat ~/.ssh/id_rsa.pub在 GitHub 上添加 SSH 密钥
在https://github.com/settings/keys下 add new ssh key
Personal settings –> SSH and GPG keys –> SSH keys –> New SSH key
设置后输入命令:
ssh git@github.com若成功,返回以下大致内容
The authenticity of host 'github.com (192.30.252.128)' can't be established.
RSA key fingerprint is 16:27:ac:a5:76:28:2d:36:63:1b:56:4d:eb:df:a6:48.
Are you sure you want to continue connecting (yes/no)? yes
Warning: Permanently added 'github.com,192.30.252.128' (RSA) to the list of known hosts.
Hi git-xuhao! You've successfully authenticated, but GitHub does not provide shell access.
Connection to github.com closed.
部署到 GitHub
a. 配置 _config.yml
# Deployment
## Docs: https://hexo.io/docs/deployment.html
# ssh://git@github.com/git-xuhao/git-xuhao.github.io
deploy:
type: git
repo: ssh://git@github.com/thebitmin/thebitmin.github.io
branch: master
repo 换成自己的 GitHub 仓库,因配置了 SSH-Key 必须填写 SSH 形式的 URL。
每个 : 后面必须有一个空格。
b. 安装 Git 包
npm install hexo-deployer-git --savec. 部署到 GitHub 上
hexo deploy现在可以通过 https://thebitmin.github.io 访问此博客。
Hexo配置文件
Hexo 中两个常用的配置文件:
a. 博客的配置文件:
E:\blog\_config.yml配置文件说明大致如下:
# Hexo Configuration
## Docs: http://hexo.io/docs/configuration.html
## Source: https://github.com/hexojs/hexo/

# Site
title: blog name    #博客名
subtitle: Goals determine what you are going to be    #副标题
description: Goals determine what you are going to be #用于搜索,没有直观表现
author: huangjunhui    #作者
language: zh-CN    #语言
timezone:     #时区,若不填写,以你目前电脑的时区为默认值

# URL
## If your site is put in a subdirectory, set url as 'http://yoursite.com/child' and root as '/child/'
url: http://yoursite.com
root: /
permalink: :year/:month/:day/:title/
permalink_defaults:

# Directory
source_dir: source
public_dir: public
tag_dir: tags
archive_dir: archives
category_dir: categories
code_dir: downloads/code
i18n_dir: :lang
skip_render:

# Writing    文章布局等
new_post_name: :title.md # File name of new posts
default_layout: post
titlecase: false # Transform title into titlecase
external_link: true # Open external links in new tab
filename_case: 0
render_drafts: false
post_asset_folder: false
relative_link: false
future: true
highlight:
  enable: true
  line_number: true
  tab_replace:

# Category & Tag
default_category: uncategorized
category_map:
tag_map:

# Date / Time format    时间格式
## Hexo uses Moment.js to parse and display date
## You can customize the date format as defined in
## http://momentjs.com/docs/#/displaying/format/
date_format: YYYY-MM-DD
time_format: HH:mm:ss

# Pagination
## Set per_page to 0 to disable pagination
per_page: 10    #每页显示的文章数,0表示不分页
pagination_dir: page

# Extensions    插件配置
## Plugins: http://hexo.io/plugins/
## Themes: http://hexo.io/themes/
plugins:
- hexo-generator-feed
theme: light    #使用的主题

feed:    #之后配置rss会用
  type: atom
  path: atom.xml
  limit: 20

# Deployment    用于部署到github,之前已经配置过
## Docs: http://hexo.io/docs/deployment.html

deploy:
  type: git
  repo: ssh://git@github.com/git-xuhao/git-xuhao.github.io
  branch: master
b. 博客主题的配置文件:
E:\blog\themes\landscape\_config.yml如何使用
新建博文使用命令:
hexo new "name"”name” 为新建博文名称,输入命令后在 ./source/_posts/ 文件夹生成 name.md 文件。打开即可编写博文。.md 格式文件显然是支持 MarkDown 语法编写,博文格式可参考自动生成的 hello-world.md。
编辑完博文通过以下命令生成静态文件:
hexo generate生成的静态文件在 ./public 目录下,可通过一下命令在本地浏览博客:
hexo server间最新编辑的博文部署到 GitHub 上使用一下命令:
hexo deploy打开 https://thebitmin.github.io/ 就可以看到更新的博文。
Hexo 主题
Hexo 主题可在以下查询:
GitHub : https://github.com/hexojs/hexo/wiki/Themes
知乎:有哪些好看的 Hexo 主题?
设置专属域名
1. 购买域名
我的域名在阿里云上购买,搜索自己喜欢的域名,若没被注册便可购买。
我购买的新域名:bitmin.tech
.com 域名被注册了,.tech 域名够便宜,而且 .tech 域名有技术的意思,感觉不错买10年才不到160元。
2. 绑定域名
登入阿里云控制台,选择域名解析。
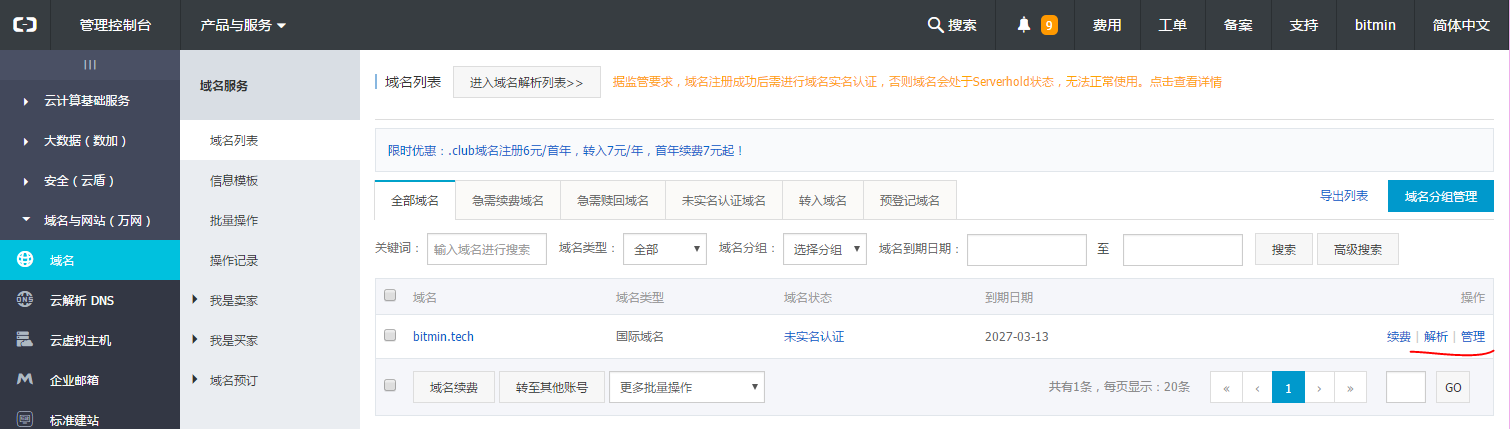
进入解析设置,如下图添加3条解析,前两条 IP 地址固定值,最后 CNAME 类型记录值为你 GitHub 上博客地址。
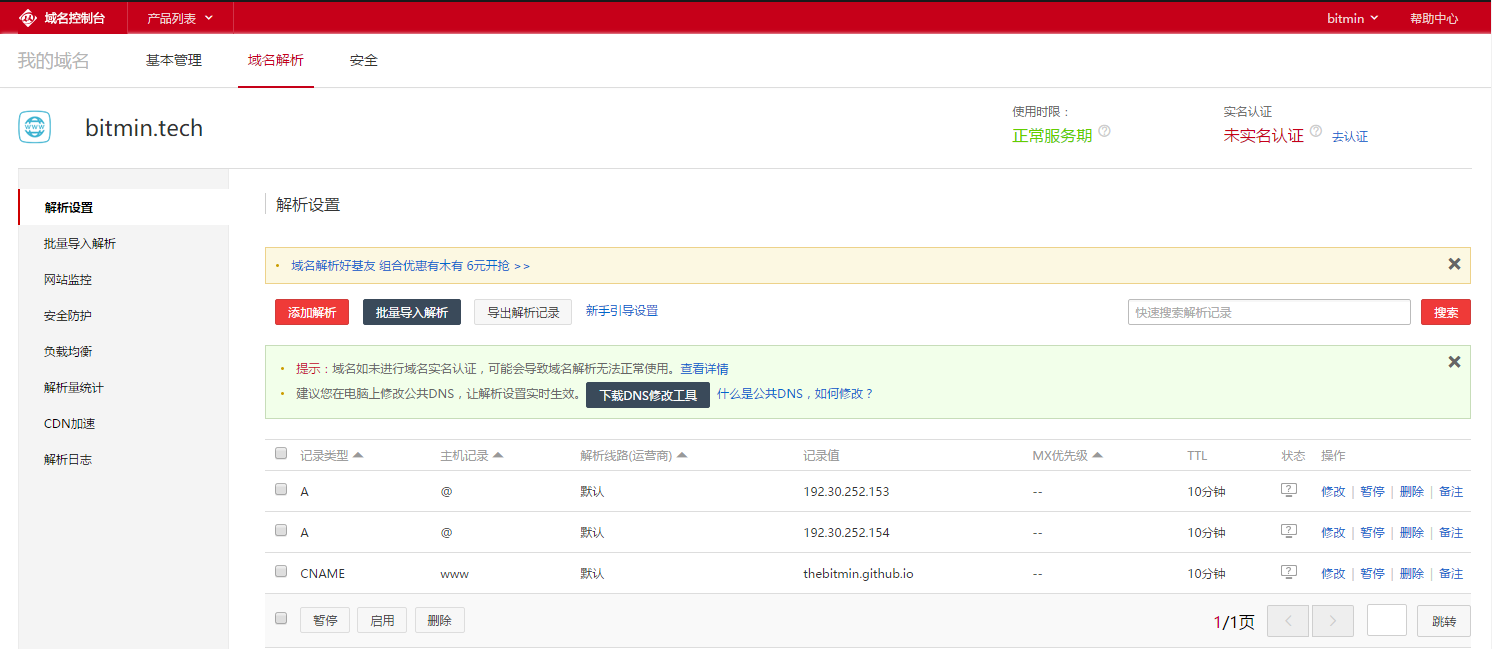
若你只想将子域名绑定在博客上,如 blog.bitmin.tech 映射到 thebitmin.github.io。那么最后一条记录类型 CNAME 讲主机记录改为 blog。
3. 在本地创建 CNAME 文件
以我为例,我在 /e/blog/source/ 目录下创建 CNAME 文件(必须为大写)。打开 CNAME 输入你购买的域名。
bitmin.tech如果你在上一部绑定的是子域名则在 CNAME 中输入:
blog.bitmin.tech4. 提交 CNAME 文件
回到 /e/blog/目录执行命令
hexo g
hexo d
等待 DNS 服务器将你的域名解析到你博客后,就可以通过 bitmin.tech 访问你的博客了。


 2000
2000

 被折叠的 条评论
为什么被折叠?
被折叠的 条评论
为什么被折叠?
 到【灌水乐园】发言


