


控制台命令行程序适合很多场景,如记录事件日志、配置应用程序、接收用户输入、访问开发者工具等等。它是GUI的一种可替代方案。
Rust提供了多种与控制台进行交互的读写操作,我们从最常用的println!和print!宏开始。
输出
- println!和print!宏用于在控制台显示信息。这两个宏将格式化的字符串插入输出流(stdout)中。 区别是println!()会在格式化输出的结尾加上一个换行符
\n。 - println!和print!宏是可变参数的,意味着可以有多个数量的参数。
- 每个宏的第一个参数是一个格式化字符串也是一个字符串字面量。格式化字符串可以包含占位符({}),宏的其余参数必须依次替换占位符所对应的位置。
- print!宏至少必须有一个参数; 而println!可以没有,仅仅表示打印换行。
格式化字符串
占位符({})保留给实现了Display trait的公共类型。标准库中很多原生类型(整数、浮点数),都被视为公共类型,它们实现了Display这个trait.比如自定义的结构体(struct),可能并未实现Display trait,无法直接使用占位符({})进行格式化。
fn main() {
let a = 10;
let b = 20;
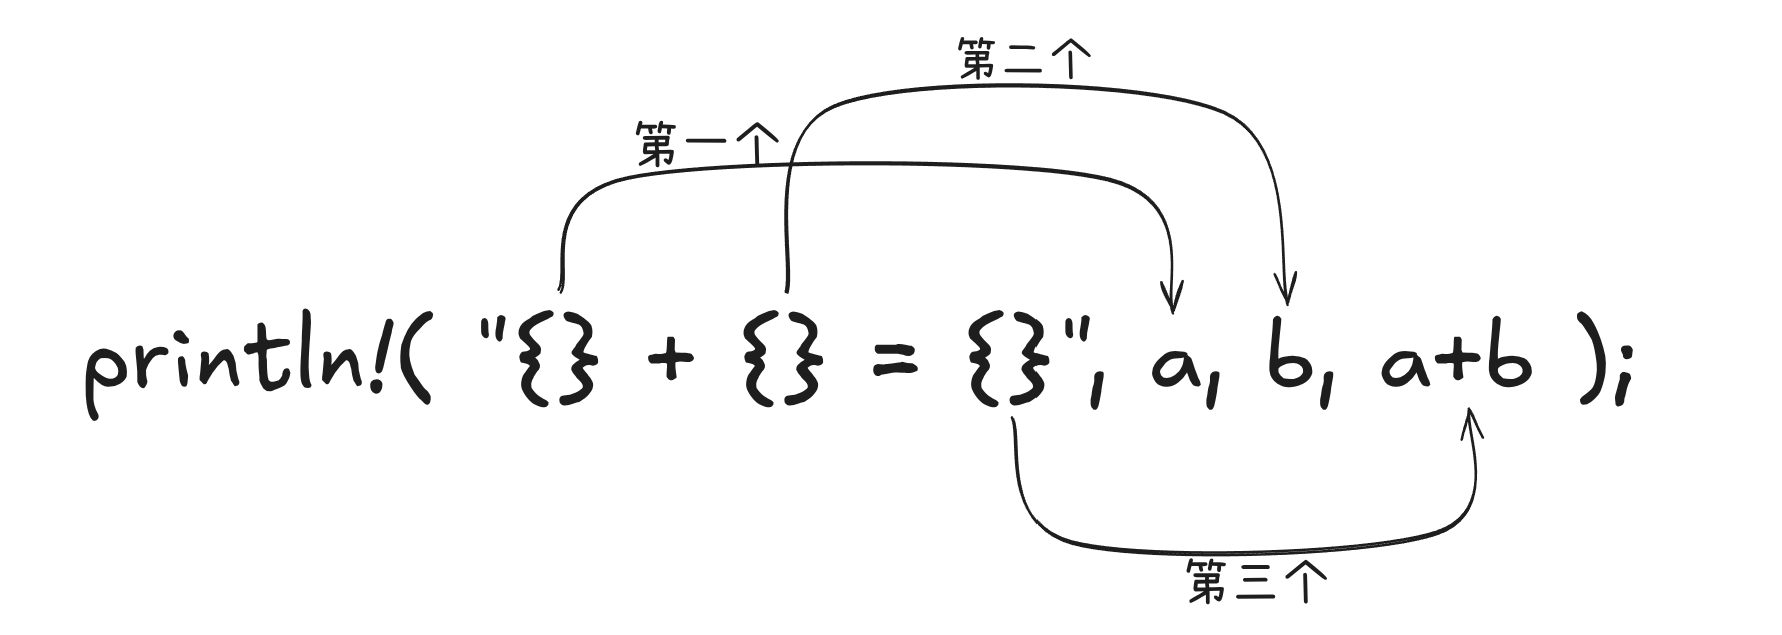
println!("{} + {} = {}",a, b, a+b);
}
格式字符串"{} + {} = {}"中的占位符"{}"将会被后面的结果替换
位置参数
你也可以使用索引来指示占位符"{}"中的位置参数,如"{index}"。index是从0开始的,且是一个usize类型
fn main() {
    let a = 15;
    let b = 20;
    println!("{1}+{0}={2}",a, b,a+b);
}
如图
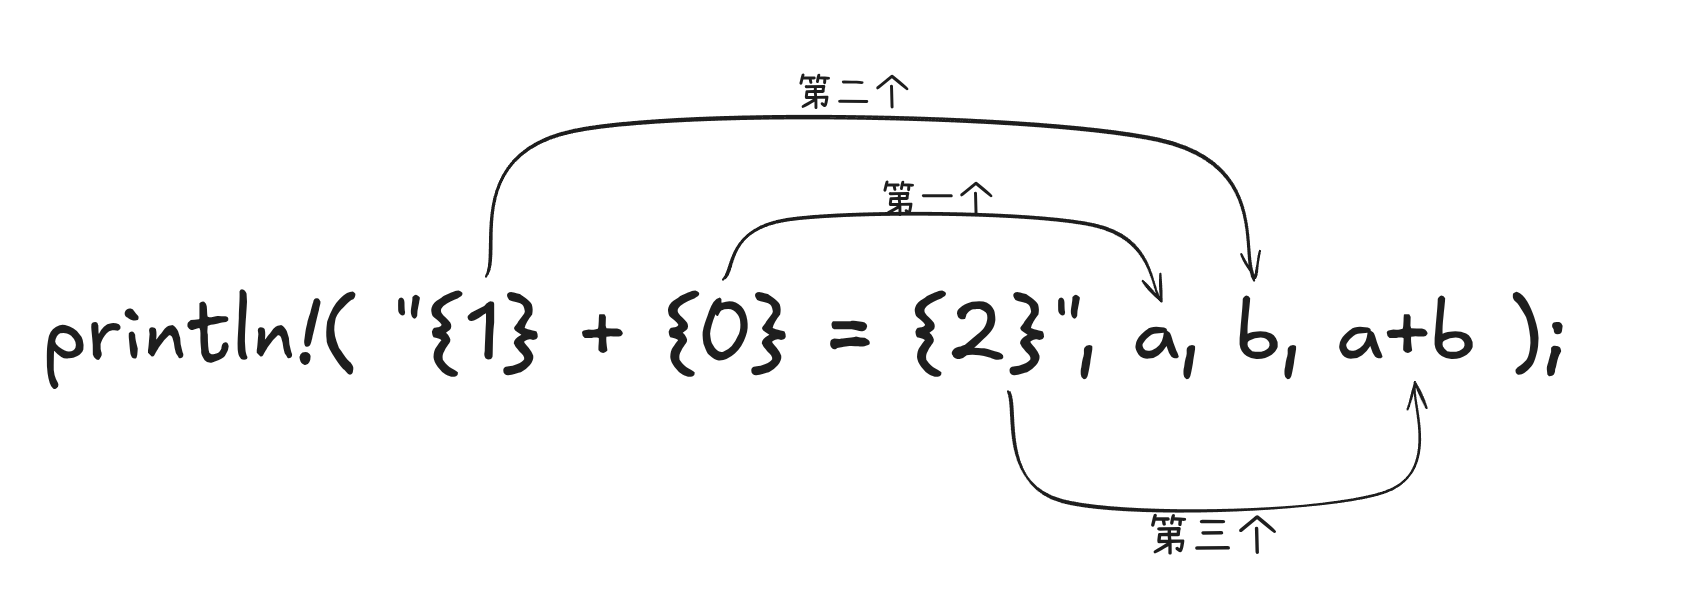
当然,你也可以混用非位置型"{}"和位置型"{index}"的占位符。但是,非位置型参数占位符"{}"会被优先求值
fn main() {
    let (first, second, third, tourth) = (1, 2, 3, 4);
    let result = first+second+third+tourth;
    println!("{} + {} + {3} + {} = {4}",first, second, third, tourth, result);
}
变量参数
格式字符串中的占位符也可以引用变量。变量参数是一种位置参数,引用的变量必须在作用于内,并且是可见的。
fn main() {
    let (first, second, third, tourth) = (1, 2, 3, 4);
    let result = first+second+third+tourth;
    println!("{first} + {second} + {third} + {tourth} = {result}");
}
命名参数
print!/println!宏内也可以使用命名参数。语法是name=value。这个参数可以在格式化字符串中的占位符中使用。
fn main() {
    let (first, second, third, tourth) = (1, 2, 3, 4);
    println!("{first} + {second} + {third} + {tourth} = {result}",result = first+second+third+tourth);
}
填充、对齐和精度
在格式化字符串中,你可以控制占位符的填充、对齐方式和数字精度。只需要在占位符后的冒号处添加格式规范即可调整对应的属性,比如{:format}。
你可以使用{:width}来设置占位符的填充和列宽。
在列中的对齐方式:
- 数字值默认是右对齐
- 字符串默认是左对齐
你可以使用以下特殊字符重写这些默认的对齐方式: >: 右对齐<: 左对齐^: 居中对齐
fn main() {
    let numbers = [("one", 10), ("two", 2000), ("three", 400)];
    println!("{:7}{:10}","Text", "Value");
    println!("{:7}{:10}","====", "====");
    for (k, v) in numbers {
        println!("{:7}{:<10}",k, v);
    }
}
对于浮点数,你可以在占位符{}中添加精度,用以控制小数点后显示的位数(并非四舍五入)。语法是padding.precision。如果没有填充宽度设置,直接使用.precision即可。需要注意的是,对于整型,precision参数会被忽略。
fn main() {
    let (float1,float2) = (3.14159,1.2);
    println!("Result: {:<10.3}{:<10.2}", float1,float2);
}
你可以使用$字符参数化精度或宽度。
基本写法
fn main() {
    let int = 43;
    let float = 3.14159;
    println!("{:5}",int);
    println!("{:.3}",float);
}
这里5和3是写死的。
参数化宽度/精度(用$)
fn main() {
    let width = 10;
    let precision = 5;
    let float = 3.1415926;
    println!("Result: {:width$.precision$}",float);
}
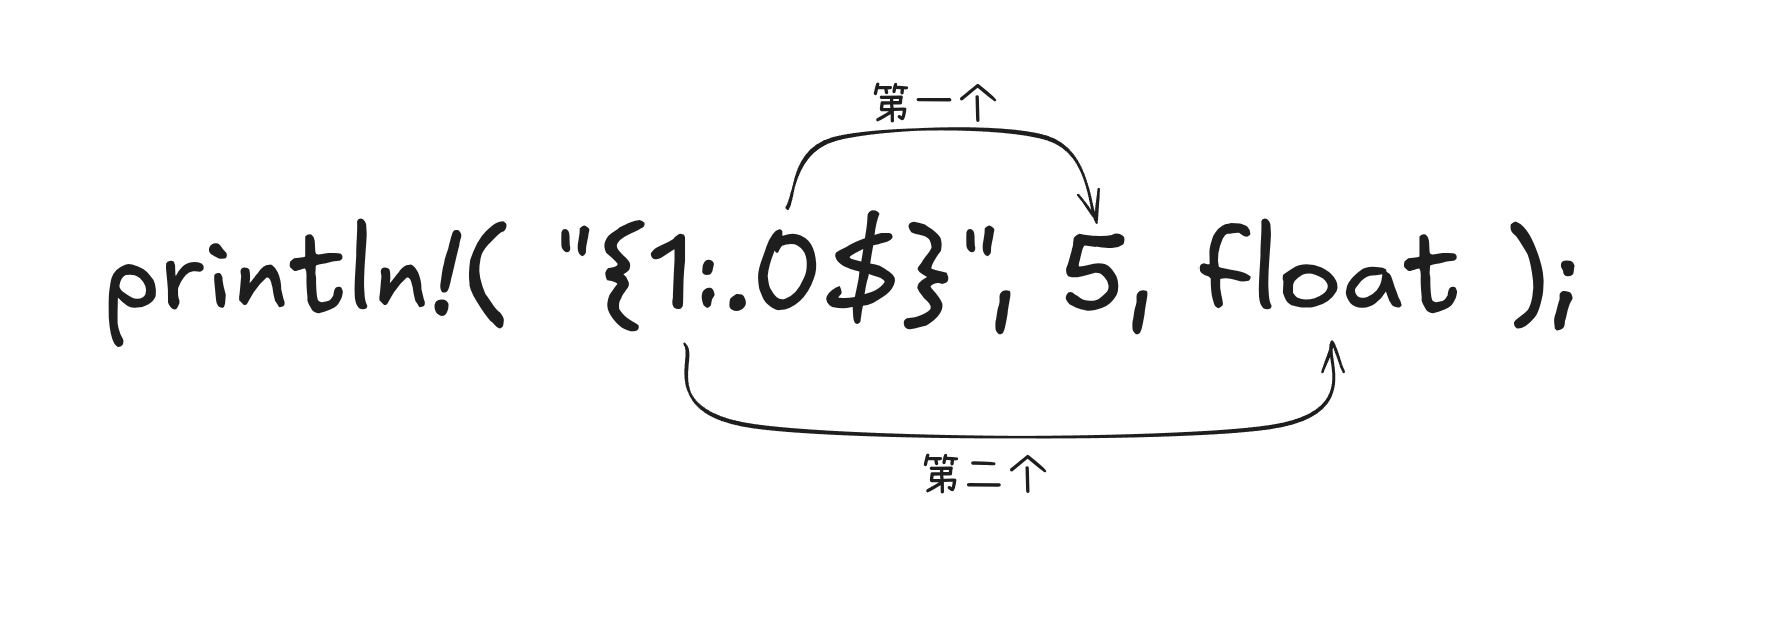
也可以和位置参数配合使用
fn main() {
    let float = 3.1415926;
    println!("{1:.0$}", 5,float);
}
如图
相应的,填充也可以参数化,这里不做过多演示。
进制
在print!/println!宏中,数值默认是以10进制表示的,如果你想使用其他进制,可以使用相关的字母标识符。
fn main() {
    println!("{:b}",42); //二进制
    println!("{:o}", 42); //八进制
    println!("{}", 42); //十进制(默认)
    println!("{:x}", 42); //十六进制(小写)
    println!("{:X}", 42); // 十六进制(大写)
}
开发者友好
在使用println!/print!宏时,
- 对于已经实现了Display trait的类型,用
{}占位符 - 对于已经实现了Debug trait的类型,用
{:?}占位符
这种区分是站在用户友好性的角度考虑,{:?}格式通常注重开发者视角。
- 对于标准库中的原生类型同时实现了Display和Debug这两个trait
- 但对于某些复杂类型,如数组和向量,只实现了Debug这个trait
fn main() {
    let vec = vec![1,2,3,4,5];
    println!("{:?}",vec);
}
- 而用户自定义的类型通常不会自动实现Display或Debug这两个trait,不过可以使用派生(derive)属性为自定义类型添加Debug的默认实现,之后在println!/print!宏调用时,可以使用{:?}占位符来输出
#[derive(Debug)]
struct Person<'a> {
    name: &'a str,
    age: i32,
}

fn main() {
    let person = Person {name: "张三", age: 43};
    println!("{:?}",person);
}
Rust还提供了{:#?}占位符,可以实现更优雅地输出。
#[derive(Debug)]
struct Person<'a> {
    name: &'a str,
    age: i32,
}

fn main() {
    let person = Person {name: "张三", age: 43};
    println!("{:#?}",person);
}


 2105
2105

 被折叠的 条评论
为什么被折叠?
被折叠的 条评论
为什么被折叠?
 到【灌水乐园】发言


