


 本文详细介绍ReactNative项目从环境搭建到项目运行的全过程,包括JDK、AndroidSDK、C++环境、node.js的安装,以及react-native-cli的使用,项目初始化与运行的关键步骤。
一、安装JDK
二、安装Android SDK
三、安装C++环境
网上很多以前的资料(其实就是那一份)都说安装Visual Studio 2013或2015,编译node.js的C++模块时需要用到。这里我没安装,我的系统是win7,好像win7自带了编译C++的工具,然后之前安装过了c-free这个软件,又考虑到电脑承受能力,所以没就安装大的软件。等后面有问题了再说。事实在后面没有出现这方面的问题。
四、安装node.js
从官网下载node.js的官方4.1版本或更高版本。安装好后在命令行下执行node -v命令是否成功,成功会显示版本信息。这个本人之前已安装。
安装react-native
命令行下运行命令
npm install -g react-native-cli
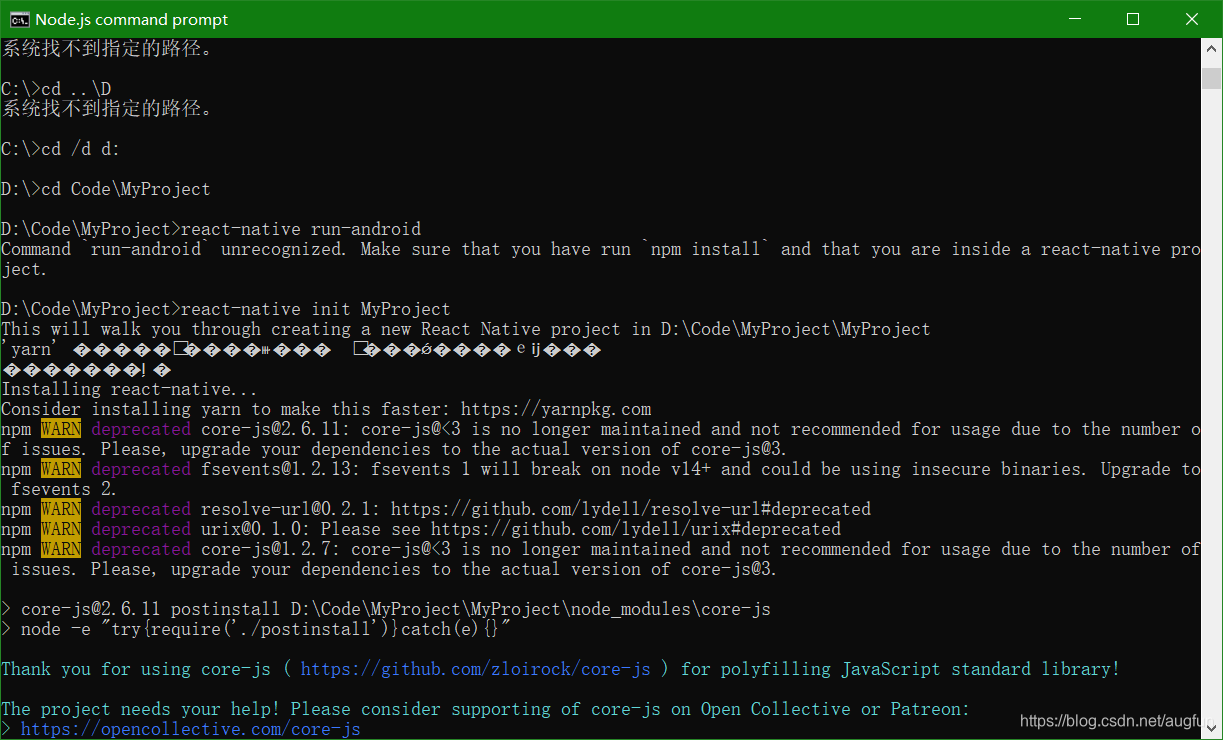
五、初始化项目
在电脑上任何一个地方创建一个目录, 例如我在E盘创建一个MyProject的目录,然后命令行下进入到MyProject目录,执行命令:
react-native init MyProject
这里需要耐心等待几分钟,使网络情况而定。这里MyProject是随便取的,执行上面的命令后,在我的MyProject目录下生成了MyProject目录,这个目录包含了整个项目的文件,初始化成功后在命令行最后会显示下面的信息
六、运行package
上面init之后,我们可以运行react-native run-android命令,如果成功的话,可以将应用安装到真机或模拟器,我这里使用的是真机。但是安装之后可能什么也显示不了,还会有一些错误信息。这是由于手机获取不到显示view的文件,那么这时候我们就需要运行package.在项目目录,输入react-native start并执行,等待一段时间:
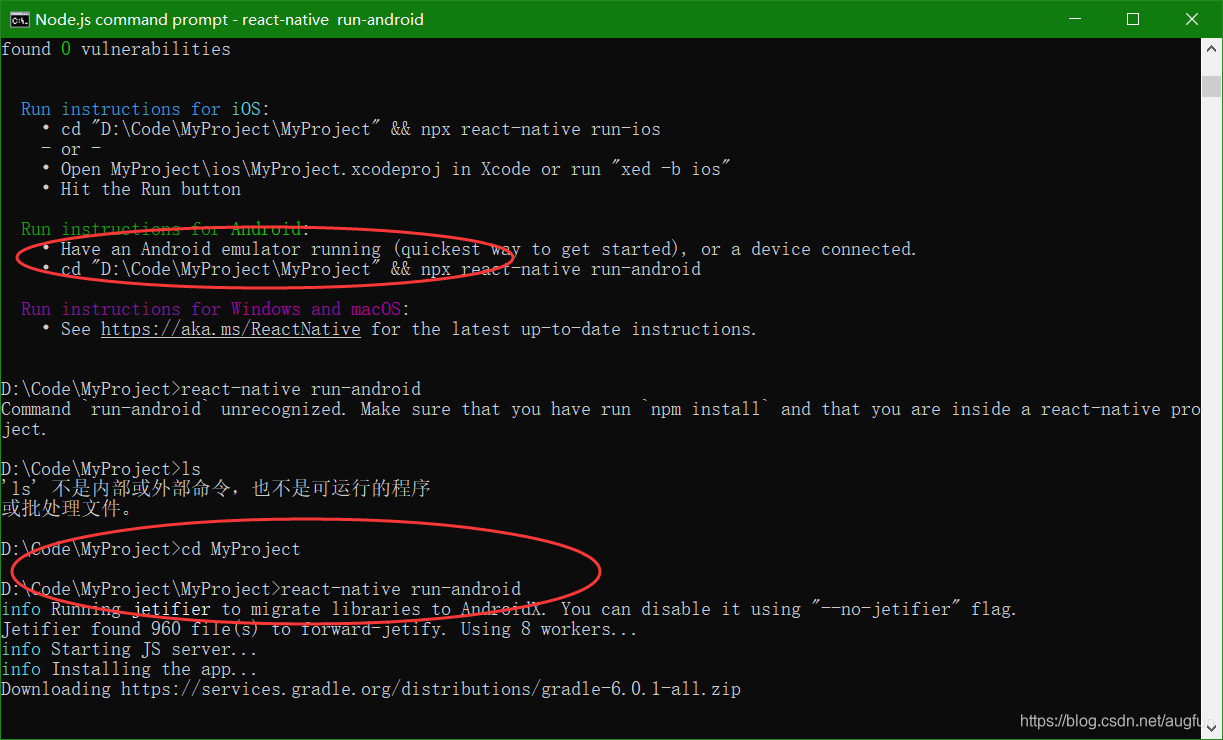
七、运行项目
刚刚运行package的命令行不要关闭,重新启动一个新的命令行,
进入项目目录,输入react-native run-android命令并执行,这个过程需要几分钟的时间
在这个过程中可能会出现一些问题,导致build失败:
1. 你没有配置ANDROID_HOME,需要再系统变量中加入这个,指到sdk目录。
2. android sdk的版本太旧了,最低需要android-23
3. 需要新的Android Support Repository
成功会显示:
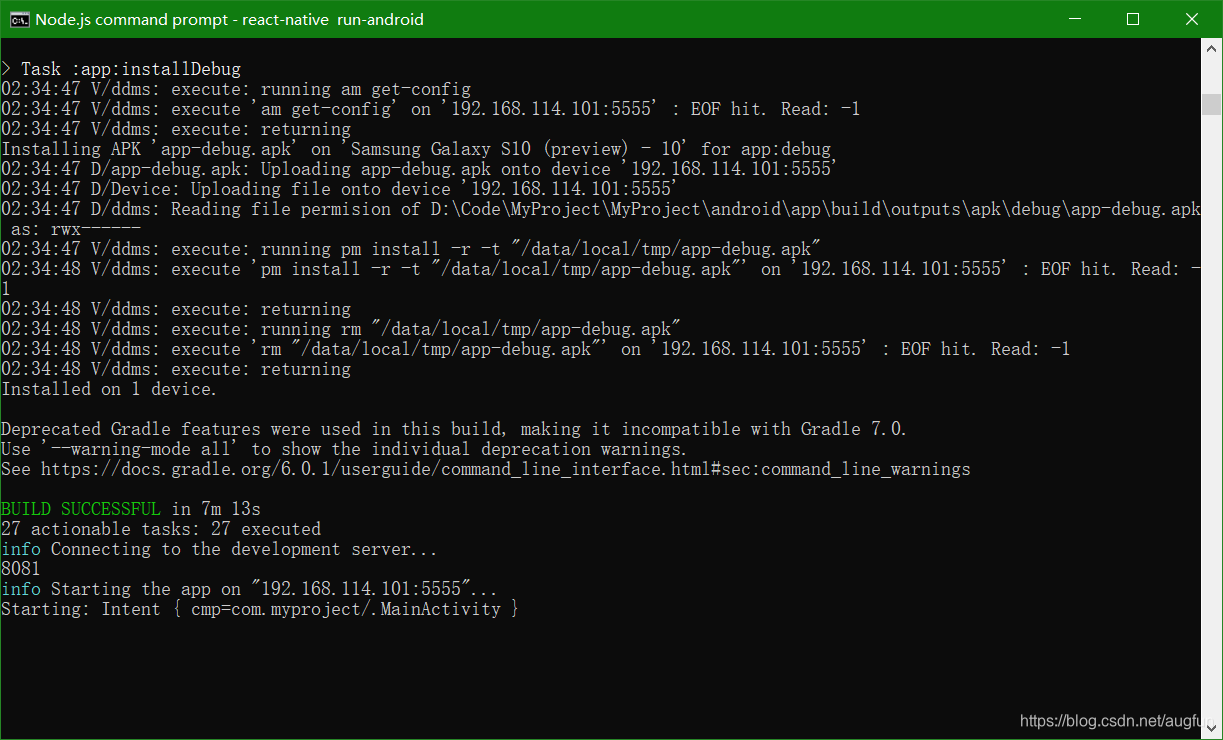
这里的IP是电脑的IP,不知道的可以在命令行中输入ipconfig进行查询,端口号固定8081。这里我们应该想到为什么需要第六步的原因。
设置完成后,回到空白页面,再次摇一摇手机,选择Reload JS,程序就运行起来,出现Welcome to React Native!

八、欢迎页
最后的稍稍分析一下欢迎也是如何显示出来的。
在项目目录MyProject目录下有个文件app.js文件,打开这个文件,会有一段代码:
/**
 * Sample React Native App
 * https://github.com/facebook/react-native
 *
 * @format
 * @flow strict-local
 */

import React from 'react';
import {
  SafeAreaView,
  StyleSheet,
  ScrollView,
  View,
  Text,
  StatusBar,
} from 'react-native';

import {
  Header,
  LearnMoreLinks,
  Colors,
  DebugInstructions,
  ReloadInstructions,
} from 'react-native/Libraries/NewAppScreen';

const App: () => React$Node = () => {
  return (
    <>
      <StatusBar barStyle="dark-content" />
      <SafeAreaView>
        <ScrollView
          contentInsetAdjustmentBehavior="automatic"
          style={styles.scrollView}>
          <Header />
          {global.HermesInternal == null ? null : (
            <View style={styles.engine}>
              <Text style={styles.footer}>Engine: Hermes</Text>
            </View>
          )}
          <View style={styles.body}>
            <View style={styles.sectionContainer}>
              <Text style={styles.sectionTitle}>Step One</Text>
              <Text style={styles.sectionDescription}>
                Edit <Text style={styles.highlight}>App.js</Text> to change this
                screen and then come back to see your edits.
              </Text>
            </View>
            <View style={styles.sectionContainer}>
              <Text style={styles.sectionTitle}>See Your Changes</Text>
              <Text style={styles.sectionDescription}>
                <ReloadInstructions />
              </Text>
            </View>
            <View style={styles.sectionContainer}>
              <Text style={styles.sectionTitle}>Debug</Text>
              <Text style={styles.sectionDescription}>
                <DebugInstructions />
              </Text>
            </View>
            <View style={styles.sectionContainer}>
              <Text style={styles.sectionTitle}>Learn More</Text>
              <Text style={styles.sectionDescription}>
                Read the docs to discover what to do next:
              </Text>
            </View>
            <LearnMoreLinks />
          </View>
        </ScrollView>
      </SafeAreaView>
    </>
  );
};

const styles = StyleSheet.create({
  scrollView: {
    backgroundColor: Colors.lighter,
  },
  engine: {
    position: 'absolute',
    right: 0,
  },
  body: {
    backgroundColor: Colors.white,
  },
  sectionContainer: {
    marginTop: 32,
    paddingHorizontal: 24,
  },
  sectionTitle: {
    fontSize: 24,
    fontWeight: '600',
    color: Colors.black,
  },
  sectionDescription: {
    marginTop: 8,
    fontSize: 18,
    fontWeight: '400',
    color: Colors.dark,
  },
  highlight: {
    fontWeight: '700',
  },
  footer: {
    color: Colors.dark,
    fontSize: 12,
    fontWeight: '600',
    padding: 4,
    paddingRight: 12,
    textAlign: 'right',
  },
});

export default App;
在android目录 app下一直找到MainActivity.java文件,里面有个方法:
package com.myproject;

import com.facebook.react.ReactActivity;

public class MainActivity extends ReactActivity {

  /**
   * Returns the name of the main component registered from JavaScript. This is used to schedule
   * rendering of the component.
   */
  @Override
  protected String getMainComponentName() {
    return "MyProject";
  }
}
EX1:
6.运行项目
上面所有的工具和依赖都安装好了之后,就可以新建一个 React Native 项目了。
react-native init hello
cd hello
react-native run-android
然后在真机就可以看到效果了。


 2万+
2万+

 被折叠的 条评论
为什么被折叠?
被折叠的 条评论
为什么被折叠?
 到【灌水乐园】发言


