


文章的目的为了记录使用java 进行android app 开发学习的经历。本职为嵌入式软件开发,公司安排开发app,临时学习,完成app的开发。开发流程和要点有些记忆模糊,赶紧记录,防止忘记。
相关链接:
开源 java android app 开发(一)开发环境的搭建-优快云博客
开源 java android app 开发(二)工程文件结构-优快云博客
开源 java android app 开发(三)GUI界面布局和常用组件-优快云博客
开源 java android app 开发(四)GUI界面重要组件-优快云博客
开源 java android app 开发(五)文件和数据库存储-优快云博客
开源 java android app 开发(六)多媒体使用-优快云博客
开源 java android app 开发(七)通讯之Tcp和Http-优快云博客
开源 java android app 开发(八)通讯之Mqtt和Ble-优快云博客
开源 java android app 开发(九)后台之线程和服务-优快云博客
开源 java android app 开发(十)广播机制-优快云博客
开源 java android app 开发(十一)调试、发布-优快云博客
开源 java android app 开发(十二)封库.aar-优快云博客
开源 java android app 开发(十三)自定义绘图控件--游戏摇杆
开源 java android app 开发(十四)自定义绘图控件--波形图
开源 java android app 开发(十五)自定义绘图控件--仪表盘
开源 java android app 开发(十六)自定义绘图控件--圆环
推荐链接:
开源C# .net mvc 开发(一)WEB搭建_c#部署web程序-优快云博客
开源 C# .net mvc 开发(二)网站快速搭建_c#网站开发-优快云博客
开源 C# .net mvc 开发(三)WEB内外网访问(VS发布、IIS配置网站、花生壳外网穿刺访问)_c# mvc 域名下不可訪問內網,內網下可以訪問域名-优快云博客
开源 C# .net mvc 开发(四)工程结构、页面提交以及显示_c#工程结构-优快云博客
开源 C# .net mvc 开发(五)常用代码快速开发_c# mvc开发-优快云博客
本章节主要内容是安卓通讯协议的使用,应用多数和网络相关,只要下载数据或上传数据,就需要用到网络通讯。通讯的内容较多,这章主要是Tcp和Http。
本章内容如下:
1.Tcp协议通讯
2.Http协议通讯
一、Tcp协议通讯
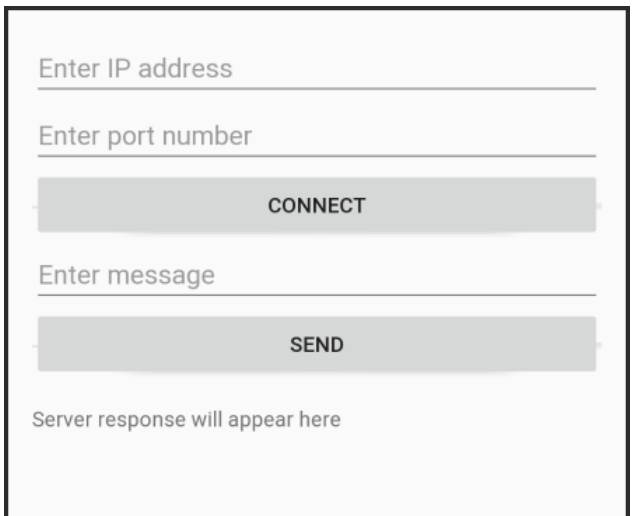
代码实现了Tcp客户端对,Tcp服务器端的访问(网络调试助手)。可以配置访问的服务器端的IP和端口号,成功连接后,可以发送数据到服务器。
1.1 添加网络权限:在 AndroidManifest.xml 中添加网络权限
<uses-permission android:name="android.permission.INTERNET" />1.2 界面 activity_main.xml:
<?xml version="1.0" encoding="utf-8"?>
<LinearLayout xmlns:android="http://schemas.android.com/apk/res/android"
    android:layout_width="match_parent"
    android:layout_height="match_parent"
    android:orientation="vertical"
    android:padding="16dp">

    <EditText
        android:id="@+id/ipEditText"
        android:layout_width="match_parent"
        android:layout_height="wrap_content"
        android:hint="Enter IP address" />

    <EditText
        android:id="@+id/portEditText"
        android:layout_width="match_parent"
        android:layout_height="wrap_content"
        android:hint="Enter port number"
        android:inputType="number" />

    <Button
        android:id="@+id/connectButton"
        android:layout_width="match_parent"
        android:layout_height="wrap_content"
        android:text="Connect" />

    <EditText
        android:id="@+id/messageEditText"
        android:layout_width="match_parent"
        android:layout_height="wrap_content"
        android:hint="Enter message" />

    <Button
        android:id="@+id/sendButton"
        android:layout_width="match_parent"
        android:layout_height="wrap_content"
        android:text="Send" />

    <TextView
        android:id="@+id/responseTextView"
        android:layout_width="match_parent"
        android:layout_height="wrap_content"
        android:text="Server response will appear here"
        android:paddingTop="16dp" />
</LinearLayout>
1.3 代码MainActivity.java
package com.example.socketclient;

import android.os.Bundle;
import android.os.Handler;
import android.os.Looper;
import android.view.View;
import android.widget.Button;
import android.widget.EditText;
import android.widget.TextView;
import androidx.appcompat.app.AppCompatActivity;
import java.io.BufferedReader;
import java.io.IOException;
import java.io.InputStreamReader;
import java.io.PrintWriter;
import java.net.Socket;

public class MainActivity extends AppCompatActivity {

    private EditText ipEditText, portEditText, messageEditText;
    private Button connectButton, sendButton;
    private TextView responseTextView;

    private Socket socket;
    private PrintWriter out;
    private BufferedReader in;
    private Handler handler = new Handler(Looper.getMainLooper());

    @Override
    protected void onCreate(Bundle savedInstanceState) {
        super.onCreate(savedInstanceState);
        setContentView(R.layout.activity_main);

        ipEditText = findViewById(R.id.ipEditText);
        portEditText = findViewById(R.id.portEditText);
        messageEditText = findViewById(R.id.messageEditText);
        connectButton = findViewById(R.id.connectButton);
        sendButton = findViewById(R.id.sendButton);
        responseTextView = findViewById(R.id.responseTextView);

        connectButton.setOnClickListener(new View.OnClickListener() {
            @Override
            public void onClick(View v) {
                connectToServer();
            }
        });

        sendButton.setOnClickListener(new View.OnClickListener() {
            @Override
            public void onClick(View v) {
                sendMessage();
            }
        });
    }

    private void connectToServer() {
        final String ip = ipEditText.getText().toString();
        final int port = Integer.parseInt(portEditText.getText().toString());

        new Thread(new Runnable() {
            @Override
            public void run() {
                try {
                    socket = new Socket(ip, port);
                    out = new PrintWriter(socket.getOutputStream(), true);
                    in = new BufferedReader(new InputStreamReader(socket.getInputStream()));

                    handler.post(new Runnable() {
                        @Override
                        public void run() {
                            responseTextView.setText("Connected to server");
                        }
                    });
                } catch (IOException e) {
                    e.printStackTrace();
                    handler.post(new Runnable() {
                        @Override
                        public void run() {
                            responseTextView.setText("Connection failed: " + e.getMessage());
                        }
                    });
                }
            }
        }).start();
    }

    private void sendMessage() {
        final String message = messageEditText.getText().toString();

        new Thread(new Runnable() {
            @Override
            public void run() {
                if (out != null) {
                    out.println(message);

                    try {
                        final String response = in.readLine();
                        handler.post(new Runnable() {
                            @Override
                            public void run() {
                                responseTextView.setText("Server response: " + response);
                            }
                        });
                    } catch (IOException e) {
                        e.printStackTrace();
                        handler.post(new Runnable() {
                            @Override
                            public void run() {
                                responseTextView.setText("Error receiving response: " + e.getMessage());
                            }
                        });
                    }
                } else {
                    handler.post(new Runnable() {
                        @Override
                        public void run() {
                            responseTextView.setText("Not connected to server");
                        }
                    });
                }
            }
        }).start();
    }

    @Override
    protected void onDestroy() {
        super.onDestroy();
        try {
            if (socket != null) {
                socket.close();
            }
        } catch (IOException e) {
            e.printStackTrace();
        }
    }
}
1.4 显示效果如下图
二、 Http访问,以下代码实现对网站的Http访问,访问中输入了用户名和密码。成功后保存cookie并跳转到指定网页。页面将打印在控制台中。
2.1 添加网络权限:在 AndroidManifest.xml 中添加网络权限。
<uses-permission android:name="android.permission.INTERNET" />2.2 使用 HTTP 客户端:Android 推荐使用 OkHttp 或 HttpURLConnection 来发送 HTTP 请求。在src文件夹的build.gradle文件中添加以下代码
dependencies {
    implementation 'com.squareup.okhttp3:okhttp:4.9.3'

}
2.3 界面 activity_main.xml:
<?xml version="1.0" encoding="utf-8"?>
<LinearLayout xmlns:android="http://schemas.android.com/apk/res/android"
    android:layout_width="match_parent"
    android:layout_height="match_parent"
    android:orientation="vertical"
    android:padding="16dp"
    android:gravity="center">


    <EditText
        android:id="@+id/test"
        android:layout_width="match_parent"
        android:layout_height="wrap_content"
        android:hint="用户名"
        android:inputType="text"/>

    <EditText
        android:id="@+id/etPassword"
        android:layout_width="match_parent"
        android:layout_height="wrap_content"
        android:hint="密码"
        android:inputType="textPassword"
        android:layout_marginTop="8dp"/>

    <Button
        android:id="@+id/btnLogin"
        android:layout_width="match_parent"
        android:layout_height="wrap_content"
        android:text="登录并保存Cookie"
        android:layout_marginTop="16dp"/>

    <Button
        android:id="@+id/btnAccessPage"
        android:layout_width="match_parent"
        android:layout_height="wrap_content"
        android:text="使用Cookie访问其他页面"
        android:layout_marginTop="8dp"/>

    <ScrollView
        android:layout_width="match_parent"
        android:layout_height="match_parent">

        <LinearLayout
            android:layout_width="match_parent"
            android:layout_height="wrap_content"
            android:orientation="vertical" >

            <TextView
                android:id="@+id/tvResult"
                android:layout_width="match_parent"
                android:layout_height="wrap_content"
                android:layout_marginTop="16dp"
                android:textSize="16sp" />
        </LinearLayout>
    </ScrollView>

</LinearLayout>
2.4 MainActivity.java
package com.example.myapplication;
import android.content.SharedPreferences;
import android.os.AsyncTask;
import android.os.Bundle;
import android.view.View;
import android.widget.Button;
import android.widget.EditText;
import android.widget.TextView;
import android.widget.Toast;

import androidx.appcompat.app.AppCompatActivity;

import java.io.BufferedReader;
import java.io.IOException;
import java.io.InputStream;
import java.io.InputStreamReader;
import java.net.HttpCookie;
import java.net.HttpURLConnection;
import java.net.URL;
import java.util.List;
import java.util.Map;

public class MainActivity extends AppCompatActivity {

    private EditText etUsername, etPassword;
    private Button btnLogin, btnAccessPage;
    private TextView tvResult;

    // 替换为你的实际登录URL和其他页面URL
    private static final String LOGIN_URL = "http://XXX/";
    private static final String OTHER_PAGE_URL = "http://XXX/Index";

    private SharedPreferences sharedPreferences;

    @Override
    protected void onCreate(Bundle savedInstanceState) {
        super.onCreate(savedInstanceState);
        setContentView(R.layout.activity_main);

        etUsername = findViewById(R.id.test);
        etPassword = findViewById(R.id.etPassword);
        btnLogin = findViewById(R.id.btnLogin);
        btnAccessPage = findViewById(R.id.btnAccessPage);
        tvResult = findViewById(R.id.tvResult);

        sharedPreferences = getSharedPreferences("MyAppPrefs", MODE_PRIVATE);

        btnLogin.setOnClickListener(v -> {
            String username = etUsername.getText().toString();
            String password = etPassword.getText().toString();

            if (username.isEmpty() || password.isEmpty()) {
                Toast.makeText(this, "请输入用户名和密码", Toast.LENGTH_SHORT).show();
                return;
            }

            new LoginTask().execute(username, password);
        });

        btnAccessPage.setOnClickListener(v -> {
            if (!sharedPreferences.contains("cookie")) {
                Toast.makeText(this, "请先登录获取Cookie", Toast.LENGTH_SHORT).show();
                return;
            }

            new AccessPageTask().execute();
        });
    }

    private class LoginTask extends AsyncTask<String, Void, String> {
        private String cookie;

        @Override
        protected String doInBackground(String... params) {
            String username = params[0];
            String password = params[1];

            try {
                URL url = new URL(LOGIN_URL);
                HttpURLConnection connection = (HttpURLConnection) url.openConnection();
                connection.setRequestMethod("POST");
                connection.setDoOutput(true);

                // 构建POST数据 (根据实际网站修改)
                String postData = "inputEmail3=" + username + "&inputPassword3=" + password;
                connection.getOutputStream().write(postData.getBytes());

                // 获取Cookie
                Map<String, List<String>> headerFields = connection.getHeaderFields();
                List<String> cookiesHeader = headerFields.get("Set-Cookie");

                if (cookiesHeader != null) {
                    for (String cookie : cookiesHeader) {
                        // 简单的Cookie处理,实际情况可能需要更复杂的解析
                        this.cookie = cookie.split(";")[0];
                        break;
                    }
                }

                // 读取响应
                InputStream inputStream = connection.getInputStream();
                BufferedReader reader = new BufferedReader(new InputStreamReader(inputStream));
                StringBuilder response = new StringBuilder();
                String line;

                while ((line = reader.readLine()) != null) {
                    response.append(line);
                }

                return response.toString();
            } catch (IOException e) {
                e.printStackTrace();
                return "登录失败: " + e.getMessage();
            }
        }

        @Override
        protected void onPostExecute(String result) {
            if (cookie != null && !cookie.isEmpty()) {
                // 保存Cookie到SharedPreferences
                SharedPreferences.Editor editor = sharedPreferences.edit();
                editor.putString("cookie", cookie);
                editor.apply();

                tvResult.setText("登录成功! Cookie已保存\n响应: " + result);
            } else {
                tvResult.setText("登录失败,未获取到Cookie\n响应: " + result);
            }
        }
    }

    private class AccessPageTask extends AsyncTask<Void, Void, String> {
        @Override
        protected String doInBackground(Void... voids) {
            String savedCookie = sharedPreferences.getString("cookie", "");

            try {
                URL url = new URL(OTHER_PAGE_URL);
                HttpURLConnection connection = (HttpURLConnection) url.openConnection();
                connection.setRequestMethod("GET");

                // 设置保存的Cookie
                connection.setRequestProperty("Cookie", savedCookie);

                // 读取响应
                InputStream inputStream = connection.getInputStream();
                BufferedReader reader = new BufferedReader(new InputStreamReader(inputStream));
                StringBuilder response = new StringBuilder();
                String line;

                while ((line = reader.readLine()) != null) {
                    response.append(line);
                }

                return response.toString();
            } catch (IOException e) {
                e.printStackTrace();
                return "访问页面失败: " + e.getMessage();
            }
        }

        @Override
        protected void onPostExecute(String result) {
            tvResult.setText("使用Cookie访问页面结果:\n" + result);
        }
    }
}
2.5 调试时报错MainActivity: 登录请求失败: CLEARTEXT communication to XXX.com not permitted by network security policy
在Android开发中,如果你遇到“CLEARTEXT communication to [host] not permitted by network security policy”错误,这意味着你的应用尝试使用HTTP(而不是HTTPS)与服务器通信,而Android的网络安全性配置默认不允许明文(HTTP)通信。
如果你暂时无法使用HTTPS,可以通过修改应用的网络安全配置来允许明文通信。不过,这种方法不推荐用于生产环境,因为它会降低应用的安全性。
在res/xml目录下创建一个network_security_config.xml文件,内容如下:
<?xml version="1.0" encoding="utf-8"?>
<network-security-config>
    <domain-config cleartextTrafficPermitted="true">
        <domain includeSubdomains="true">40977f53b4.qicp.vip</domain>
    </domain-config>
</network-security-config>然后在AndroidManifest.xml文件中引用这个配置文件:
<application
    android:networkSecurityConfig="@xml/network_security_config"
    ... >
    ...
</application>
2.6 调试结果,登录成功并跳转。控制台打印2个页面,第1个是登录页面,第2个是目标页面。


 969
969

 被折叠的 条评论
为什么被折叠?
被折叠的 条评论
为什么被折叠?
 到【灌水乐园】发言


