


 本文介绍了在使用Flutter打包APP Bundle时遇到版本号冲突的问题及解决方案。当尝试上传版本1.0.0+1到GooglePlay时,由于版本号已被使用,故提示错误。解决办法是修改`pubspec.yaml`文件中的versionCode,将其值增加,例如改为1.0.0+2,然后重新打包上传即可成功。
出现场景
使用flutter build appbundle打包aab时
因为上个版本是第一个默认版本1.0.0。所以这次打包我们在版本名后面加了1。
name: flutter_demo
description: A new Flutter application for Flutter demo

# The following line prevents the package from being accidentally published to
# pub.dev using `pub publish`. This is preferred for private packages.
publish_to: 'none' # Remove this line if you wish to publish to pub.dev

# The following defines the version and build number for your application.
# A version number is three numbers separated by dots, like 1.2.43
# followed by an optional build number separated by a +.
# Both the version and the builder number may be overridden in flutter
# build by specifying --build-name and --build-number, respectively.
# In Android, build-name is used as versionName while build-number used as versionCode.
# Read more about Android versioning at https://developer.android.com/studio/publish/versioning
# In iOS, build-name is used as CFBundleShortVersionString while build-number used as CFBundleVersion.
# Read more about iOS versioning at
# https://developer.apple.com/library/archive/documentation/General/Reference/InfoPlistKeyReference/Articles/CoreFoundationKeys.html
version: 1.0.0+1
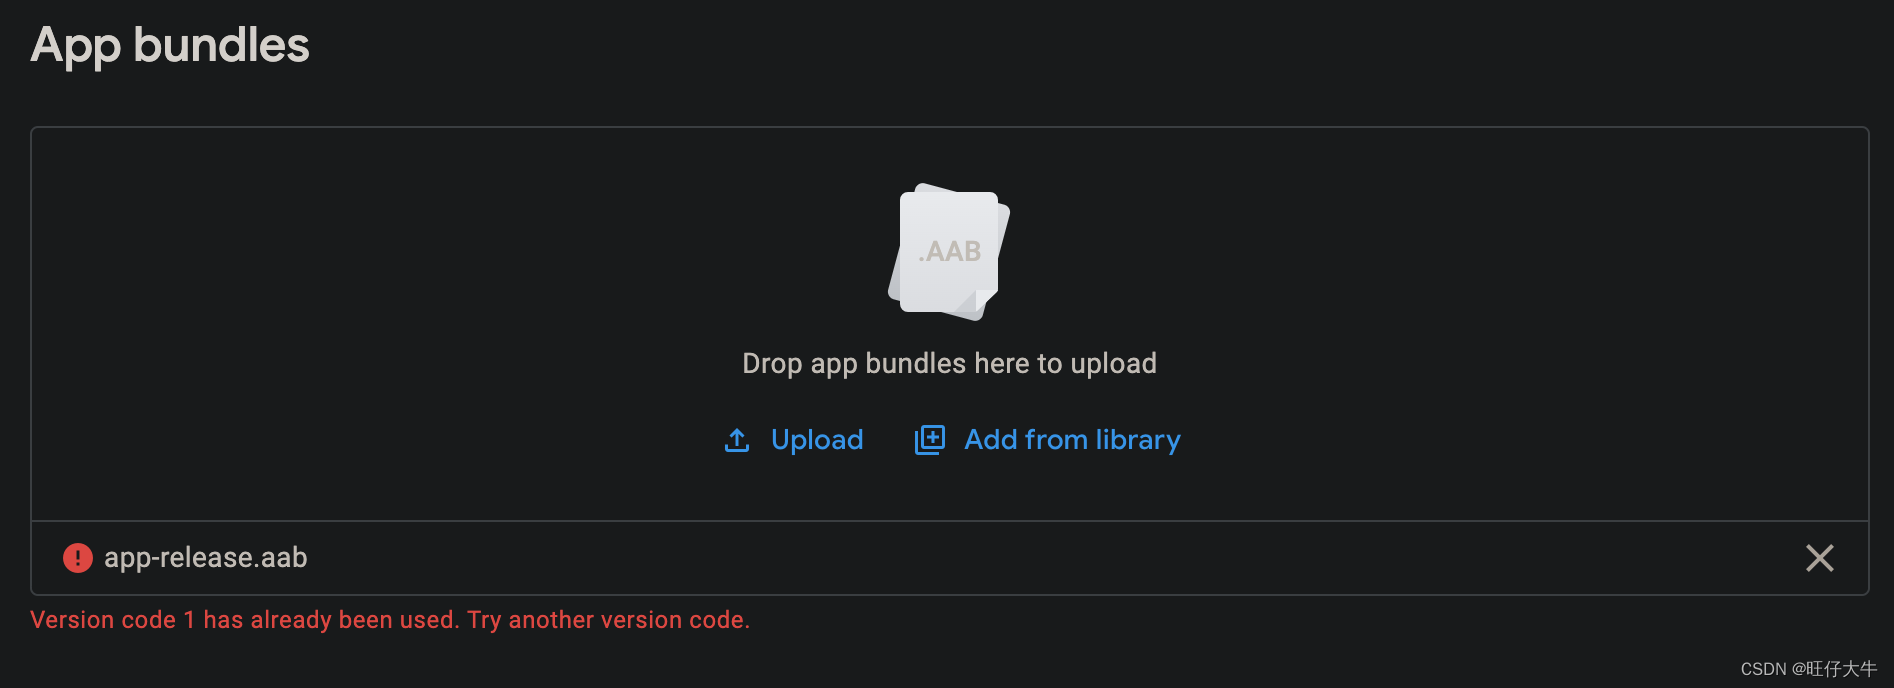
上传到Google Play,提示以下错误信息。
Version code 1 has already been used. Try another version code.
原因分析
首先我们得搞清楚Flutter中的版本是如何管理的。
Flutter打包的版本名和版本号默认是从pubspec.yaml中的version读取的。我们只需要更新它的值就可以了。
格式为
version:A.B.C+X
对于Android的版本来说,版本号的管理在app/build.gradle中配置。
android{
    defaultConfig {
        // TODO: Specify your own unique Application ID (https://developer.android.com/studio/build/application-id.html).
        applicationId "com.exmaple.demo"
        minSdkVersion 21
        targetSdkVersion 31
        versionCode flutterVersionCode.toInteger()
        versionName flutterVersionName
    }
}
A.B.C代表了verisonName,比如默认初始值为1.0.0.
X代表versionCode,默认值从1开始,依次累加。
默认App的versionName为1.0.0,versionCode为1。
解决方案
因为对于默认的versionName来说,后面不加上versionCode,versionCode就会默认为1.所以1.0.0和1.0.0+1是没有任何区别的。
我们只需要在versionCode后面加上更大的数字即可。比如+2.
name: flutter_demo
description: A new Flutter application for Flutter demo

# The following line prevents the package from being accidentally published to
# pub.dev using `pub publish`. This is preferred for private packages.
publish_to: 'none' # Remove this line if you wish to publish to pub.dev

# The following defines the version and build number for your application.
# A version number is three numbers separated by dots, like 1.2.43
# followed by an optional build number separated by a +.
# Both the version and the builder number may be overridden in flutter
# build by specifying --build-name and --build-number, respectively.
# In Android, build-name is used as versionName while build-number used as versionCode.
# Read more about Android versioning at https://developer.android.com/studio/publish/versioning
# In iOS, build-name is used as CFBundleShortVersionString while build-number used as CFBundleVersion.
# Read more about iOS versioning at
# https://developer.apple.com/library/archive/documentation/General/Reference/InfoPlistKeyReference/Articles/CoreFoundationKeys.html
# 1更改为2
version: 1.0.0+2
重新打包后上传,就能成功上传到Google Play了。


 1735
1735

 被折叠的 条评论
为什么被折叠?
被折叠的 条评论
为什么被折叠?
 到【灌水乐园】发言


