一、背景
Butterknife 作为一款几乎每一个Android开发都会用到的常用开源组件,可以绑定android视图和事件回调到字段和方法,它通过使用注解处理并生成模版代码,为你绑定android视图中到字段和方法。如此有用到第三方开源组件,我们有必要去了解它到实现流程。
二、原理解析
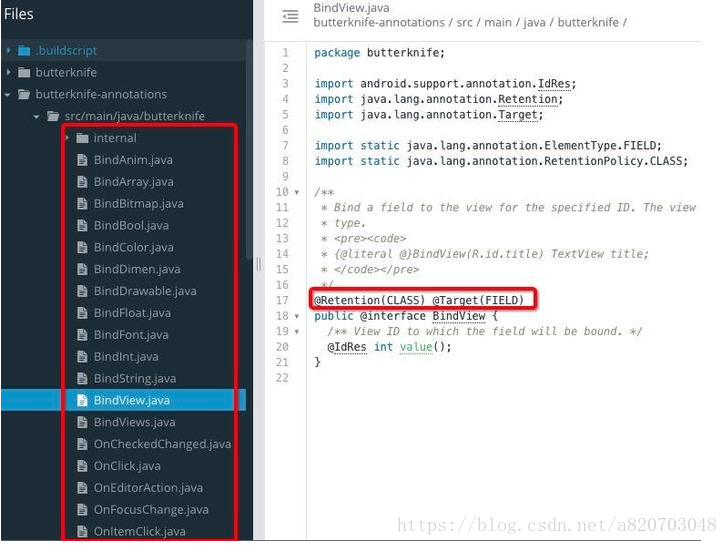
这里我们来看常用的注解BindView
@Retention(Class)表明@BindView采用的是编译时注解
@Target(FIELD)则表明它应用于成员变量
接下来我们写一个很简单的例子,后面将会用到此代码
public class HelloActivity extends Activity {@BindView (R.id.tv_hello)
TextView mHelloTv;
@Override
protected void onCreate (@Nullable Bundle savedInstanceState) {
super .onCreate(savedInstanceState);
setContentView(R.layout.activity_hello);
ButterKnife.bind(this );
}
}butterknife的原理主要分为三个部分来介绍,主要为:注解生成模板代码分析、butterknife.bind()方法分析、生成的模板类代码分析。butterknife注册的注解器为ButterKnifeProcessor,源码在在butterknife-compiler工程下
@AutoService (Processor.class)
public final class ButterKnifeProcessor extends AbstractProcessor {@Override public boolean process (Set<? extends TypeElement> elements, RoundEnvironment env) {
Map<TypeElement, BindingSet> bindingMap = findAndParseTargets(env);
for (Map.Entry<TypeElement, BindingSet> entry : bindingMap.entrySet()) {
TypeElement typeElement = entry.getKey();
BindingSet binding = entry.getValue();
JavaFile javaFile = binding.brewJava(sdk, debuggable);
try {
javaFile.writeTo(filer);
} catch (IOException e) {
error(typeElement, "Unable to write binding for type %s: %s" , typeElement, e.getMessage());
}
}
return false ;
}
...
}先来看注释1处调用的findAndParseTargets方法,顾名思义此方法为查找并解析目标注解,源码如下:
private Map<TypeElement, BindingSet> findAndParseTargets (RoundEnvironment env) {
Map<TypeElement, BindingSet.Builder> builderMap = new LinkedHashMap<>();
Set<TypeElement> erasedTargetNames = new LinkedHashSet<>();
scanForRClasses(env);
...
for (Element element : env.getElementsAnnotatedWith(BindView.class)) {
try {
parseBindView(element, builderMap, erasedTargetNames);
} catch (Exception e) {
logParsingError(element, BindView.class, e);
}
}
...
return bindingMap;
}接着查看注释2处parseBindView方法:
private void parseBindView (Element element, Map<TypeElement, BindingSet.Builder> builderMap,
Set<TypeElement> erasedTargetNames) {
TypeElement enclosingElement = (TypeElement) element.getEnclosingElement();
...
String name = element.getSimpleName().toString();
int [] ids = element.getAnnotation(BindViews.class).value ();
BindingSet.Builder builder = getOrCreateBindingBuilder(builderMap, enclosingElement);
builder.addFieldCollection(new FieldCollectionViewBinding(name, type, kind, idVars, required));
}来看注释3处,如下:
private BindingSet.Builder getOrCreateBindingBuilder (
Map<TypeElement, BindingSet.Builder> builderMap, TypeElement enclosingElement) {
BindingSet.Builder builder = builderMap.get (enclosingElement);
if (builder == null ) {
builder = BindingSet.newBuilder(enclosingElement);
builderMap.put(enclosingElement, builder);
}
return builder;
}顾名思义获取或创建BindingBuilder,从builderMap中获取BindingSet.Builder如果有则return, 如果没有则创建并放入Map缓存中。那么BindingSet.Builder存储的是什么的?接下来我们看注释4处builder对象的创建,如下:
static Builder newBuilder(TypeElement enclosingElement) {
TypeMirror typeMirror = enclosingElement.asType ()
boolean isView = isSubtypeOfType(typeMirror, VIEW_TYPE)
boolean isActivity = isSubtypeOfType(typeMirror, ACTIVITY_TYPE)
boolean isDialog = isSubtypeOfType(typeMirror, DIALOG_TYPE)
TypeName targetType = TypeName.get (typeMirror)
if (targetType instanceof ParameterizedTypeName) {
targetType = ((ParameterizedTypeName) targetType).rawType
}
String packageName = getPackage(enclosingElement).getQualifiedName ().toString ()
String className = enclosingElement.getQualifiedName ().toString ().substring (
packageName.length () + 1 ).replace ('.' , '$' )
ClassName bindingClassName = ClassName.get (packageName, className + "_ViewBinding" )
boolean isFinal = enclosingElement.getModifiers ().contains (Modifier.FINAL )
return new Builder(targetType, bindingClassName, isFinal, isView, isActivity, isDialog)
}里面可以看到实际上它是创建了一个BindingSet对象。而这个BindingSet对象里面存储着生成类的名称以及注解类名称等。
接下来findAndParseTargets会把此BindingSet对象返回来,到ButterKnifeProcessor类的process方法, 重新贴一下代码:
@AutoService (Processor.class)
public final class ButterKnifeProcessor extends AbstractProcessor {@Override public boolean process (Set<? extends TypeElement> elements, RoundEnvironment env) {
Map<TypeElement, BindingSet> bindingMap = findAndParseTargets(env);
for (Map.Entry<TypeElement, BindingSet> entry : bindingMap.entrySet()) {
TypeElement typeElement = entry.getKey();
BindingSet binding = entry.getValue();
JavaFile javaFile = binding.brewJava(sdk, debuggable);
try {
javaFile.writeTo(filer);
} catch (IOException e) {
error(typeElement, "Unable to write binding for type %s: %s" , typeElement, e.getMessage());
}
}
return false ;
}
...
}注释8获取到了上面生成的BindingSet对象。
JavaFile javaFile = binding.brewJava (sdk, debuggable)
javaFile.writeTo (filer)这两行代码为javapoet的范畴,其功能根据返回的binding对象配置信息生成我们需要用到的模板类代码,到此第一部分注解生成模板代码的源码就分析完了。
butterknife.bind()
来看butterknife工程下butterknife包下的ButterKnife.java类bind方法。
public static Unbinder bind (@NonNull Activity target) {
View sourceView = target.getWindow().getDecorView();
return createBinding(target, sourceView);
}
此方法有很多重载的方法, 这里我们只看绑定activity场景的重载方法。获取到activity中的decorview,将activity和decorview传入createBinding()方法。
private static Unbinder createBinding(@NonNull Object target, @NonNull View source) {
Class <?><? extends Unbinder > constructor = findBindingConstructorForClass (targetClass );//1
if (constructor == null ) {
return Unbinder.EMPTY ;
}
try {
return constructor.newInstance(target, source);
...
}
注释1 进入findBindingConstructorForClass并传入了activity为参数,方法如下:
private static Constructor<? extends Unbinder> findBindingConstructorForClass(Class <?><? extends Unbinder > bindingCtor = BINDINGS .get (cls );//4
if (bindingCtor != null ) {
if (debug) Log.d(TAG, "HIT: Cached in binding map." );
return bindingCtor;
}
String clsName = cls.getName();
if (clsName.startsWith("android." ) || clsName.startsWith("java." )) {
if (debug) Log.d(TAG, "MISS: Reached framework class. Abandoning search." );
return null ;
}
try {
Class <?><? extends Unbinder >) bindingClass .getConstructor (cls , View .class );
if (debug ) Log .d (TAG , "HIT : Loaded binding class and constructor .");
} catch (ClassNotFoundException e ) {
if (debug) Log.d(TAG, "Not found. Trying superclass " + cls.getSuperclass().getName());
bindingCtor = findBindingConstructorForClass(cls.getSuperclass());
} catch (NoSuchMethodException e) {
throw new RuntimeException("Unable to find binding constructor for " + clsName, e);
}
BINDINGS.put(cls, bindingCtor);
return bindingCtor;
}先来看注释2处通过类加载器加载模板类,然后获取到它的构造方法,此处用到了反射会对性能有一定影响,为了优化性能看注解3会把构造方法加入到缓存map中,而注释4也就是方法开始的地方会对缓存做判断,如果有数据的话就直接返回了。createBinding ()方法 注释5处根据构造器创建xx_ViewBinding模板类对象,我们例子里面的模板类ming成为“HelloActivity_ViewBinding”。
板类代码分析
接下来看HelloActivity_ViewBinding类,代码如下:
public class HelloActivity_ViewBinding implements Unbinder {private HelloActivity target;
@UiThread
public HelloActivity_ViewBinding (HelloActivity target) {
this (target, target.getWindow().getDecorView());
}
@UiThread
public HelloActivity_ViewBinding (HelloActivity target, View source) {
this .target = target;
target.mHelloTv = Utils.findRequiredViewAsType(source, R.id.tv_hello, "field 'mHelloTv'" , TextView.class);
}
@Override
@CallSuper
public void unbind () {
HelloActivity target = this .target;
if (target == null ) throw new IllegalStateException("Bindings already cleared." );
this .target = null ;
target.mHelloTv = null ;
}
}
接下来进入注释1 findRequiredViewAsType方法
public static <T> T findRequiredViewAsType (View source, @IdRes int id, String who,
Class<T> cls) {
View view = findRequiredView(source, id, who);
return castView(view, id, who, cls);
}继续看注释2
public static View findRequiredView(View source , @IdRes int id, String who) {
View view = source.findViewById(id);
if (view != null) {
return view;
}
String name = getResourceEntryName(source , id);
...
}
此处看到了我们熟悉的View view = source.findViewById(id);。
注释3return castView(view, id, who, cls); 此处将view强制转型为cls类型。cls类型也就是下面的TextView.class。
target.mHelloTv = Utils.findRequiredViewAsType(source, R.id.tv_hello, “field ‘mHelloTv’”, TextView.class);此处的TextView.class。
将mHelloTv赋值给,target(也就是HelloActivity)。
至此我们的原理简单的分析完了。
哈哈,断断续续几个小时的时间又重新温习了一下butterknife原理。


 本文详细解析Butterknife的工作原理,包括注解处理、模板代码生成及运行时绑定过程。


 2412
2412

 被折叠的 条评论
为什么被折叠?
被折叠的 条评论
为什么被折叠?
 到【灌水乐园】发言


