


 本文介绍了一个iOS应用中使用UISlider控制图片缩放及显示进度的实现方法,通过滑动事件监听更新图片大小和显示百分比。
图片展示效果如下:
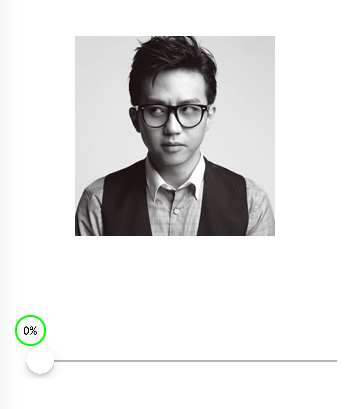
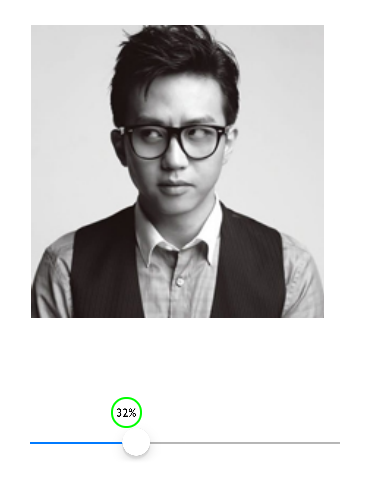
其他没什么好说的,直接上代码:
RootView.h:
1 #import <UIKit/UIKit.h>
2
3 @interface RootView : UIView
4 @property (nonatomic, strong) UISlider *slider;
5 @property (nonatomic, strong) UILabel *label;
6 @property (nonatomic, strong) UIImageView *imageView;
7
8 @end
RootView.m:
 1 #import "RootView.h"
 2
 3 @implementation RootView
 4
 5 - (instancetype)initWithFrame:(CGRect)frame {
 6     if (self = [super initWithFrame:frame]) {
 7         // 添加子视图
 8         [self add];
 9     }
10     return self;
11 }
12
13
14 // 添加子视图
15 - (void)add {
16
17     // 添加slider
18     self.slider = [[UISlider alloc] initWithFrame:CGRectMake(50, 500, self.frame.size.width - 50 * 2, 50)];
19     self.slider.minimumValue = 0.0;
20     self.slider.maximumValue = 100.0;
21     [self addSubview:self.slider];
22
23     // 添加label
24     self.label = [[UILabel alloc] init];
25     self.label.textAlignment = NSTextAlignmentCenter;
26     self.label.layer.cornerRadius = 15;
27     self.label.layer.borderWidth = 2;
28     self.label.layer.borderColor = [UIColor greenColor].CGColor;
29     self.label.font = [UIFont fontWithName:@"Gill Sans" size:12];
30     [self addSubview:self.label];
31
32     // 添加图片
33     self.imageView = [[UIImageView alloc] initWithFrame:CGRectMake(100, 200, 200, 200)];
34     self.imageView.image = [UIImage imageNamed:@"u=347478478,461363313&fm=11&gp=0.jpg"];
35     [self addSubview:self.imageView];
36
37 }
38
39 @end
RootViewController.m:
 1 #import "RootViewController.h"
 2 #import "RootView.h"
 3
 4 @interface RootViewController ()
 5 @property (nonatomic, strong) RootView *rootView;
 6
 7 @end
 8
 9 @implementation RootViewController
10
11 - (void)loadView {
12     self.rootView = [[RootView alloc] initWithFrame:[UIScreen mainScreen].bounds];
13     self.view = self.rootView;
14 }
15
16
17 - (void)viewDidLoad {
18     [super viewDidLoad];
19
20     // 为slider添加一个滑动事件(注意添加的事件是改变数据的事件UIControlEventValueChanged)
21     [self.rootView.slider addTarget:self action:@selector(slding:) forControlEvents:UIControlEventValueChanged];
22 }
23
24 #pragma mark - 实现滑动事件
25 - (void)slding:(UISlider *)sender {
26
27     // 1.实现滑动显示进度(百分比)
28     // 创建一个图片控制器,并且获取slider控件的某一个子控件(就是进度条的滑块,位置是2)
29     UIImageView *imageView = [self.rootView.slider.subviews objectAtIndex:2];
30     // 获取滑块在父视图上的位置
31     CGRect nowRect = [self.rootView convertRect:imageView.frame fromView:imageView.superview];
32     // 根据滑块的位置来设置label的位置
33     self.rootView.label.frame = CGRectMake(nowRect.origin.x - 10, nowRect.origin.y - 30, nowRect.size.width, nowRect.size.height);
34     // 定义一个NSInteger类型的变量来接收滑块当前滑动到的位置
35     NSInteger x = self.rootView.slider.value;
36     // 在label上显示滑块的位置
37     self.rootView.label.text = [NSString stringWithFormat:@"%ld%%",x];
38
39
40     // 2.实现图片缩放
41     // 创建一个图片控制器,并且获取slider控件的某一个子控件(就是进度条的滑块,位置是2)
42     UIImageView *imageView1 = [self.rootView.slider.subviews objectAtIndex:2];
43     // 获取滑块在父视图上的位置
44     CGRect imageRect = [self.rootView convertRect:imageView1.frame fromView:imageView.superview];
45     // 重新设置图片的frame
46     self.rootView.imageView.frame = CGRectMake(100 - (imageRect.origin.x - 50) / 2, 200 - (imageRect.origin.x - 50) / 2, 200 + imageRect.origin.x - 50, 200 + imageRect.origin.x - 50);
47 }
48
49
50 - (void)didReceiveMemoryWarning {
51     [super didReceiveMemoryWarning];
52     // Dispose of any resources that can be recreated.
53 }
54
55 @end


 6469
6469

 被折叠的 条评论
为什么被折叠?
被折叠的 条评论
为什么被折叠?
 到【灌水乐园】发言


