


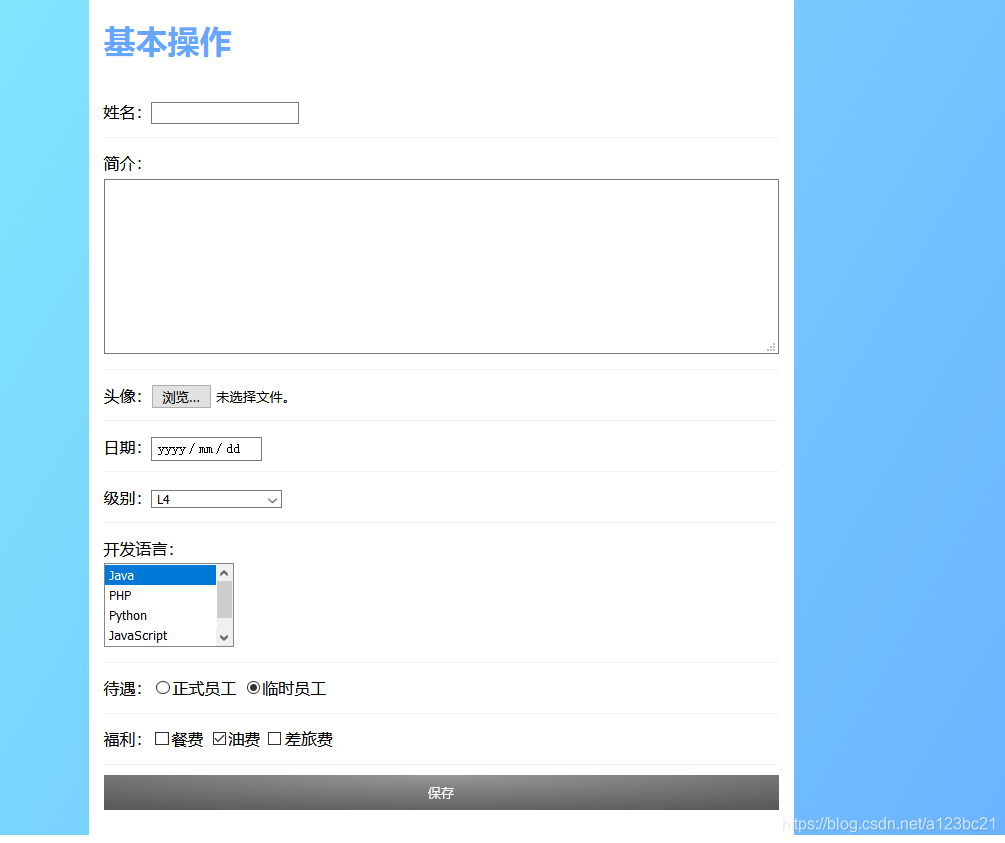
一、整体
1)地址:
http://www.euqaz.com/selenium/oper.html
源代码:
from selenium import webdriver
from selenium.webdriver.support.ui import Select #导入多选项的语法
driver = webdriver.Firefox()
from time import sleep
#跳转页面
driver.get("http://www.euqaz.com/selenium/oper.html")
sleep(2)
#输入动作
#基本操作(姓名)
driver.find_element_by_id("inputusername").send_keys("liehhhhh")
#personalInfor ='''555henh很好很好很好很好'''
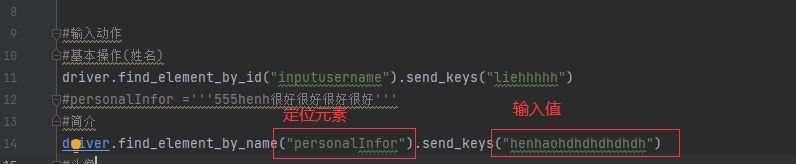
#简介
driver.find_element_by_name("personalInfor").send_keys("henhaohdhdhdhdhdh")
#头像
#driver.find_element_by_class_name("picfile").send_keys('E:\\ceshi')
#日期
driver.find_element_by_id("datetime").send_keys("2021\t0527")
#选择动作
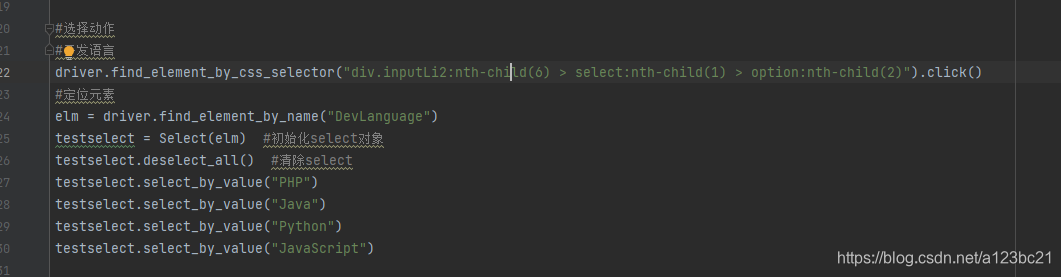
#开发语言
driver.find_element_by_css_selector("div.inputLi2:nth-child(6) > select:nth-child(1) > option:nth-child(2)").click()
#定位元素
elm = driver.find_element_by_name("DevLanguage")
testselect = Select(elm) #初始化select对象
testselect.deselect_all() #清除select
testselect.select_by_value("PHP")
testselect.select_by_value("Java")
testselect.select_by_value("Python")
testselect.select_by_value("JavaScript")
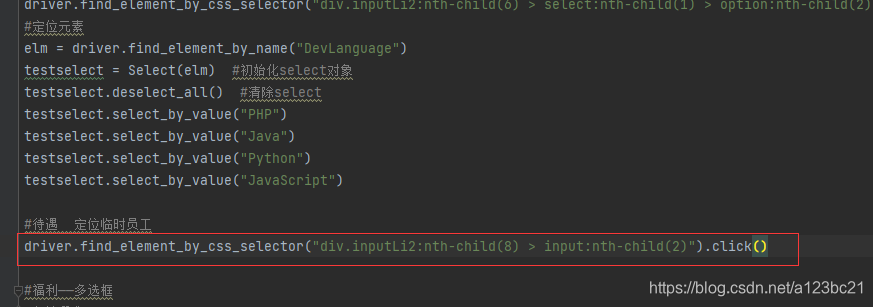
#待遇 定位临时员工
driver.find_element_by_css_selector("div.inputLi2:nth-child(8) > input:nth-child(2)").click()
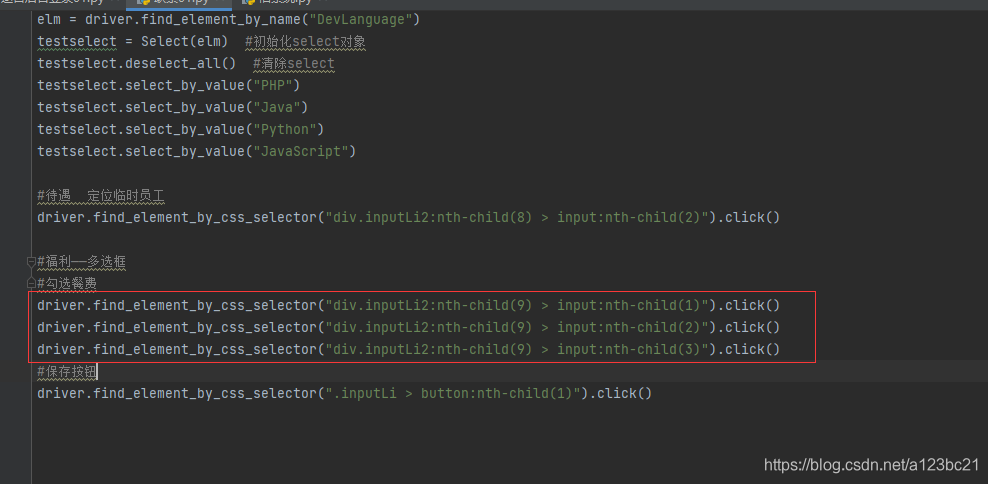
#福利——多选框
#勾选餐费
driver.find_element_by_css_selector("div.inputLi2:nth-child(9) > input:nth-child(1)").click()
driver.find_element_by_css_selector("div.inputLi2:nth-child(9) > input:nth-child(2)").click()
driver.find_element_by_css_selector("div.inputLi2:nth-child(9) > input:nth-child(3)").click()
#保存按钮
driver.find_element_by_css_selector(".inputLi > button:nth-child(1)").click()
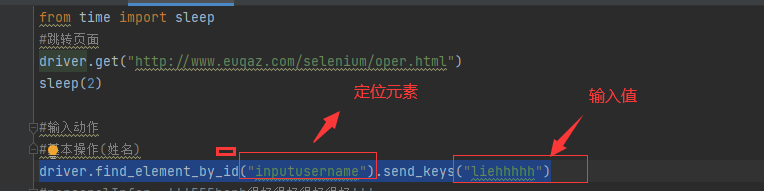
1、输入动作
1.1send_keys()是输入值
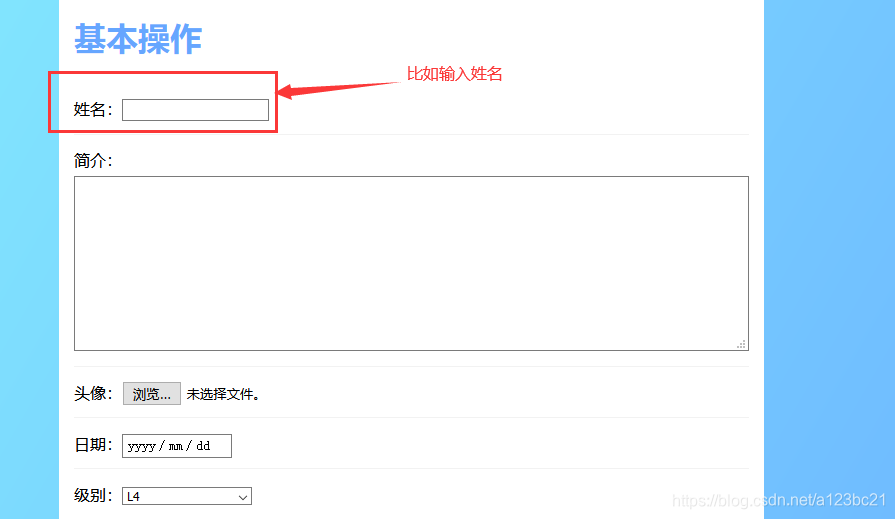
1)eg:比如输入姓名
根据标签定位元素,姓名的输入框使用id来定位元素
代码写法:driver.find_element_by_id("inputusername").send_keys("liehhhhh")

1.2简介-简介输入框
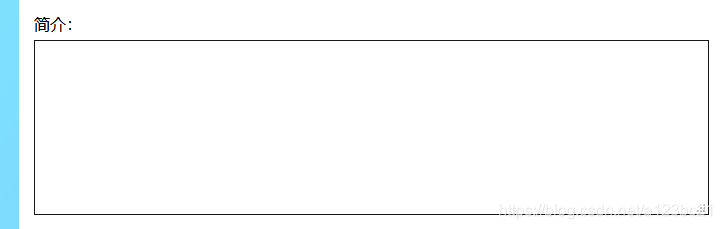
1)eg:先定位元素再输入值
driver.find_element_by_name("personalInfor").send_keys("henhaohdhdhdhdhdh")
1.3选择日期

1)先定位元素再输入值
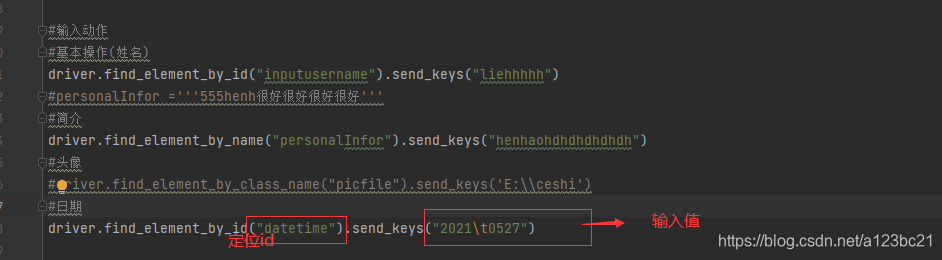
源代码:driver.find_element_by_id("datetime").send_keys("2021\t0527")
2、选择的动作
2.1选择开发语言
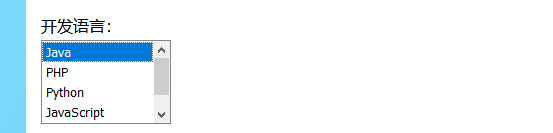
1)前提导入select
写法有:from selenium.webdriver.support.ui import Select
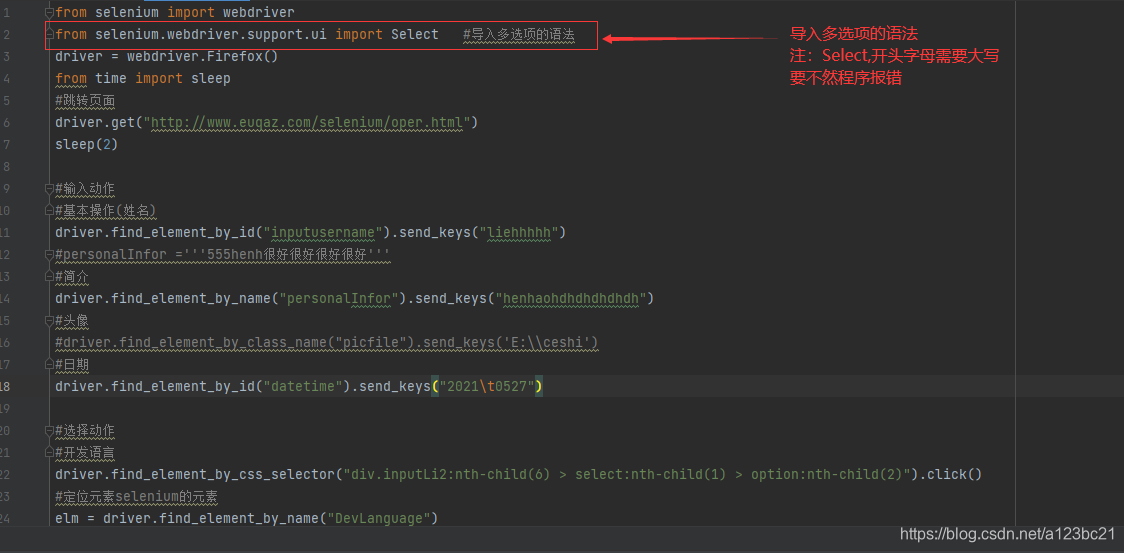
2)定位元素
源代码:
#选择动作
#开发语言
driver.find_element_by_css_selector("div.inputLi2:nth-child(6) > select:nth-child(1) > option:nth-child(2)").click()
#定位元素
elm = driver.find_element_by_name("DevLanguage")
testselect = Select(elm)  #初始化select对象
testselect.deselect_all()  #清除select
testselect.select_by_value("PHP")
testselect.select_by_value("Java")
testselect.select_by_value("Python")
testselect.select_by_value("JavaScript")
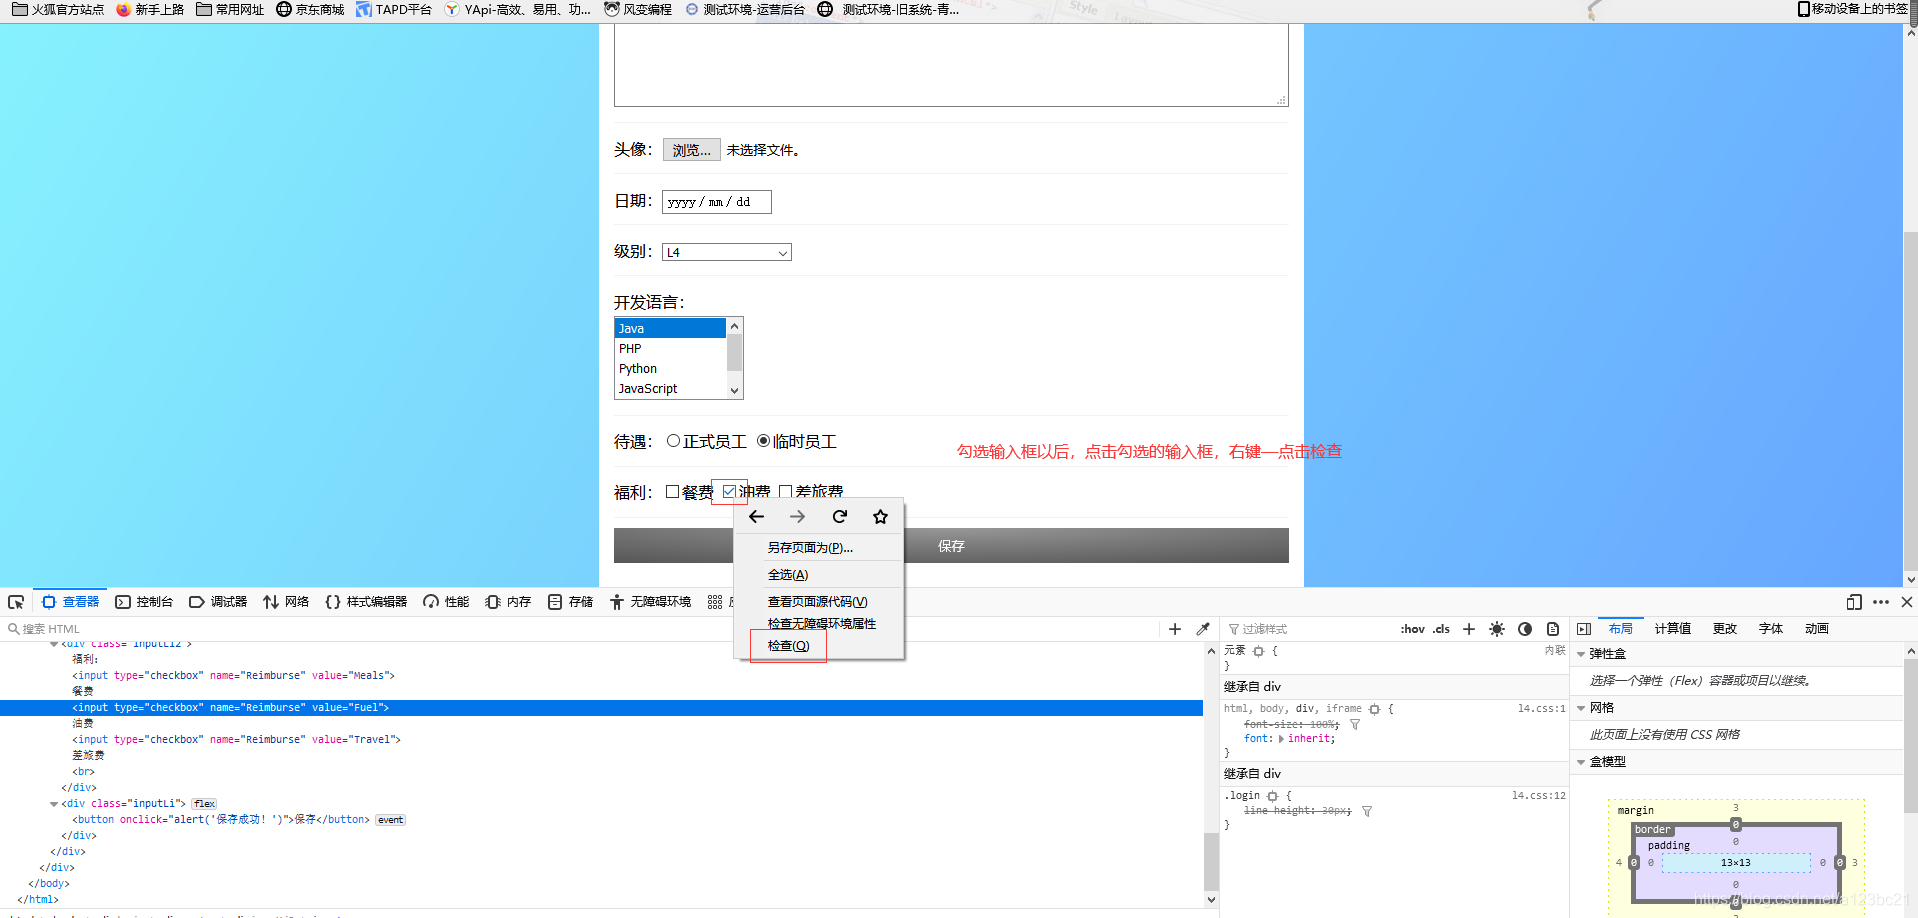
2.2单选框

1)定位元素的操作步骤(以火狐浏览器为例)

2)编写程序如下:
源代码:
driver.find_element_by_css_selector("div.inputLi2:nth-child(8) > input:nth-child(2)").click()
2.3多选框

1)操作步骤如下(火狐浏览器为例)
2)代码如下:
源代码:
#福利——多选框
#勾选餐费
driver.find_element_by_css_selector("div.inputLi2:nth-child(9) > input:nth-child(1)").click()
driver.find_element_by_css_selector("div.inputLi2:nth-child(9) > input:nth-child(2)").click()
driver.find_element_by_css_selector("div.inputLi2:nth-child(9) > input:nth-child(3)").click()
2.4 保存按钮
![]()
1)定位元素的操作步骤如下:
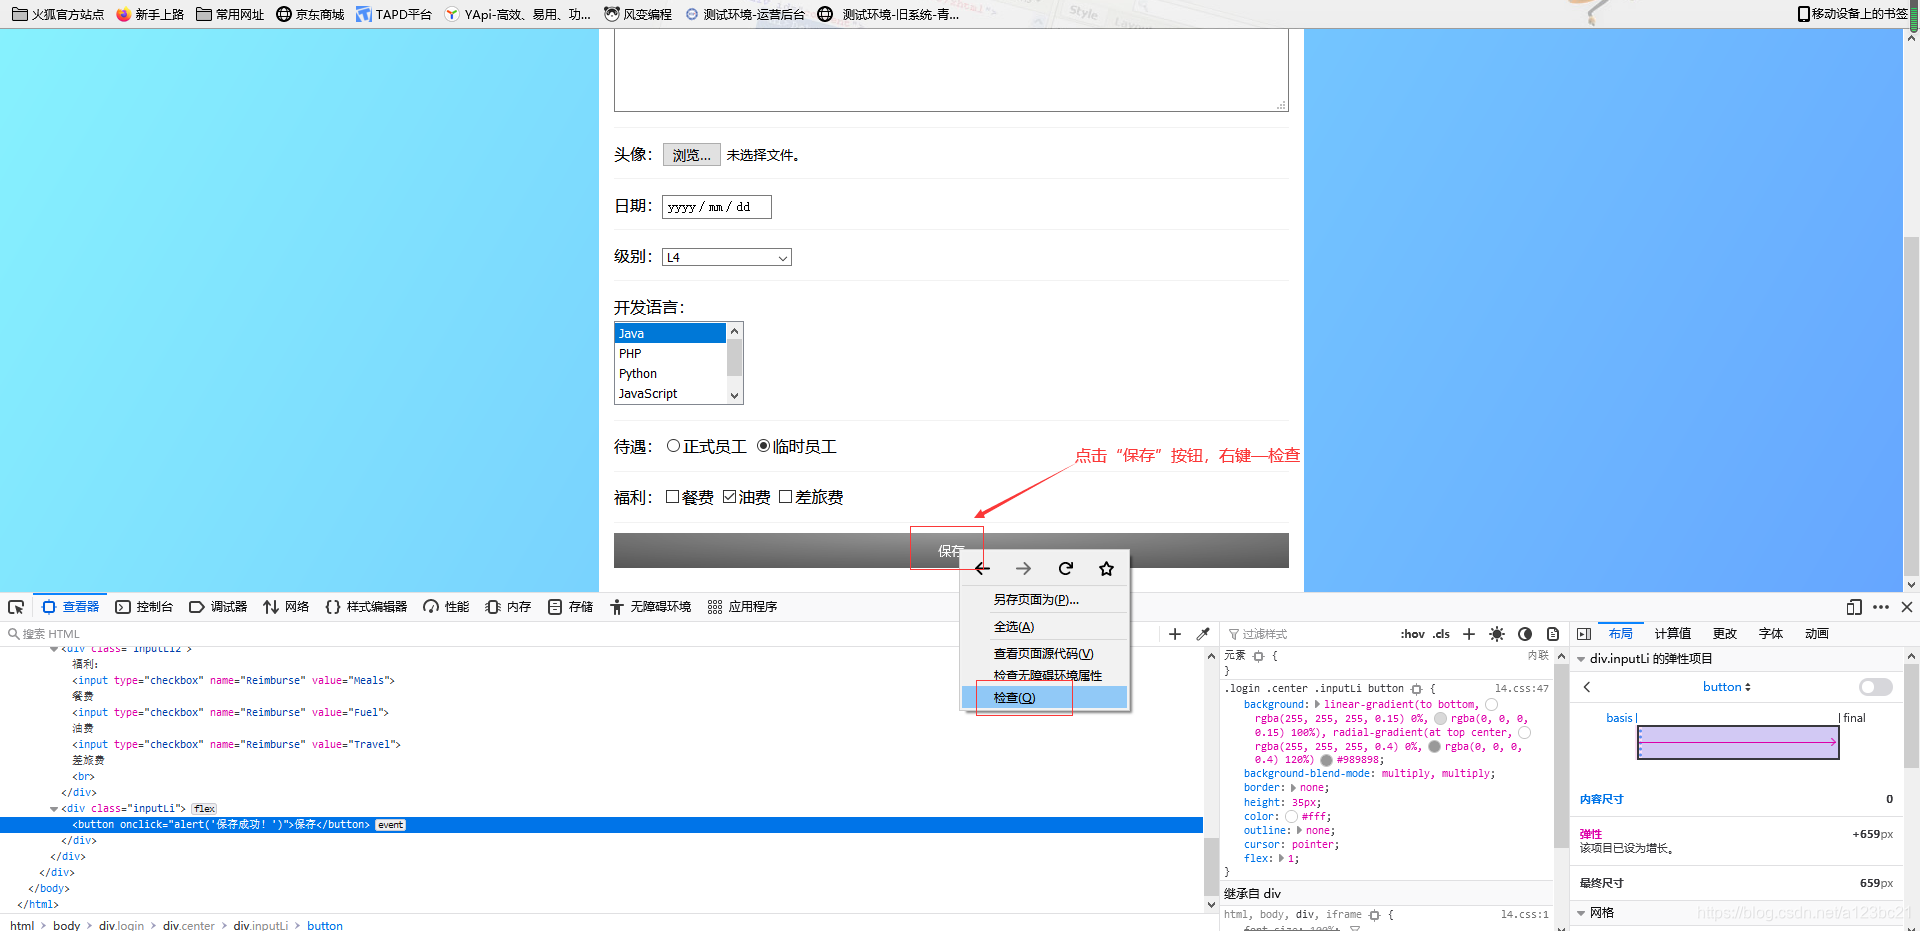
2)代码如下:

源代码如下:
driver.find_element_by_css_selector(".inputLi > button:nth-child(1)").click()
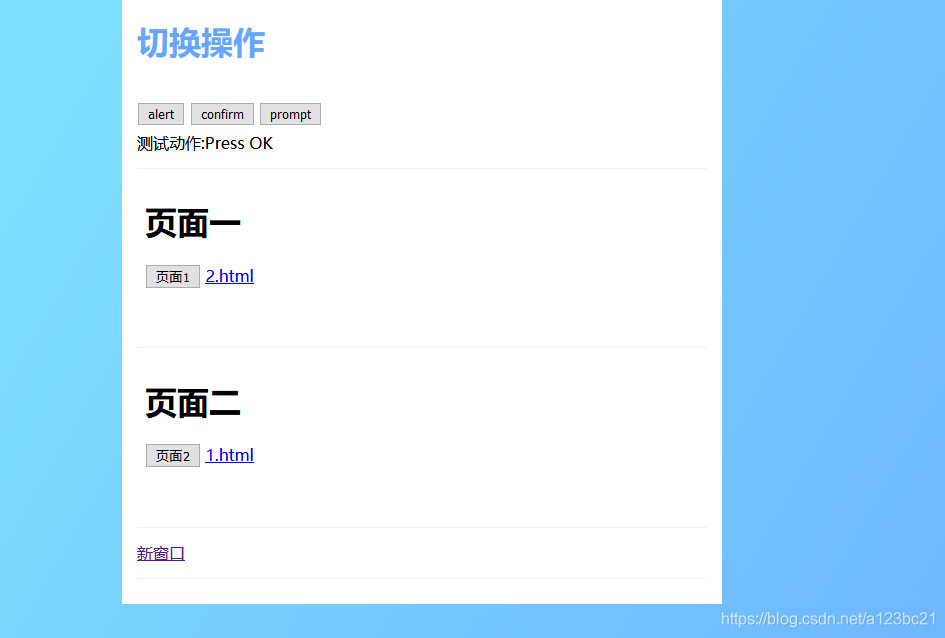
3、切换动作
3.1地址:http://www.euqaz.com/selenium/oper2.html
代码:

全部的源代码:
import time
from selenium import webdriver
driver = webdriver.Firefox()
from time import sleep
driver.get("http://www.euqaz.com/selenium/oper2.html")
time.sleep(2)
#练习切换操作
#定位alert的元素
driver.find_element_by_id("balert").click()
#睡眠时间
time.sleep(2)
#得到对话框的对象
dlgobj = driver.switch_to.alert
#借用accept方法,点击确定按钮
dlgobj.accept()
#睡眠时间
time.sleep(2)
#定位confirm元素
driver.find_element_by_id("bconfirm").click()
#睡眠时间
time.sleep(2)
#得到对话框的对象
dlgobj = driver.switch_to.alert
#点击取消按钮
dlgobj.dismiss()
#定位prompt的元素
driver.find_element_by_id("bprompt").click()
#睡眠2秒
time.sleep(2)
#得到对话框的对象
dlgobj = driver.switch_to.alert
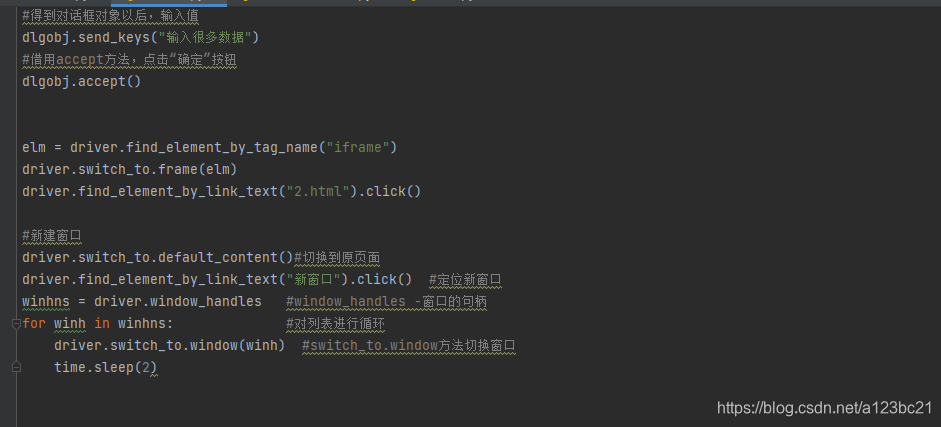
#得到对话框对象以后,输入值
dlgobj.send_keys("输入很多数据")
#借用accept方法,点击“确定”按钮
dlgobj.accept()
elm = driver.find_element_by_tag_name("iframe")
driver.switch_to.frame(elm)
driver.find_element_by_link_text("2.html").click()
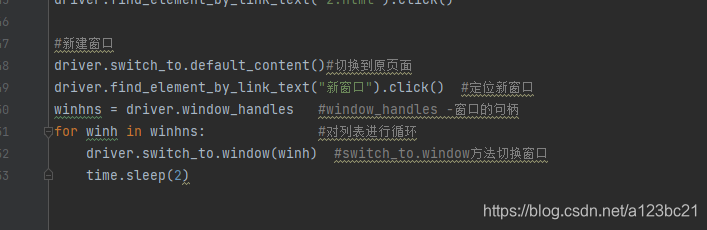
#新建窗口
driver.switch_to.default_content()#切换到原页面
driver.find_element_by_link_text("新窗口").click() #定位新窗口
winhns = driver.window_handles #window_handles -窗口的句柄
for winh in winhns: #对列表进行循环
driver.switch_to.window(winh) #switch_to.window方法切换窗口
time.sleep(2)
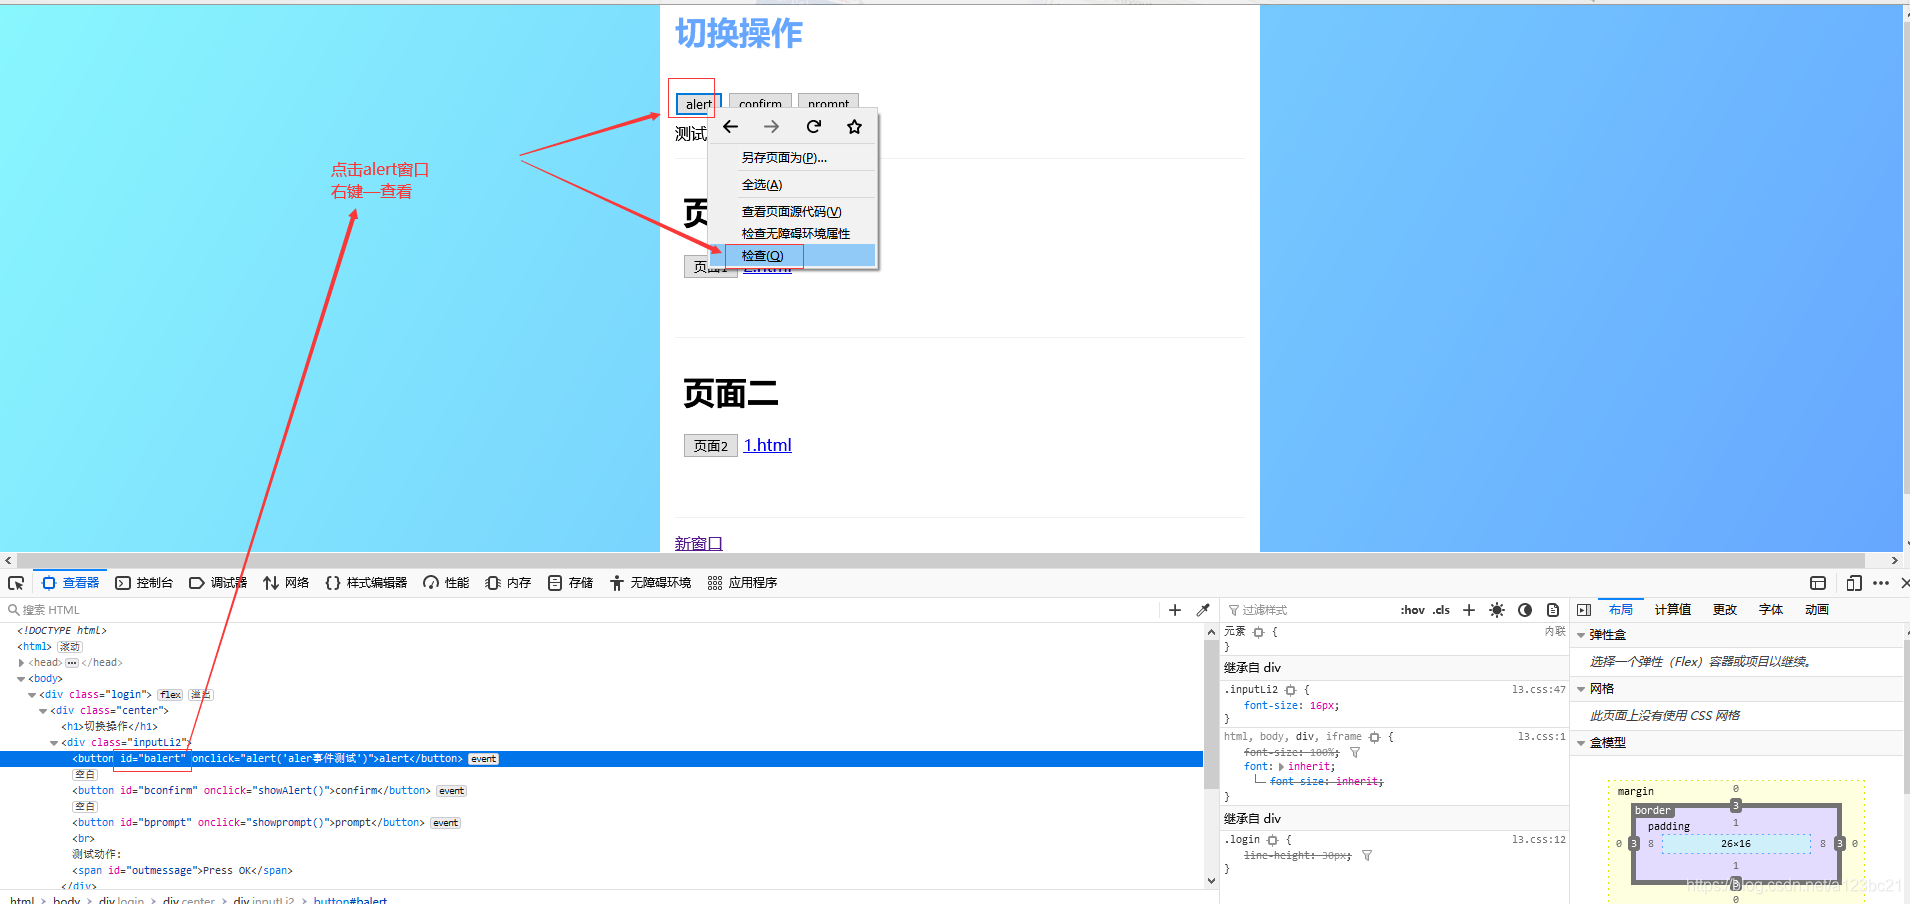
3.1alert窗口进行切换
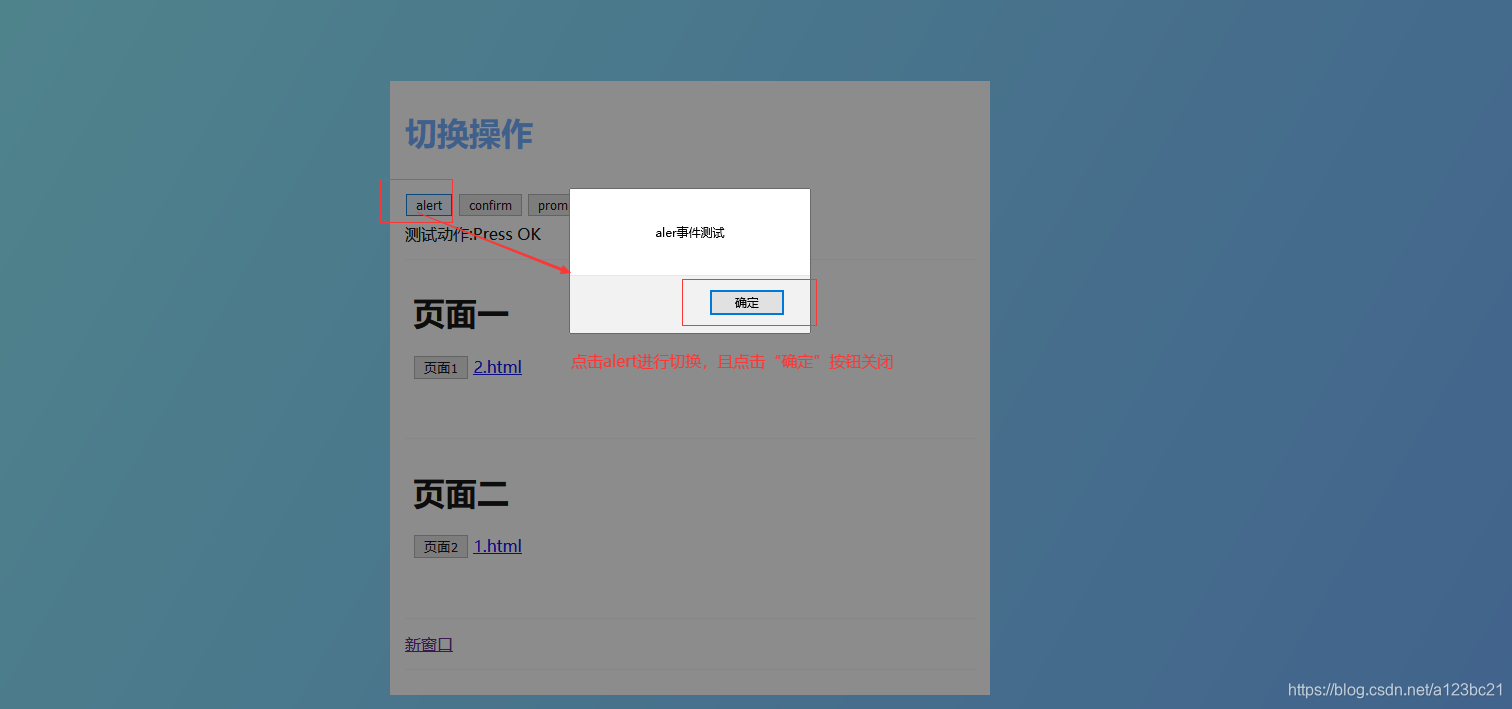
1)操作步骤:
2)代码

3)源代码:
#定位alert的元素
driver.find_element_by_id("balert").click()
#睡眠时间
time.sleep(2)
#得到对话框的对象
dlgobj = driver.switch_to.alert
#借用accept方法,点击确定按钮
dlgobj.accept()
#睡眠时间
time.sleep(2)
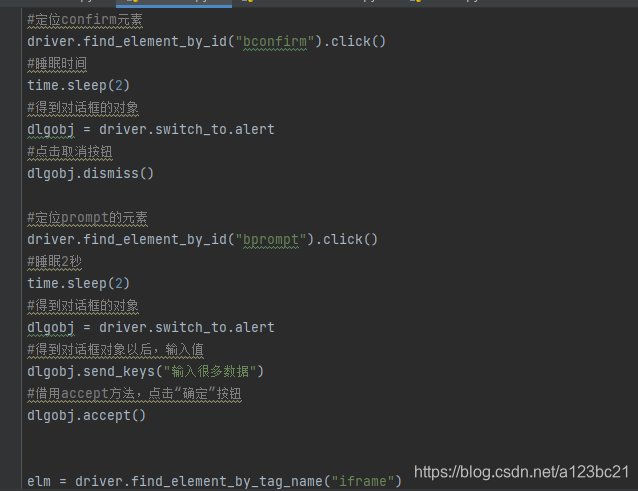
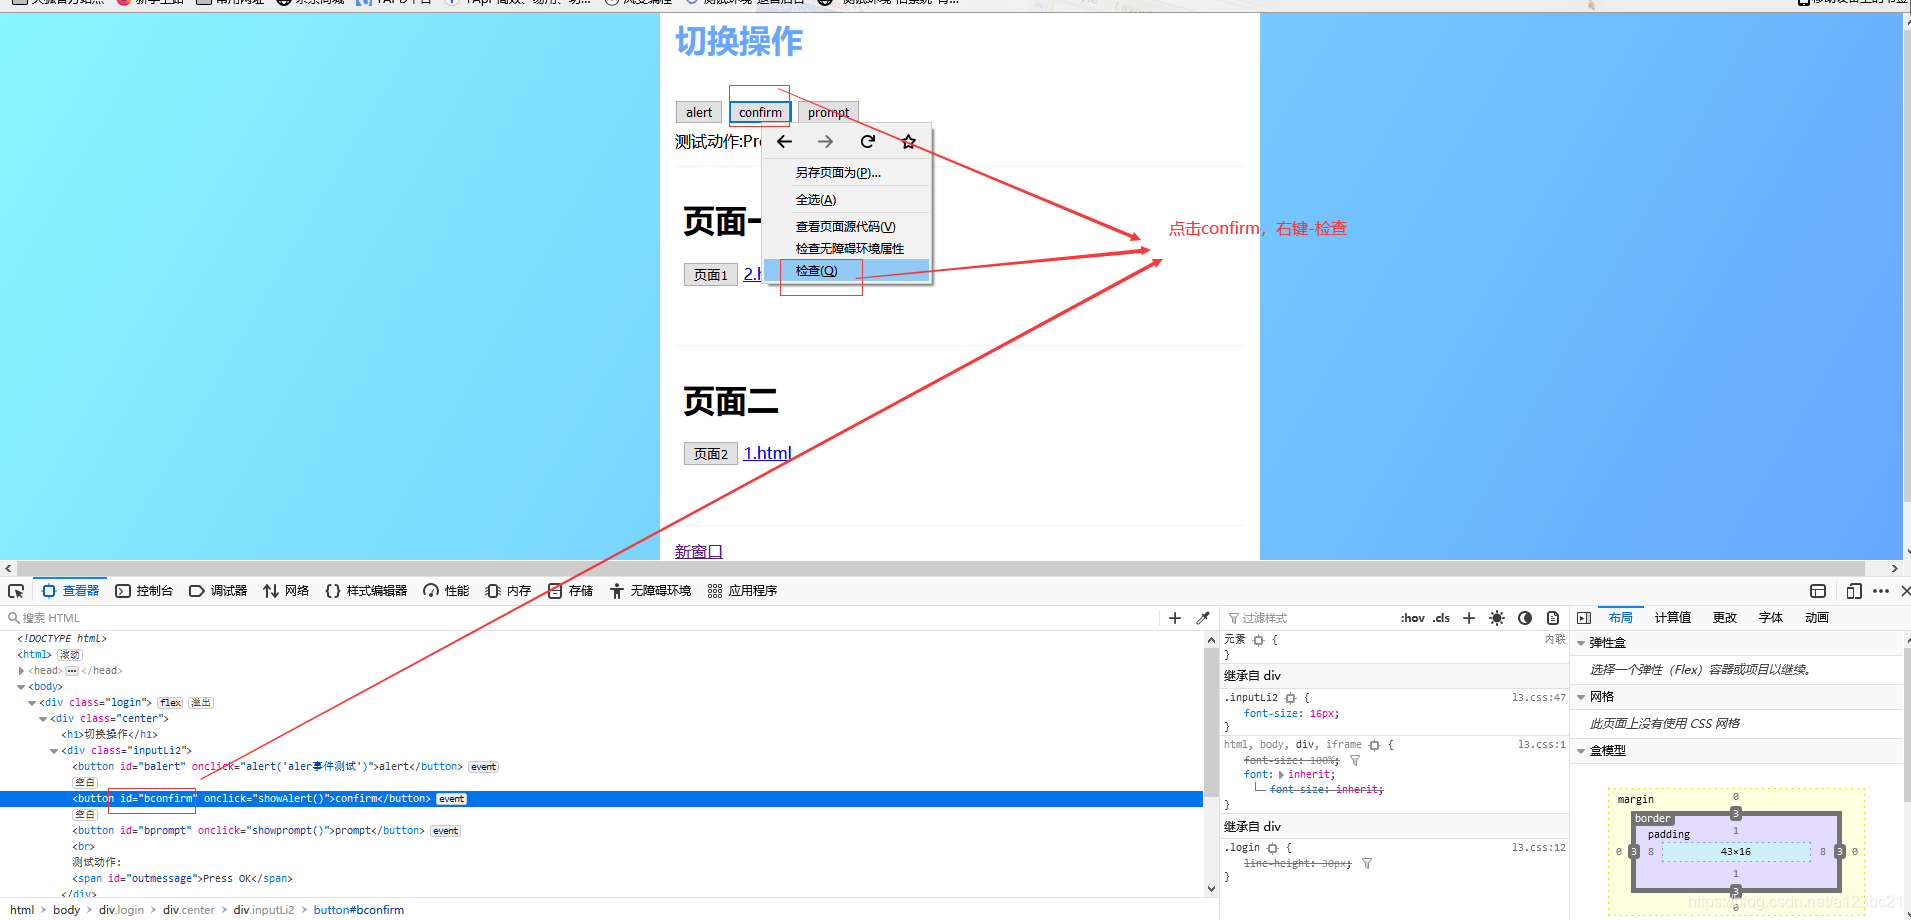
3.2confirm窗口切换
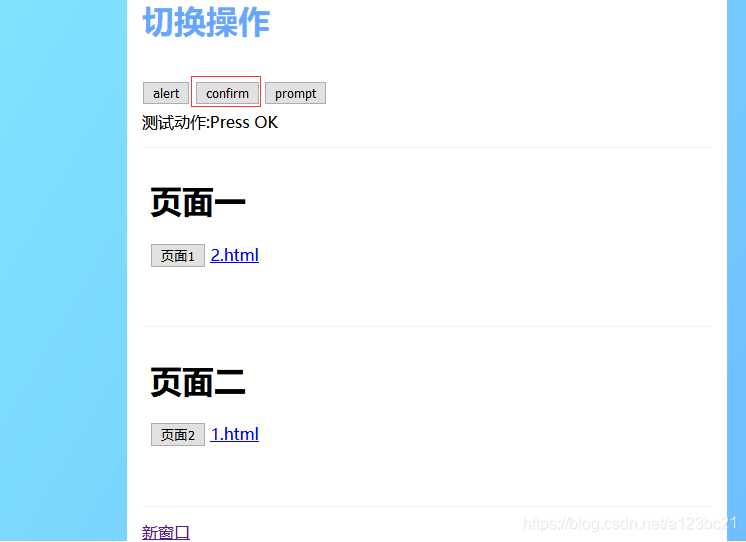
1)操作步骤如下:
2)代码如下:
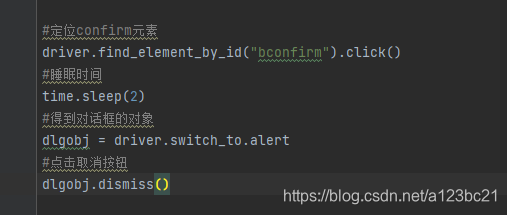
源代码:
#定位confirm元素
driver.find_element_by_id("bconfirm").click()
#睡眠时间
time.sleep(2)
#得到对话框的对象
dlgobj = driver.switch_to.alert
#点击取消按钮
dlgobj.dismiss()
3.3prompt切换窗口
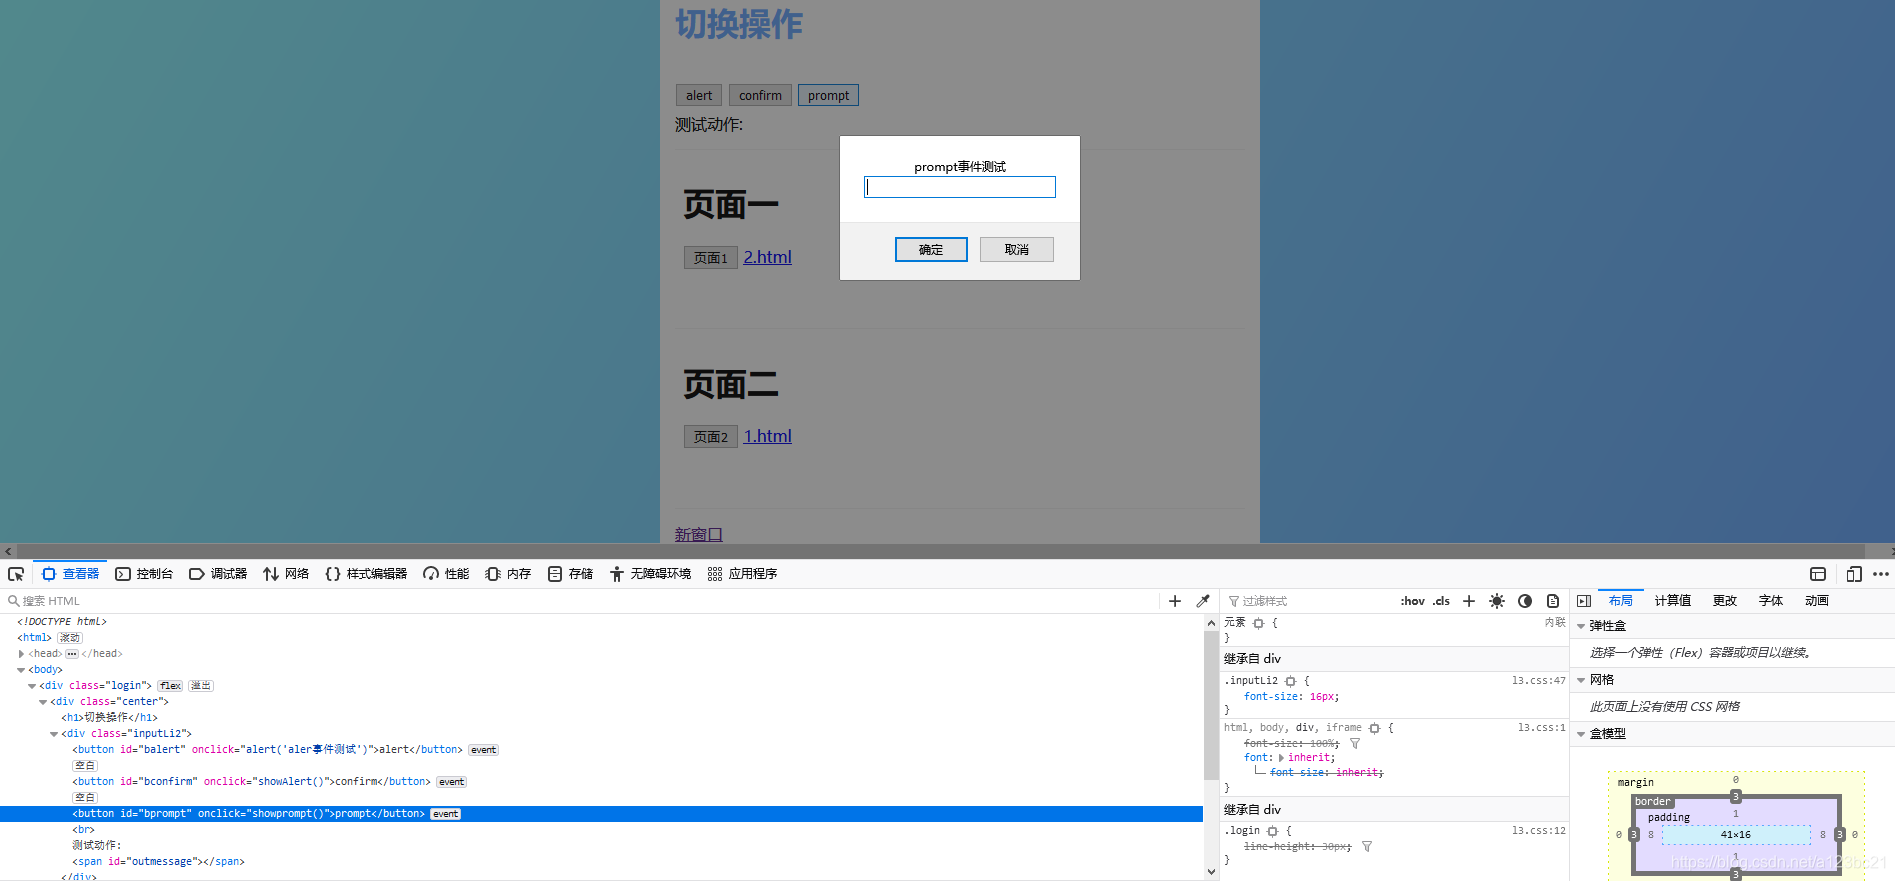
1)操作步骤:
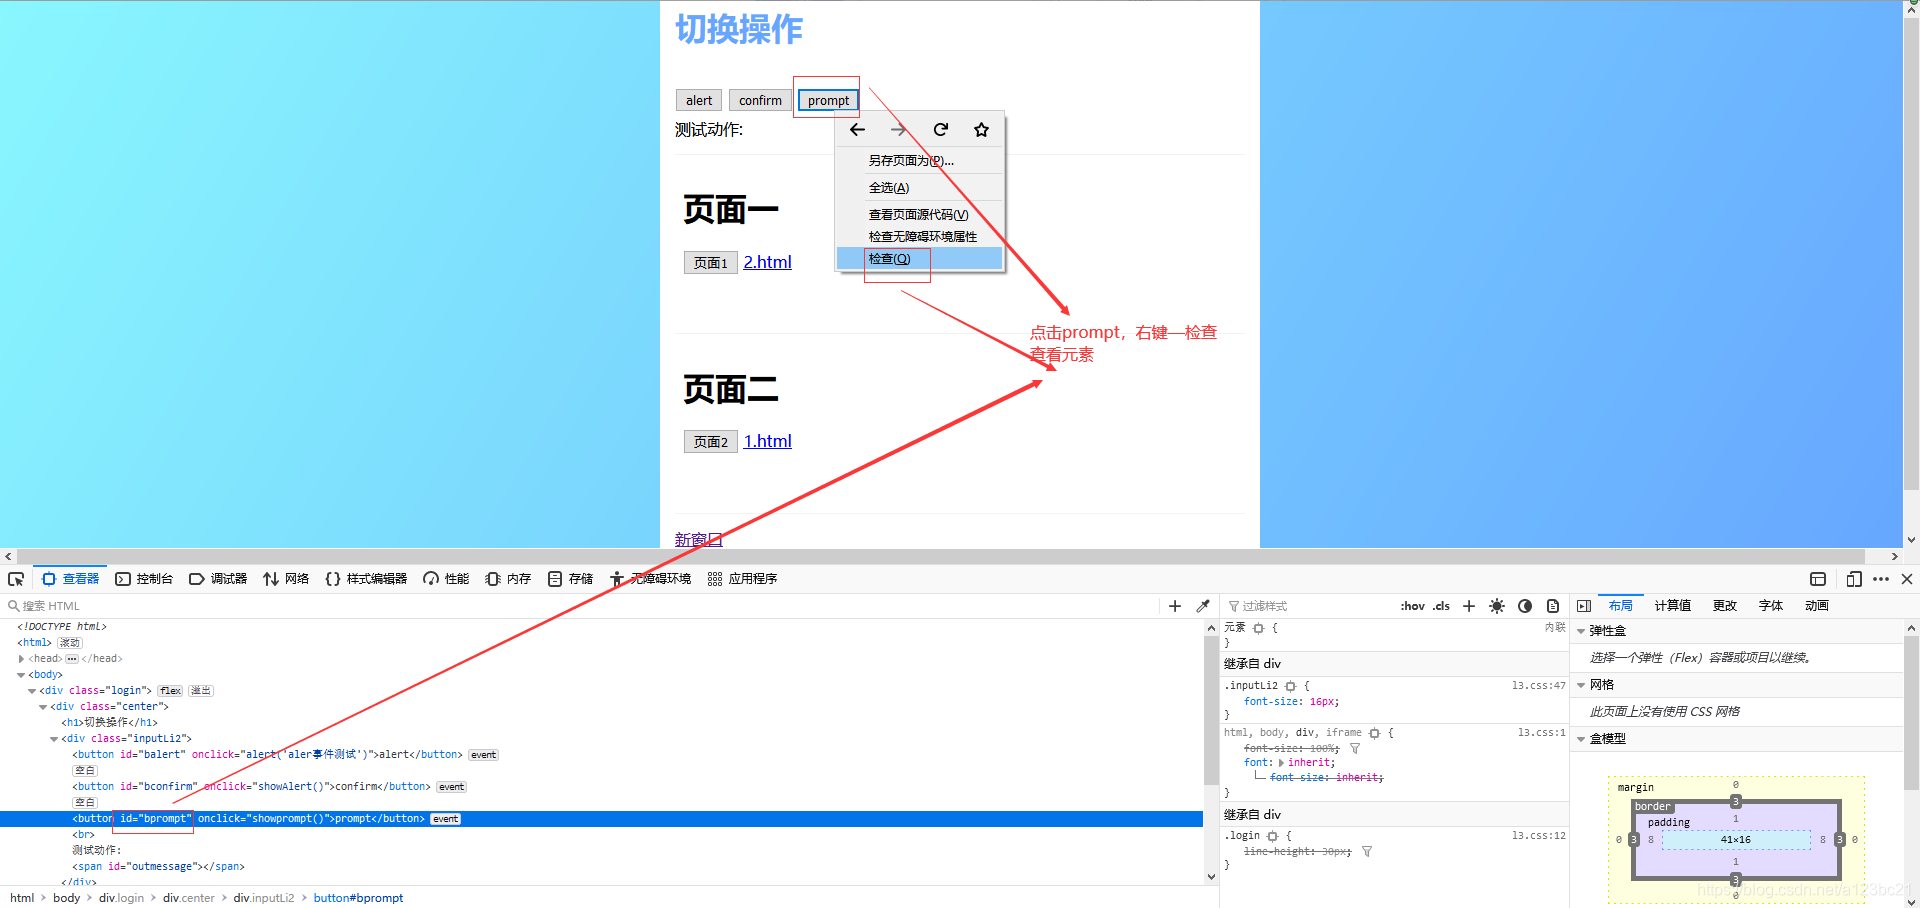
2)代码
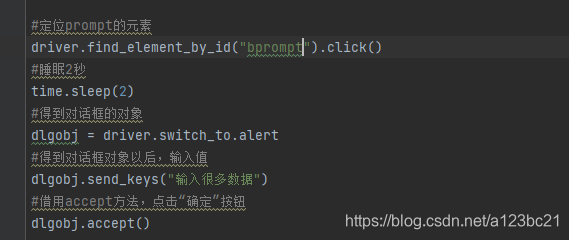
源代码:
#定位prompt的元素
driver.find_element_by_id("bprompt").click()
#睡眠2秒
time.sleep(2)
#得到对话框的对象
dlgobj = driver.switch_to.alert
#得到对话框对象以后,输入值
dlgobj.send_keys("输入很多数据")
#借用accept方法,点击“确定”按钮
dlgobj.accept()
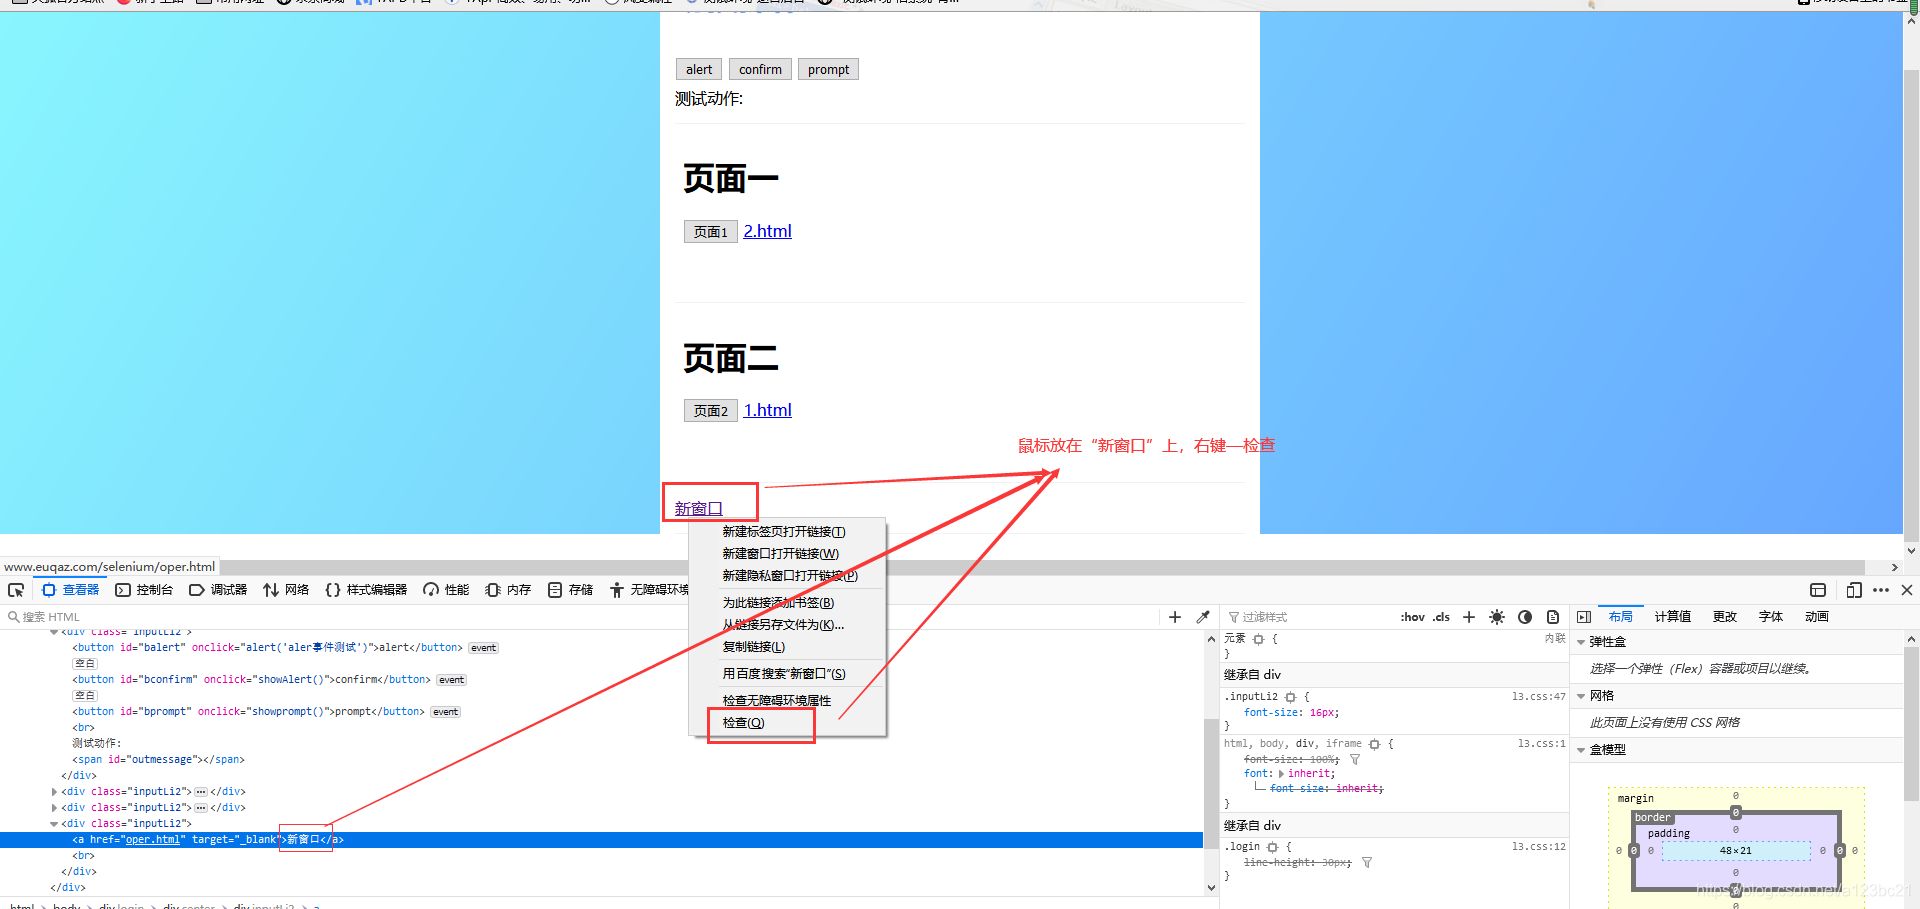
3.4新窗口
1)操作步骤:
2)代码:
源代码:
driver.switch_to.default_content()#切换到原页面
driver.find_element_by_link_text("新窗口").click()  #定位新窗口
winhns = driver.window_handles   #window_handles -窗口的句柄
for winh in winhns:              #对列表进行循环
    driver.switch_to.window(winh)  #switch_to.window方法切换窗口
    time.sleep(2)


 806
806

 被折叠的 条评论
为什么被折叠?
被折叠的 条评论
为什么被折叠?
 到【灌水乐园】发言


