


 本文详细介绍了如何在QT中使用qcustomplot库扩展热力图功能,包括动态数据刷新、鼠标点击事件处理、比例尺缩放以及x轴自动更新,同时展示了如何通过鼠标滚轮操作进行数据范围选择。
QT 基于qcustomplot实现热力图(一)-优快云博客
QT 基于qcustomplot实现热力图(二)-优快云博客
1.背景
前面个两篇文章基本完成了热力图的基本使用场景,但对于一些负复杂的项目来说功能还是不够,本片讲继续完善。
-
a.增加动态刷新,从右想做刷新;
-
b.增加鼠标点击事件,获得当前的鼠标对应的行和列的值;
-
c.增加通过比例尺的缩过滤显示区域的数据;
-
d.x轴自动更新坐标
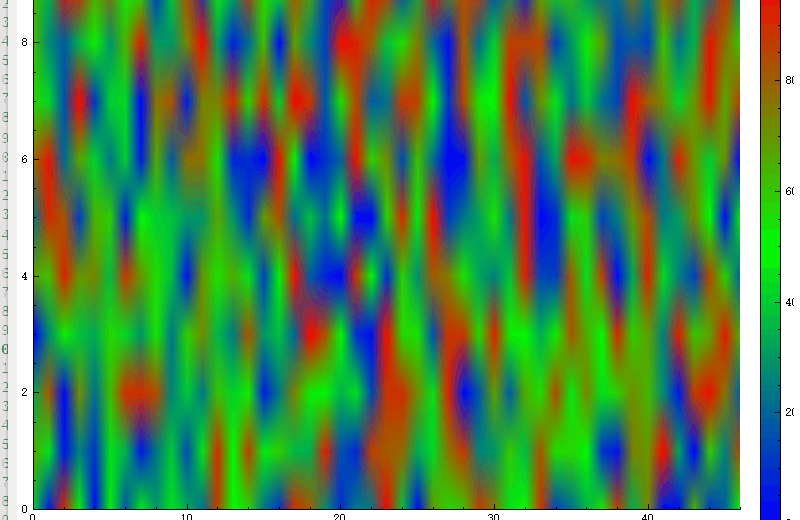
2.先上效果
3.实现
本次还是再之前的工程中完善优化,修改后的代码如下:
3.1动态刷新
#if static_Type
    for (int i = 0; i < data_.size(); ++i)
    {
        // 更新 ColorMap 数据
        for (int j = 0; j < data_.at(i).size(); ++j)
        {
            m_colorMap_->data()->setCell(i, j, data_[i][j]);
        }
    }

    timer_.stop();
#else
#if dynamic_Type

    for (int i = 0; i < data_.size(); ++i)
    {
        // 更新 ColorMap 数据
        for (int j = 0; j < data_.at(i).size(); ++j)
        {
            m_colorMap_->data()->setCell(i, j, qrand() % 100);
        }
    }
#else //real_update_Type
    static int indexCols = 0;
    indexCols++;
    if(indexCols > numCols)
    {
        numCols += 1;
        m_colorMap_->data()->setSize(numCols, numRows);
        m_colorMap_->data()->setRange(QCPRange(0, numCols-1), QCPRange(0, numRows-1));
    }

    //新增1列数据
    QVector<double>tmp;
    for(int j = 0; j < numRows; j++)
    {
        tmp.append(qrand() % 100);
    }
    data_.append(tmp);

     // 更新 ColorMap 数据
    for(int i = 0; i < data_.size(); i++)
    {
        for (int j = 0; j < data_.at(i).size(); ++j)
        {
            m_colorMap_->data()->setCell(i, j, data_[i][j]);
            //qDebug() << data_.size() << indexCols << i << j << data_[i][j];
        }
    }

    ui->widget->yAxis->setRange(0, indexCols);

#endif
#endif
3.2鼠标点击
    customMouseTimer_ = new QTimer(this);
    connect(customMouseTimer_, SIGNAL(timeout()), this, SLOT(customMouseTimerSlot()));
    connect(ui->widget, SIG
最低0.47元/天 解锁文章


 1353
1353

 被折叠的 条评论
为什么被折叠?
被折叠的 条评论
为什么被折叠?
 到【灌水乐园】发言


