hadoop中hive配置mysql

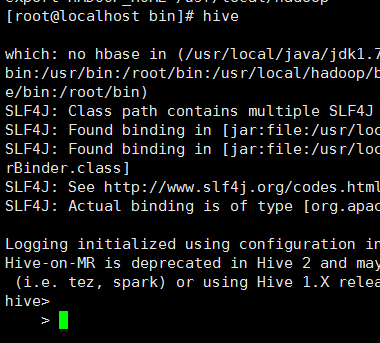
本文详细介绍Hive的下载、安装、配置步骤,包括环境变量设置、MySQL集成、Hive服务启动及数据导入操作,适合初学者快速上手。

摘要生成于 C知道 ,由 DeepSeek-R1 满血版支持, 前往体验 >

1.首先下载hive

下载地址   选择带有 bin 选项的  ,不然以后还要自己编译

解压安装 移动到/usr/local/hive  下

进入hive目录,进入conf

1

2

3

cp hive-env.sh.template hive-env.sh

cp hive-default.xml.template hive-site.xml

cp hive-log4j2.properties.template  hive-log4j2.properties<br>cp hive-exec-log4j.properties.template hive-exec-log4j.properties

  配置 hive/conf/hive-env.sh,把下面三项的注释去掉并加上地址

1

2

3

4

5

HADOOP_HOME=/usr/local/hadoop


 export HIVE_CONF_DIR=/usr/local/hive/conf


 export HIVE_AUX_JARS_PATH=/usr/local/hive

 配置 hive/conf/hive-site.xml 

1

2

3

4

5

6

7

8

9

10

11

12

13

14

15

16

17

18

19

20

21

22

23

24

25

26

27

28

29

30

31

32

33

34

35

36

37

38

39

40

41

42

43

44

45

46

47

48

49

50

51

52

53

54

55

56

57

58

59

60

61

62

63

64

65

66

67

68

69

70

71

72

73

74

<?xml version="1.0" encoding="UTF-8" standalone="no"?>

<?xml-stylesheet type="text/xsl" href="configuration.xsl"?><!--

   Licensed to the Apache Software Foundation (ASF) under one or more

   contributor license agreements.  See the NOTICE file distributed with

   this work for additional information regarding copyright ownership.

   The ASF licenses this file to You under the Apache License, Version 2.0

   (the "License"); you may not use this file except in compliance with

   the License.  You may obtain a copy of the License at


       http://www.apache.org/licenses/LICENSE-2.0


   Unless required by applicable law or agreed to in writing, software

   distributed under the License is distributed on an "AS IS" BASIS,

   WITHOUT WARRANTIES OR CONDITIONS OF ANY KIND, either express or implied.

   See the License for the specific language governing permissions and

   limitations under the License.

-->

<configuration>

<!--<property>

<name>hive.metastore.warehouse.dir</name>

<value>/user/hive/warehouse</value>

</property>

<property>

<name>hive.metastore.local</name>

<value>true</value>

</property> -->

 <!-- 如果是远程mysql数据库的话需要在这里写入远程的IP或hosts -->

<property>

<name>javax.jdo.option.ConnectionURL</name>

<value>jdbc:mysql://localhost/hive?createDatabaseIfNotExist=true</value>

</property>

<property>

<name>javax.jdo.option.ConnectionDriverName</name>

<value>com.mysql.jdbc.Driver</value>

</property>

<property>

<name>javax.jdo.option.ConnectionUserName</name>

<value>root</value>

</property>

<property>

<name>javax.jdo.option.ConnectionPassword</name>

<value>root</value>

</property>


<property> 

   <name>hive.metastore.schema.verification</name> 

   <value>false</value> 

 </property>


<property> 

        <name>datanucleus.readOnlyDatastore</name> 

        <value>false</value> 

    </property> 

    <property>  

        <name>datanucleus.fixedDatastore</name> 

        <value>false</value>  

    </property> 


    <property>  

        <name>datanucleus.autoCreateSchema</name>  

        <value>true</value>  

    </property> 


    <property> 

        <name>datanucleus.autoCreateTables</name> 

        <value>true</value> 

    </property> 


    <property> 

        <name>datanucleus.autoCreateColumns</name> 

        <value>true</value> 

    </property>    

</configuration>

  配置 hive/bin/hive-config.sh  在最后添加

1

2

3

export JAVA_HOME=/usr/local/java

export HIVE_HOME=/usr/local/hive

export HADOOP_HOME=/usr/local/hadoop

  需要注意的是 hive使用mysql的时候需要把mysql 的jdbc包拷贝到hive/lib下,mysql包下载链接https://www.mysql.com/products/connector/

  启动 mysql 服务

  service mysqld start

 使用 mysql -uroot  登陆测试是否成功,如果成功修改root密码:

1

2

3

4

mysql>use mysql;

mysql> update user set password=passworD("test"where user='root';

mysql> flush privileges;

mysql> exit; 

 在先启动hadoop服务下,在其中hive:

 启动hive服务:

1

hive --service metastore&

 启动hive服务在后台运行:

1

hive --service hiveserver2  &

 接着启动 hive客户端:

1

hive

  如果进入 hive>  shell中证明起启动成功;

  首先创建表:

1

2

3

hive> CREATE EXTERNAL TABLE MYTEST(num INT, name STRING) 

    > ROW FORMAT DELIMITED FIELDS TERMINATED BY '\t'    //分隔符 ‘\t’

    > ;

  导入数据:

1

2

3

4

5

6

7

hive> load data local inpath  '/tmp/hive.txt' overwrite into table MYTEST; 

Copying data from file:/tmp/hive.txt

Copying file: file:/tmp/hive.txt

Loading data to table default.mytest

Deleted hdfs://localhost:9000/user/hive/warehouse/mytest

OK

Time taken: 0.402 seconds

  查看数据:

1

2

3

4

5

6

7

hive> SELECT * FROM MYTEST;

OK

NULL    NULL

22    world

33    hive

Time taken: 0.089 seconds

hive>

 最后看看/tmp/hive.txt 文档:

1

2

3

4

5

sina@ubuntu:~/hive/conf$ cat /tmp/hive.txt

11,hello

22    world

33    hive

sina@ubuntu:~/hive/conf$


转载地址:https://www.cnblogs.com/tong775131501/p/6366188.html

评论
添加红包

请填写红包祝福语或标题

红包个数最小为10个

红包金额最低5元

当前余额3.43前往充值 >
需支付:10.00
成就一亿技术人!
领取后你会自动成为博主和红包主的粉丝 规则
hope_wisdom
发出的红包
实付
使用余额支付
点击重新获取
扫码支付
钱包余额 0

抵扣说明:

1.余额是钱包充值的虚拟货币,按照1:1的比例进行支付金额的抵扣。
2.余额无法直接购买下载,可以购买VIP、付费专栏及课程。

余额充值