


 本文详细介绍了如何在Spring Boot项目中引入Spring Security依赖,并配置自定义的用户名和密码。Spring Security默认生成一个UUID作为密码,并在控制台打印。通过配置`SecurityProperties`可以在`application.yml`中设定用户名和密码。另外,文章还展示了如何通过配置类`SecurityConfig`来自定义登录页面、登录接口、登录成功和失败的回调处理,以及注销登录的配置。同时,讨论了`defaultSuccessUrl`和`successForwardUrl`在登录成功回调中的区别。
引入SpringSecurity依赖
<dependency>
       <groupId>org.springframework.boot</groupId>
       <artifactId>spring-boot-starter-security</artifactId>
</dependency>
启动SpringBoot项目后
控制台 会打印
Using generated security password: 30abfb1f-36e1-446a-a79b-f70024f589ab这就是 Spring Security 为默认用户 user 生成的临时密码,是一个 UUID 字符串。
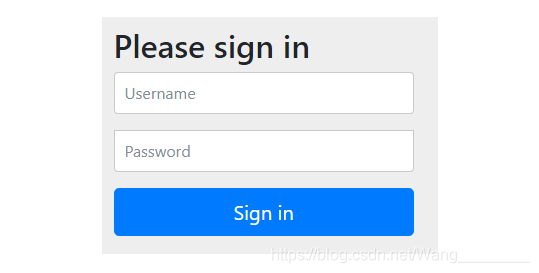
接下来我们去访问任何接口,就可以看到自动重定向到登录页面了:
在 Spring Security 中,默认的登录页面和登录接口,都是
/login,只不过一个是 get 请求(登录页面),另一个是 post 请求(登录接口)。
密码为什么说是一个UUID呢?
在 自动化配置类 UserDetailsServiceAutoConfiguration 类中
private String getOrDeducePassword(User user, PasswordEncoder encoder) {
        String password = user.getPassword();
        if (user.isPasswordGenerated()) {
            logger.info(String.format("%n%nUsing generated security password: %s%n", user.getPassword()));
        }

        return encoder == null && !PASSWORD_ALGORITHM_PATTERN.matcher(password).matches() ? "{noop}" + password : password;
    }
控制台中UUID密码的打印条件为 user.isPasswordGenerated() 为true 时
//
// Source code recreated from a .class file by IntelliJ IDEA
// (powered by Fernflower decompiler)
//

package org.springframework.boot.autoconfigure.security;

import java.util.ArrayList;
import java.util.Arrays;
import java.util.HashSet;
import java.util.List;
import java.util.Set;
import java.util.UUID;
import org.springframework.boot.context.properties.ConfigurationProperties;
import org.springframework.boot.web.servlet.DispatcherType;
import org.springframework.util.StringUtils;

@ConfigurationProperties(
    prefix = "spring.security"
)
public class SecurityProperties {
    public static final int BASIC_AUTH_ORDER = 2147483642;
    public static final int IGNORED_ORDER = -2147483648;
    public static final int DEFAULT_FILTER_ORDER = -100;
    private final SecurityProperties.Filter filter = new SecurityProperties.Filter();
    private final SecurityProperties.User user = new SecurityProperties.User();

    public SecurityProperties() {
    }

    public SecurityProperties.User getUser() {
        return this.user;
    }

    public SecurityProperties.Filter getFilter() {
        return this.filter;
    }

    public static class User {
        private String name = "user";
        private String password = UUID.randomUUID().toString();
        private List<String> roles = new ArrayList();
        private boolean passwordGenerated = true;

        public User() {
        }

        public String getName() {
            return this.name;
        }

        public void setName(String name) {
            this.name = name;
        }

        public String getPassword() {
            return this.password;
        }

        public void setPassword(String password) {
            if (StringUtils.hasLength(password)) {
                this.passwordGenerated = false;
                this.password = password;
            }
        }

        public List<String> getRoles() {
            return this.roles;
        }

        public void setRoles(List<String> roles) {
            this.roles = new ArrayList(roles);
        }

        public boolean isPasswordGenerated() {
            return this.passwordGenerated;
        }
    }

    public static class Filter {
        private int order = -100;
        private Set<DispatcherType> dispatcherTypes;

        public Filter() {
            this.dispatcherTypes = new HashSet(Arrays.asList(DispatcherType.ASYNC, DispatcherType.ERROR, DispatcherType.REQUEST));
        }

        public int getOrder() {
            return this.order;
        }

        public void setOrder(int order) {
            this.order = order;
        }

        public Set<DispatcherType> getDispatcherTypes() {
            return this.dispatcherTypes;
        }

        public void setDispatcherTypes(Set<DispatcherType> dispatcherTypes) {
            this.dispatcherTypes = dispatcherTypes;
        }
    }
}
从 SecurityProperties 中我们可以看出默认用户名为user ,密码为每次启动都不一致的UUID。 同时 passwordGenerated = true 说明密码默认是在控制台打印的。
由于每次启动我们都要有一个新的 UUID密码 因此需要我们自己进行用户名密码配置,去覆盖默认配置。两种方法如下。
第一种方法 :下面是配置的两个步骤。
第一步 创建 SecurityProperties 类
/**
 * @author ShawnWang
 * @create 2021-07-05 20:38
 *
 * 进行Spring Boot配置文件部署时,发出警告Spring Boot Configuration Annotation Processor not configured,但是不影响运行。
 *
 * 解决办法 引入下面依赖
 * <dependency>
 *     <groupId>org.springframework.boot</groupId>
 *     <artifactId>spring-boot-configuration-processor</artifactId>
 *     <optional>true</optional>
 * </dependency>
 *
 */
@ConfigurationProperties(prefix = "spring.security")
public class SecurityProperties {

}
第二步 在 application.yml 中配置
spring:
  security:
    user:
      name: shawnwang
      password: 123
在 yml 中定义的用户名密码最终是通过 set 方法注入到属性中。 重启项目即可使用自定义用户名和密码进行授权登录了。
第二种方法:
在配置类中配置,我们就要指定 PasswordEncoder 。
Spring Security 提供了多种密码加密方案,官方推荐使用 BCryptPasswordEncoder,BCryptPasswordEncoder 使用 BCrypt 强哈希函数,开发者在使用时可以选择提供 strength 和 SecureRandom 实例。strength 越大,密钥的迭代次数越多,密钥迭代次数为 2^strength。strength 取值在 4~31 之间,默认为 10。
不同于 Shiro 中需要自己处理密码加盐,在 Spring Security 中,BCryptPasswordEncoder 就自带了盐,处理起来非常方便。
而 BCryptPasswordEncoder 就是 PasswordEncoder 接口的实现类。
//
// Source code recreated from a .class file by IntelliJ IDEA
// (powered by Fernflower decompiler)
//

package org.springframework.security.crypto.password;

public interface PasswordEncoder {
    String encode(CharSequence var1);

    boolean matches(CharSequence var1, String var2);

    default boolean upgradeEncoding(String encodedPassword) {
        return false;
    }
}
- encode 方法用来对明文密码进行加密,返回加密之后的密文。
- matches 方法是一个密码校对方法,在用户登录的时候,将用户传来的明文密码和数据库中保存的密文密码作为参数,传入到这个方法中去,根据返回的 Boolean 值判断用户密码是否输入正确。
- upgradeEncoding 是否还要进行再次加密,这个一般来说就不用了。
具体配置
创建 SecurityConfig 继承 WebSecurityConfigurerAdapter 重写里边的 configure 方法。
/**
 * @author ShawnWang
 * @create 2021-07-06 8:59
 */
@Configuration
public class SecurityConfig extends WebSecurityConfigurerAdapter {

    @Bean
    PasswordEncoder passwordEncoder(){
//        return NoOpPasswordEncoder.getInstance();
        return new BCryptPasswordEncoder();
    }

    @Override
    protected void configure(AuthenticationManagerBuilder auth) throws Exception {
        auth.inMemoryAuthentication()
                .withUser("shawn")
                .password("123").roles("admin");
    }

    @Override
    public void configure(WebSecurity web) {
        //用来配置忽略的url地址  一般为静态文件
        web.ignoring().antMatchers("/js/**", "/css/**","/images/**");
    }
    @Override
    protected void configure(HttpSecurity http) throws Exception {
        http.authorizeRequests()
                .anyRequest().authenticated()
                .and()
                .formLogin()
                //自定义登录页 不用自带的登录页
                .loginPage("/login.html")
                //指定登录接口地址
                .loginProcessingUrl("/doLogin")
                //和successForwardUrl 两者只能存在其一  .defaultSuccessUrl("/index",true)同.successForwardUrl("/index")作用一致
                //两种情况 一、你在浏览器输入登录地址  登录成功后跳转到/index,输入其他如http://localhost/hello 登录成功后就跳转到/hello
                .defaultSuccessUrl("/index")
                //successForwardUrl 无论输入什么地址 登陆成功后都会跳转到/index
                .successForwardUrl("/index")
                //表示登录相关的页面/接口不要被拦截
                .permitAll()
                .and()
                //默认注销登录URL是/logout  可以通过logoutUrl方法来修改默认的注销URL
                .logout()
                .logoutUrl("/logout2")

                .and()
                .csrf().disable();
    }


}
- 首先我们提供了一个 PasswordEncoder 的实例,因为目前的案例还比较简单,因此我暂时先不给密码进行加密,所以返回 NoOpPasswordEncoder 的实例即可。
- configure 方法中,我们通过 inMemoryAuthentication 来开启在内存中定义用户,withUser 中是用户名,password 中则是用户密码,roles 中是用户角色。
- 如果需要配置多个用户,用 and 相连。 (因为现在的 and 符号相当于就是 XML 标签的结束符,表示结束当前标签)
自定义表单登录页
重写它的 configure(WebSecurity web) 和 configure(HttpSecurity http) 方法 代码段在上面
- web.ignoring() 用来配置忽略掉的 URL 地址,一般对于静态文件,我们可以采用此操作。
- 如果我们使用 XML 来配置 Spring Security ,里边会有一个重要的标签
<http>,HttpSecurity 提供的配置方法 都对应了该标签。 - authorizeRequests 对应了
<intercept-url>。 - formLogin 对应了
<formlogin>。 - and 方法表示结束当前标签,上下文回到HttpSecurity,开启新一轮的配置。
- permitAll 表示登录相关的页面/接口不要被拦截。
- 最后记得关闭 csrf (在Security的默认拦截器里,默认会开启CSRF处理,判断请求是否携带了token,如果没有就拒绝访问)
只需将login.html放到 resources -> static 下即可
html中
<!-- action="/doLogin" 时请求自定义的接口  为/login.html时为自定义的页面 -->
<!--    <form action="/doLogin" method="post">-->
登录回调
在登录成功之后,我们就要分情况处理了,大体上来说,无非就是分为两种情况:
- 前后端分离登录
- 前后端不分登录
两种情况的处理方式不一样。
(前后端不分登录 如下)
3.1 登录成功回调
在 Spring Security 中,和登录成功重定向 URL 相关的方法有两个:
- defaultSuccessUrl
- successForwardUrl
这两个咋看没什么区别,实际上内藏乾坤。
首先我们在配置的时候,defaultSuccessUrl 和 successForwardUrl 只需要配置一个即可,具体配置哪个,则要看你的需求,两个的区别如下:
- defaultSuccessUrl 有一个重载的方法,我们先说一个参数的 defaultSuccessUrl 方法。如果我们在 defaultSuccessUrl 中指定登录成功的跳转页面为
/index,此时分两种情况,如果你是直接在浏览器中输入的登录地址,登录成功后,就直接跳转到/index,如果你是在浏览器中输入了其他地址,例如http://xxxx/hello,结果因为没有登录,又重定向到登录页面,此时登录成功后,就不会来到/index,而是来到/hello页面。 - defaultSuccessUrl 还有一个重载的方法,第二个参数如果不设置默认为 false,也就是我们上面的的情况,如果手动设置第二个参数为 true,则 defaultSuccessUrl 的效果和 successForwardUrl 一致。
- successForwardUrl 表示不管你是从哪里来的,登录后一律跳转到 successForwardUrl 指定的地址。例如 successForwardUrl 指定的地址为
/index,你在浏览器地址栏输入 http://xxxx/hello,结果因为没有登录,重定向到登录页面,当你登录成功之后,就会服务端跳转到/index页面;或者你直接就在浏览器输入了登录页面地址,登录成功后也是来到/index。
3.2 登录失败回调
与登录成功相似,登录失败也是有两个方法:
- failureForwardUrl
- failureUrl
这两个方法在设置的时候也是设置一个即可。failureForwardUrl 是登录失败之后会发生服务端跳转,failureUrl 则在登录失败之后,会发生重定向。
 .and()
 //默认注销登录URL是/logout  可以通过logoutUrl方法来修改默认的注销URL
 .logout()
 .logoutUrl("/logout2")
 .logoutRequestMatcher(new AntPathRequestMatcher("/logout2","POST"))
 .logoutSuccessUrl("/successIndex")
 .deleteCookies()
 .clearAuthentication(true)
 .invalidateHttpSession(true)
 .permitAll()
 .and()
注销登录的配置:
- 默认注销的 URL 是/logout2,是一个 GET 请求,我们可以通过 logoutUrl 方法来修改默认的注销 URL。
- logoutRequestMatcher 方法不仅可以修改注销 URL,还可以修改请求方式,实际项目中,这个方法和 logoutUrl 任意设置一个即可。
- logoutSuccessUrl 表示注销成功后要跳转的页面。
- deleteCookies 用来清除 cookie。
- clearAuthentication 和 invalidateHttpSession 分别表示清除认证信息和使 HttpSession 失效,默认可以不用配置,默认就会清除。


 5万+
5万+

 被折叠的 条评论
为什么被折叠?
被折叠的 条评论
为什么被折叠?
 到【灌水乐园】发言


