


 本文介绍了如何在LinuxCentOS系统中查看操作系统版本,更换yum源以解决下载速度问题,以及详细步骤来安装和配置DockerCE,包括设置国内镜像加速和处理内核警告。
Linux查看当前操作系统版本信息
[root@VM-0-9-centos ~]# cat /proc/version
Linux version 3.10.0-1127.19.1.el7.x86_64 (mockbuild@kbuilder.bsys.centos.org) (gcc version 4.8.5 20150623 (Red Hat 4.8.5-39) (GCC) ) #1 SMP Tue Aug 25 17:23:54 UTC 2020
Centos<?> Linux更改yum源
Centos 下载慢,随手百度,方法都是推荐更换国内的yum源。
按照推荐的方法,发现总是出现
错误:为 repo ‘base’ 下载元数据失败
搞了一晚上才发现,源网址都是对应系统版本号的,现在的资料都是针历史版本的。
大家可以按照如下流程修改源
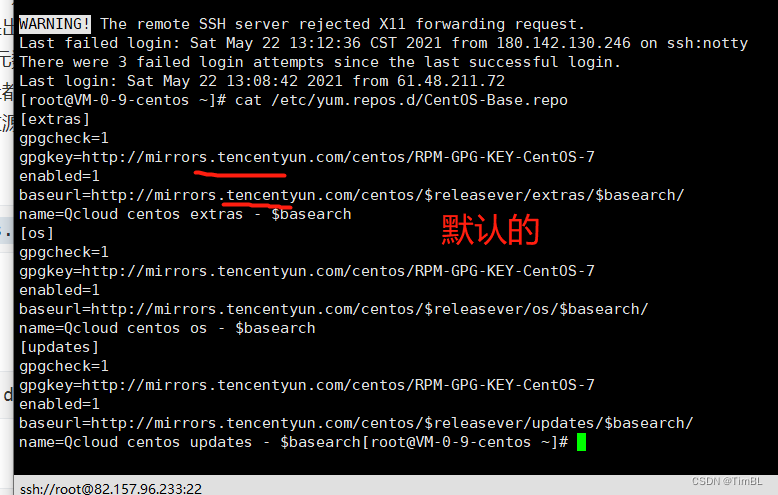
查看现有数据源
cat /etc/yum.repos.d/CentOS-Base.repo
1.备份现有源
mv /etc/yum.repos.d /etc/yum.repos.d.backup
2.设置新的yum目录
mkdir /etc/yum.repos.d
3.安装wget(我没安装,也没事,可能是我以前安装过)
yum install -y wget
4.就是坑了我一晚上的下载配置(大家一定要区分自己的系统版本,不然肯定不通过)
CentOS 5:
wget -O /etc/yum.repos.d/CentOS-Base.repo http://mirrors.aliyun.com/repo/Centos-5.repo

CentOS 6:
wget -O /etc/yum.repos.d/CentOS-Base.repo http://mirrors.aliyun.com/repo/Centos-6.repo

CentOS 7:
wget -O /etc/yum.repos.d/CentOS-Base.repo http://mirrors.aliyun.com/repo/Centos-7.repo

CentOS 8:
wget -O /etc/yum.repos.d/CentOS-Base.repo http://mirrors.aliyun.com/repo/Centos-8.repo
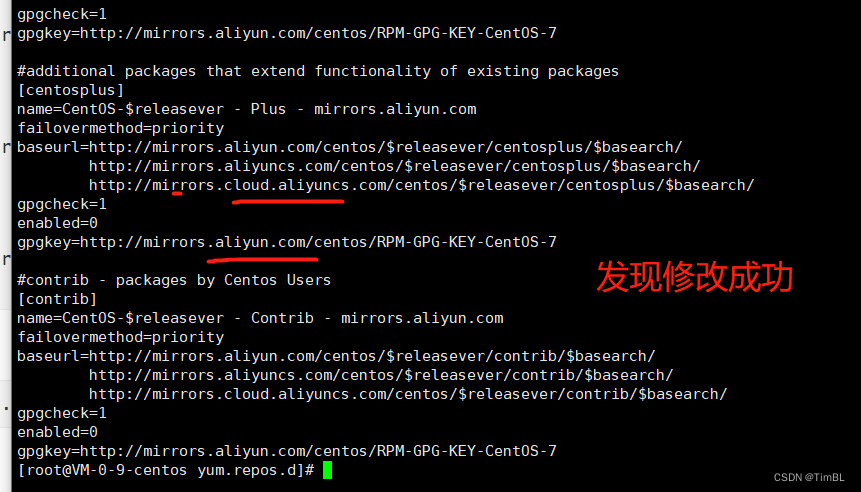
再次查询
cat /etc/yum.repos.d/CentOS-Base.repo
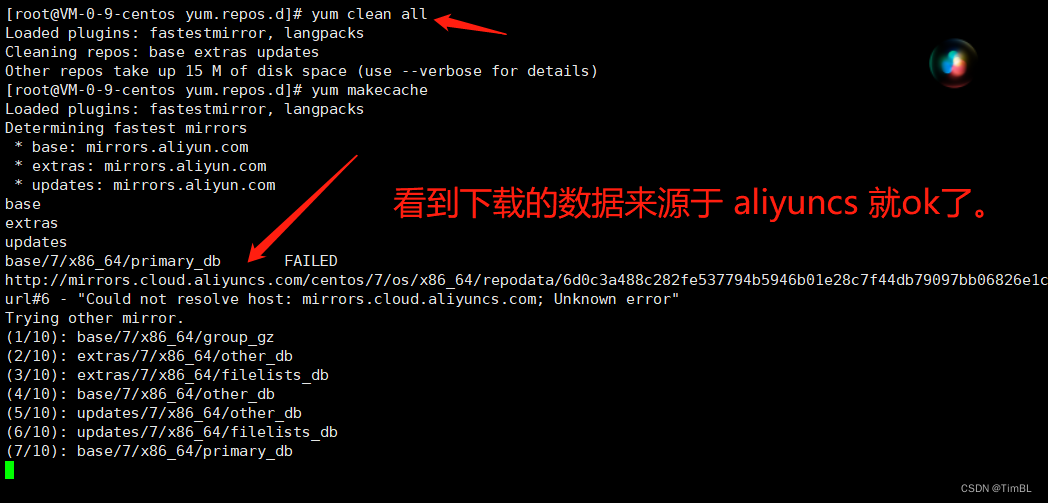
5.清除文件并重建元数据缓存
yum clean all

yum makecache
6.最后更新软件包,这一步要下载安扎ung或升级一百多个软件包,比较费时间,大概三五分钟吧!
yum update -y
CentOS<?> 安装 Docker
Centos 安装 doker,docker-compose,并设置docker开机启动
警告:切勿在没有配置 Docker YUM 源的情况下直接使用 yum 命令安装 Docker.
#准备工作
#系统要求
Docker CE 支持 64 位版本 CentOS 7,并且要求内核版本不低于 3.10。 CentOS 7 满足最低内核的要求,但由于内核版本比较低,部分功能(如 overlay2 存储层驱动)无法使用,并且部分功能可能不太稳定。
#卸载旧版本
旧版本的 Docker 称为 docker 或者 docker-engine,使用以下命令卸载旧版本:
$sudo yum remove docker \
                  docker-client \
                  docker-client-latest \
                  docker-common \
                  docker-latest \
                  docker-latest-logrotate \
                  docker-logrotate \
                  docker-selinux \
                  docker-engine-selinux \
                  docker-engine
#使用 yum 安装
执行以下命令安装依赖包:
$sudo yum install -y yum-utils \
           device-mapper-persistent-data \
           lvm2
鉴于国内网络问题,强烈建议使用国内源,官方源请在注释中查看。
执行下面的命令添加 yum 软件源:
$sudo yum-config-manager \
    --add-repo \
    https://mirrors.ustc.edu.cn/docker-ce/linux/centos/docker-ce.repo


# 官方源
# $ sudo yum-config-manager \
#     --add-repo \
#     https://download.docker.com/linux/centos/docker-ce.repo
如果需要最新版本的 Docker CE 请使用以下命令:
$sudo yum-config-manager --enable docker-ce-edge
如果需要测试版本的 Docker CE 请使用以下命令:
$sudo yum-config-manager --enable docker-ce-test
#安装 Docker CE
更新 yum 软件源缓存,并安装 docker-ce。
$sudo yum makecache fast
$sudo yum install docker-ce
#使用脚本自动安装
在测试或开发环境中 Docker 官方为了简化安装流程,提供了一套便捷的安装脚本,CentOS 系统上可以使用这套脚本安装:
$sudo curl -fsSL get.docker.com -o get-docker.sh
$sudo sh get-docker.sh --mirror Aliyun
执行这个命令后,脚本就会自动的将一切准备工作做好,并且把 Docker CE 的 Edge 版本安装在系统中。
#启动 Docker CE
$sudo systemctl enable docker
$sudo systemctl start docker
#建立 docker 用户组
默认情况下,docker 命令会使用 Unix socket 与 Docker 引擎通讯。而只有 root 用户和 docker 组的用户才可以访问 Docker 引擎的 Unix socket。出于安全考虑,一般 Linux 系统上不会直接使用 root 用户。因此,更好地做法是将需要使用 docker 的用户加入 docker 用户组。
建立 docker 组:
$sudo groupadd docker
将当前用户加入 docker 组:
$sudo usermod -aG docker $USER
退出当前终端并重新登录,进行如下测试。
#测试 Docker 是否安装正确
docker run hello-world

Unable to find image 'hello-world:latest' locally
latest: Pulling from library/hello-world
ca4f61b1923c: Pull complete
Digest: sha256:be0cd392e45be79ffeffa6b05338b98ebb16c87b255f48e297ec7f98e123905c
Status: Downloaded newer image for hello-world:latest

Hello from Docker!
This message shows that your installation appears to be working correctly.

To generate this message, Docker took the following steps:
 1. The Docker client contacted the Docker daemon.
 2. The Docker daemon pulled the "hello-world" image from the Docker Hub.
    (amd64)
 3. The Docker daemon created a new container from that image which runs the
    executable that produces the output you are currently reading.
 4. The Docker daemon streamed that output to the Docker client, which sent it
    to your terminal.

To try something more ambitious, you can run an Ubuntu container with:
 $ docker run -it ubuntu bash

Share images, automate workflows, and more with a free Docker ID:
 https://cloud.docker.com/

For more examples and ideas, visit:
 https://docs.docker.com/engine/userguide/
若能正常输出以上信息,则说明安装成功。
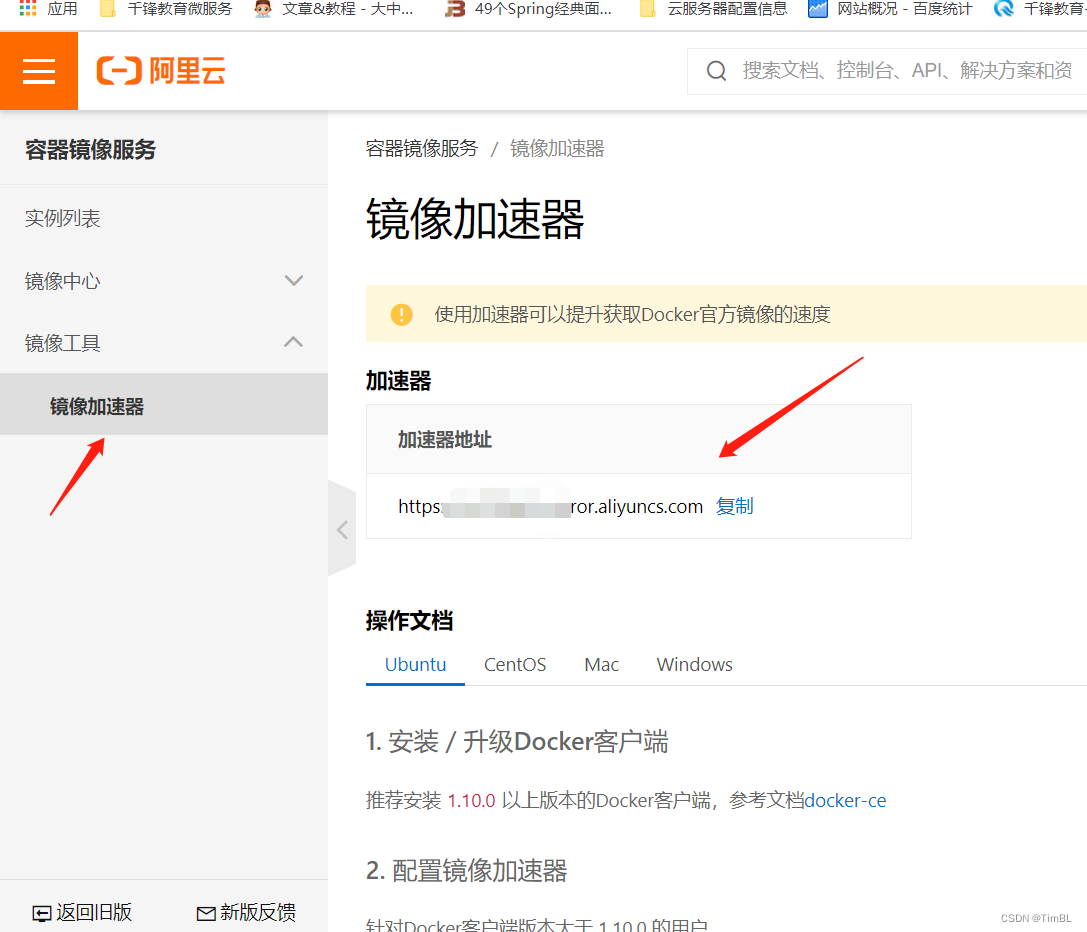
#镜像加速
鉴于国内网络问题,后续拉取 Docker 镜像十分缓慢,强烈建议安装 Docker 之后配置 国内镜像加速。
阿里云容器镜像地址:https://cr.console.aliyun.com/cn-beijing/instances/mirrors
对于使用 systemd 的系统,请在 /etc/docker/daemon.json 中写入如下内容(如果文件不存在请新建该文件)
{
  "registry-mirrors": [
    "https://registry.docker-cn.com" // 换成自己的阿里云仓库的地址【"https://m755ftg1.mirror.aliyuncs.com"】
  ]
}
注意,一定要保证该文件符合 json 规范,否则 Docker 将不能启动。
之后重新启动服务。
sudo mkdir -p /etc/docker

sudo tee /etc/docker/daemon.json <<-'EOF'
{
  "registry-mirrors": ["https://m755ftg1.mirror.aliyuncs.com"]
}
EOF

sudo systemctl daemon-reload
sudo systemctl restart docker
检查加速器是否生效
docker info
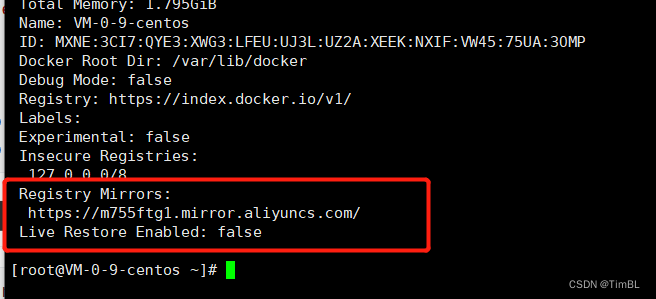
配置加速器之后,如果拉取镜像仍然十分缓慢,请手动检查加速器配置是否生效,在命令行执行 ,如果从结果中看到了如下内容,说明配置成功。
#添加内核参数
默认配置下,如果在 CentOS 使用 Docker CE 看到下面的这些警告信息:
WARNING: bridge-nf-call-iptables is disabled
WARNING: bridge-nf-call-ip6tables is disabled
请添加内核配置参数以启用这些功能。
$sudo tee -a /etc/sysctl.conf <<-EOF
net.bridge.bridge-nf-call-ip6tables = 1
net.bridge.bridge-nf-call-iptables = 1
EOF
然后重新加载 sysctl.conf 即可
$sudo sysctl -p
- 设置开机启动(避免重启机器后,docker无法使用的问题)
systemctl enable docker
#参考文档
Docker Compose 安装与卸载
Linux 系统请使用以下介绍的方法安装。
#二进制包安装
在 Linux 上的也安装十分简单,从 官方 GitHub Release 处直接下载编译好的二进制文件即可。
例如,在 Linux 64 位系统上直接下载对应的二进制包。
sudo curl -L https://github.com/docker/compose/releases/download/1.17.1/docker-compose-`uname -s`-`uname -m` > /usr/local/bin/docker-compose
sudo chmod +x /usr/local/bin/docker-compose
的也安装十分简单,从 官方 GitHub Release 处直接下载编译好的二进制文件即可。
例如,在 Linux 64 位系统上直接下载对应的二进制包。
sudo curl -L https://github.com/docker/compose/releases/download/1.17.1/docker-compose-`uname -s`-`uname -m` > /usr/local/bin/docker-compose
sudo chmod +x /usr/local/bin/docker-compose


 被折叠的 条评论
为什么被折叠?
被折叠的 条评论
为什么被折叠?
 到【灌水乐园】发言


