


 本文详细介绍如何使用Eclipse、Maven和JDK创建SpringBoot项目,包括配置依赖、启动类及应用配置。通过示例代码展示如何创建HelloController并运行SpringBoot应用。
一、环境信息
- 工具:Eclipse、Maven、JDK
- 版本:
- JDK:

- Maven:

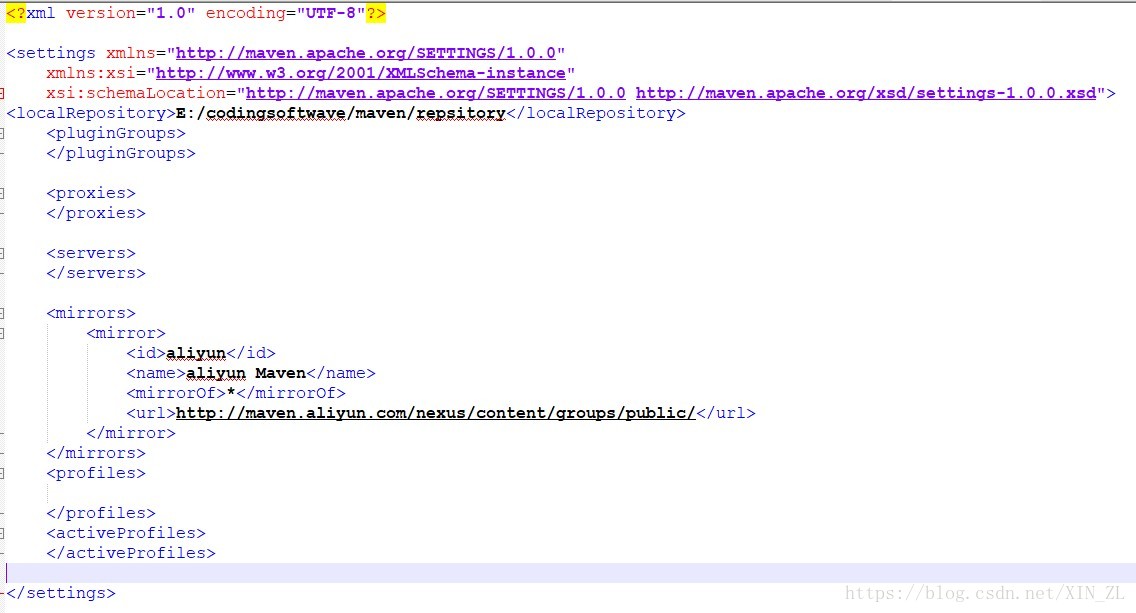
- Maven配置:
二、创建springboot项目
-
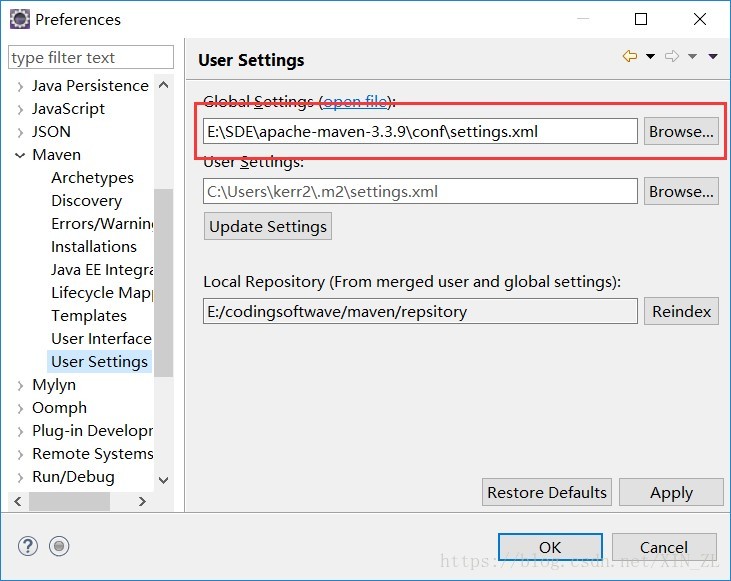
检查eclipse是否关联Maven
-
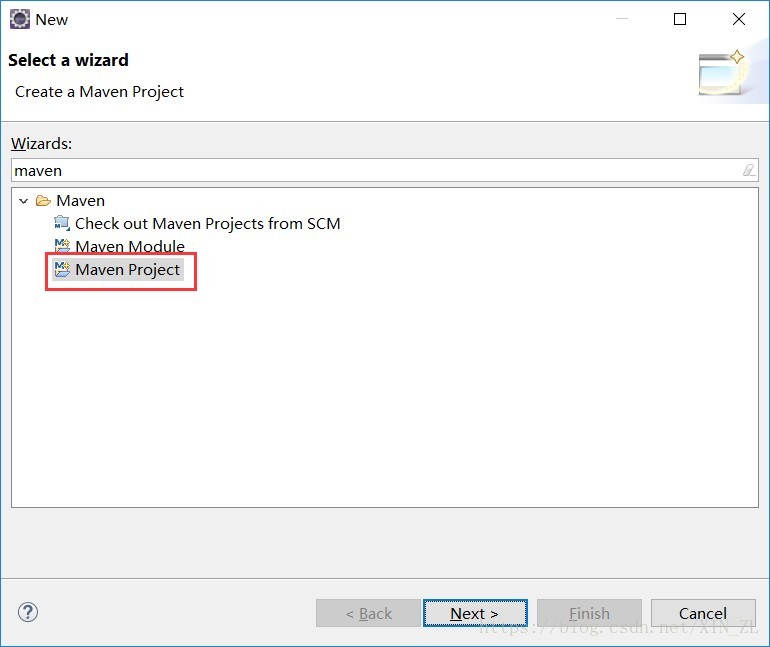
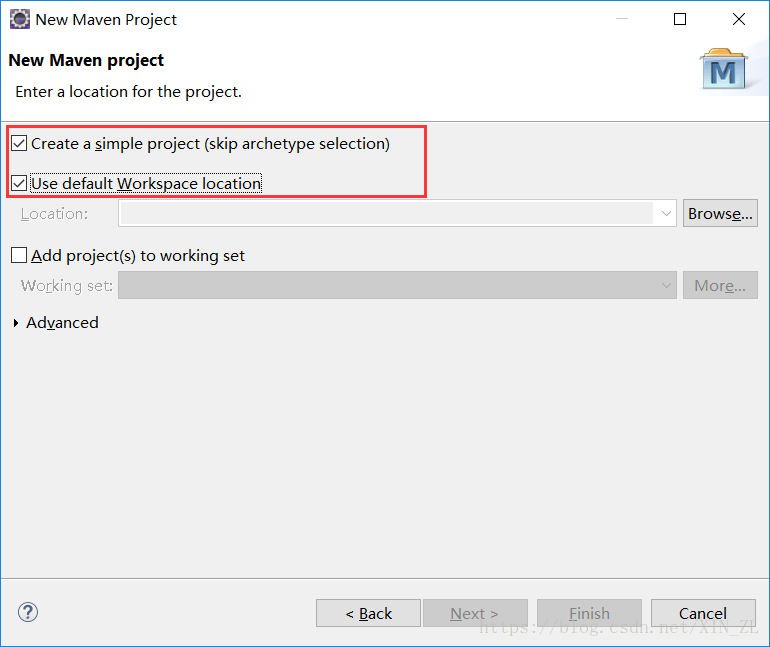
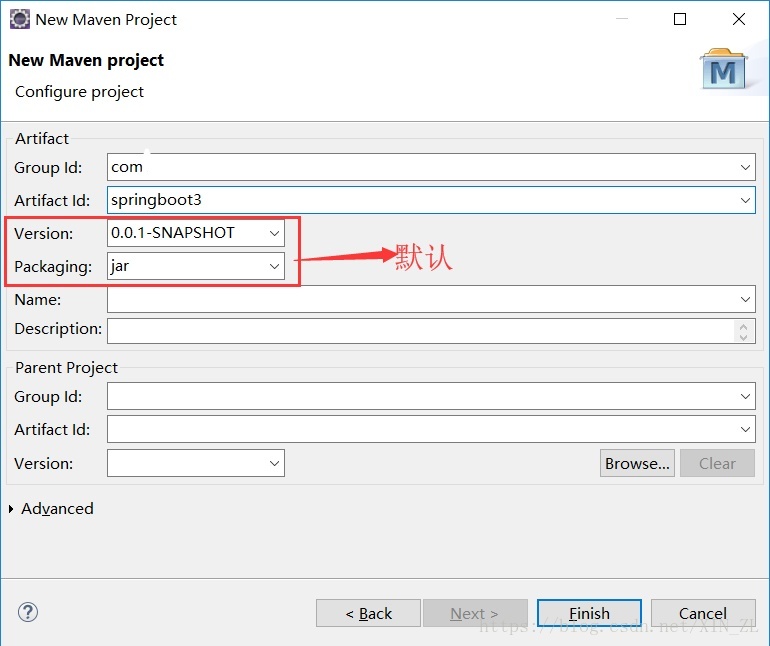
创建Maven项目
-
引入Springboot依赖关系
1. 在pom中添加以下内容<parent> <groupId>org.springframework.boot</groupId> <artifactId>spring-boot-starter-parent</artifactId> <version>2.0.5.RELEASE</version> </parent> <!-- Add typical dependencies for a web application --> <dependencies> <dependency> <groupId>org.springframework.boot</groupId> <artifactId>spring-boot-starter-web</artifactId> </dependency> </dependencies> <!-- Package as an executable jar --> <build> <plugins> <plugin> <groupId>org.springframework.boot</groupId> <artifactId>spring-boot-maven-plugin</artifactId> </plugin> </plugins> </build>- 更新该项目
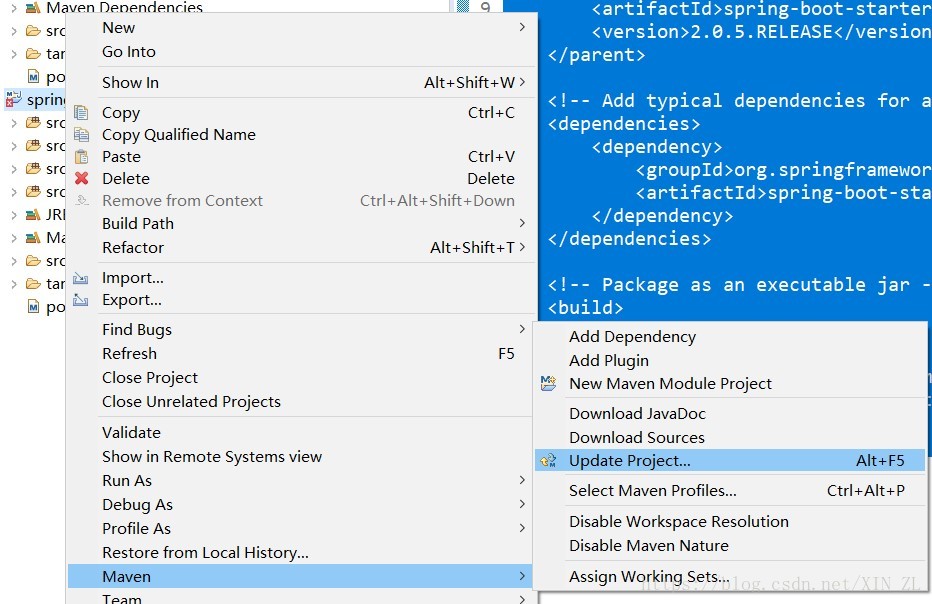
- 当项目无报错标识时即完成
- 更新该项目
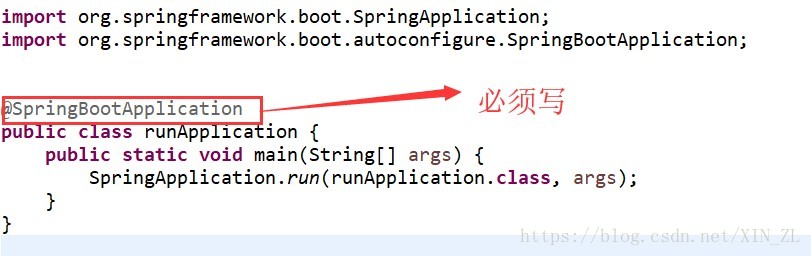
三、springboot启动类
四、springboot配置文件
springboot配置文件可分为两种方式:1.application.properties 2.application.yml
建议使用application.yml配置文件
优点:
-
编写方便。例如:
properties写法:server.port=8080 server.servlet.context-path=/springyml写法:
server: port: 8080 servlet: context-path: /spring -
易于配置时分组
五、Hello SpringBoot!
以上配置完成后,就可以开始写springboot项目了!!!
首先我们检验一下:
-
创建一个HelloController.java
import org.springframework.web.bind.annotation.RequestMapping; import org.springframework.web.bind.annotation.RequestMethod; import org.springframework.web.bind.annotation.RestController; @RestController public class HelloController { @RequestMapping(value = "hello", method= RequestMethod.GET) public String hello() { return "Hello Spring Boot!"; } } -
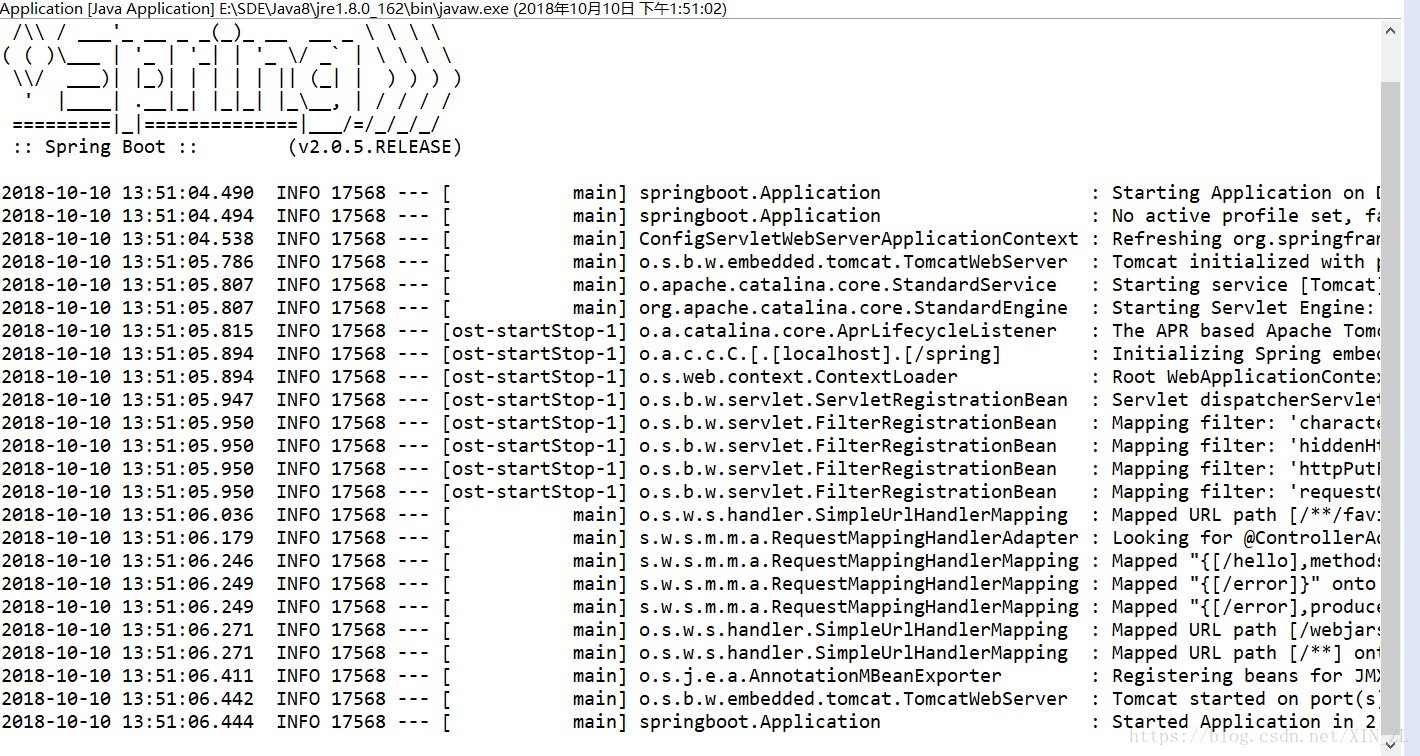
然后启动该springboot项目
-
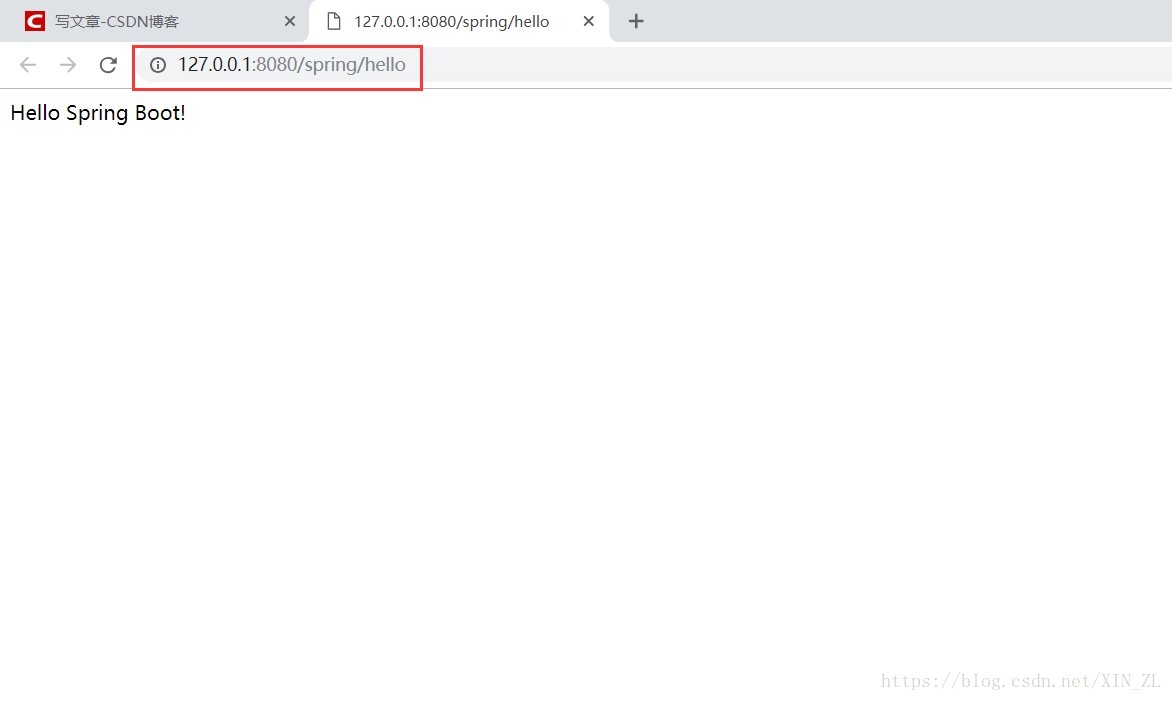
在网页访问该项目
由于我们在application.yml中配置了context-path,所以访问时需加入配置的名称,我这里配置的为spring


 1万+
1万+

 被折叠的 条评论
为什么被折叠?
被折叠的 条评论
为什么被折叠?
 到【灌水乐园】发言


