


前言
环境的部署在annaconda下进行,笔者的基本环境如下:
- python版本:3.10
- Tensorrt-python版本:10.3
- cuda版本:12.6
- Tensorrt-LLM版本:v0.12.0-jetson
使用设备为orin nx 16g super,预装了jetpack 6.2。jetpack6.2已经包含了cuda 12.6和Tensorrt C++ 10.3. 所以后续配置基本只介绍如何在jetson安装Tensorrt-LLM。
搭建的硬件平台如下:
https://www.seeedstudio.com/reComputer-Super-J4012-p-6443.html
关于部署推理的模型,本文以Tiny-Llama 1.1B为例。
Tiny-Llama的github仓库:https://github.com/jzhang38/TinyLlama
Tensorrt-llm适配了哪些模型,可以在官方github仓库的v0.12.0-jetson分支下查看:
https://github.com/NVIDIA/TensorRT-LLM/tree/v0.12.0-jetson/examples
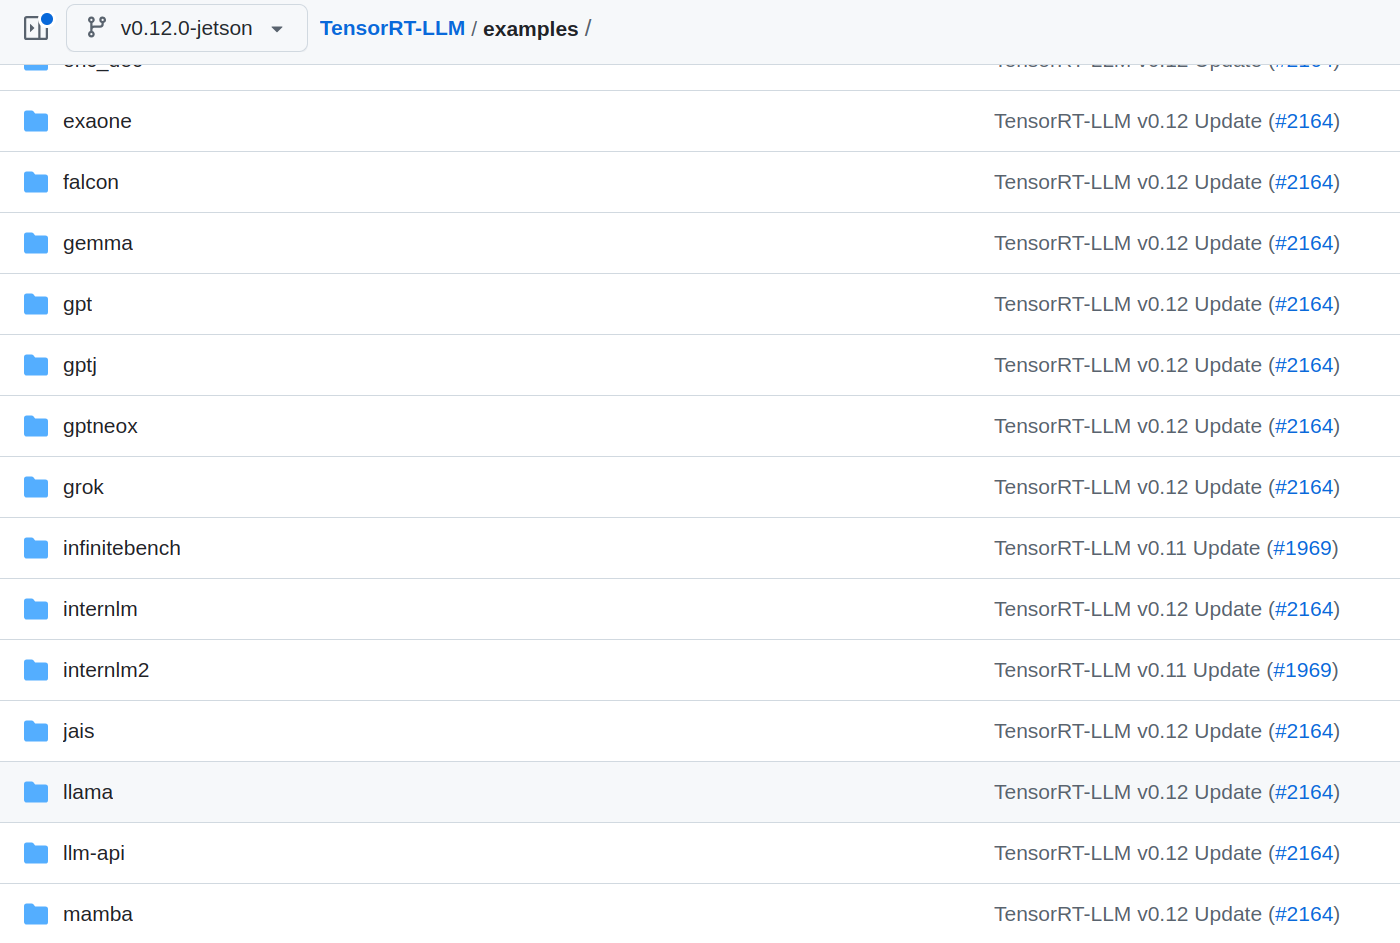
Tiny-Llama虽然不在example中,但是和Llama是相关的模型架构,也是可以在Tensorrt上部署的
1. 在Jetson安装Tensorrt-LLM
创建用于部署的conda环境,制定python版本为3.10,名字自定义。创建完成后激活conda环境:
conda create --name trtllm-tiny python=3.10
conda activate trtllm-tiny
更新包并安装所需的软件包:
sudo apt-get update
sudo apt-get install -y python3-pip libopenblas-dev ccache
下载 CuSparseLT 安装脚本,在cuda12.6环境下运行安装脚本:
wget https://raw.githubusercontent.com/pytorch/pytorch/9b424aac1d70f360479dd919d6b7933b5a9181ac/.ci/docker/common/install_cusparselt.sh
sudo -E bash ./install_cusparselt.sh
在上面创建的conda环境中安装制定版本的numpy:
pip install numpy=='1.26.1'
拉取Tensorrt-llm的github仓库:
git clone -b v0.12.0-jetson https://github.com/NVIDIA/TensorRT-LLM.git
cd TensorRT-LLM
git checkout v0.12.0-jetson
git lfs pull
运行脚本,构造wheel文件用于安装:
python scripts/build_wheel.py --clean
--cuda_architectures 87
-DENABLE_MULTI_DEVICE=0
--build_type Release --benchmarks
--use_ccache -DCMAKE_CUDA_COMPILER=/usr/local/cuda-12.6/bin/nvcc
脚本运行完成后,再当前路径的build目录会生成一个wheel文件,使用pip安装:
pip install build/tensorrt_llm-0.12.0-cp310-cp310-linux_aarch64.whl
到此,Tensorrt-llm完成安装。在当前conda环境下运行该指令验证是否安装成功,正常情况会输出对应版本号:
python3 -c "import tensorrt_llm; print(tensorrt_llm.__version__)"

2. 从Hugging face获取用于推理的模型
Tiny-Llama在Hugging Face上为免费公开的模型,不需要申请访问,可以直接终端拉取或。
可以使用 Hugging Face CLI 来下载模型。使用以下命令安装 CLI:
pip install -U "huggingface_hub[cli]"
安装完成后通过CLI获取模型:
huggingface-cli download TinyLlama/TinyLlama-1.1B-Chat-v1.0 --local-dir /your_path/TinyLlama-1.1B
非免费公开的模型,需要你在对应的Hugging face模型页面申请访问权限,然后再终端登录你的Hugging face账号,并输入你的Hugging Face API KEY。
如果因为网络问题无法通过CLI获取,可以在下面的模型主页手动下载模型的相关文件:
https://huggingface.co/TinyLlama/TinyLlama-1.1B-Chat-v1.0/tree/main
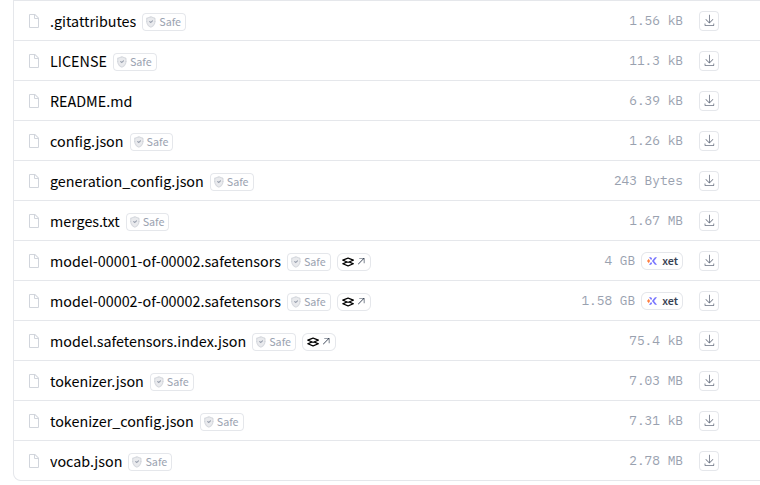
完整地下载完成后,文件夹包括如下的内容:
3. 把Hugging face格式模型转为trt-llm格式
模型转换参考指令
根据个人需求,转为trt-llm格式可以选择是否量化,本文以不量化以及量化为int4_awq两种方式为例。
转换过程遇到的报错处理在该小节后面。
不量化模型,直接转为trt-llm格式:
python /your_path/TensorRT-LLM/examples/llama/convert_checkpoint.py
--model_dir /your_path/TinyLlama-1.1B
--output_dir /your_path/TinyLlama-1.1B-Chat-convert
--dtype float16
--model_dir是下载的Hugging face模型路径,--output_dir是trt-llm格式模型的输出路径。
如果选择量化为int4_awq,则转换的参考命令如下:
python /your_path/TensorRT-LLM/examples/quantization/quantize.py
--model_dir  /your_path/TinyLlama-1.1B
--output_dir /your_path/TinyLlama-1.1B-quantized-awq
--dtype float16
--qformat int4_awq
--awq_block_size 128
--device cuda
--batch_size 16
同样的,--output_dir是trt-llm格式模型的输出路径,不过已量化为in4t_awq。
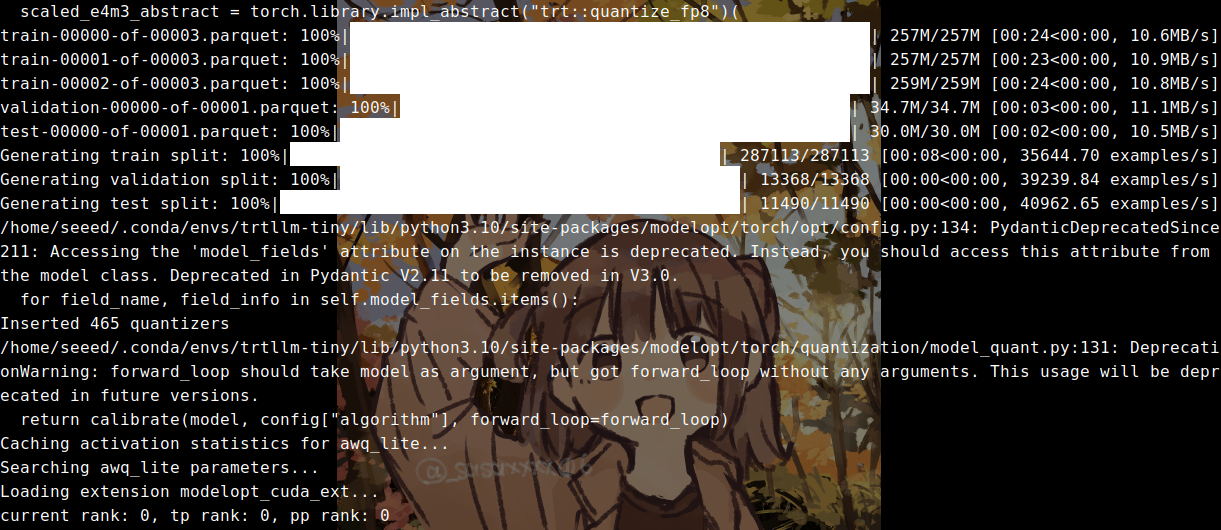
完成后终端打印信息如下:
(optional)转换过程的可能报错以及解决方案
报错一,因为conda环境下缺失libstdc++.so.6 导致报错如下:
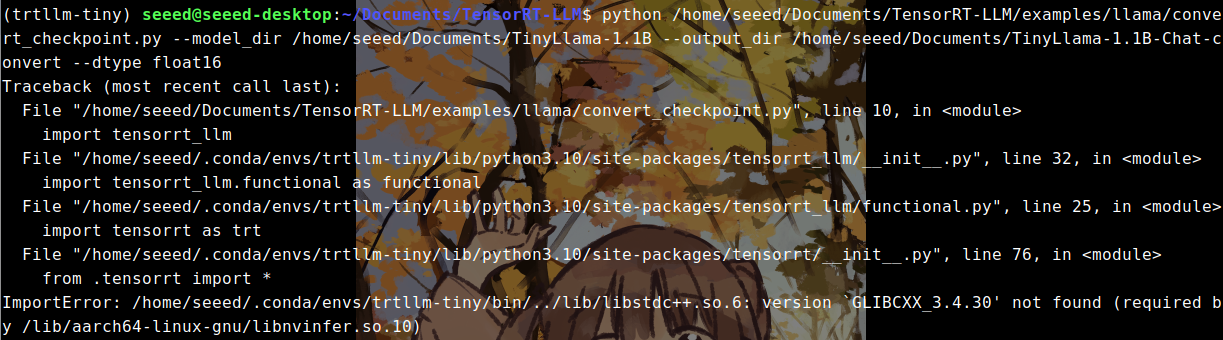
解决方式:
查看本地环境是否有该动态库:
strings /usr/lib/aarch64-linux-gnu/libstdc++.so.6 | grep GLIBCXX_3.4.30
如果有内容返回,则把本地的动态库拷贝到conda环境的路径下,trtllm-tiny换为你的环境名称:
sudo cp /usr/lib/aarch64-linux-gnu/libstdc++.so.6 ~/.conda/envs/trtllm-tiny/lib/
报错二,可能会在执行quantize.py 的时候发生:
```python
The above exception was the direct cause of the following exception:

Traceback (most recent call last):
  File "/home/seeed/Documents/TensorRT-LLM/examples/quantization/quantize.py", line 107, in <module>
    quantize_and_export(
  File "/home/seeed/Documents/TensorRT-LLM/tensorrt_llm/quantization/quantize_by_modelopt.py", line 384, in quantize_and_export
    from modelopt.torch.export import export_tensorrt_llm_checkpoint
  File "/home/seeed/.conda/envs/trtllm-tiny/lib/python3.10/site-packages/modelopt/torch/__init__.py", line 24, in <module>
    raise ImportError("Please install optional ``[torch]`` dependencies.") from e
ImportError: Please install optional ``[torch]`` dependencies.
解决方式:
修改修改~/.conda/envs/trtllm-tiny/lib/python3.10/site-packages/modelopt/torch/utils/network.py,其中trtllm-tiny为conda环境名。
首先修改import torch.distributed.fsdp:
import inspect
import warnings
from collections import abc, deque
from typing import Any, Callable, Dict, Iterable, Optional, Set, Tuple, Type, Union

import torch

#import torch.distributed.fsdp 改为下面内容
try:
    import torch.distributed.fsdp
except (ImportError, ModuleNotFoundError, AttributeError):
    pass

import torch.nn as nn
from torch.nn.modules.batchnorm import _BatchNorm
from tqdm import tqdm
然后修改UNSUPPORTED_WRAPPERS:
SUPPORTED_WRAPPERS = {
    nn.parallel.DataParallel: "module",  # indicating attribute key to unwrap
    nn.parallel.DistributedDataParallel: "module",
}
#UNSUPPORTED_WRAPPERS = {torch.distributed.fsdp.FullyShardedDataParallel} 改为下面一行
UNSUPPORTED_WRAPPERS = set()
4.构建trt-llm推理的engine
构建engine参考指令
根据第三小节中是否选择量化,构建engine的指令也会有所不同。
如果不选择量化,参考的构建指令如下:
python /your_path/TensorRT-LLM/tensorrt_llm/commands/build.py
--checkpoint_dir /your_path/TensorRT-LLM/TinyLlama-1.1B-Chat-convert
--output_dir /your_path/TensorRT-LLM/TinyLlama-1.1B-Chat-engine
--gpt_attention_plugin float16
--gemm_plugin float16
如果量化int4_awq,参考的构建指令如下:
python /your_path/TensorRT-LLM/tensorrt_llm/commands/build.py
--checkpoint_dir /your_path/TensorRT-LLM/TinyLlama-1.1B-Chat-convert
--output_dir /your_path/TensorRT-LLM/TinyLlama-1.1B-Chat-engine
--gpt_attention_plugin float16
--gemm_plugin float16
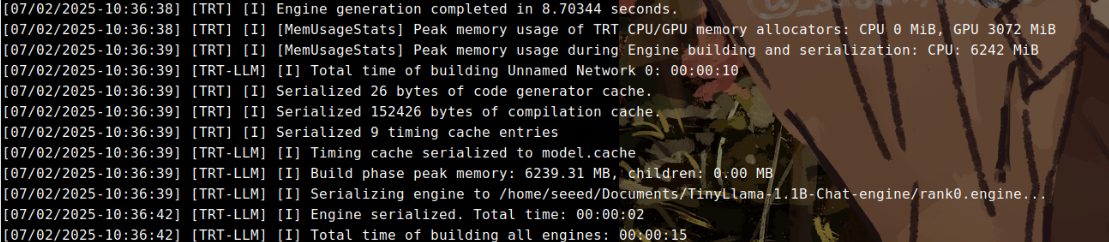
构建engine完成的打印信息如下:
(optional)构建过程的可能报错以及解决方案
类似报错信息如下:
[TensorRT-LLM] TensorRT-LLM version: 0.12.0
Traceback (most recent call last):
  File "/home/seeed/Documents/TensorRT-LLM/tensorrt_llm/commands//build.py", line 509, in <module>
    main()
  File "/home/seeed/Documents/TensorRT-LLM/tensorrt_llm/commands//build.py", line 500, in main
    parallel_build(model_config, ckpt_dir, build_config, args.output_dir,
  File "/home/seeed/Documents/TensorRT-LLM/tensorrt_llm/commands//build.py", line 377, in parallel_build
    passed = build_and_save(rank, rank % workers, ckpt_dir,
  File "/home/seeed/Documents/TensorRT-LLM/tensorrt_llm/commands//build.py", line 344, in build_and_save
    engine = build_model(build_config,
  File "/home/seeed/Documents/TensorRT-LLM/tensorrt_llm/commands//build.py", line 286, in build_model
    assert not build_config.plugin_config.streamingllm or architecture == "LlamaForCausalLM", \
  File "/home/seeed/.conda/envs/trtllm-tiny/lib/python3.10/site-packages/tensorrt_llm/plugin/plugin.py", line 94, in prop
    field_value = getattr(self, storage_name)
AttributeError: 'PluginConfig' object has no attribute '_streamingllm'. Did you mean: '_streamingllm'?
解决方式:
编辑/your_path/TensorRT-LLM/tensorrt_llm/plugin/plugin.py或者~/.conda/envs/trtllm-tiny/lib/python3.10/site-packages/tensorrt_llm/plugin/plugin.py。取决于你使用工程目录下的脚本,还是安装后的trt-llm命令,本文为示例为前者。
把下面代码段的init=False改为init=True。
5.本地推理测试
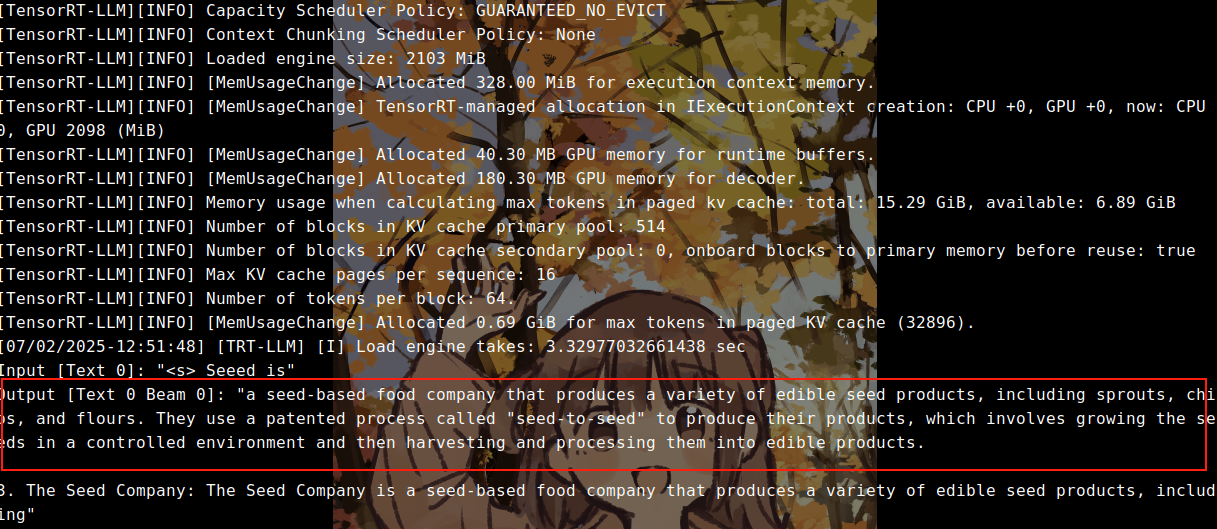
可以使用run.py,对构建好的engine进行功能性的推理测试,参考指令如下:
python /your_path/TensorRT-LLM/examples/run.py
--engine_dir TinyLlama-1.1B-Chat-engine/
--max_output_len 100
--max_attention_window_size 1024
--tokenizer_dir TinyLlama-1.1B
--input_text "Seeed is"
--gpu_weights_percent 80
--kv_cache_free_gpu_memory_fraction 0.1 --num_beams 1
正常情况下,会返回模型的推理输出:
6.推理速度测试
benchmark测试参考指令
运行benchmark.py,可以对前面非量化/量化为int4_awq的模型进行推理速度测试。
对于非量化的模型,参考指令:
python /your_path/TensorRT-LLM/benchmarks/python/benchmark.py
--engine_dir TinyLlama-1.1B-Chat-engine
--batch_size 4
--input_output_len 16,64
--num_runs 10
--dtype float16```
当batch size设置为4时,结果为155.9 tokens/s。

对于量化为int4_awq的模型,参考指令:
python /your_path/TensorRT-LLM/benchmarks/python/benchmark.py
--engine_dir TinyLlama-1.1B-Chat-engine-int4_awq
--batch_size 4
--input_output_len 16,64
--num_runs 10
--dtype float16
--quantization int4_weight_only_awq
当batch size设置为4时,结果为302 tokens/s, 明显快于非量化的模型。
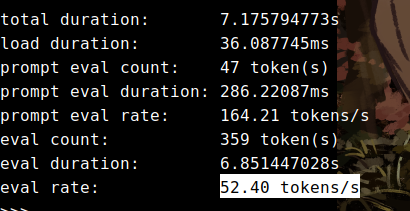
顺便贴一下,同样是int4精度的模型,使用ollma的推理速度是不到60tokens/s.
(optional)运行benchmark.py可能报错以及解决方案
类似报错信息如下,:
[TensorRT-LLM] TensorRT-LLM version: 0.12.0
Process Process-1:
Traceback (most recent call last):
  File "/home/seeed/.conda/envs/trtllm-tiny/lib/python3.10/multiprocessing/process.py", line 315, in _bootstrap
    self.run()
  File "/home/seeed/.conda/envs/trtllm-tiny/lib/python3.10/multiprocessing/process.py", line 108, in run
    self._target(*self._args, **self._kwargs)
  File "/home/seeed/Documents/TensorRT-LLM/benchmarks/python/mem_monitor.py", line 72, in _upd_peak_memory_usage
    peak_host_used, peak_device_used = self.get_memory_usage()
  File "/home/seeed/Documents/TensorRT-LLM/benchmarks/python/mem_monitor.py", line 84, in get_memory_usage
    device_used, _, _ = device_memory_info()
  File "/home/seeed/Documents/TensorRT-LLM/tensorrt_llm/profiler.py", line 163, in device_memory_info
    mem_info = _device_get_memory_info_fn(handle)
NameError: name '_device_get_memory_info_fn' is not defined
解决方式:
修改/your_path/TensorRT-LLM/benchmarks/python/mem_monitor.py,把device_used改为=0,禁用内存监控
    def get_memory_usage(self):
        if self.disable_host_mem_monitor:
            host_used = 0
        else:
            host_used, _, _ = host_memory_info(self.pid)
        #device_used, _, _ = device_memory_info() 改为下面
        device_used = 0

        return host_used, device_used
总结
根据这个流程,也可以完成Qwen等模型在jetson上的部署推理,但模型的参数大小会受限于显存,计算公式可以参考这里。目前笔者在orin nx super 16g推理7B-int8大小的模型没有什么压力。
完成模型的部署后,就可以在jetson上搭建你的大语言服务器了。


 2057
2057

 被折叠的 条评论
为什么被折叠?
被折叠的 条评论
为什么被折叠?
 到【灌水乐园】发言


