


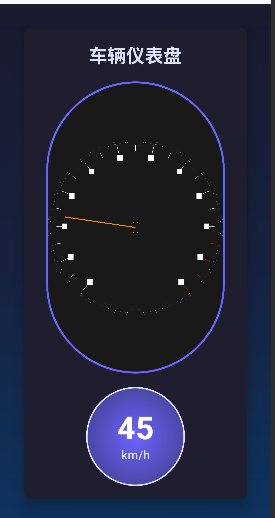
在车载HMI(人机交互界面)开发中,OpenGL ES 凭借其硬件加速能力和跨平台特性,成为实现高帧率、低延迟图形渲染的首选方案。本文将深入解析一个基于OpenGL ES 2.0的汽车仪表盘实现,涵盖图形渲染管线设计、矩阵变换优化和动画控制逻辑等核心技术。
一、核心实现原理
1. 渲染管线架构

-
顶点着色器:完成坐标变换(模型-视图-投影矩阵)
-
片段着色器:处理颜色插值与抗锯齿
-
帧缓冲:双缓冲机制避免画面撕裂
2. 关键数据结构
// 顶点数据存储优化
private val vertices = FloatArray(2000)  // 预分配顶点空间
private lateinit var vertexBuffer: FloatBuffer  // 直接内存缓冲区

// 矩阵栈管理
private val projectionMatrix = FloatArray(16)
private val viewMatrix = FloatArray(16)
private val modelMatrix = FloatArray(16)
通过预分配顶点缓冲区和矩阵栈,减少GC压力,提升渲染效率。
3. 矩阵变换
// 投影矩阵计算(透视投影)
Matrix.frustumM(projectionMatrix, 0, -ratio, ratio, -1f, 1f, 3f, 7f)

// 视图矩阵设置(摄像机位置)
Matrix.setLookAtM(viewMatrix, 0, 0f, 0f, 4f, 0f, 0f, 0f, 0f, 1f, 0f)
-
透视投影:通过
frustumM实现16:9宽高比适配 -
视锥体裁剪:近裁剪面(0.1f)与远裁剪面(10f)设置
-
模型矩阵:通过旋转实现仪表盘方向调整
4. 顶点数据动态生成
private fun drawCircle(centerX: Float, centerY: Float, radius: Float, color: Int, segments: Int) {
    val angleStep = 2 * Math.PI / segments
    vertices.forEachIndexed { i, _ ->
        val angle = angleStep * i
        vertices[i*3] = (centerX + radius * cos(angle)).toFloat()
        vertices[i*3+1] = (centerY + radius * sin(angle)).toFloat()
    }
}
-
参数化生成:通过分段数控制圆弧精度
-
内存复用:固定大小顶点数组避免频繁内存分配
5. 动画控制逻辑
private fun updateSpeed() {
    speed = when {
        speed < targetSpeed -> min(speed + 2f, targetSpeed)
        speed > targetSpeed -> max(speed - 2f, targetSpeed)
        else -> speed
    }
}
-
线性插值:实现平滑速度过渡
-
帧率无关:通过固定时间步长保证动画流畅性
二 渲染代码
package com.example.openglcarpannel.graphics

import android.graphics.Color
import android.opengl.GLES20
import android.opengl.GLSurfaceView
import android.opengl.Matrix
import java.nio.ByteBuffer
import java.nio.ByteOrder
import java.nio.FloatBuffer
import javax.microedition.khronos.egl.EGLConfig
import javax.microedition.khronos.opengles.GL10
import kotlin.math.cos
import kotlin.math.sin

class CarDashboardRenderer : GLSurfaceView.Renderer {
    private val projectionMatrix = FloatArray(16)
    private val viewMatrix = FloatArray(16)
    private val modelMatrix = FloatArray(16)
    private val mvpMatrix = FloatArray(16)

    private var speed = 0f // 当前速度
    private var targetSpeed = 0f // 目标速度
    private val speedIncrement = 2f // 速度增加步长,用于动画效果

    // 着色器程序
    private var programId = 0

    // 着色器位置
    private var positionHandle = 0
    private var colorHandle = 0
    private var mvpMatrixHandle = 0

    // 顶点数据存储 - increased size to handle more segments
    private val vertices = FloatArray(2000)
    private var vertexCount = 0
    private lateinit var vertexBuffer: FloatBuffer

    override fun onSurfaceCreated(unused: GL10?, config: EGLConfig?) {
        // 设置背景颜色
        GLES20.glClearColor(0.1f, 0.1f, 0.1f, 1.0f)

        // 创建和编译着色器程序
        programId = createProgram()

        // 获取着色器变量位置
        positionHandle = GLES20.glGetAttribLocation(programId, "vPosition")
        colorHandle = GLES20.glGetUniformLocation(programId, "vColor")
        mvpMatrixHandle = GLES20.glGetUniformLocation(programId, "uMVPMatrix")

        // 初始化顶点缓冲区
        val byteBuffer = ByteBuffer.allocateDirect(vertices.size * 4) // 每个float占4字节
        byteBuffer.order(ByteOrder.nativeOrder())
        vertexBuffer = byteBuffer.asFloatBuffer()
    }

    override fun onSurfaceChanged(unused: GL10?, width: Int, height: Int) {
        GLES20.glViewport(0, 0, width, height)

        // 计算投影矩阵
        val ratio = width.toFloat() / height.toFloat()
        Matrix.frustumM(projectionMatrix, 0, -ratio, ratio, -1f, 1f, 3f, 7f)

        // 设置视图矩阵
        Matrix.setLookAtM(viewMatrix, 0, 0f, 0f, 4f, 0f, 0f, 0f, 0f, 1f, 0f)
    }

    override fun onDrawFrame(unused: GL10?) {
        // 清除颜色缓冲区
        GLES20.glClear(GLES20.GL_COLOR_BUFFER_BIT)

        // 使用着色器程序
        GLES20.glUseProgram(programId)

        // 更新速度(动画效果)
        updateSpeed()

        // 保存当前模型矩阵,准备应用旋转
        val tempModelMatrix = FloatArray(16)

        // 绘制仪表盘背景
        Matrix.setIdentityM(modelMatrix, 0)
        // 顺时针旋转270度(90+180),调整仪表盘方向
        Matrix.rotateM(modelMatrix, 0, -270f, 0f, 0f, 1f)
        System.arraycopy(modelMatrix, 0, tempModelMatrix, 0, 16)
        drawDashboardBackground()

        // 绘制刻度
        System.arraycopy(tempModelMatrix, 0, modelMatrix, 0, 16)
        drawSpeedMarkings()

        // 绘制指针
        System.arraycopy(tempModelMatrix, 0, modelMatrix, 0, 16)
        drawSpeedPointer()

        // 速度文本已移除
    }

    private fun updateSpeed() {
        // 平滑过渡到目标速度
        if (speed < targetSpeed) {
            speed = kotlin.math.min(speed + speedIncrement, targetSpeed)
        } else if (speed > targetSpeed) {
            speed = kotlin.math.max(speed - speedIncrement, targetSpeed)
        }
    }

    private fun drawDashboardBackground() {
        // 绘制外圈(更亮的颜色提高可见性)
        drawCircle(0f, 0f, 0.8f, Color.rgb(120, 120, 120), 120)

        // 绘制中间圈(增加对比度)
        drawCircle(0f, 0f, 0.78f, Color.WHITE, 120)

        // 绘制内圈
        drawCircle(0f, 0f, 0.75f, Color.rgb(40, 40, 40), 120)
    }

    // 速度文本相关功能已移除

    private fun drawSpeedMarkings() {
        // 绘制刻度和数字
        val startAngle = 140f // 起始角度(左侧)
        val endAngle = 40f // 结束角度(右侧)
        val angleRange = 280f // 总角度范围(140到40度,实际是280度)
        val maxSpeed = 220f // 最大速度

        for (i in 0..maxSpeed.toInt() step 10) {
            val angle = startAngle - (i / maxSpeed) * angleRange
            val radians = Math.toRadians(angle.toDouble())

            // 刻度长度
            val length = if (i % 20 == 0) 0.1f else 0.05f

            // 刻度颜色
            val color = if (i > 180) Color.RED else Color.WHITE

            // 绘制刻度线
            drawLine(
                (0.75f - length) * cos(radians).toFloat(),
                (0.75f - length) * sin(radians).toFloat(),
                0.75f * cos(radians).toFloat(),
                0.75f * sin(radians).toFloat(),
                color,
                2f
            )

            // 绘制数字(每20单位)
            if (i % 20 == 0) {
                // 简化:这里不绘制实际文本,使用小方块代替
                drawSmallSquare(
                    (0.65f) * cos(radians).toFloat(),
                    (0.65f) * sin(radians).toFloat(),
                    Color.WHITE
                )
            }
        }
    }

    private fun drawSpeedPointer() {
        // 计算指针角度
        val startAngle = 140f
        val angleRange = 280f
        val maxSpeed = 220f
        val currentAngle = startAngle - (speed / maxSpeed) * angleRange
        val radians = Math.toRadians(currentAngle.toDouble())

        // 绘制指针
        drawLine(
            0f,
            0f,
            0.65f * cos(radians).toFloat(),
            0.65f * sin(radians).toFloat(),
            Color.rgb(255, 140, 0),
            4f
        )

        // 绘制中心圆点
        drawCircle(0f, 0f, 0.05f, Color.rgb(255, 140, 0), 30)
    }

    private fun drawCircle(centerX: Float, centerY: Float, radius: Float, color: Int, segments: Int) {
        vertexCount = segments * 3

        // 生成圆形顶点数据
        for (i in 0 until segments) {
            val angle = 2.0 * Math.PI * i / segments
            val x = centerX + radius * cos(angle).toFloat()
            val y = centerY + radius * sin(angle).toFloat()

            vertices[i * 3] = centerX
            vertices[i * 3 + 1] = centerY
            vertices[i * 3 + 2] = 0f

            vertices[segments * 3 + i * 3] = x
            vertices[segments * 3 + i * 3 + 1] = y
            vertices[segments * 3 + i * 3 + 2] = 0f

            val nextAngle = 2.0 * Math.PI * (i + 1) / segments
            val nextX = centerX + radius * cos(nextAngle).toFloat()
            val nextY = centerY + radius * sin(nextAngle).toFloat()

            vertices[segments * 6 + i * 3] = nextX
            vertices[segments * 6 + i * 3 + 1] = nextY
            vertices[segments * 6 + i * 3 + 2] = 0f
        }

        // 更新顶点缓冲区
        vertexBuffer.clear()
        vertexBuffer.put(vertices, 0, vertexCount * 3)
        vertexBuffer.position(0)

        // 使用已设置好的模型矩阵(包含旋转)

        // 计算MVP矩阵
        Matrix.multiplyMM(mvpMatrix, 0, viewMatrix, 0, modelMatrix, 0)
        Matrix.multiplyMM(mvpMatrix, 0, projectionMatrix, 0, mvpMatrix, 0)

        // 设置顶点数据
        GLES20.glVertexAttribPointer(
            positionHandle, 3, GLES20.GL_FLOAT, false, 12, vertexBuffer
        )
        GLES20.glEnableVertexAttribArray(positionHandle)

        // 设置颜色
        GLES20.glUniform4f(
            colorHandle,
            Color.red(color) / 255f,
            Color.green(color) / 255f,
            Color.blue(color) / 255f,
            Color.alpha(color) / 255f
        )

        // 设置MVP矩阵
        GLES20.glUniformMatrix4fv(mvpMatrixHandle, 1, false, mvpMatrix, 0)

        // 绘制三角形
        GLES20.glDrawArrays(GLES20.GL_TRIANGLES, 0, vertexCount)

        // 禁用顶点属性数组
        GLES20.glDisableVertexAttribArray(positionHandle)
    }

    private fun drawLine(startX: Float, startY: Float, endX: Float, endY: Float, color: Int, width: Float) {
        // 设置线宽
        GLES20.glLineWidth(width)

        // 设置顶点数据
        vertices[0] = startX
        vertices[1] = startY
        vertices[2] = 0f
        vertices[3] = endX
        vertices[4] = endY
        vertices[5] = 0f

        vertexCount = 2

        // 更新顶点缓冲区
        vertexBuffer.clear()
        vertexBuffer.put(vertices, 0, vertexCount * 3)
        vertexBuffer.position(0)

        // 使用已设置好的模型矩阵(包含旋转)

        // 计算MVP矩阵
        Matrix.multiplyMM(mvpMatrix, 0, viewMatrix, 0, modelMatrix, 0)
        Matrix.multiplyMM(mvpMatrix, 0, projectionMatrix, 0, mvpMatrix, 0)

        // 设置顶点数据
        GLES20.glVertexAttribPointer(
            positionHandle, 3, GLES20.GL_FLOAT, false, 12, vertexBuffer
        )
        GLES20.glEnableVertexAttribArray(positionHandle)

        // 设置颜色
        GLES20.glUniform4f(
            colorHandle,
            Color.red(color) / 255f,
            Color.green(color) / 255f,
            Color.blue(color) / 255f,
            Color.alpha(color) / 255f
        )

        // 设置MVP矩阵
        GLES20.glUniformMatrix4fv(mvpMatrixHandle, 1, false, mvpMatrix, 0)

        // 绘制线段
        GLES20.glDrawArrays(GLES20.GL_LINES, 0, vertexCount)

        // 禁用顶点属性数组
        GLES20.glDisableVertexAttribArray(positionHandle)
    }

    private fun drawSmallSquare(x: Float, y: Float, color: Int, customWidth: Float = 0.05f, customHeight: Float = 0.05f) {
        val width = customWidth
        val height = customHeight

        // 设置顶点数据
        vertices[0] = x - width / 2
        vertices[1] = y - height / 2
        vertices[2] = 0f
        vertices[3] = x + width / 2
        vertices[4] = y - height / 2
        vertices[5] = 0f
        vertices[6] = x - width / 2
        vertices[7] = y + height / 2
        vertices[8] = 0f
        vertices[9] = x + width / 2
        vertices[10] = y + height / 2
        vertices[11] = 0f

        vertexCount = 4

        // 更新顶点缓冲区
        vertexBuffer.clear()
        vertexBuffer.put(vertices, 0, vertexCount * 3)
        vertexBuffer.position(0)

        // 使用已设置好的模型矩阵(包含旋转)

        // 计算MVP矩阵
        Matrix.multiplyMM(mvpMatrix, 0, viewMatrix, 0, modelMatrix, 0)
        Matrix.multiplyMM(mvpMatrix, 0, projectionMatrix, 0, mvpMatrix, 0)

        // 设置顶点数据
        GLES20.glVertexAttribPointer(
            positionHandle, 3, GLES20.GL_FLOAT, false, 12, vertexBuffer
        )
        GLES20.glEnableVertexAttribArray(positionHandle)

        // 设置颜色
        GLES20.glUniform4f(
            colorHandle,
            Color.red(color) / 255f,
            Color.green(color) / 255f,
            Color.blue(color) / 255f,
            Color.alpha(color) / 255f
        )

        // 设置MVP矩阵
        GLES20.glUniformMatrix4fv(mvpMatrixHandle, 1, false, mvpMatrix, 0)

        // 绘制四边形
        GLES20.glDrawArrays(GLES20.GL_TRIANGLE_STRIP, 0, vertexCount)

        // 禁用顶点属性数组
        GLES20.glDisableVertexAttribArray(positionHandle)
    }

    private fun createProgram(): Int {
        val vertexShaderCode = """
            attribute vec4 vPosition;
            uniform mat4 uMVPMatrix;
            void main() {
                gl_Position = uMVPMatrix * vPosition;
            }
        """

        val fragmentShaderCode = """
            precision mediump float;
            uniform vec4 vColor;
            void main() {
                gl_FragColor = vColor;
            }
        """

        // 编译着色器
        val vertexShader = loadShader(GLES20.GL_VERTEX_SHADER, vertexShaderCode)
        val fragmentShader = loadShader(GLES20.GL_FRAGMENT_SHADER, fragmentShaderCode)

        // 创建程序
        val program = GLES20.glCreateProgram()
        GLES20.glAttachShader(program, vertexShader)
        GLES20.glAttachShader(program, fragmentShader)
        GLES20.glLinkProgram(program)

        return program
    }

    private fun loadShader(type: Int, shaderCode: String): Int {
        val shader = GLES20.glCreateShader(type)
        GLES20.glShaderSource(shader, shaderCode)
        GLES20.glCompileShader(shader)
        return shader
    }

    // 设置目标速度
    fun setTargetSpeed(newSpeed: Float) {
        targetSpeed = newSpeed.coerceIn(0f, 220f) // 限制在0-220之间
    }

    // 获取当前速度
    fun getCurrentSpeed(): Float {
        return speed
    }
}


 2026
2026

 被折叠的 条评论
为什么被折叠?
被折叠的 条评论
为什么被折叠?
 到【灌水乐园】发言


