


概述
Guava Cache 是 Google 开源的一套开发工具集合,Guava Cache 是其中的一个专门用于处理本地缓存的轻量级框架,是全内存方式的本地缓存,而且是线程安全的。
和 ConcurrentMap 相比,Guava Cache 可以限制内存的占用,并可设置缓存的过期时间,可以自动回收数据,而 ConcurrentMap 只能通过静态方式来控制缓存,移除数据元素需要显示的方式来移除。
缓存回收方式
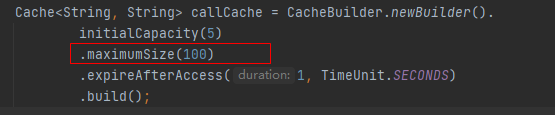
1、基于容量回收
例如maximumSize
2、基于时间回收

3、基于引用类型
CacheBuilder.weakValues():和 CacheBuilder.weakKeys() 方法类似,该方法按照弱引用方式来存储缓存项的值,允许系统垃圾回收时回收缓存项。
CacheBuilder.weakValues(),使用软引用方式来包装缓存值,只有在内存需要时(一般在接近内存溢出时),系统会按照全局LRU(least-recently-used)原则进行垃圾回收。考虑到垃圾回收的性能问题,推荐使用基于容量的回收方式。
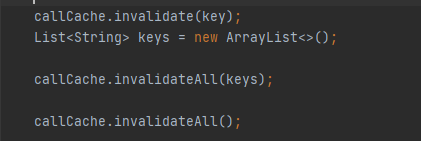
4、手动回收
- 回收单个缓存项,Cache.invalidate(key)
- 批量回收,Cache.invalidateAll(keys)
- 全部回收Cache.invalidateAll()
使用
依赖
 <dependency>
            <groupId>com.google.guava</groupId>
            <artifactId>guava</artifactId>
            <version>20.0</version>
        </dependency>
缓存统计功能
recordStats:开启统计功能
stats:查看统计情况
例如:
void testRecordStats(){
        Cache<String, String> callCache = CacheBuilder.newBuilder().
                initialCapacity(5)
                .maximumSize(100)
                .recordStats()
                .expireAfterAccess(1, TimeUnit.SECONDS)
                .build();


        /**
        * CacheStats{hitCount=0, missCount=0, loadSuccessCount=0, loadExceptionCount=0, totalLoadTime=0, evictionCount=0}
        */
        CacheStats stats = callCache.stats();
        System.out.println(stats);

    }
hitRate(), 缓存命中率。 hitCount(),缓存命中次数。
loadCount(),新值加载次数。
requestCount(),缓存访问次数,是命中次数和非命中次数之和
averageLoadPenalty(),加载新值时的平均耗时,以纳秒为单位。
evictionCount(),除了手动清除意外的缓存回收总次数。
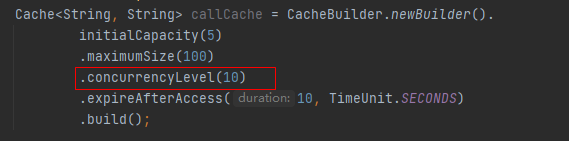
并发级别
调整concurrencyLevel即可
工具类
package com.walker.springbootdemo.common.util;

import com.google.common.cache.Cache;
import com.google.common.cache.CacheBuilder;

import javax.annotation.PostConstruct;
import java.util.concurrent.TimeUnit;

public class CacheUtil {
    /** 缓存值的最大数 */
    private int maximumSize = 1000;

    /** 缓存过期分钟数 */
    private int expireAfterAccessMinutes = 60 * 72;

    private Cache<String,Object> _cache = null;

    public CacheUtil()
    {
        super();
    }

    public int getMaximumSize()
    {
        return maximumSize;
    }

    public void setMaximumSize(int maximumSize)
    {
        this.maximumSize = maximumSize;
    }

    public int getExpireAfterAccessMinutes()
    {
        return expireAfterAccessMinutes;
    }

    public void setExpireAfterAccessMinutes(int expireAfterAccessMinutes)
    {
        this.expireAfterAccessMinutes = expireAfterAccessMinutes;
    }

    //项目启动时加载
    @PostConstruct
    public void init() {
        _cache = CacheBuilder.newBuilder().maximumSize(this.maximumSize).expireAfterAccess(this.expireAfterAccessMinutes * 60, TimeUnit.SECONDS).build();
    }


    public  Object get(String key)
    {
        return this._cache.getIfPresent(key);
    }

    public  void put(String key,Object o)
    {
        this._cache.put(key, o);
    }


    public  void invalidate(String key)
    {
        this._cache.invalidate(key);
    }
}
参考:
https://blog.youkuaiyun.com/Q772363685/article/details/119635353


 4112
4112

 被折叠的 条评论
为什么被折叠?
被折叠的 条评论
为什么被折叠?
 到【灌水乐园】发言


