


springboot整合shiro
中国加油,武汉加油!
篇幅较长,配合右边目录观看
项目准备
3 功能扩展
3.1 连接数据库
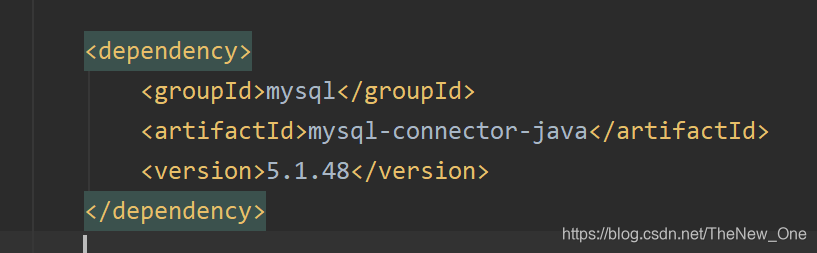
3.1.1 导druid依赖
<dependency>
    <groupId>com.alibaba</groupId>
    <artifactId>druid</artifactId>
    <version>1.1.21</version>
</dependency>
3.1.2 application.properties配置数据库
# 数据库配置
mybatis.type-aliases-package=com.wpj.pojo
mybatis.mapper-locations=classpath:mapper/*.xml

spring.datasource.driver-class-name=com.mysql.jdbc.Driver
spring.datasource.url=jdbc:mysql:///nz1904-shiro
spring.datasource.username=root
spring.datasource.password=123456

spring.datasource.type=com.alibaba.druid.pool.DruidDataSource
3.1.3 写mapper和service及impl
package com.wpj.mapper;

import com.wpj.pojo.User;

public interface IUserMapper {

    /**
     * 通过用户名找用户
     * @param name
     * @return
     */
    User findUserByName(String name);
}
package com.wpj.service;

import com.wpj.pojo.User;

public interface IUserService {
    /**
     * 通过用户名找用户
     * @param name
     * @return
     */
    User findUserByName(String name);
}
package com.wpj.service.impl;

import com.wpj.mapper.IUserMapper;
import com.wpj.pojo.User;
import com.wpj.service.IUserService;
import org.springframework.beans.factory.annotation.Autowired;
import org.springframework.stereotype.Service;

@Service
public class UserServiceImpl implements IUserService {

    @Autowired
    private IUserMapper iUserMapper;


    @Override
    public User findUserByName(String name) {
        return iUserMapper.findUserByName(name);
    }
}
3.1.4 写mapper.xml
<?xml version="1.0" encoding="UTF-8" ?>
<!DOCTYPE mapper
        PUBLIC "-//mybatis.org//DTD Mapper 3.0//EN"
        "http://mybatis.org/dtd/mybatis-3-mapper.dtd">
<mapper namespace="com.wpj.mapper.IUserMapper">

    <select id="findUserByName" parameterType="String" resultType="user">
        select * from user where name = #{name}
    </select>

</mapper>
3.1.5 修改User对象及创建对应库表
package com.wpj.pojo;

import lombok.AllArgsConstructor;
import lombok.Data;
import lombok.NoArgsConstructor;

import java.io.Serializable;

@Data
@AllArgsConstructor
@NoArgsConstructor
public class User implements Serializable {

    private static final long serialVersionUID = 8434196542261610760L;

    private Integer id;
    private String name;
    private String pwd;
    private String salt;	// 加入盐值

}
e99a18c428cb38d5f260853678922e03 为密码123 通过MD5散列一次后得到的,盐值为abc
DROP TABLE IF EXISTS `user`;
CREATE TABLE `user` (
  `id` int(11) NOT NULL AUTO_INCREMENT,
  `name` varchar(50) COLLATE utf8_bin DEFAULT NULL,
  `pwd` varchar(50) COLLATE utf8_bin DEFAULT NULL,
  `salt` varchar(50) COLLATE utf8_bin DEFAULT NULL,
  PRIMARY KEY (`id`)
) ENGINE=InnoDB AUTO_INCREMENT=2 DEFAULT CHARSET=utf8 COLLATE=utf8_bin;


INSERT INTO `user` VALUES ('1', 'wpj', 'e99a18c428cb38d5f260853678922e03', 'abc');
3.1.6 修改Realm
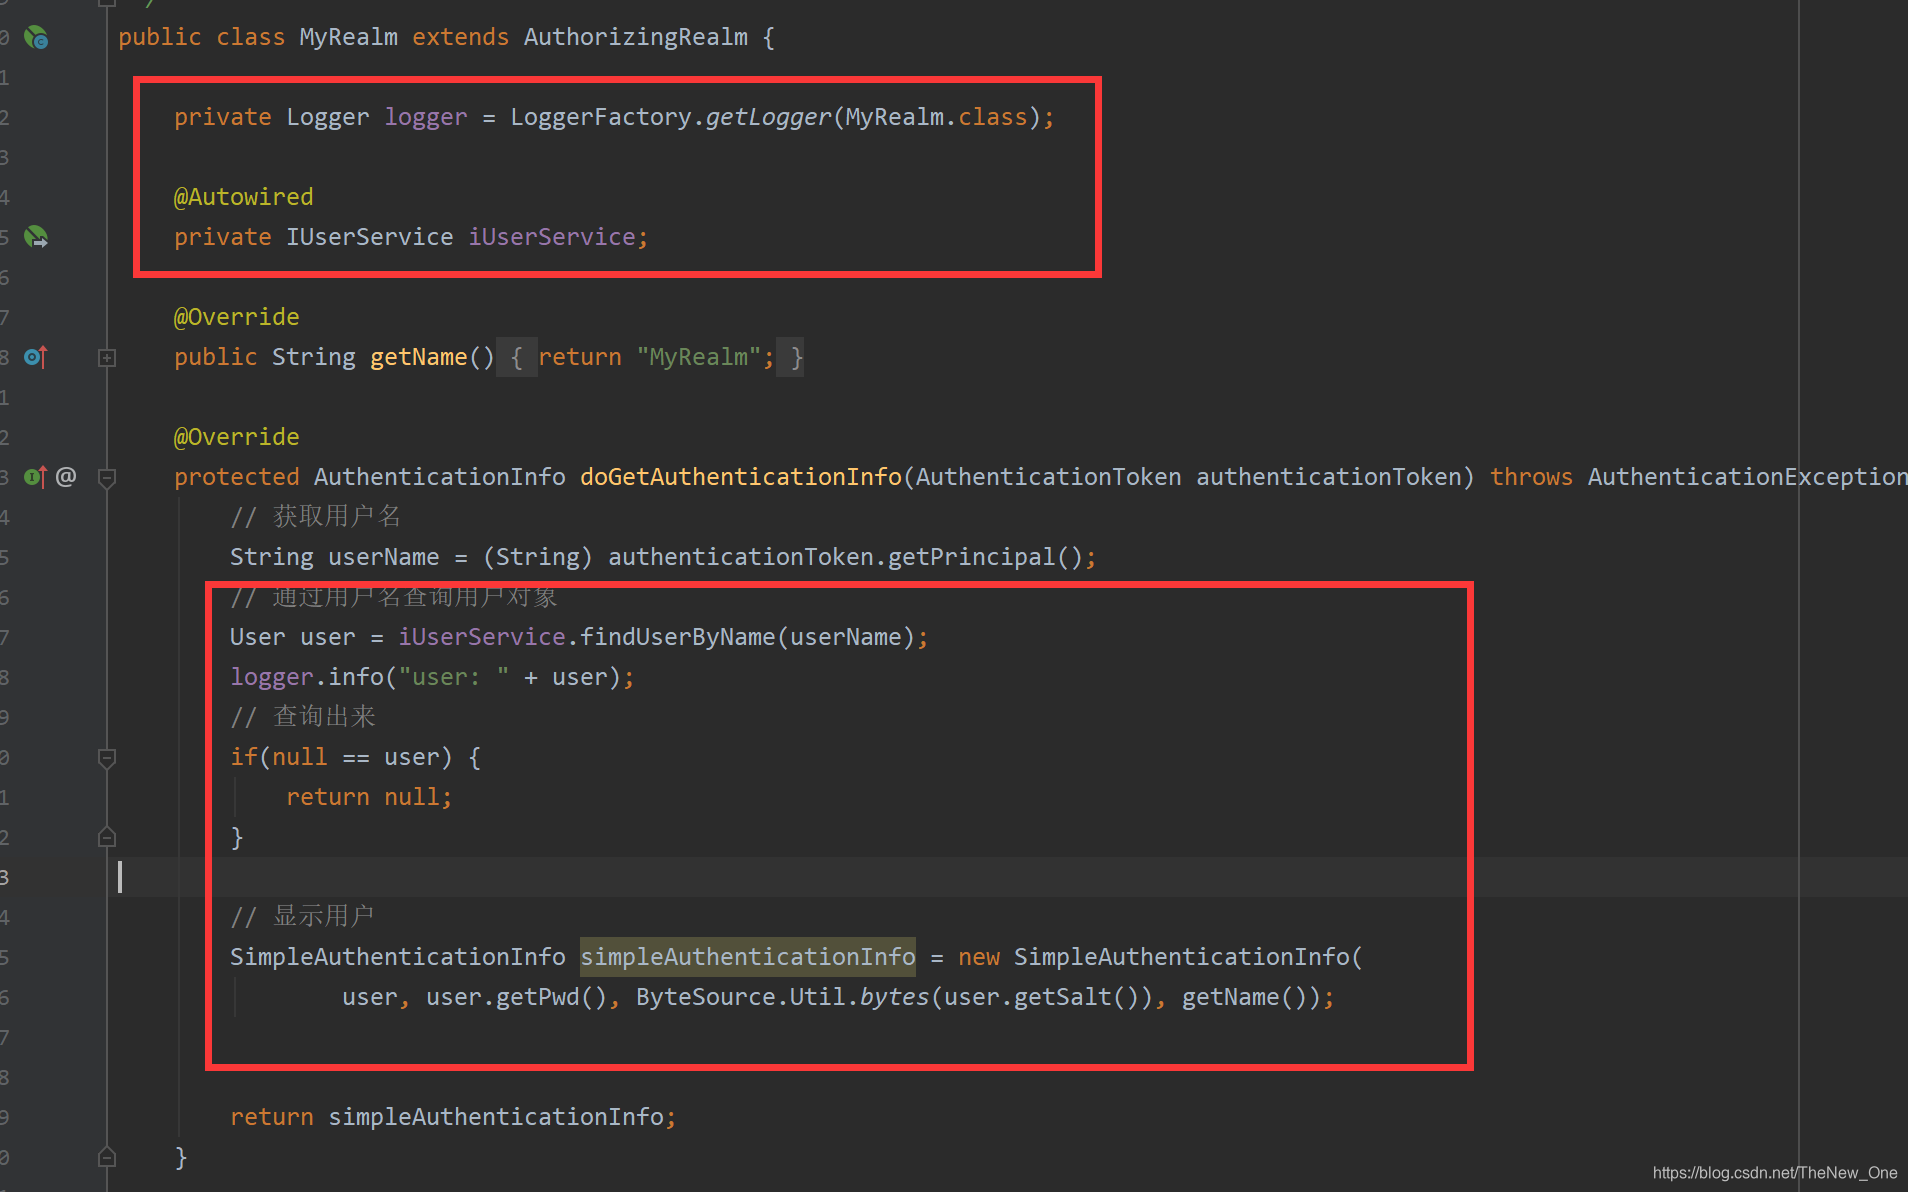
3.1.7 定义一个AppConfig类
package com.wpj.config;

import org.mybatis.spring.annotation.MapperScan;
import org.springframework.boot.SpringBootConfiguration;
import org.springframework.context.annotation.ComponentScan;

@SpringBootConfiguration
@ComponentScan(basePackages = {"com.wpj"})
@MapperScan(basePackages = {"com.wpj.mapper"})
public class AppConfig {
}
3.1.8 启动主启动类
DataSourceAutoConfiguration可以不用排除了
package com.wpj;

import org.springframework.boot.SpringApplication;
import org.springframework.boot.autoconfigure.SpringBootApplication;

@SpringBootApplication
public class Application {

    public static void main(String[] args) {
        SpringApplication.run(Application.class, args);
    }

}
3.1.9 测试
localhost:8080/ 进入首页,然后因为没有登录进入登录页面
输入 wpj 和 123 登录成功进入首页
3.1.10 注意
如果数据库连接报错,则需要修改一下
3.2 设置权限
3.2.1 新建addUser页面和权限不够页面
<!DOCTYPE html>
<html lang="en" xmlns:th="http://www.thymeleaf.org">
<head>
    <meta charset="UTF-8">
    <title>Title</title>
    <base th:href="${#request.getContextPath()+'/'}">
</head>
<body>
    this is addUser Page.
</body>
</html>
<!DOCTYPE html>
<html lang="en" xmlns:th="http://www.thymeleaf.org">
<head>
    <meta charset="UTF-8">
    <title>Title</title>
    <base th:href="${#request.getContextPath()+'/'}">
</head>
<body>
    权限不够。
</body>
</html>
3.2.2 index页面添加addUser按钮
<a href="/addUser">添加用户</a>
3.2.3 修改MyRealm
 /**
     * 授权
     * @param principalCollection
     * @return
     */
    @Override
    protected AuthorizationInfo doGetAuthorizationInfo(PrincipalCollection principalCollection) {
        // 查询用户名
        User user = (User) principalCollection.getPrimaryPrincipal();
        // 通过用户名查询权限和角色
        // 模拟数据库
        Set<String> perms = new HashSet<String>();
        perms.add("ad:add");

        SimpleAuthorizationInfo simpleAuthorizationInfo = new SimpleAuthorizationInfo();
        simpleAuthorizationInfo.setStringPermissions(perms);

        return null;
    }
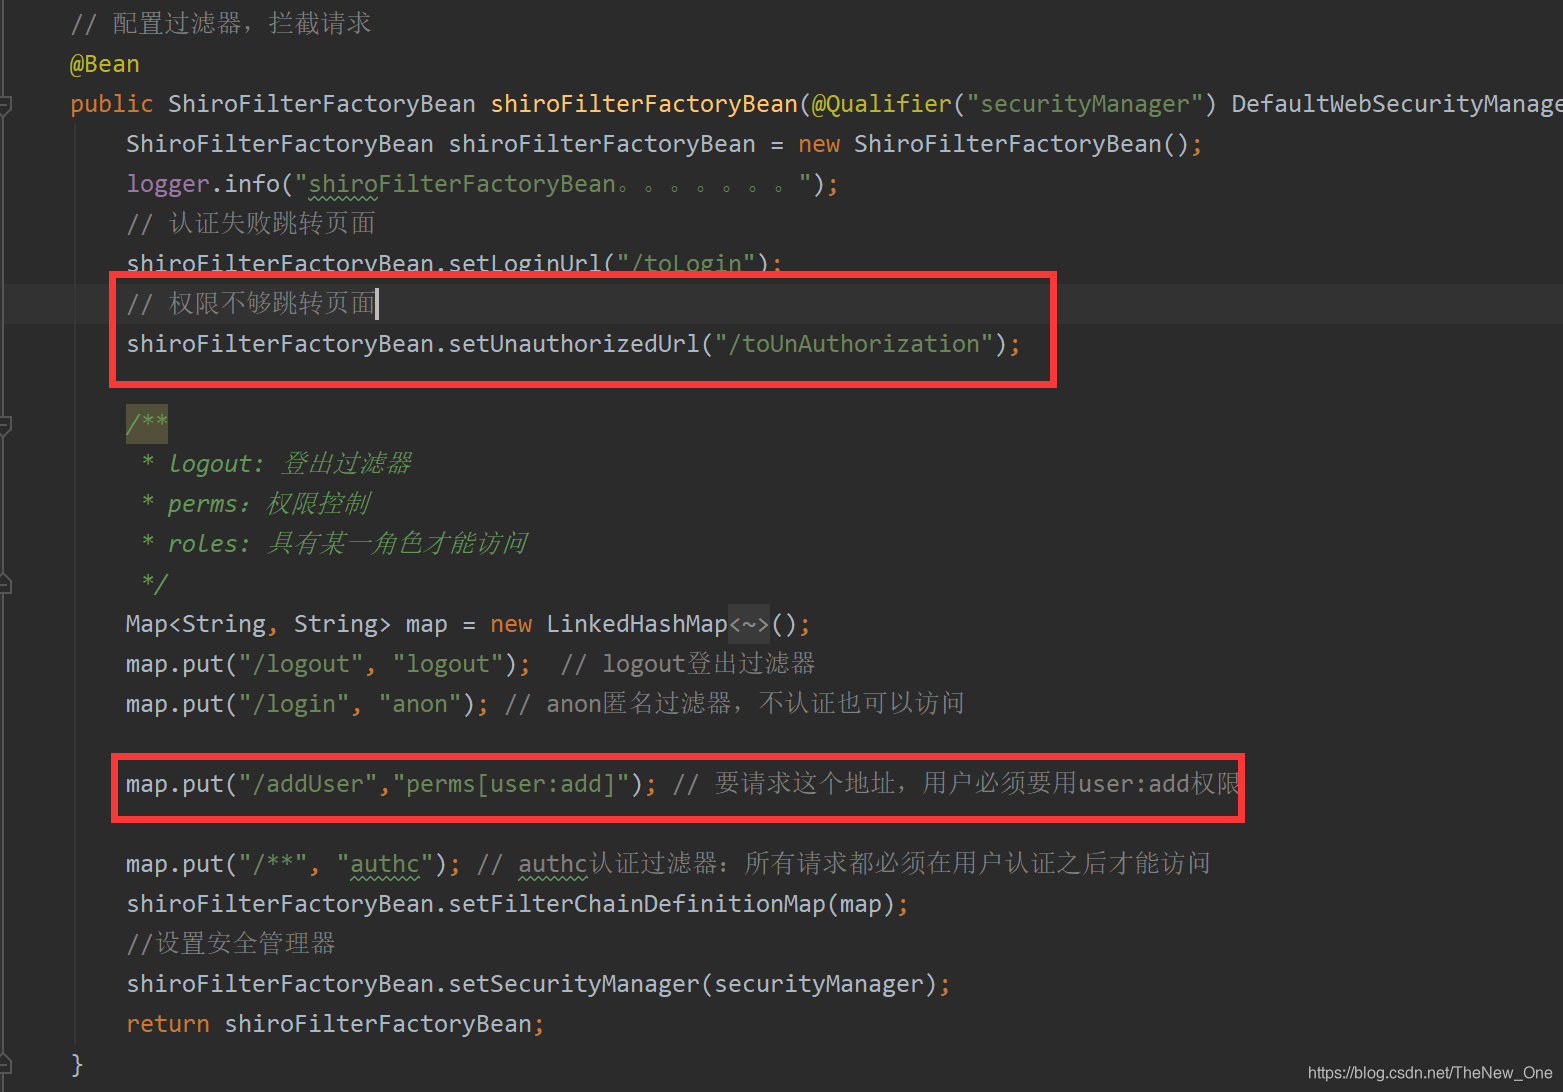
3.2.4 添加权限过滤
3.2.5 Controller添加方法
/**
* 测试过滤器授权问题
* 这个接口必须用户具有user:add的权限才能访问
* @return
*/
@RequestMapping("/addUser")
public String addUser(){
return "addUser";
}
/**
* 没有权限跳转
* @return
*/
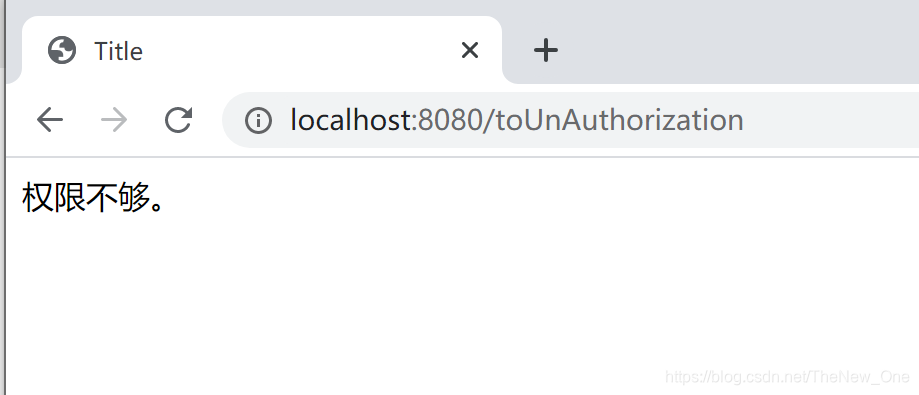
@RequestMapping("/toUnAuthorization")
public String toUnAuthorization(){
return "unauthorization";
}
3.2.6 启动主启动类 测试
localhost:8080 进入login页面
点击 添加用户
因为在Realm中给的权限是 perms.add(“ad:add”);
而 ShiroConfig中的 map.put("/addUser",“perms[user:add]”); // 要请求这个地址,用户必须要用user:add权限
再根据配了 shiroFilterFactoryBean.setUnauthorizedUrl("/toUnAuthorization");
所有跳转到controller中的toUnAuthorization,在跳转到权限不够的页面
3.3 设置权限(注解版)
3.3.1 在ShiroConfig配置AOP对注解的支持,也是shiro注解的支持
 // 配置AOP对注解的支持,也是shiro注解的支持
@Bean
public AuthorizationAttributeSourceAdvisor authorizationAttributeSourceAdvisor(
        @Qualifier("securityManager") DefaultWebSecurityManager securityManager){
    AuthorizationAttributeSourceAdvisor authorizationAttributeSourceAdvisor = new AuthorizationAttributeSourceAdvisor();
    authorizationAttributeSourceAdvisor.setSecurityManager(securityManager);
    return authorizationAttributeSourceAdvisor;
}
// 管理目标对象的生命周期 跟上面组合使用
@Bean
@ConditionalOnMissingBean
public DefaultAdvisorAutoProxyCreator defaultAdvisorAutoProxyCreator(){
    DefaultAdvisorAutoProxyCreator defaultAdvisorAutoProxyCreator = new DefaultAdvisorAutoProxyCreator();
    defaultAdvisorAutoProxyCreator.setProxyTargetClass(true);
    return defaultAdvisorAutoProxyCreator;
}
3.3.2 index页面添加deleteUser按钮
<a href="/deleteUser">删除用户(注解授权)</a>
3.3.3 Controller添加方法
/**
  * 跳转到删除页面
  * @return
  */
 @RequestMapping("/deleteUser")
 @RequiresPermissions({"user:add"}) // 需要该权限才能访问
 public String deleteUser(){
     return "deleteUser";
 }
3.3.4 新建deleteUser页面
<!DOCTYPE html>
<html lang="en" xmlns:th="http://www.thymeleaf.org">
<head>
    <meta charset="UTF-8">
    <title>Title</title>
    <base th:href="${#request.getContextPath()+'/'}">
</head>
<body>
    this is deleteUser page.
</body>
</html>
3.3.5 启动主启动类测试
localhost:8080 进入login在登录进去index页面
点击删除用户(注解授权)
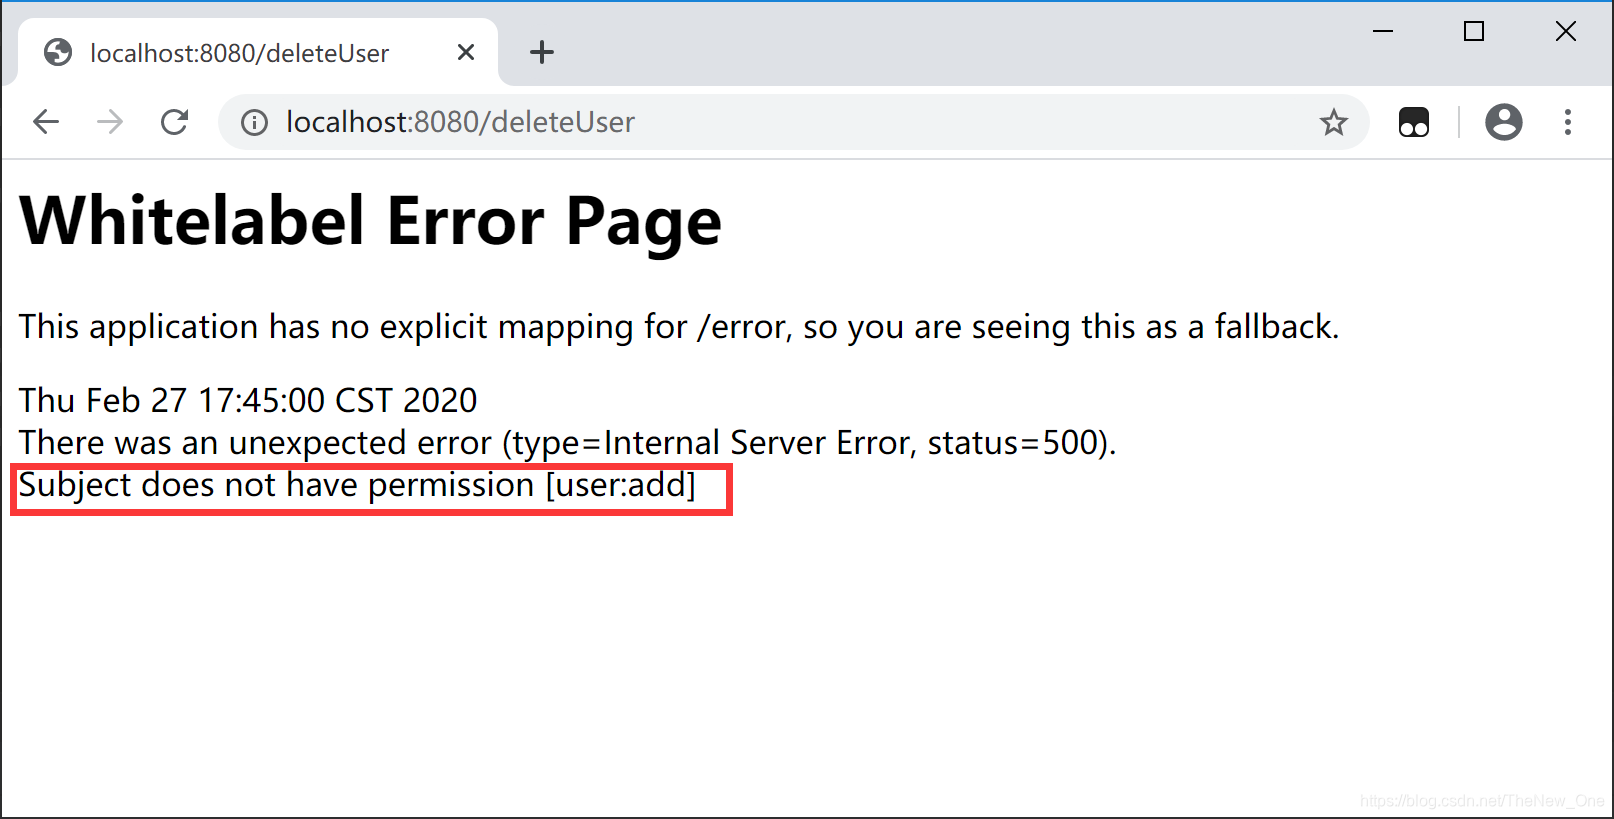
因为没有权限所以不能访问,注解也没法跳转 到配好的权限不够页面,只能捕获异常
3.4 Html页面基于Thymeleaf的支持
3.4.1 导Thymeleaf对shiro的支持
<!-- thymeleaf对shiro的支持-->
<dependency>
    <groupId>com.github.theborakompanioni</groupId>
    <artifactId>thymeleaf-extras-shiro</artifactId>
    <version>2.0.0</version>
</dependency>
3.4.2 ShiroConfig配置shiro方言
// 配置shiro-dialect方言
@Bean
public ShiroDialect shiroDialect(){
    return new ShiroDialect();
}
3.4.4 页面导约束,写标签
<!DOCTYPE html>
<html lang="en" xmlns:th="http://www.thymeleaf.org"
      xmlns:shiro="http://www.pollix.at/thymeleaf/shiro">
<head>
    <meta charset="UTF-8">
    <title>Title</title>
    <base th:href="${#request.getContextPath()+'/'}">
</head>
<body>
    欢迎<sapn th:text="${user.name}"></sapn>登录<br />
    this is index page!

    <a href="/logout">退出</a><br />

    <a href="/addUser">添加用户</a><br />

    <a href="/deleteUser">删除用户(注解授权)</a><br />

    <!-- shiro标签库标签-->
    <shiro:authenticated>
        用户的身份验证是成功的
    </shiro:authenticated>

    <shiro:guest>
        游客
    </shiro:guest>

    <shiro:hasPermission name="user:add">
         用户必须具有某一个权限才能访问
    </shiro:hasPermission>

    <shiro:hasAllRoles name="buyer,seller">
        拥有某一个角色下面才显示
    </shiro:hasAllRoles>

    <shiro:lacksPermission>
        没有某一个权限的时候才能访问
    </shiro:lacksPermission>

    <shiro:lacksRole name="user">
         没有某一个角色的时候才能访问
    </shiro:lacksRole>

    <shiro:notAuthenticated>
        没有认证通过才能显示
    </shiro:notAuthenticated>


    <!--下面就是显示用户信息的-->
    <shiro:principal property="name"/> <br>

    <!--下面这个标签就表示的是用户已经登陆-->
    <shiro:user>
        <label>欢迎[<shiro:principal property="name"/>]登陆</label>
    </shiro:user>

</body>
</html>


 774
774

 被折叠的 条评论
为什么被折叠?
被折叠的 条评论
为什么被折叠?
 到【灌水乐园】发言


