


 本文详细介绍了Presto SQL查询引擎的部署步骤,包括环境准备、JDK与Presto安装、配置文件修改、服务角色分配及常见问题解决。适用于希望在多节点环境中部署Presto的读者。
文章预览:
1.安装包地址
链接:https://pan.baidu.com/s/1U676CujPaD8kfjrkXgj0qQ
提取码:zvy0
2.环境准备
1.服务角色分布
| IP地址 | 职责 |
|---|---|
| 172.16.180.4 | coordinator |
| 172.16.180.17 | worker |
| 172.16.180.3 | worker |
| 172.16.180.3 | worker |
2.安装包
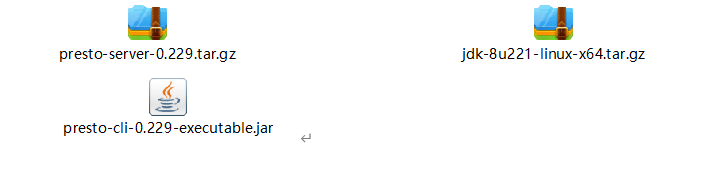
需要在开始的百度网盘拿
2.部署
1. 安装JDK
不在详细赘述,需要注意,官网的解释是presto-server-0.229.tar.gz版本要求jdk版本在jdk-6u115及以上,经过实地在生产环境上的测试(jdk-8u45-linux-x64.gz)这个版本是不行的,后来换了这个版本(jdk-8u221-linux-x64.tar.gz)才OK,第一次部署的环境变量最好写到/etc/profile,若存在JDK,环境变量写到对应用户的.bashrc下
2.安装presto
1.新建用户并上传包
新建presto用户,并上传presto-server-0.229.tar.gz到/home/presto/目录下
# useradd presto
# chown -R presto. presto /home/presto
# su – presto
$ tar -zxvf presto-server-0.229.tar.gz
2.修改配置文件(172.16.180.12上操作)
# su – presto
$ cd /home/presto/presto-server-0.229
$ mkdir etc
$ cd etc/
$ touch node.properties
$ touch jvm.config
$ touch config.properties
$ touch log.properties
$ mkdir catalog
$ cd catalog
$ touch hive.properties
$ mkdir hive ##将hive的配置文件core-site.xml、hdfs-site.xml上传到此文件下
$ vi hive.properties
	connector.name=hive-hadoop2
	hive.metastore.uri=thrift://172.16.180.4:9083
	hive.config.resources=/home/presto/presto-server-0.229/etc/catalog/hive/core-site.xml,/home/presto/presto-server-0.229/etc/catalog/hive/hdfs-site.xml
:wq保存退出
$ cd ..
$ vi config.properties
coordinator=true
node-scheduler.include-coordinator=true
http-server.http.port=19999
query.max-memory=8GB
query.max-memory-per-node=2GB
discovery-server.enabled=true
discovery.uri=http://172.16.180.12:19999
:wq保存退出
$ vi jvm.config
-server
-Xmx8G
-XX:+UseG1GC
-XX:G1HeapRegionSize=32M
-XX:+UseGCOverheadLimit
:wq保存退出
$ vi log.properties
com.facebook.presto=INFO #输出日志级别
:wq保存退出
$ vi node.properties
node.environment=production
node.id=cgn_presto_coordinator_node1 #节点唯一标识
node.data-dir=/home/presto/presto-server-0.229/data
:wq保存退出
$ exit
# scp -r /home/presto/presto-server-0.229 root@172.16.180.17: /home/presto/
# scp -r /home/presto/presto-server-0.229 root@172.16.180.3: /home/presto/
修改172.16.180.17、172.16.180.3上的config.properties和node.properties,其中config.properties一样,如下:
coordinator=false
http-server.http.port=19999
query.max-memory=8GB
query.max-memory-per-node=2GB
discovery.uri=http://172.16.180.12:19999
172.16.180.17上node.properties如下:
node.environment=production
node.id=cgn_presto_coordinator_node2
node.data-dir=/home/presto/presto-server-0.229/data
172.16.180.3上node.properties如下:
node.environment=production
node.id=cgn_presto_coordinator_node3
node.data-dir=/home/presto/presto-server-0.229/data
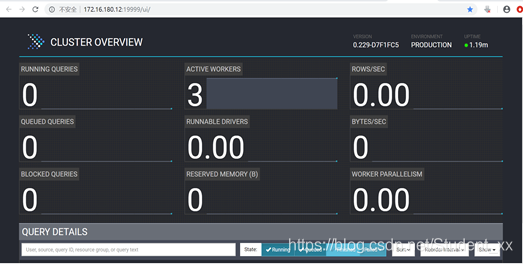
3.启动presto
$ cd /home/presto/presto-server-0.229/bin
$ ./launcher start

出现以上信息即为启动成功。
浏览器登录:http://172.16.180.12:19999
4.上传presto-cli-0.229-executable.jar
上传presto-cli-0.229-executable.jar至/home/presto/presto-server-0.229/bin目录下(连接hive数据仓库)
$ cd /home/presto/presto-server-0.229/bin
$ mv presto-cli-0.229-executable.jar presto
$ chmod +x presto
$ vi hive.sh
./presto --server 172.16.180.12:19999 --catalog hive --schema test
:wq保存退出
$ ./hive.sh
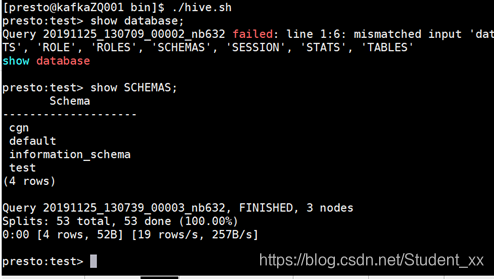
连接成功!
3.解决可能遇到的问题
1.错误1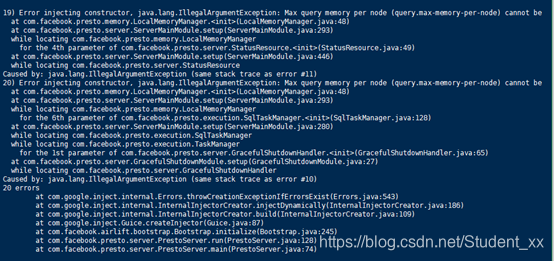
解决:给config.properties中加入这个参数:query.max-total-memory-per-node=2GB(2GB的值作为参考)
2)若是出现这种错误:(注入构造函数错误,java.lang。无效的内存配置。每个节点的最大查询总内存(2147483648)和堆头空间(644245094)之和不能大于可用堆内存(2147483648)
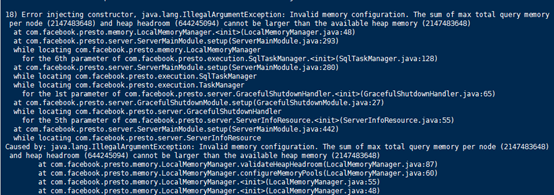
解决:修改etc/jvm.config文件的-Xmx2G参数调节大小


 1965
1965

 被折叠的 条评论
为什么被折叠?
被折叠的 条评论
为什么被折叠?
 到【灌水乐园】发言


