


1)源码安装nginx
[root@proxy ~]# yum -y install gcc make pcre-devel openssl-devel #安装编译工具,正则表达式依赖包,SSL加密依赖包
[root@proxy ~]# tar -xf /root/lnmp_soft.tar.gz (Nginux源码包需自行准备)
[root@proxy ~]# cd lnmp_soft/
[root@proxy ~]# tar -xf nginx-1.22.1.tar.gz
[root@proxy lnmp_soft]# cd nginx-1.22.1/
[root@proxy nginx-1.22.1]# ./configure --prefix=/usr/local/nginx --user=nginx --group=nginx --with-http_ssl_module #指定安装路径,指定用户,指定组,开启SSL加密功能
[root@proxy nginx-1.22.1]# make #编译
[root@proxy nginx-1.22.1]# make install #安装
[root@proxy nginx-1.22.1]# cd /usr/local/nginx/
[root@proxy nginx]# ls
conf html logs sbin
目录说明:
conf 配置文件目录
sbin 主程序目录
html 网站页面目录
logs 日志目录
2)启动nginx
[root@proxy nginx]# useradd nginx -s /sbin/nologin
[root@proxy nginx]# /usr/local/nginx/sbin/nginx #启动服务(绝对路径也可以相对路径)
nginx服务默认通过80端口监听客户端请求
[root@proxy nginx]# ss -antlp | grep 80
tcp LISTEN 0 128 0.0.0.0:80 0.0.0.0:* users:(("nginx",pid=7681,fd=6),("nginx",pid=7680,fd=6))
ss命令可以查看系统中启动的端口信息,该命令常用选项如下:
-a显示所有端口的信息
-n以数字格式显示端口号
-t显示TCP连接的端口
-u显示UDP连接的端口
-l显示服务正在监听的端口信息,如httpd启动后,会一直监听80端口
-p显示监听端口的服务名称是什么(也就是程序名称)
nginx命令其他命令:
[root@proxy nginx]# /usr/local/nginx/sbin/nginx -V #查看软件信息
[root@proxy nginx]# /usr/local/nginx/sbin/nginx -s reload #重新加载配置文件
[root@proxy nginx]# /usr/local/nginx/sbin/nginx -s stop #关闭服务
Nginx服务默认首页文档存储目录为/usr/local/nginx/html/,在此目录下默认有一个index.html的文件
[root@proxy nginx]# echo "abc-test~" > html/abc.html #创建新页面(示例)
[root@client ~]# curl 192.168.88.5/abc.html #客户端访问新页面
abc-test~
真机浏览器访问:192.168.88.5/abc.html #如果无效,可以按ctrl+f5强制刷新
基于域名的虚拟主机
1)修改Nginx配置
配置基于域名的虚拟主机,实现两个基于域名的虚拟主机,域名分别为www.a.com和www.b.com
[root@proxy nginx]# cp conf/nginx.conf.default conf/nginx.conf #还原配置文件
[root@proxy nginx]# vim conf/nginx.conf #修改配置文件
... #(红色为修改的地方)
http { #(shift + %)可以匹配相对应 }
.. ..
server {
listen 80; #端口
server_name www.b.com; #定义虚拟主机域名
location / {
root html_b; #指定网站根路径
index index.html index.htm; #默认页面
}
}
server {
listen 80; #端口
server_name www.a.com; #定义虚拟主机域名
...
location / {
root html; #指定网站根路径
index index.html index.htm;
}
}
...
[root@proxy nginx]# /usr/local/nginx/sbin/nginx -s reload #重新加载配置文件
2)创建网站文件
[root@proxy nginx]# echo "nginx-A~~~" > html/index.html #创建a网站测试页
[root@proxy nginx]# mkdir html_b #创建b网站的目录
[root@proxy nginx]# echo "nginx-B~~~" > html_b/index.html #创建b网站测试页
client客户端测试
[root@client ~]# vim /etc/hosts #修改hosts文件添加ip和域名的映射关系
192.168.88.5 www.a.com www.b.com #文件里面添加新一行
[root@client ~]# curl www.a.com
nginx-A~~~
[root@client ~]# curl www.b.com
nginx-B~~~
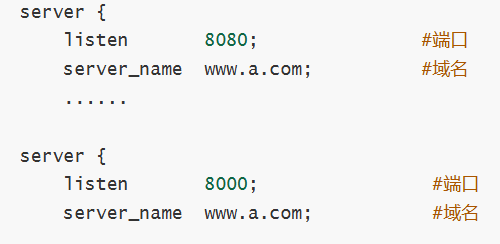
基于端口的虚拟主机 (修改端口即可)
基于IP的虚拟主机

SSL虚拟主机
源码安装Nginx时必须使用--with-http_ssl_module参数,启用加密模块,对于需要进行SSL加密处理的站点添加ssl相关指令(设置网站需要的私钥和证书)
加密算法一般分为对称算法、非对称算法、信息摘要
对称算法有:AES、DES,主要应用在单机数据加密
非对称算法有:RSA、DSA,主要应用在网络数据加密
信息摘要:MD5、sha256,主要应用在数据完整性校验
[root@proxy nginx]# echo 123 > /root/test
[root@proxy nginx]# md5sum /root/test
[root@proxy nginx]# echo 1234 > /root/test #更改文件内容
[root@proxy nginx]# md5sum /root/test #md5值已经发生变化
配置SSL虚拟主机
1)修改Nginx配置
[root@proxy nginx]# cp conf/nginx.conf.default conf/nginx.conf #还原配置文件
[root@proxy nginx]# vim /usr/local/nginx/conf/nginx.conf
...
server {
listen 443 ssl; #监听端口443,ssl使用安全加密技术
server_name localhost;
ssl_certificate cert.pem; #这里是证书文件
ssl_certificate_key cert.key; #这里是私钥文件
ssl_session_cache shared:SSL:1m;
ssl_session_timeout 5m;
ssl_ciphers HIGH:!aNULL:!MD5;
ssl_prefer_server_ciphers on;
location / {
root https; #加密网站根目录,更改,也可以自行定义
index index.html index.htm;
}
}
...
2)生成私钥与证书
[root@proxy nginx]# openssl genrsa > conf/cert.key #生成私钥,放到cert.key文件
[root@proxy nginx]# openssl req -x509 -key conf/cert.key > conf/cert.pem #-x509格式,生成证书,生成过程会询问诸如你在哪个国家之类的问题,可以随意回答(公司里除外)
Country Name (2 letter code) [XX]:dc #国家名
State or Province Name (full name) [ ]:dc #省份
Locality Name (eg, city) [Default City]:dc #城市
Organization Name (eg, company) [Default Company Ltd]:dc #公司
Organizational Unit Name (eg, section) [ ]:dc #部门
Common Name (eg, your name or your server's hostname) [ ]:dc #服务器名称
Email Address []:dc@dc.com #电子邮件
[root@proxy nginx]# /usr/local/nginx/sbin/nginx -s reload #重新加载配置文件
[root@proxy nginx]# mkdir https #创建安全网站的目录
[root@proxy nginx]# echo "nginx-https~" > https/index.html #创建安全网站的页面
3)客户端验证
命令行测试
[root@client ~]# curl -k https://192.168.88.5 #检验,-k是忽略安全风险
nginx-https~ #看到这个内容就说明实验成功
真机浏览器访问:https://192.168.88.5


 1021
1021

 被折叠的 条评论
为什么被折叠?
被折叠的 条评论
为什么被折叠?
 到【灌水乐园】发言


