


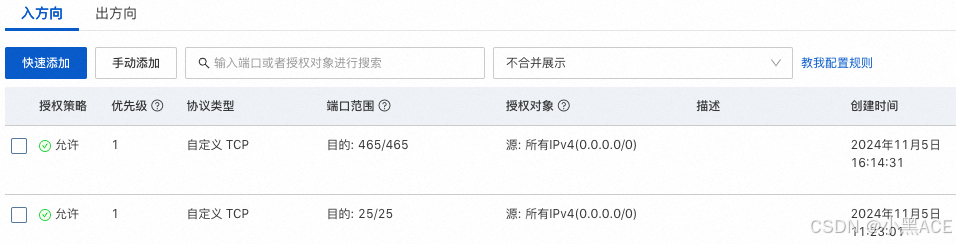
1.开放端口
阿里云服务器ESC安全组开放25、465端口
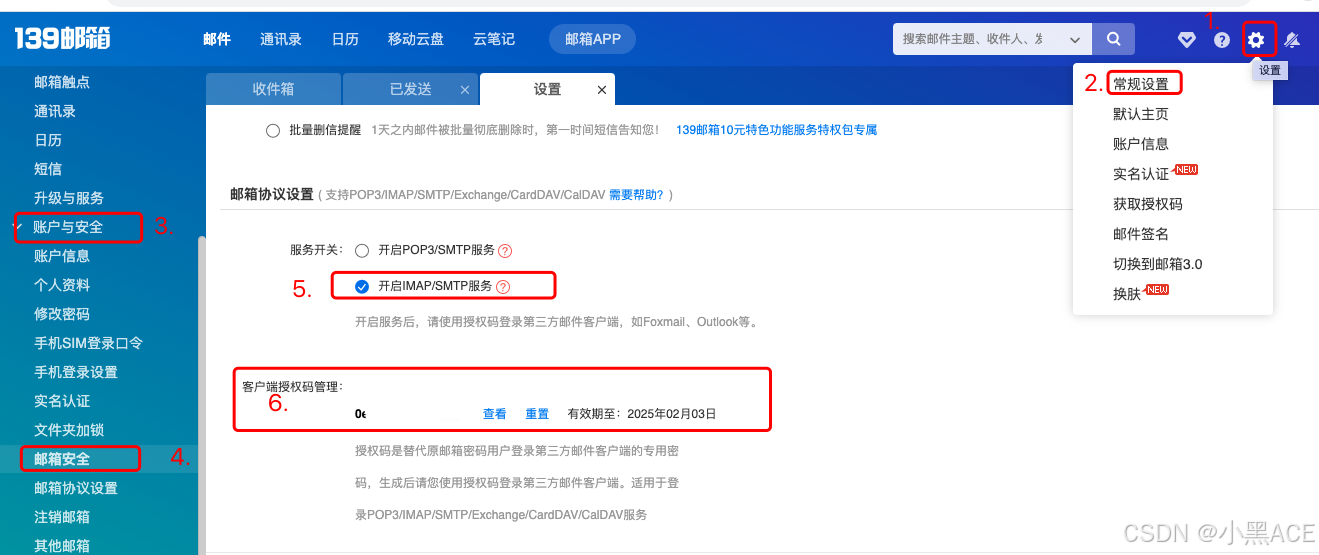
2.获取邮箱授权码
本文使用的139邮箱,其他QQ、163邮箱其实类似
3.创建认证
下面操作可以直接复制
mkdir /root/.certs/  #需要先创建文件夹
####139证书创建
echo -n | openssl s_client -connect smtp.139.com:465 | sed -ne '/-BEGIN CERTIFICATE-/,/-END CERTIFICATE-/p' > ~/.certs/139.crt
certutil -A -n "GeoTrust SSL CA" -t "C,," -d ~/.certs -i ~/.certs/139.crt
certutil -A -n "GeoTrust Global CA" -t "C,," -d ~/.certs -i ~/.certs/139.crt
certutil -L -d /root/.certs
cd /root/.certs
certutil -A -n "GeoTrust SSL CA - G3" -t "Pu,Pu,Pu" -d ./ -i 139.crt
####阿里云证书创建
echo -n | openssl s_client -connect smtp.qiye.aliyun.com:465 | sed -ne '/-BEGIN CERTIFICATE-/,/-END CERTIFICATE-/p' > ~/.certs/qiye.aliyun.com.crt
certutil -A -n "GeoTrust SSL CA" -t "C,," -d ~/.certs -i ~/.certs/qiye.aliyun.com.crt
certutil -A -n "GeoTrust Global CA" -t "C,," -d ~/.certs -i ~/.certs/qiye.aliyun.com.crt

显示:Notice: Trust flag u is set automatically if the private key is present.为正常

4.安装mailx并配置
yum -y install mailx
vi /etc/mail.rc
set from=******@139.com  #你的发件邮箱
set smtp=smtps://smtp.139.com    #139邮箱就写这个,网易邮箱写smtp.163.com,qq邮箱写smtp.qq.com,一定要加上smtps://
set smtp-auth-user=******@139.com  #发件人
set smtp-auth-password=0e6**************  #邮箱授权码
set smtp-auth=login
set ssl-verify=ignore
set nss-config-dir=/root/.certs
测试:
echo “send a test mail” | mail -s “test2024” ******@139.com
问题记录:
- 所有配置都正确了,为什么还是不行!提示:
SSL/TLS handshake failed: SSL received a malformed Alert record.
"/root/dead.letter" 11/306
. . . message not sent.
答:请在mail.rc 中,将第四步中的命令set smtp-use-starttls去掉
2.报错如下:
could not connect: Connection timed out
“/root/dead.letter” 11/299
. . . message not sent.
将/etc/mail.rc中的set smtp=smtp.139.com改为set smtp=smtps://smtp.139.com


 897
897

 被折叠的 条评论
为什么被折叠?
被折叠的 条评论
为什么被折叠?
 到【灌水乐园】发言


