


 本文探讨了使用Kotlin结合SpringBoot进行响应式开发的方法,包括WebFlux特性的应用及协程在异步编程中的优势。通过实例展示了如何搭建基于RxJava和WebFlux的后端系统,同时比较了传统阻塞式编程与协程的异同。

在前一篇文章《使用 Kotlin + Spring Boot 进行后端开发》中,曾介绍过尝试使用 Kotlin 来做后端开发。这一次,尝试 WebFlux 以及协程。
首先,在build.gradle中添加插件和依赖的库。
plugins {id 'java'id 'org.jetbrains.kotlin.jvm' version '1.3.10'id "org.jetbrains.kotlin.plugin.allopen" version "1.3.10"}ext {libraries = [rxjava : "2.2.2",logback : "1.2.3",spring_boot : "2.1.0.RELEASE",kotlinx_coroutines_core : "1.0.1"]}group 'com.kotlin.tutorial'version '1.0-SNAPSHOT'sourceCompatibility = 1.8def libs = rootProject.ext.libraries // 库repositories {mavenCentral()}dependencies {compile "org.jetbrains.kotlin:kotlin-stdlib-jdk8"compile "org.jetbrains.kotlin:kotlin-reflect:1.3.10"testCompile group: 'junit', name: 'junit', version: '4.12'implementation "io.reactivex.rxjava2:rxjava:${libs.rxjava}"implementation "org.jetbrains.kotlinx:kotlinx-coroutines-core:${libs.kotlinx_coroutines_core}"implementation "org.jetbrains.kotlinx:kotlinx-coroutines-rx2:${libs.kotlinx_coroutines_core}"implementation "ch.qos.logback:logback-classic:${libs.logback}"implementation "ch.qos.logback:logback-core:${libs.logback}"implementation "ch.qos.logback:logback-access:${libs.logback}"implementation "org.springframework.boot:spring-boot-starter-web:${libs.spring_boot}"implementation "org.springframework.boot:spring-boot-starter-data-mongodb-reactive:${libs.spring_boot}"}compileKotlin {kotlinOptions.jvmTarget = "1.8"}compileTestKotlin {kotlinOptions.jvmTarget = "1.8"}
此次,使用了 allopen 插件。它是官方提供的插件详见:https://kotlinlang.org/docs/reference/compiler-plugins.html
Kotlin 的类默认是final的,一般需要使用
open关键字。使用了allopen插件就可以节省open关键字。值得注意的是,需要打开 Intellij 的 Enable annotation processing 选项。
这样,创建 SpringKotlinApplication 就不需要使用 open:
import org.springframework.boot.SpringApplicationimport org.springframework.boot.autoconfigure.SpringBootApplication/*** Created by tony on 2018/11/13.*/@SpringBootApplicationclass SpringKotlinApplicationfun main(args: Array<String>) {SpringApplication.run(SpringKotlinApplication::class.java, *args)}
另外,不要忘记配置数据库的信息,例子采用的是 MongoDB。
WebFlux
WebFlux 是 Spring 5 新增的特性,相对于传统 MVC 的同步阻塞IO模型,它采用异步非阻塞的IO模型。
WebFlux 的 Flux 取自于 Reactor 中的类 Flux。Reactor 是 Spring 5 响应式开发的基础。
Reactor 是完全基于响应式流规范设计和实现的库,Flux 和 Mono 是 Reactor 中的两个基本概念。
Flux 类似 RxJava 的 Observable,它可以触发零到多个事件,并根据实际情况结束处理或触发错误。Mono 最多只触发一个事件,它跟 RxJava 的 Single 和 Maybe 类似,所以可以把 Mono 用于在异步任务完成时发出通知。
1.1 创建 Model
首先,创建几个 Model 类。
User 表示用户对象。
import org.springframework.data.annotation.Id/*** Created by tony on 2018/11/22.*/data class User(@Id val id: String? = null, val name: String, val age: Int, val address: Address) {constructor() : this(null, "", 0, Address())constructor(name: String, age: Int, address: Address) : this(null, name = name, age = age, address = address)}
Address 记录用户的地址。
import org.springframework.data.annotation.Id/*** Created by tony on 2018/11/22.*/data class Address(@Id val id: String? = null, val number: Int, val street: String, val city: String) {constructor() : this(null, 0, "", "")constructor(number: Int, street: String, city: String) : this(null, number, street, city)}
Audit 用于记录用户操作的时间。
import org.springframework.data.annotation.Idimport java.time.LocalDateTime/*** Created by tony on 2018/11/22.*/data class Audit(@Id val id: String? = null, val name: String, val eventDate: LocalDateTime) {constructor() : this(null, "",LocalDateTime.now())constructor(name: String, eventDate: LocalDateTime) : this(null, name, eventDate)}
1.2 创建 Repository
创建 UserReactiveRepository 用于 User 对象的查询操作,它实现 ReactiveMongoRepository 接口。
import com.kotlin.tutorial.model.Userimport org.springframework.data.mongodb.repository.ReactiveMongoRepositoryimport org.springframework.stereotype.Repositoryimport reactor.core.publisher.Flux/*** Created by tony on 2018/11/22.*/@Repositoryinterface UserReactiveRepository : ReactiveMongoRepository<User, String> {fun findUserByAge(age: Int): Flux<User>fun findUserByAddressCity(city: String): Flux<User>fun findUserByAgeAndAddressCity(age: Int, city: String): Flux<User>}
创建 AuditRepository 用于查询用户最近一条的操作时间。
import com.kotlin.tutorial.model.Auditimport org.springframework.data.repository.CrudRepositoryimport org.springframework.stereotype.Repository/*** Created by tony on 2018/11/22.*/@Repositoryinterface AuditRepository: CrudRepository<Audit, String> {fun findFirstByNameOrderByEventDateDesc(name: String): Audit}
1.3 创建 Service
创建 UserReactiveService,通过依赖注入了 userRepository、auditRepository。
import com.kotlin.tutorial.Utils.toLowerimport com.kotlin.tutorial.model.Addressimport com.kotlin.tutorial.model.Auditimport com.kotlin.tutorial.model.Userimport com.kotlin.tutorial.repository.AuditRepositoryimport com.kotlin.tutorial.repository.UserReactiveRepositoryimport org.springframework.beans.factory.annotation.Autowiredimport org.springframework.stereotype.Componentimport reactor.core.publisher.Fluximport java.time.LocalDateTime/*** Created by tony on 2018/11/22.*/@Componentclass UserReactiveService {@Autowiredlateinit var userRepository: UserReactiveRepository@Autowiredlateinit var auditRepository: AuditRepositorycompanion object {val cities = listOf("Shanghai", "Suzhou", "Hangzhou").toLower()val streets = listOf("renming road", "zhongshan road").toLower()}fun find(age: Int?, rawCity: String?): Flux<User> {val city = rawCity?.toLowerCase()return when {age is Int && city is String -> userRepository.findUserByAgeAndAddressCity(age, city)city is String -> userRepository.findUserByAddressCity(city)age is Int -> userRepository.findUserByAge(age)else -> userRepository.findAll()}}fun generateData(): Flux<User> {val list = listOf(20, 25, 33, 28, 34).map {val u = generate(it)auditRepository.save(Audit(u.name, LocalDateTime.now()))u}return userRepository.deleteAll().thenMany(userRepository.saveAll(list))}private fun generate(age: Int): User {val address = Address(age, streets[age % streets.size], cities[age % cities.size])return User("Tony$age", age, address)}}
1.4 创建 Controller
创建 UserController 编写两个 reactive 的接口:
@RestController@RequestMapping("/user")class UserController {@Autowiredlateinit var userReactiveService: UserReactiveService@GetMapping("/reactive/find")fun findByReactive(@RequestParam age: Int?, @RequestParam city: String?) = userReactiveService.find(age, city)@GetMapping("/reactive/generate")fun genDataByReactive() = userReactiveService.generateData()......}
创建用户的方式:
curl http://localhost:8080/user/reactive/generate
基于城市查询用户的方式:
curl http://localhost:8080/user/reactive/find?city=suzhou
RxJava 2
RxJava 库是 JVM 上响应式编程的先驱,也是响应式流规范(Reactive Streams)的基础。
如果对 RxJava 2 不熟悉,也可以购买我的《RxJava 2.x 实战》
2.1 创建 Repository
创建 UserRxJavaRepository 功能跟 UserReactiveRepository 一样,只是多了一个 findUserByName() 方法。
import com.kotlin.tutorial.model.Userimport io.reactivex.Flowableimport org.springframework.data.repository.reactive.RxJava2CrudRepositoryimport org.springframework.stereotype.Repository/*** Created by tony on 2018/11/22.*/@Repositoryinterface UserRxJavaRepository : RxJava2CrudRepository<User, String> {fun findUserByName(name: String): Flowable<User>fun findUserByAge(age: Int): Flowable<User>fun findUserByAddressCity(city: String): Flowable<User>fun findUserByAgeAndAddressCity(age: Int, city: String): Flowable<User>}
2.2 创建 JavaService
创建 UserRxJavaService ,类似于 UserReactiveService。但是,多了两个方法:findByName()、login()。其中,调用 login() 会添加一条审计的记录。
import com.kotlin.tutorial.Utils.toLowerimport com.kotlin.tutorial.model.Addressimport com.kotlin.tutorial.model.Auditimport com.kotlin.tutorial.model.Userimport com.kotlin.tutorial.repository.AuditRepositoryimport com.kotlin.tutorial.repository.UserRxJavaRepositoryimport io.reactivex.Flowableimport org.springframework.beans.factory.annotation.Autowiredimport org.springframework.stereotype.Componentimport java.time.LocalDateTime/*** Created by tony on 2018/11/22.*/@Componentclass UserRxJavaService {@Autowiredlateinit var userRepository: UserRxJavaRepository@Autowiredlateinit var auditRepository: AuditRepositorycompanion object {val cities = listOf("Shanghai", "Suzhou", "Hangzhou").toLower()val streets = listOf("renming road", "zhongshan road").toLower()}fun findByName(name: String): Flowable<User> = userRepository.findUserByName(name)fun find(age: Int?, rawCity: String?): Flowable<User> {val city = rawCity?.toLowerCase()return when {age is Int && city is String -> userRepository.findUserByAgeAndAddressCity(age, city)city is String -> userRepository.findUserByAddressCity(city)age is Int -> userRepository.findUserByAge(age)else -> userRepository.findAll()}}fun generateData(): Flowable<User> {val list = listOf(20, 25, 33, 28, 34).map {val u = generate(it)auditRepository.save(Audit(u.name, LocalDateTime.now()))u}return userRepository.deleteAll().andThen(userRepository.saveAll(list))}private fun generate(age: Int): User {val address = Address(age, streets[age % streets.size], cities[age % cities.size])return User("Tony$age", age, address)}fun login(name: String) =userRepository.findUserByName(name).map {auditRepository.save(Audit(it.name, LocalDateTime.now()))}}
2.3 创建 Controller
在原有的 UserController 中新增两个 rxjava 的接口:
@RestController@RequestMapping("/user")class UserController {@Autowiredlateinit var userRxJavaService: UserRxJavaService@GetMapping("/rxjava/find")fun findByRx(@RequestParam age: Int?, @RequestParam city: String?) = userRxJavaService.find(age, city)@GetMapping("/rxjava/generate")fun genDateByRx() = userRxJavaService.generateData()......}
Kotlin 1.3 的 Coroutines
协程(coroutine)相比于线程更加轻量级,协程又称为微线程。线程和协程的一个显著区别是,线程的阻塞代价是昂贵的,而协程使用了更简单、代价更小的挂起(suspend)来代替阻塞。
Coroutines 是 Kotlin 1.1 增加的实验的功能,到 Kotlin 1.3 已经变成了正式的功能。
先在 UserController 创建一个模拟登陆的接口,访问该接口时会添加一条审计的记录
@GetMapping("/rxjava/login")fun mockLogin(@RequestParam username: String) = userRxJavaService.login(username)
然后尝试用传统的 blocking 方式来编写一个获取登陆信息的接口:
@GetMapping("/blocking/{username}")fun getNormalLoginMessage(@PathVariable username: String):String {val user = userService.findByName(username)val lastLoginTime = auditService.findByName(user.name).eventDatereturn "Hi ${user.name}, you have logged in since $lastLoginTime"}
再尝试用 RxJava 的方式来编写该接口:
@GetMapping("/rxjava/{username}")fun getRxLoginMessage(@PathVariable username: String)=userRxJavaService.findByName(username).map {auditService.findByName(it.name).eventDate}.map {"Hi ${username}, you have logged in since $it"}
最后,使用 Coroutines 的方式来编写接口:
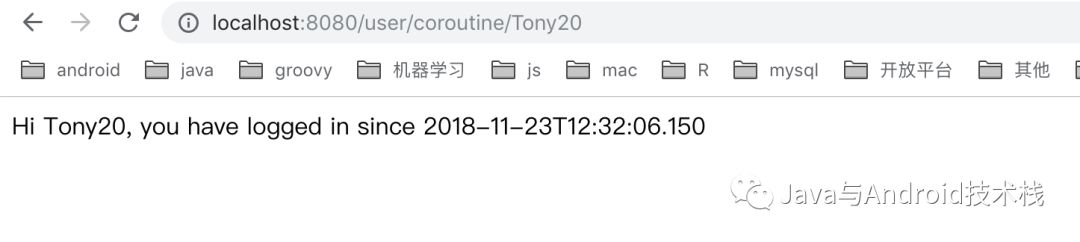
@GetMapping("/coroutine/{username}")fun getLoginMessage(@PathVariable username: String) = runBlocking {val user = userRxJavaService.findByName(username).awaitSingle()val lastLoginTime = GlobalScope.async {auditService.findByName(user.name).eventDate}.await()"Hi ${user.name}, you have logged in since $lastLoginTime"}
可以看到,使用协程的方式类似于传统的 blocking 的方式来编写代码。
模拟用户登陆:

使用 Coroutines 的方式获取登陆信息:
关于协程,更多可以参考之前写的 Coroutines 笔记:
Kotlin Coroutines 笔记 (一)、Kotlin Coroutines 笔记 (二)
虽然 Kotlin 1.3 之后有些变动,但是大体是不变的。之后,也会整理更多 Kotlin Coroutines 笔记。
总结
响应式开发是未来的趋势,无论是服务端开发还是移动端开发,都会顺应这个趋势。
另外,Kotlin 1.3 之后的协程已经是正式版本,Kotlin 在语言级别上支持了协程,它是异步编程的另一个不错的选择。
本文 demo 的 github 地址:https://github.com/fengzhizi715/kotlin-spring-reactive-coroutine-demo
关注【Java与Android技术栈】
更多精彩内容请关注扫码:


 1037
1037

 被折叠的 条评论
为什么被折叠?
被折叠的 条评论
为什么被折叠?
 到【灌水乐园】发言


