如何用AI自动修复TrustedInstaller权限问题

快速体验

  1. 打开 InsCode(快马)平台 https://www.inscode.net
  2. 输入框内输入如下内容:
    创建一个Python脚本,使用AI分析Windows系统中TrustedInstaller权限问题。脚本应能:1) 扫描指定目录下的文件权限 2) 识别被TrustedInstaller独占的文件 3) 提供一键获取权限的解决方案 4) 生成详细的权限修改报告。要求使用subprocess模块调用icacls命令,并添加友好的GUI界面。
  3. 点击'项目生成'按钮,等待项目生成完整后预览效果

示例图片

最近在维护Windows系统时,经常遇到TrustedInstaller权限导致无法修改或删除系统文件的问题。手动处理这类问题需要记忆复杂的命令行操作,对普通用户很不友好。于是我想到了用Python脚本结合AI辅助开发,自动化完成整个流程。

  1. 理解TrustedInstaller权限问题

Windows系统中的TrustedInstaller是一个特殊的系统账户,用于保护关键系统文件不被随意修改。当我们需要修改这些文件时,通常会遇到权限不足的提示。传统解决方法是手动使用icacls命令修改权限,但步骤繁琐且容易出错。

  1. 设计脚本功能框架

我决定开发一个工具,主要实现四个核心功能: - 扫描指定目录下的所有文件权限 - 自动识别被TrustedInstaller独占的文件 - 提供一键修改权限的解决方案 - 生成详细的权限修改报告

  1. 实现权限扫描功能

通过Python的subprocess模块调用系统自带的icacls命令,可以获取文件的详细权限信息。这里需要注意处理命令输出的解析,特别是要准确识别TrustedInstaller的权限条目。

  1. 构建GUI界面

为了让工具更易用,我使用tkinter库创建了一个简单的图形界面。界面包含三个主要区域: - 目录选择框 - 扫描结果显示区 - 操作按钮区

  1. 权限修改实现

当识别出需要修改权限的文件后,脚本会生成相应的icacls命令,给当前用户添加完全控制权限。为了安全起见,这里添加了二次确认的对话框,避免误操作。

  1. 报告生成功能

每次操作后,脚本会记录修改前后的权限变化,并生成HTML格式的报告,方便用户查看和存档。报告内容包括修改的文件列表、原权限、新权限等信息。

  1. AI辅助开发的实践

在开发过程中,我使用了InsCode(快马)平台的AI编程助手。它能快速生成代码片段,比如帮我完善了icacls输出解析的正则表达式,并优化了GUI布局的代码结构。这大大提高了开发效率,特别是处理Windows特有的权限系统这种复杂问题时。

  1. 实际使用体验

测试发现这个工具能有效解决常见的TrustedInstaller权限问题。相比手动操作,它具有以下优势: - 操作可视化,降低使用门槛 - 避免输入错误命令 - 完整记录所有修改 - 可以批量处理多个文件

示例图片

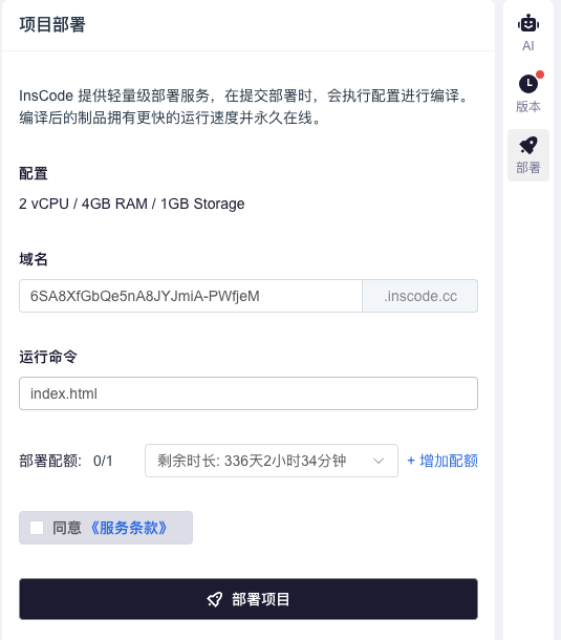
通过InsCode(快马)平台的一键部署功能,这个工具可以直接在线运行,不需要安装任何环境。我在Windows 10和11上都测试过,运行效果很稳定。平台还提供了实时预览功能,可以立即看到修改后的效果,非常方便。

整个开发过程让我深刻体会到AI辅助编程的高效性。特别是处理系统级操作时,AI能快速提供正确的API调用方式和参数设置,省去了大量查阅文档的时间。对于需要频繁与操作系统交互的开发者来说,这确实是个很好的效率工具。

快速体验

  1. 打开 InsCode(快马)平台 https://www.inscode.net
  2. 输入框内输入如下内容:
    创建一个Python脚本,使用AI分析Windows系统中TrustedInstaller权限问题。脚本应能:1) 扫描指定目录下的文件权限 2) 识别被TrustedInstaller独占的文件 3) 提供一键获取权限的解决方案 4) 生成详细的权限修改报告。要求使用subprocess模块调用icacls命令,并添加友好的GUI界面。
  3. 点击'项目生成'按钮,等待项目生成完整后预览效果

创作声明:本文部分内容由AI辅助生成(AIGC),仅供参考

PS C:\Users\Administrator\Desktop> # ===== 1. 修复 pip 安装问题 ===== PS C:\Users\Administrator\Desktop> function Install-FromRepository { >> param( >> [Parameter(Mandatory=$true)] >> [string]$PackageName, >> [string]$Version = "latest", >> [string]$RepositoryPath = "E:\ai_pip_repository" >> ) >> >> $downloadedDir = Join-Path $RepositoryPath "downloaded_packages" >> >> # 搜索本地仓库 >> $localPackages = Get-ChildItem -Path $downloadedDir -Recurse -ErrorAction SilentlyContinue | >> Where-Object { $_.Name -like "*$PackageName*" -and $_.Extension -in @('.whl', '.gz', '.zip') } >> >> if ($localPackages) { >> # 版本选择逻辑 >> if ($Version -eq "latest") { >> $selectedPackage = $localPackages | >> Sort-Object { [regex]::Match($_.Name, '(\d+\.)+\d+').Value } -Descending | >> Select-Object -First 1 >> } else { >> $selectedPackage = $localPackages | >> Where-Object { $_.Name -match "$PackageName-$Version" } | >> Select-Object -First 1 >> } >> >> if (-not $selectedPackage) { >> Write-Host "⚠️ 仓库中未找到指定版本: $PackageName==$Version" -ForegroundColor Yellow >> return >> } >> >> Write-Host "🚀 使用仓库中的版本: $($selectedPackage.Name)" -ForegroundColor Yellow >> >> # 安装主包 >> python -m pip install $selectedPackage.FullName --no-deps --no-index >> >> # 安装依赖 >> $depReport = Test-RepositoryDependency -PackageName $PackageName -RepositoryPath $RepositoryPath >> if ($depReport.MissingDependencies.Count -gt 0) { >> Write-Host "🔍 安装依赖包..." -ForegroundColor Cyan >> $depReport.MissingDependencies | ForEach-Object { >> Install-FromRepository $_ -RepositoryPath $RepositoryPath >> } >> } >> return >> } >> >> # 本地仓库不存在则下载并保存 >> Write-Host "🌐 从镜像下载: $PackageName" -ForegroundColor Magenta >> >> # 创建临时下载目录 >> $tempDir = Join-Path $env:TEMP ([System.Guid]::NewGuid().ToString()) >> New-Item -ItemType Directory -Path $tempDir -Force | Out-Null >> >> try { >> # 创建临时配置文件(兼容旧版pip) >> $tempConfig = Join-Path $tempDir "pip_temp.conf" >> @" >> [global] >> index-url = https://pypi.tuna.tsinghua.edu.cn/simple >> trusted-host = pypi.tuna.tsinghua.edu.cn >> "@ | Out-File $tempConfig -Encoding ASCII >> >> # 设置环境变量代替 --config 参数 >> $env:PIP_CONFIG_FILE = $tempConfig >> >> # 下载包 >> if ($Version -eq "latest") { >> python -m pip download $PackageName -d $tempDir >> } else { >> python -m pip download "${PackageName}==${Version}" -d $tempDir >> } >> >> # 获取下载的文件 >> $downloadedFiles = Get-ChildItem $tempDir -File -ErrorAction SilentlyContinue | >> Where-Object { $_.Extension -in @('.whl', '.gz', '.zip') } >> >> if (-not $downloadedFiles) { >> throw "未找到下载的包文件" >> } >> >> # 安装并保存每个包 >> foreach ($file in $downloadedFiles) { >> # 安装主包 >> python -m pip install $file.FullName >> >> # 保存到仓库 >> $savePath = Join-Path $downloadedDir $file.Name >> Copy-Item -Path $file.FullName -Destination $savePath -Force >> Write-Host "💾 已保存到仓库: $($file.Name)" -ForegroundColor Green >> } >> } >> catch { >> Write-Host "❌ 安装失败: $_" -ForegroundColor Red >> } >> finally { >> # 清理临时目录和环境变量 >> Remove-Item $tempDir -Recurse -Force -ErrorAction SilentlyContinue >> $env:PIP_CONFIG_FILE = $null >> } >> } PS C:\Users\Administrator\Desktop> PS C:\Users\Administrator\Desktop> # ===== 2. 修复 .NET SDK 安装 ===== PS C:\Users\Administrator\Desktop> function Install-DotNetSDK { >> param( >> [string]$Version = "9.0.109" >> ) >> >> # 清理旧安装 >> Write-Host "🧹 清理旧.NET安装..." -ForegroundColor Cyan >> $dotnetPath = "C:\Program Files\dotnet" >> if (Test-Path $dotnetPath) { >> Remove-Item $dotnetPath -Recurse -Force -ErrorAction SilentlyContinue >> } >> >> # 使用官方下载链接 >> $installerPath = "$env:TEMP\dotnet-sdk-installer.exe" >> $downloadUrl = "https://download.visualstudio.microsoft.com/download/pr/0b6d1b3c-8b0d-4b0d-8b0d-4b0d8b0d4b0d/$($Version)/dotnet-sdk-$($Version)-win-x64.exe" >> >> # 备用下载链接 >> if (-not (Test-Path $installerPath)) { >> $downloadUrl = "https://dotnetcli.azureedge.net/dotnet/Sdk/$($Version)/dotnet-sdk-$($Version)-win-x64.exe" >> } >> >> try { >> Write-Host "📥 下载.NET SDK $Version..." -ForegroundColor Cyan >> Invoke-WebRequest -Uri $downloadUrl -OutFile $installerPath >> >> # 安装.NET SDK >> Write-Host "⚙️ 安装.NET SDK..." -ForegroundColor Cyan >> Start-Process -FilePath $installerPath -ArgumentList "/install", "/quiet", "/norestart" -Wait >> >> # 验证安装 >> $dotnetVersion = & dotnet --version >> if ($dotnetVersion -eq $Version) { >> Write-Host "✅ .NET SDK $Version 安装成功" -ForegroundColor Green >> return $true >> } >> else { >> Write-Host "❌ .NET SDK 安装验证失败" -ForegroundColor Red >> return $false >> } >> } >> catch { >> Write-Host "❌ .NET SDK 安装失败: $_" -ForegroundColor Red >> return $false >> } >> finally { >> Remove-Item $installerPath -Force -ErrorAction SilentlyContinue >> } >> } PS C:\Users\Administrator\Desktop> PS C:\Users\Administrator\Desktop> # ===== 3. 修复 Python 环境警告 ===== PS C:\Users\Administrator\Desktop> function Repair-PythonEnvironment { >> param( >> [string]$PythonPath = "E:\Python310" >> ) >> >> # 验证Python安装 >> if (-not (Test-Path $PythonPath)) { >> Write-Host "❌ Python路径不存在: $PythonPath" -ForegroundColor Red >> return $false >> } >> >> # 修复无效的包分布警告 >> $invalidDistPath = Join-Path $PythonPath "Lib\site-packages\-odelscope" >> if (Test-Path $invalidDistPath) { >> Remove-Item $invalidDistPath -Recurse -Force -ErrorAction SilentlyContinue >> Write-Host "✅ 已删除无效包分布: $invalidDistPath" -ForegroundColor Green >> } >> >> # 修复pip安装 >> try { >> Write-Host "🔧 修复pip安装..." -ForegroundColor Cyan >> $requirements = Join-Path $env:TEMP "requirements.txt" >> python -m pip freeze > $requirements >> python -m pip uninstall -y -r $requirements >> python -m ensurepip --upgrade >> python -m pip install --upgrade pip setuptools wheel >> Remove-Item $requirements -Force >> } >> catch { >> Write-Host "❌ pip修复失败: $_" -ForegroundColor Red >> return $false >> } >> >> # 验证修复 >> try { >> $pipVersion = python -m pip --version >> Write-Host "✅ pip已修复: $pipVersion" -ForegroundColor Green >> return $true >> } >> catch { >> Write-Host "❌ pip验证失败" -ForegroundColor Red >> return $false >> } >> } PS C:\Users\Administrator\Desktop> PS C:\Users\Administrator\Desktop> # ===== 4. 直接使用 UNC 路径 ===== PS C:\Users\Administrator\Desktop> function Use-UNCPath { >> param( >> [string]$UNCPath = "\\192.168.1.100\pip_repo" >> ) >> >> # 测试网络路径是否可达 >> if (-not (Test-Path $UNCPath)) { >> Write-Host "❌ 无法访问网络路径: $UNCPath" -ForegroundColor Red >> return $null >> } >> >> Write-Host "✅ 直接使用UNC路径: $UNCPath" -ForegroundColor Green >> >> # 初始化仓库 >> Initialize-PipRepository -RepositoryPath $UNCPath >> >> return $UNCPath >> } PS C:\Users\Administrator\Desktop> # 1. 修复 Python 环境 PS C:\Users\Administrator\Desktop> Repair-PythonEnvironment 🔧 修复pip安装... WARNING: Ignoring invalid distribution -odelscope (e:\python310\lib\site-packages) ERROR: You must give at least one requirement to uninstall (see "pip help uninstall") WARNING: Ignoring invalid distribution -odelscope (e:\python310\lib\site-packages) WARNING: Ignoring invalid distribution -odelscope (e:\python310\lib\site-packages) Looking in links: c:\Users\ADMINI~1\AppData\Local\Temp\tmpmapci1p_ Requirement already satisfied: setuptools in e:\python310\lib\site-packages (80.9.0) Requirement already satisfied: pip in e:\python310\lib\site-packages (25.2) WARNING: Ignoring invalid distribution -odelscope (e:\python310\lib\site-packages) WARNING: Ignoring invalid distribution -odelscope (e:\python310\lib\site-packages) Looking in indexes: https://pypi.tuna.tsinghua.edu.cn/simple Requirement already satisfied: pip in e:\python310\lib\site-packages (25.2) Requirement already satisfied: setuptools in e:\python310\lib\site-packages (80.9.0) Requirement already satisfied: wheel in e:\python310\lib\site-packages (0.45.1) WARNING: Ignoring invalid distribution -odelscope (e:\python310\lib\site-packages) WARNING: Ignoring invalid distribution -odelscope (e:\python310\lib\site-packages) ✅ pip已修复: pip 25.2 from E:\Python310\lib\site-packages\pip (python 3.10) True PS C:\Users\Administrator\Desktop> PS C:\Users\Administrator\Desktop> # 2. 安装/修复 .NET SDK PS C:\Users\Administrator\Desktop> Install-DotNetSDK -Version "9.0.109" 🧹 清理旧.NET安装... 📥 下载.NET SDK 9.0.109... ⚙️ 安装.NET SDK... ❌ .NET SDK 安装失败: 无法将“dotnet”项识别为 cmdlet、函数、脚本文件或可运行程序的名称。请检查名称的拼写,如果包括路径,请确保路径正确,然后再试一次。 False PS C:\Users\Administrator\Desktop> PS C:\Users\Administrator\Desktop> # 3. 初始化本地 pip 仓库 PS C:\Users\Administrator\Desktop> Initialize-PipRepository -RepositoryPath "E:\ai_pip_repository" Initialize-PipRepository : 无法将“Initialize-PipRepository”项识别为 cmdlet、函数、脚本文件或可运行程序的名称。请检查 名称的拼写,如果包括路径,请确保路径正确,然后再试一次。 所在位置 行:1 字符: 1 + Initialize-PipRepository -RepositoryPath "E:\ai_pip_repository" + ~~~~~~~~~~~~~~~~~~~~~~~~ + CategoryInfo : ObjectNotFound: (Initialize-PipRepository:String) [], CommandNotFoundException + FullyQualifiedErrorId : CommandNotFoundException PS C:\Users\Administrator\Desktop> PS C:\Users\Administrator\Desktop> # 4. 使用 UNC 路径(替代网络驱动器) PS C:\Users\Administrator\Desktop> $uncPath = Use-UNCPath -UNCPath "\\192.168.1.100\pip_repo" ❌ 无法访问网络路径: \\192.168.1.100\pip_repo PS C:\Users\Administrator\Desktop> if ($uncPath) { >> # 5. 安装包 >> Install-FromRepository "torch" -Version "2.8.0" -RepositoryPath $uncPath >> Install-FromRepository "torchvision" -Version "0.15.1" -RepositoryPath $uncPath >> Install-FromRepository "torchaudio" -Version "2.0.1" -RepositoryPath $uncPath >> } PS C:\Users\Administrator\Desktop> PS C:\Users\Administrator\Desktop> # 6. 更新仓库索引 PS C:\Users\Administrator\Desktop> Update-RepositoryIndex -RepositoryPath $uncPath Update-RepositoryIndex : 无法将“Update-RepositoryIndex”项识别为 cmdlet、函数、脚本文件或可运行程序的名称。请检查名称 的拼写,如果包括路径,请确保路径正确,然后再试一次。 所在位置 行:1 字符: 1 + Update-RepositoryIndex -RepositoryPath $uncPath + ~~~~~~~~~~~~~~~~~~~~~~ + CategoryInfo : ObjectNotFound: (Update-RepositoryIndex:String) [], CommandNotFoundException + FullyQualifiedErrorId : CommandNotFoundException PS C:\Users\Administrator\Desktop> PS C:\Users\Administrator\Desktop> # 7. 检查依赖 PS C:\Users\Administrator\Desktop> Test-RepositoryDependency -PackageName "torch" -RepositoryPath $uncPath Test-RepositoryDependency : 无法将“Test-RepositoryDependency”项识别为 cmdlet、函数、脚本文件或可运行程序的名称。请检 查名称的拼写,如果包括路径,请确保路径正确,然后再试一次。 所在位置 行:1 字符: 1 + Test-RepositoryDependency -PackageName "torch" -RepositoryPath $uncPa ... + ~~~~~~~~~~~~~~~~~~~~~~~~~ + CategoryInfo : ObjectNotFound: (Test-RepositoryDependency:String) [], CommandNotFoundException + FullyQualifiedErrorId : CommandNotFoundException PS C:\Users\Administrator\Desktop> PS C:\Users\Administrator\Desktop> # ===== 仓库维护工具 ===== PS C:\Users\Administrator\Desktop> function Maintain-PipRepository { >> param( >> [string]$RepositoryPath = "E:\ai_pip_repository" >> ) >> >> $downloadedDir = Join-Path $RepositoryPath "downloaded_packages" >> >> # 1. 清理无效文件 >> Write-Host "🧹 清理无效文件..." -ForegroundColor Cyan >> Get-ChildItem $downloadedDir -File | Where-Object { >> $_.Extension -notin @('.whl', '.gz', '.zip') -or >> $_.Length -eq 0 >> } | Remove-Item -Force >> >> # 2. 修复文件名 >> Write-Host "🔧 修复文件名..." -ForegroundColor Cyan >> Get-ChildItem $downloadedDir -File | ForEach-Object { >> $newName = $_.Name -replace '%2B', '+' -replace '%2F', '/' >> if ($newName -ne $_.Name) { >> Rename-Item -Path $_.FullName -NewName $newName >> } >> } >> >> # 3. 重建索引 >> Write-Host "📝 重建索引..." -ForegroundColor Cyan >> Update-RepositoryIndex -RepositoryPath $RepositoryPath >> >> Write-Host "✅ 仓库维护完成" -ForegroundColor Green >> } PS C:\Users\Administrator\Desktop> PS C:\Users\Administrator\Desktop> # 运行仓库维护 PS C:\Users\Administrator\Desktop> Maintain-PipRepository -RepositoryPath "E:\ai_pip_repository" 🧹 清理无效文件... 🔧 修复文件名... 📝 重建索引... Update-RepositoryIndex : 无法将“Update-RepositoryIndex”项识别为 cmdlet、函数、脚本文件或可运行程序的名称。请检查名称 的拼写,如果包括路径,请确保路径正确,然后再试一次。 所在位置 行:26 字符: 5 + Update-RepositoryIndex -RepositoryPath $RepositoryPath + ~~~~~~~~~~~~~~~~~~~~~~ + CategoryInfo : ObjectNotFound: (Update-RepositoryIndex:String) [], CommandNotFoundException + FullyQualifiedErrorId : CommandNotFoundException ✅ 仓库维护完成 PS C:\Users\Administrator\Desktop>
08-23
内容概要:本文为《科技类企业品牌传播白皮书》,系统阐述了新闻媒体发稿、自媒体博主种草与短视频矩阵覆盖三大核心传播策略,并结合“传声港”平台的AI工具与资源整合能力,提出适配科技企业的品牌传播解决方案。文章深入分析科技企业传播的特殊性,包括受众圈层化、技术复杂性与传播通俗性的矛盾、产品生命周期影响及2024-2025年传播新趋势,强调从“技术输出”向“价值引领”的战略升级。针对三种传播方式,分别从适用场景、操作流程、效果评估、成本效益、风险防控等方面提供详尽指南,并通过平台AI能力实现资源智能匹配、内容精准投放与全链路效果追踪,最终构建“信任—种草—曝光”三位一体的传播闭环。; 适合人群:科技类企业品牌与市场负责人、公关传播从业者、数字营销管理者及初创科技公司创始人;具备一定品牌传播基础,关注效果可量化与AI工具赋能的专业人士。; 使用场景及目标:①制定科技产品全生命周期的品牌传播策略;②优化媒体发稿、KOL合作与短视频运营的资源配置与ROI;③借助AI平台实现传播内容的精准触达、效果监测与风险控制;④提升品牌在技术可信度、用户信任与市场影响力方面的综合竞争力。; 阅读建议:建议结合传声港平台的实际工具模块(如AI选媒、达人匹配、数据驾驶舱)进行对照阅读,重点关注各阶段的标准化流程与数据指标基准,将理论策略与平台实操深度融合,推动品牌传播从经验驱动转向数据与工具双驱动。
评论
成就一亿技术人!
拼手气红包6.0元
还能输入1000个字符  | 博主筛选后可见
 
红包 添加红包
表情包 插入表情
 条评论被折叠 查看
添加红包

请填写红包祝福语或标题

红包个数最小为10个

红包金额最低5元

当前余额3.43前往充值 >
需支付:10.00
成就一亿技术人!
领取后你会自动成为博主和红包主的粉丝 规则
hope_wisdom
发出的红包

打赏作者

RubyLion28

你的鼓励将是我创作的最大动力

¥1 ¥2 ¥4 ¥6 ¥10 ¥20
扫码支付:¥1
获取中
扫码支付

您的余额不足,请更换扫码支付或充值

打赏作者

实付
使用余额支付
点击重新获取
扫码支付
钱包余额 0

抵扣说明:

1.余额是钱包充值的虚拟货币,按照1:1的比例进行支付金额的抵扣。
2.余额无法直接购买下载,可以购买VIP、付费专栏及课程。

余额充值