


 本文介绍了Docker,它是开源的应用容器引擎,可实现虚拟化。阐述了Docker思想,对比了镜像、容器和虚拟机。详细说明了在Ubuntu 18.04系统下Docker的安装与卸载步骤,还介绍了运行Nginx镜像的方法,最后讲解了如何编写Dockerfile制作镜像。
目录
一、什么是Docker?
Docker 是一个开源的应用容器引擎,让开发者可以打包他们的应用以及依赖包到一个可移植的容器中,然后发布到任何流行的 Linux 机器上,也可以实现虚拟化。容器是完全使用沙箱机制,相互之间不会有任何接口。
内容来源Docker官网:https://docs.docker.com/
二、Docker 思想
Docker是一个为开发人员和系统管理员提供开发、部署和通过容器运行应用程序的平台。使用Linux容器来部署应用程序被称为“集装箱化”。容器技术很早就已经有了,但是Docker最先把它们用于轻松部署应用程序。
集装箱化越来越受欢迎,因为集装箱是:
- Flexible: Even the most complex applications can be containerized.
- Lightweight: Containers leverage and share the host kernel.
- Interchangeable: You can deploy updates and upgrades on-the-fly.
- Portable: You can build locally, deploy to the cloud, and run anywhere.
- Scalable: You can increase and automatically distribute container replicas.
- Stackable: You can stack services vertically and on-the-fly.
镜像和容器
容器通过运行一个镜像来启动。镜像个可执行的包,包含了应用运行所需要的一切,代码、运行时、、库、环境变量和配置文件。
容器是一个镜像的运行时实例,镜像执行后被加载到内存。可以通过 docker ps 来查看正在运行的容器。
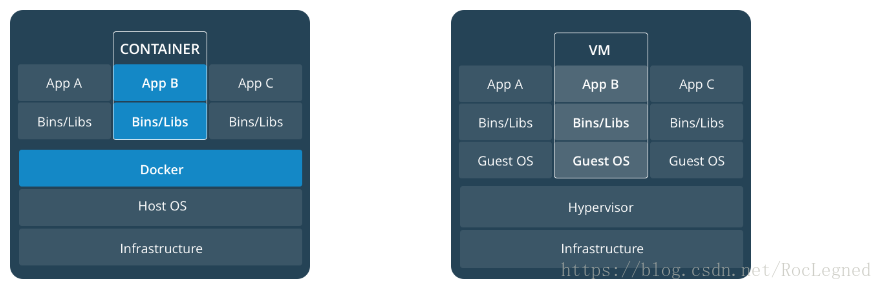
容器和虚拟机
容器运行在linux本机和其它容器共享主机的内核。它以独立进程方式运行,非常的轻量级,只提供程序运行所必要的资源。
相对比,虚拟机以成熟的客户操作系统的方式运行,通过虚拟监控程序虚拟访问主机资源。通常,虚拟机(VMs)提供的环境包含的资源比大多数应用所需要的都要多。
三、Docker 安装
官网连接:https://docs.docker.com/install/#supported-platforms,下图选择你的linux环境
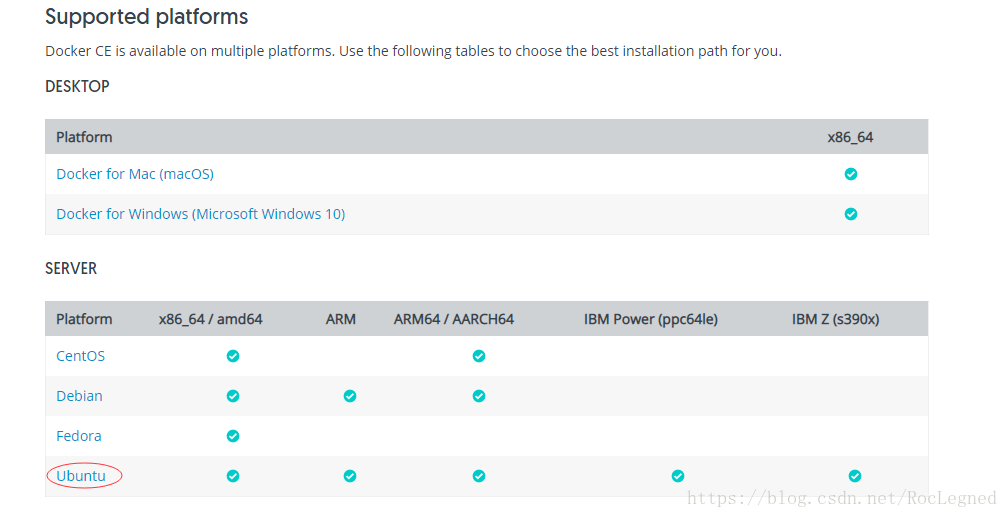
我以ubunto 18.04 (LTS) 系统为例
卸载历史版本
$ sudo apt-get remove docker docker-engine docker.io安装用到的一些存储库
升级apt包
$ sudo apt-get update安装包,使apt能够在HTTPS上使用存储库:
$ sudo apt-get install \
    apt-transport-https \
    ca-certificates \
    curl \
    software-properties-common
添加Docker的官方GPG密钥:
$ curl -fsSL https://download.docker.com/linux/ubuntu/gpg | sudo apt-key add -通过搜索指纹的最后8个字符,验证你现在有了指纹9DC8 5822 9fc8854a e2d88d81 803 C 0EBF CD88的密钥
$ sudo apt-key fingerprint 0EBFCD88

pub   4096R/0EBFCD88 2017-02-22
      Key fingerprint = 9DC8 5822 9FC7 DD38 854A  E2D8 8D81 803C 0EBF CD88
uid                  Docker Release (CE deb) <docker@docker.com>
sub   4096R/F273FCD8 2017-02-22
使用下面的命令来设置稳定存储库
$ sudo add-apt-repository \
   "deb [arch=amd64] https://download.docker.com/linux/ubuntu \
   $(lsb_release -cs) \
   stable"
备注:Starting with Docker 17.06, stable releases are also pushed to the edge and test repositories.
安装docker-ce
安装最新版本
$ sudo apt-get install docker-ce列出你的可用的版本:
$ sudo apt-cache madison docker-ce

docker-ce | 18.03.0~ce-0~ubuntu | https://download.docker.com/linux/ubuntu xenial/stable amd64 Packages
通过包全名安装指定版本
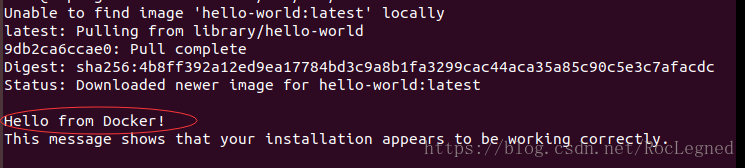
$ sudo apt-get install docker-ce=<VERSION>运行一个hello world镜像,验证docker-ce是否正确安装:
$ sudo docker run hello-world看到下图代表验证成功
卸载docker-ce
删除docker-ce
$ sudo apt-get purge docker-ce删除本地镜像、容器、卷或自定义配置
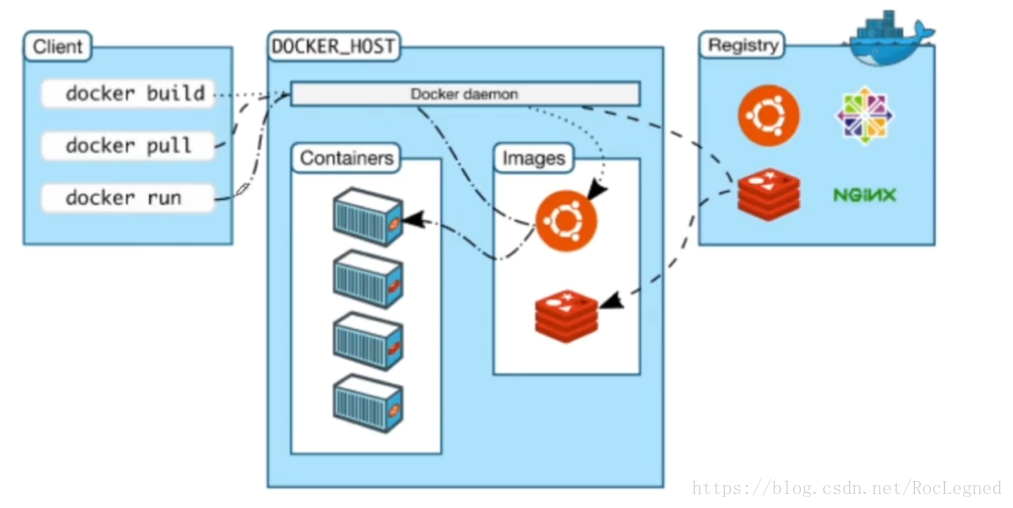
$ sudo rm -rf /var/lib/docker四、Docker 镜像、容器、仓库
运行一个Nginx 镜像
访问网易蜂巢镜像中心:https://c.163yun.com/hub#/m/repository/?repoId=2967

拉取镜像:
docker pull hub.c.163.com/library/nginx:latest
查看本地镜像:
docker images
运行镜像:
docker run -d hub.c.163.com/library/nginx
890fa544f8676a4ba873d758c346d328c6d1748e10d2f1dab6038af2fc92760a
docker ps 查看

进入容器,docker exec -it 后面跟刚刚运行nginx返回的一串字符,只需要写部分Id即可(确保唯一定位此容器)
docker exec -it 89 bash

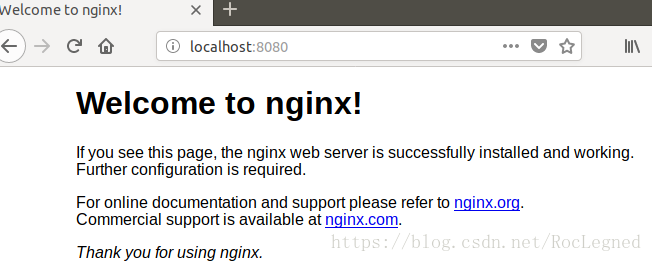
下面我们需要访问运行的nginx服务,这个时候需要将容器的端口隐射到本机,重新运行镜像
docker run -d -p 8080:80 hub.c.163.com/library/nginx在浏览器上面访问
五、制作一个镜像
编写Dockerfile,这里事先准备了一个jpress.war的web应用
vim Dockerfile

内容如下:
from hub.c.163.com/library/tomcat

MAINTAINER xxx xxx@hd123.com

COPY jpress.war /usr/local/tomcat/webapps
编译镜像,docker build
docker build -t jpress:latest .
运行
$ docker run -it --rm -p 8888:8080 tomcat:8.0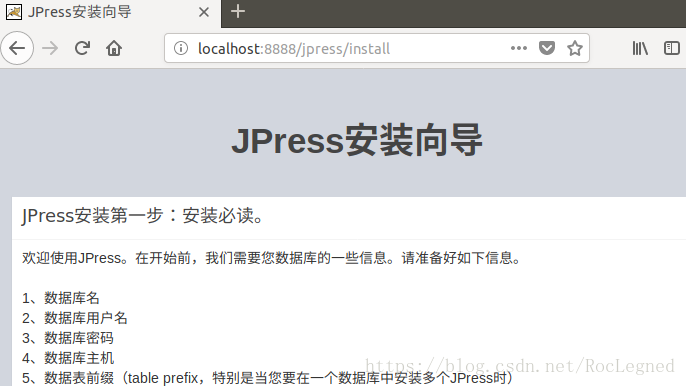
OK!!!


 2223
2223

 被折叠的 条评论
为什么被折叠?
被折叠的 条评论
为什么被折叠?
 到【灌水乐园】发言


