


 本文详细介绍如何在SharePoint环境中集成AJAX.NET和AJAXControlToolkit,包括配置SharePoint站点的web.config文件、在WebPart中使用ScriptManager和UpdatePanel实现AJAX效果,以及引入AJAXControlToolkit控件的方法。
SharePoint应用AJAX.NET和AJAX Control Toolkit
1. 首先,在SharePoint服务器上安装ASP.NET 2.0 AJAX Extensions.
2. 修改SP站点web.config,在c:/inetpub/wwwroot/wss/virtualdirectories/下会有对应站点占用端口号的文件夹,web.config就在这里:
1) 在<configSections>下添加
 <sectionGroup name="system.web.extensions" type="System.Web.Configuration.SystemWebExtensionsSectionGroup, System.Web.Extensions, Version=1.0.61025.0, Culture=neutral, PublicKeyToken=31bf3856ad364e35"> <sectionGroup name="scripting" type="System.Web.Configuration.ScriptingSectionGroup, System.Web.Extensions, Version=1.0.61025.0, Culture=neutral, PublicKeyToken=31bf3856ad364e35"> <section name="scriptResourceHandler" type="System.Web.Configuration.ScriptingScriptResourceHandlerSection, System.Web.Extensions, Version=1.0.61025.0, Culture=neutral, PublicKeyToken=31bf3856ad364e35" requirePermission="false" allowDefinition="MachineToApplication" /> <sectionGroup name="webServices" type="System.Web.Configuration.ScriptingWebServicesSectionGroup, System.Web.Extensions, Version=1.0.61025.0, Culture=neutral, PublicKeyToken=31bf3856ad364e35"> <section name="jsonSerialization" type="System.Web.Configuration.ScriptingJsonSerializationSection, System.Web.Extensions, Version=1.0.61025.0, Culture=neutral, PublicKeyToken=31bf3856ad364e35" requirePermission="false" allowDefinition="Everywhere" /> <section name="profileService" type="System.Web.Configuration.ScriptingProfileServiceSection, System.Web.Extensions, Version=1.0.61025.0, Culture=neutral, PublicKeyToken=31bf3856ad364e35" requirePermission="false" allowDefinition="MachineToApplication" /> <section name="authenticationService" type="System.Web.Configuration.ScriptingAuthenticationServiceSection, System.Web.Extensions, Version=1.0.61025.0, Culture=neutral, PublicKeyToken=31bf3856ad364e35" requirePermission="false" allowDefinition="MachineToApplication" /> </sectionGroup> </sectionGroup> </sectionGroup>
2) <SafeControls>下添加:
<
SafeControl
Assembly
="System.Web.Extensions, Version=1.0.61025.0, Culture=neutral, PublicKeyToken=31bf3856ad364e35"
Namespace
="System.Web.UI"
TypeName
="*"
Safe
="True"
/>
3) 在 <httpHandlers>下添加:
<add verb="*" path="*.asmx" validate="false" type="System.Web.Script.Services.ScriptHandlerFactory, System.Web.Extensions, Version=1.0.61025.0, Culture=neutral, PublicKeyToken=31bf3856ad364e35" /> <add verb="*" path="*_AppService.axd" validate="false" type="System.Web.Script.Services.ScriptHandlerFactory, System.Web.Extensions, Version=1.0.61025.0, Culture=neutral, PublicKeyToken=31bf3856ad364e35" /> <add verb="GET,HEAD" path="ScriptResource.axd" type="System.Web.Handlers.ScriptResourceHandler, System.Web.Extensions, Version=1.0.61025.0, Culture=neutral, PublicKeyToken=31bf3856ad364e35" validate="false" />
4) 在<httpModules>下添加:
<
add
name
="ScriptModule"
type
="System.Web.Handlers.ScriptModule, System.Web.Extensions, Version=1.0.61025.0, Culture=neutral, PublicKeyToken=31bf3856ad364e35"
/>
5) 在<assemblies>下添加:
<
add
assembly
="System.Web.Extensions, Version=1.0.61025.0, Culture=neutral, PublicKeyToken=31bf3856ad364e35"
/>
6) 在<pages>下添加:
<
controls
>
<
add
tagPrefix
="asp"
namespace
="System.Web.UI"
assembly
="System.Web.Extensions, Version=1.0.61025.0, Culture=neutral, PublicKeyToken=31bf3856ad364e35"
/>
</
controls
>
7) 在<configuration>下的最后添加:
<
system
.web.extensions
>
<
scripting
>
<
webServices
>
<!--
Uncomment this line to enable the authentication service. Include requireSSL="true" if appropriate.
-->
<!--
<authenticationService enabled="true" requireSSL = "true|false"/>
-->
<!--
Uncomment these lines to enable the profile service. To allow profile properties to be retrieved and modified in ASP.NET AJAX applications, you need to add each property name to the readAccessProperties and writeAccessProperties attributes.
-->
<!--
<profileService enabled="true" readAccessProperties="propertyname1,propertyname2" writeAccessProperties="propertyname1,propertyname2" />
-->
</
webServices
>
<!--
<scriptResourceHandler enableCompression="true" enableCaching="true" />
-->
</
scripting
>
</
system.web.extensions
>
<
system
.webServer
>
<
validation
validateIntegratedModeConfiguration
="false"
/>
<
modules
>
<
add
name
="ScriptModule"
preCondition
="integratedMode"
type
="System.Web.Handlers.ScriptModule, System.Web.Extensions, Version=1.0.61025.0, Culture=neutral, PublicKeyToken=31bf3856ad364e35"
/>
</
modules
>
<
handlers
>
<
remove
name
="WebServiceHandlerFactory-Integrated"
/>
<
add
name
="ScriptHandlerFactory"
verb
="*"
path
="*.asmx"
preCondition
="integratedMode"
type
="System.Web.Script.Services.ScriptHandlerFactory, System.Web.Extensions, Version=1.0.61025.0, Culture=neutral, PublicKeyToken=31bf3856ad364e35"
/>
<
add
name
="ScriptHandlerFactoryAppServices"
verb
="*"
path
="*_AppService.axd"
preCondition
="integratedMode"
type
="System.Web.Script.Services.ScriptHandlerFactory, System.Web.Extensions, Version=1.0.61025.0, Culture=neutral, PublicKeyToken=31bf3856ad364e35"
/>
<
add
name
="ScriptResource"
preCondition
="integratedMode"
verb
="GET,HEAD"
path
="ScriptResource.axd"
type
="System.Web.Handlers.ScriptResourceHandler, System.Web.Extensions, Version=1.0.61025.0, Culture=neutral, PublicKeyToken=31bf3856ad364e35"
/>
</
handlers
>
</
system.webServer
>
3. 在webpart中就使用ScriptManager和UpdatePanel
1) 添加 System.Web.Extensions引用
2) 添加代码如下:
protected override void OnInit(EventArgs e)

 {
{ base.OnInit(e); ScriptManager SM = ScriptManager.GetCurrent(this.Page); if (SM == null)
 { SM = new ScriptManager(); SM.ID = "SM"; if (this.Page.IsPostBack) { Page.ClientScript.RegisterStartupScript( typeof(AJAXWebPart), this.ID, "_spOriginalFormAction = document.forms[0].action; _spSuppressFormOnSubmitWrapper=true;", true);
 } if (this.Page.Form != null) { string formOnSubmitAtt = this.Page.Form.Attributes["onsubmit"]; if (!string.IsNullOrEmpty(formOnSubmitAtt) && formOnSubmitAtt == "return _spFormOnSubmitWrapper();") { this.Page.Form.Attributes["onsubmit"] = "_spFormOnSubmitWrapper();"; } this.Page.Form.Controls.AddAt(0, SM); } }
 }
}
此代码来自十一。
3) 在CreateChildControls()方法里添加UpdatePanel:
UpdatePanel up
=
new
UpdatePanel(); up.ID
=
"
UpdatePanel2
"
; up.ChildrenAsTriggers
=
true
; up.UpdateMode
=
UpdatePanelUpdateMode.Always;
this
.Controls.Add(up); Button button
=
new
Button(); button.Text
=
"
Groups
"
; button.Click
+=
new
EventHandler(HandleButtonClick); up.ContentTemplateContainer.Controls.Add(button); listbox1
=
new
ListBox(); listbox2
=
new
ListBox(); up.ContentTemplateContainer.Controls.Add(listbox1); up.ContentTemplateContainer.Controls.Add(listbox2);
Button事件:
private
void
HandleButtonClick(
object
sender, EventArgs eventArgs)
{ SPWeb currentWeb = SPContext.Current.Web; foreach (SPGroup group in currentWeb.CurrentUser.Groups) { listbox1.Items.Add(group.Name); } foreach (SPGroup group in currentWeb.CurrentUser.OwnedGroups) { listbox2.Items.Add(group.Name); } }
这样,我们的webpart在updatepanel的帮助下实现AJAX效果!
再让我们的WSS站点支持AJAX Control Toolkit。
1. 将AjaxControlToolkit.dll添加到GAC.
将AjaxControlToolkit.dll拖拽到C:/Windows/Assembly下就可以了.
2. 继续修改WSS站点web.config
在<assemblies>下添加:
<
add
assembly
="AjaxControlToolkit, Version=1.0.10618.0, Culture=neutral, PublicKeyToken=28f01b0e84b6d53e"
/>
在<controls>下添加:
<
add
tagPrefix
="ajaxToolkit"
namespace
="AjaxControlToolkit"
assembly
="AjaxControlToolkit, Version=1.0.10618.0, Culture=neutral, PublicKeyToken=28f01b0e84b6d53e"
/>
这样,在WebPart中就可以使用Toolkit里面的控件了。
添加AjaxControlToolkit引用;
在上面代码基础上添加代码:
this
.textBox
=
new
TextBox();
this
.textBox.ID
=
"
TextBox
"
; up.ContentTemplateContainer.Controls.Add(
this
.textBox); c
=
new
AjaxControlToolkit.CalendarExtender(); c.TargetControlID
=
"
TextBox
"
; up.ContentTemplateContainer.Controls.Add(c);
我们也可以在webpart中加载包含Toolkit 控件的UC。
Control ctl
=
Page.LoadControl(
"
~//wpresources//MyJAJXCalendar.ascx
"
); Controls.Add(ctl);
当然,UC也可以用Feature去加载到页面上。
效果如下: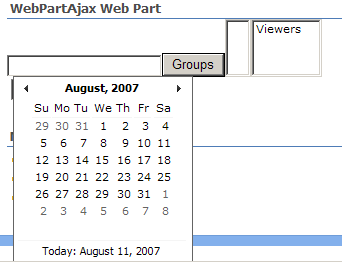


 97
97

 被折叠的 条评论
为什么被折叠?
被折叠的 条评论
为什么被折叠?
 到【灌水乐园】发言


