 Vue.js与Element UI实现回车跳转输入框


 本文介绍了如何在Vue.js项目中结合Element UI库,利用键盘事件监听回车键,实现在多个输入框之间的焦点切换,提升前端交互体验。
<template>
<div class="table-container">
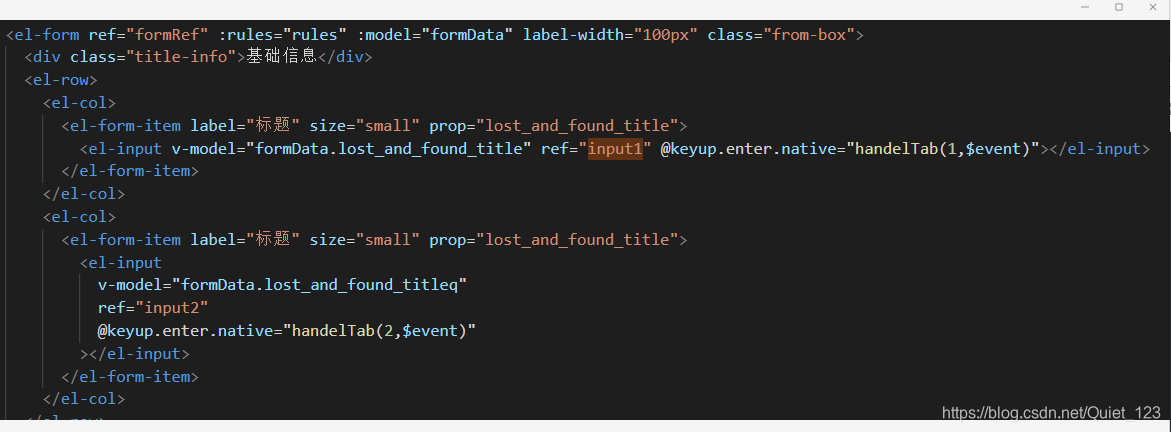
<el-form ref="formRef" :rules="rules" :model="formData" label-width="100px" class="from-box">
<div class="title-info">基础信息</div>
<el-row>
<el-col>
<el-form-item label="标题" size="small" prop="lost_and_found_title">
<el-input v-model="formData.lost_and_found_title" ref="input1" @keyup.enter.native="handelTab(1,$event)"></el-input>
</el-form-item>
</el-col>
<el-col>
<el-form-item label="标题" size="small" prop="lost_and_found_title">
<el-input
v-model="formData.lost_and_found_titleq"
ref="input2"
@keyup.enter.native="handelTab(2,$event)"
></el-input>
</el-form-item>
</el-col>
</el-row>
</el-form>
</div>
</template>
<script>
export default {
name: "Index",
data() {
return {
formData: {},
rules: {},
};
},
computed: {},
created() {},
mounted() {},
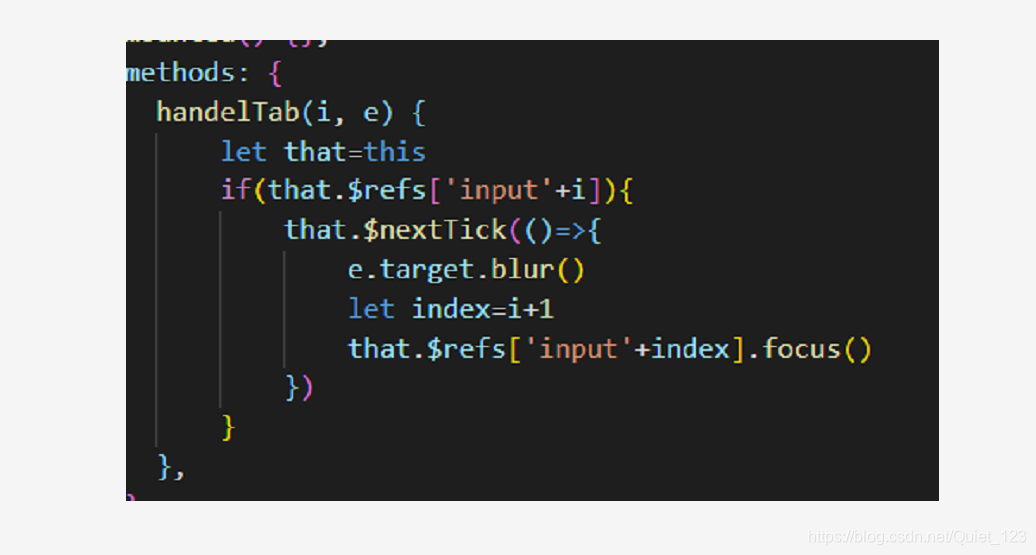
methods: {
handelTab(i, e) {
let that=this
if(that.$refs['input'+i]){
that.$nextTick(()=>{
e.target.blur()
let index=i+1
that.$refs['input'+index].focus()
})
}
},
},
};
</script>
<style lang="scss" scoped>
.table-container {
width: calc(100% - 40px);
height: calc(100vh - 120px);
background: #ffffff;
margin: 20px;
.from-box {
padding: 20px;
width: 100%;
max-height: 90%;
overflow-y: auto;
.title-info {
font-weight: 400;
font-size: 16px;
color: rgba(42, 101, 190, 1);
margin-bottom: 20px;
&:not(:first-of-type) {
margin-top: 30px;
}
}
}
.btn-footer {
width: 80%;
margin-top: 15px;
text-align: right;
}
}
>>> .el-col-24 {
width: 40%;
}
>>> .el-upload--picture-card {
width: 100px;
height: 100px;
line-height: 100px;
}
>>> .el-date-editor.el-input,
.el-date-editor.el-input__inner {
width: 100%;
}
主要方法:


 610
610

 被折叠的 条评论
为什么被折叠?
被折叠的 条评论
为什么被折叠?
 到【灌水乐园】发言


