


注册cloudfare
注册cf后需要绑定自己的域名后,可以实现更多的功能
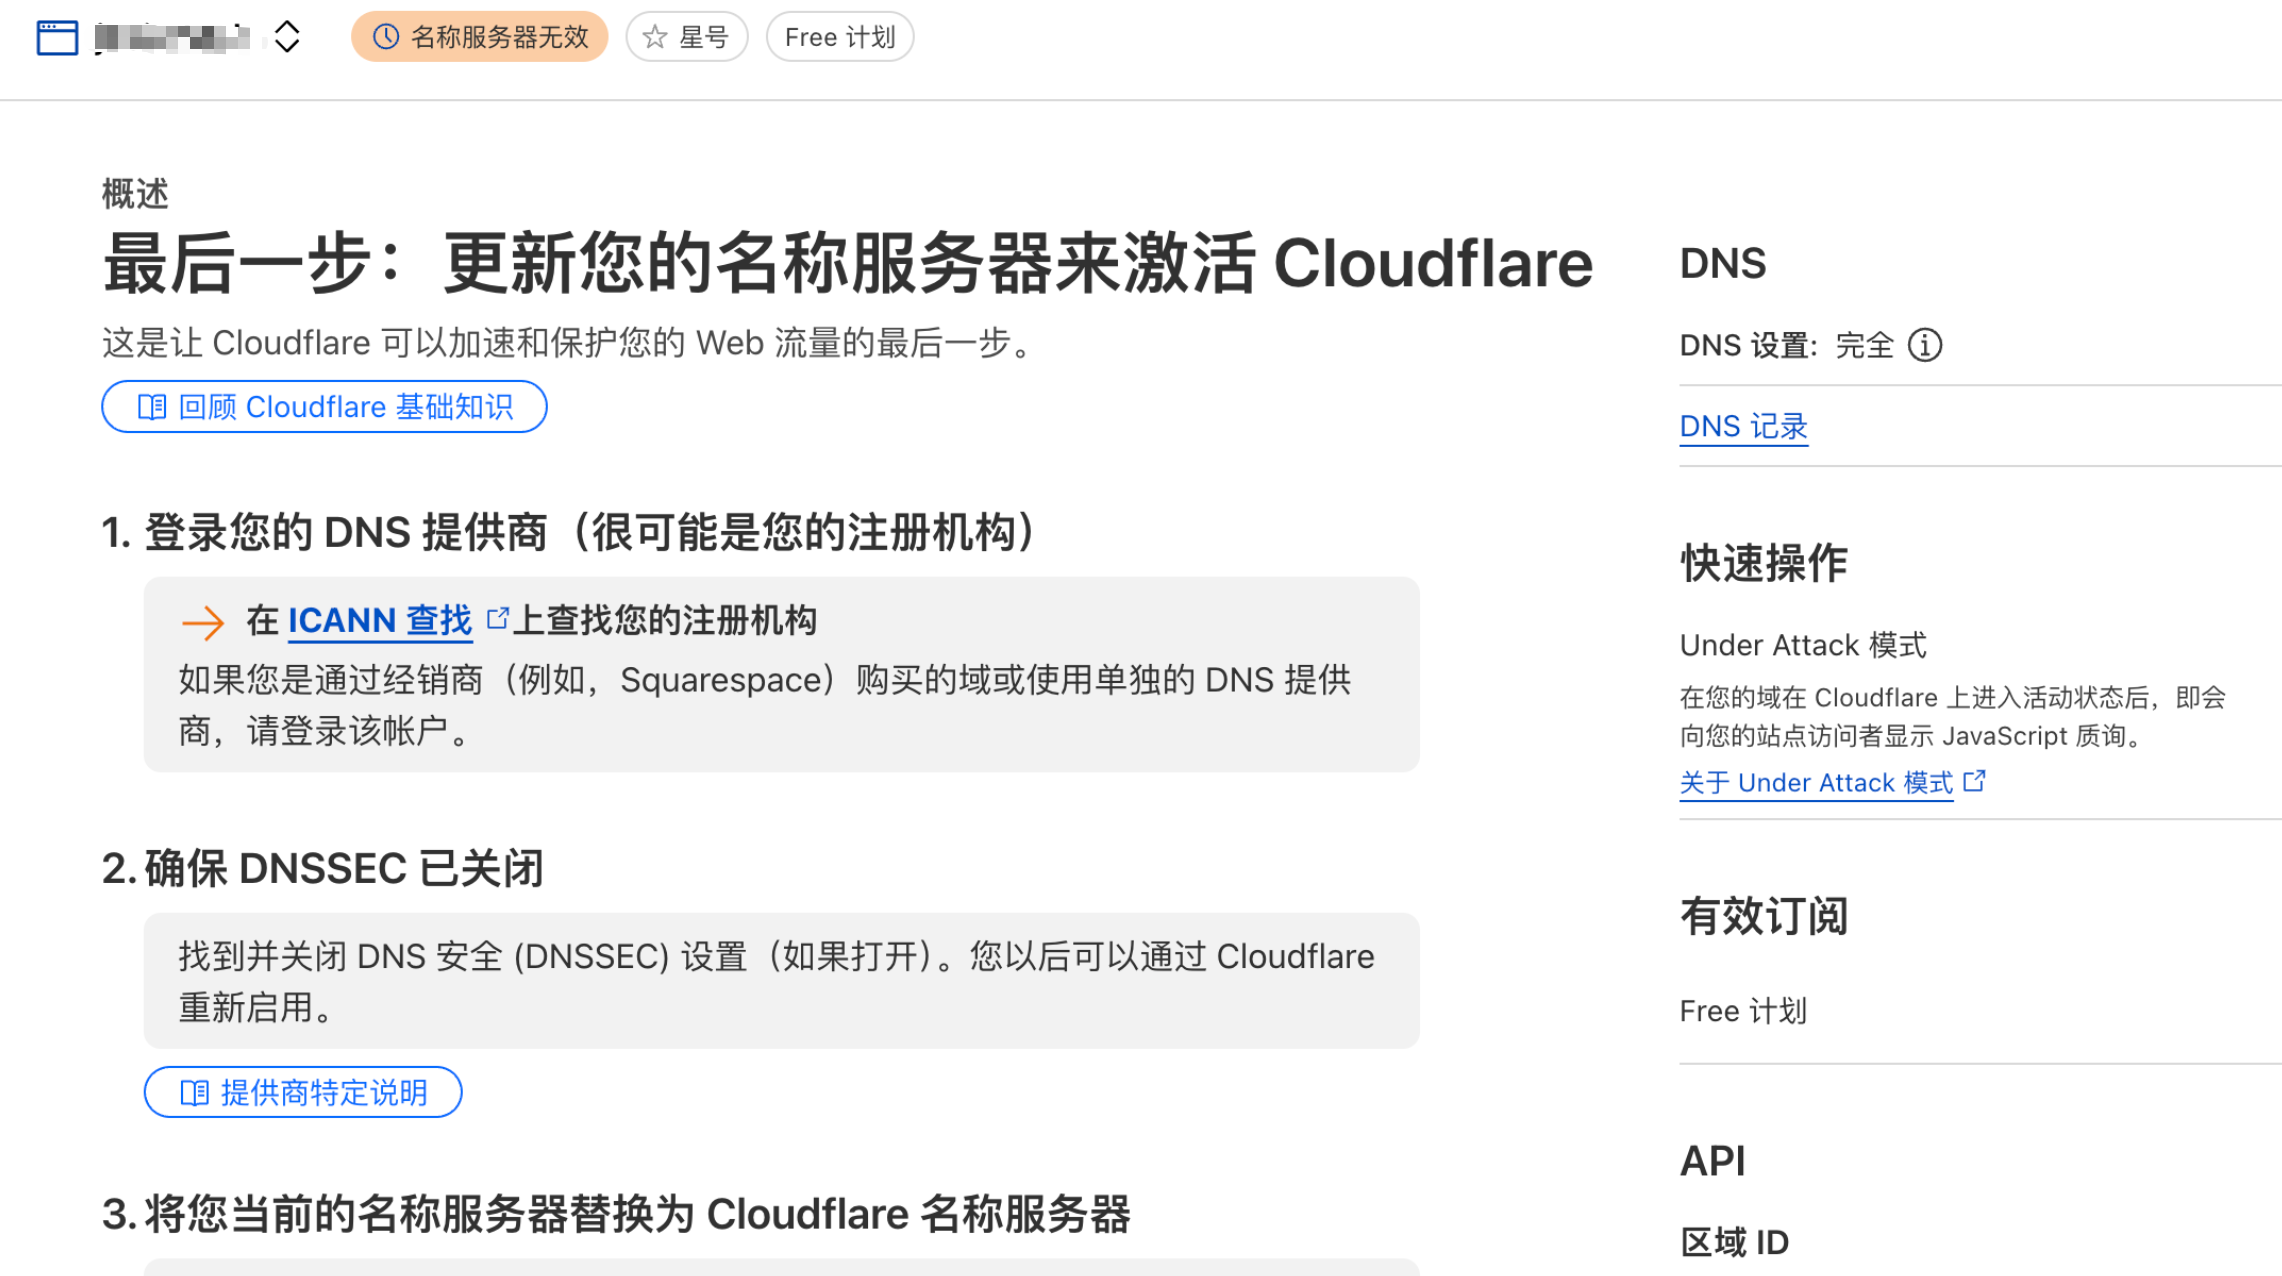
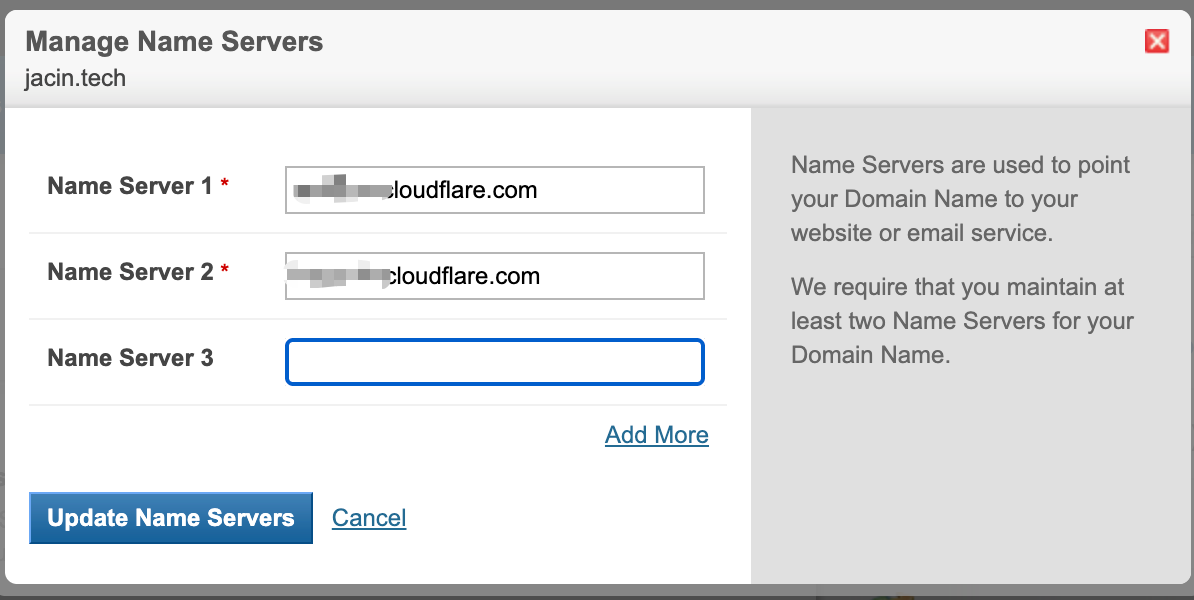
这里面首先关闭自己买的服务器的DNSSEC ,关闭,然后需要写入自己的:Name Servers
写入CF的DNS ,即表示已经激活
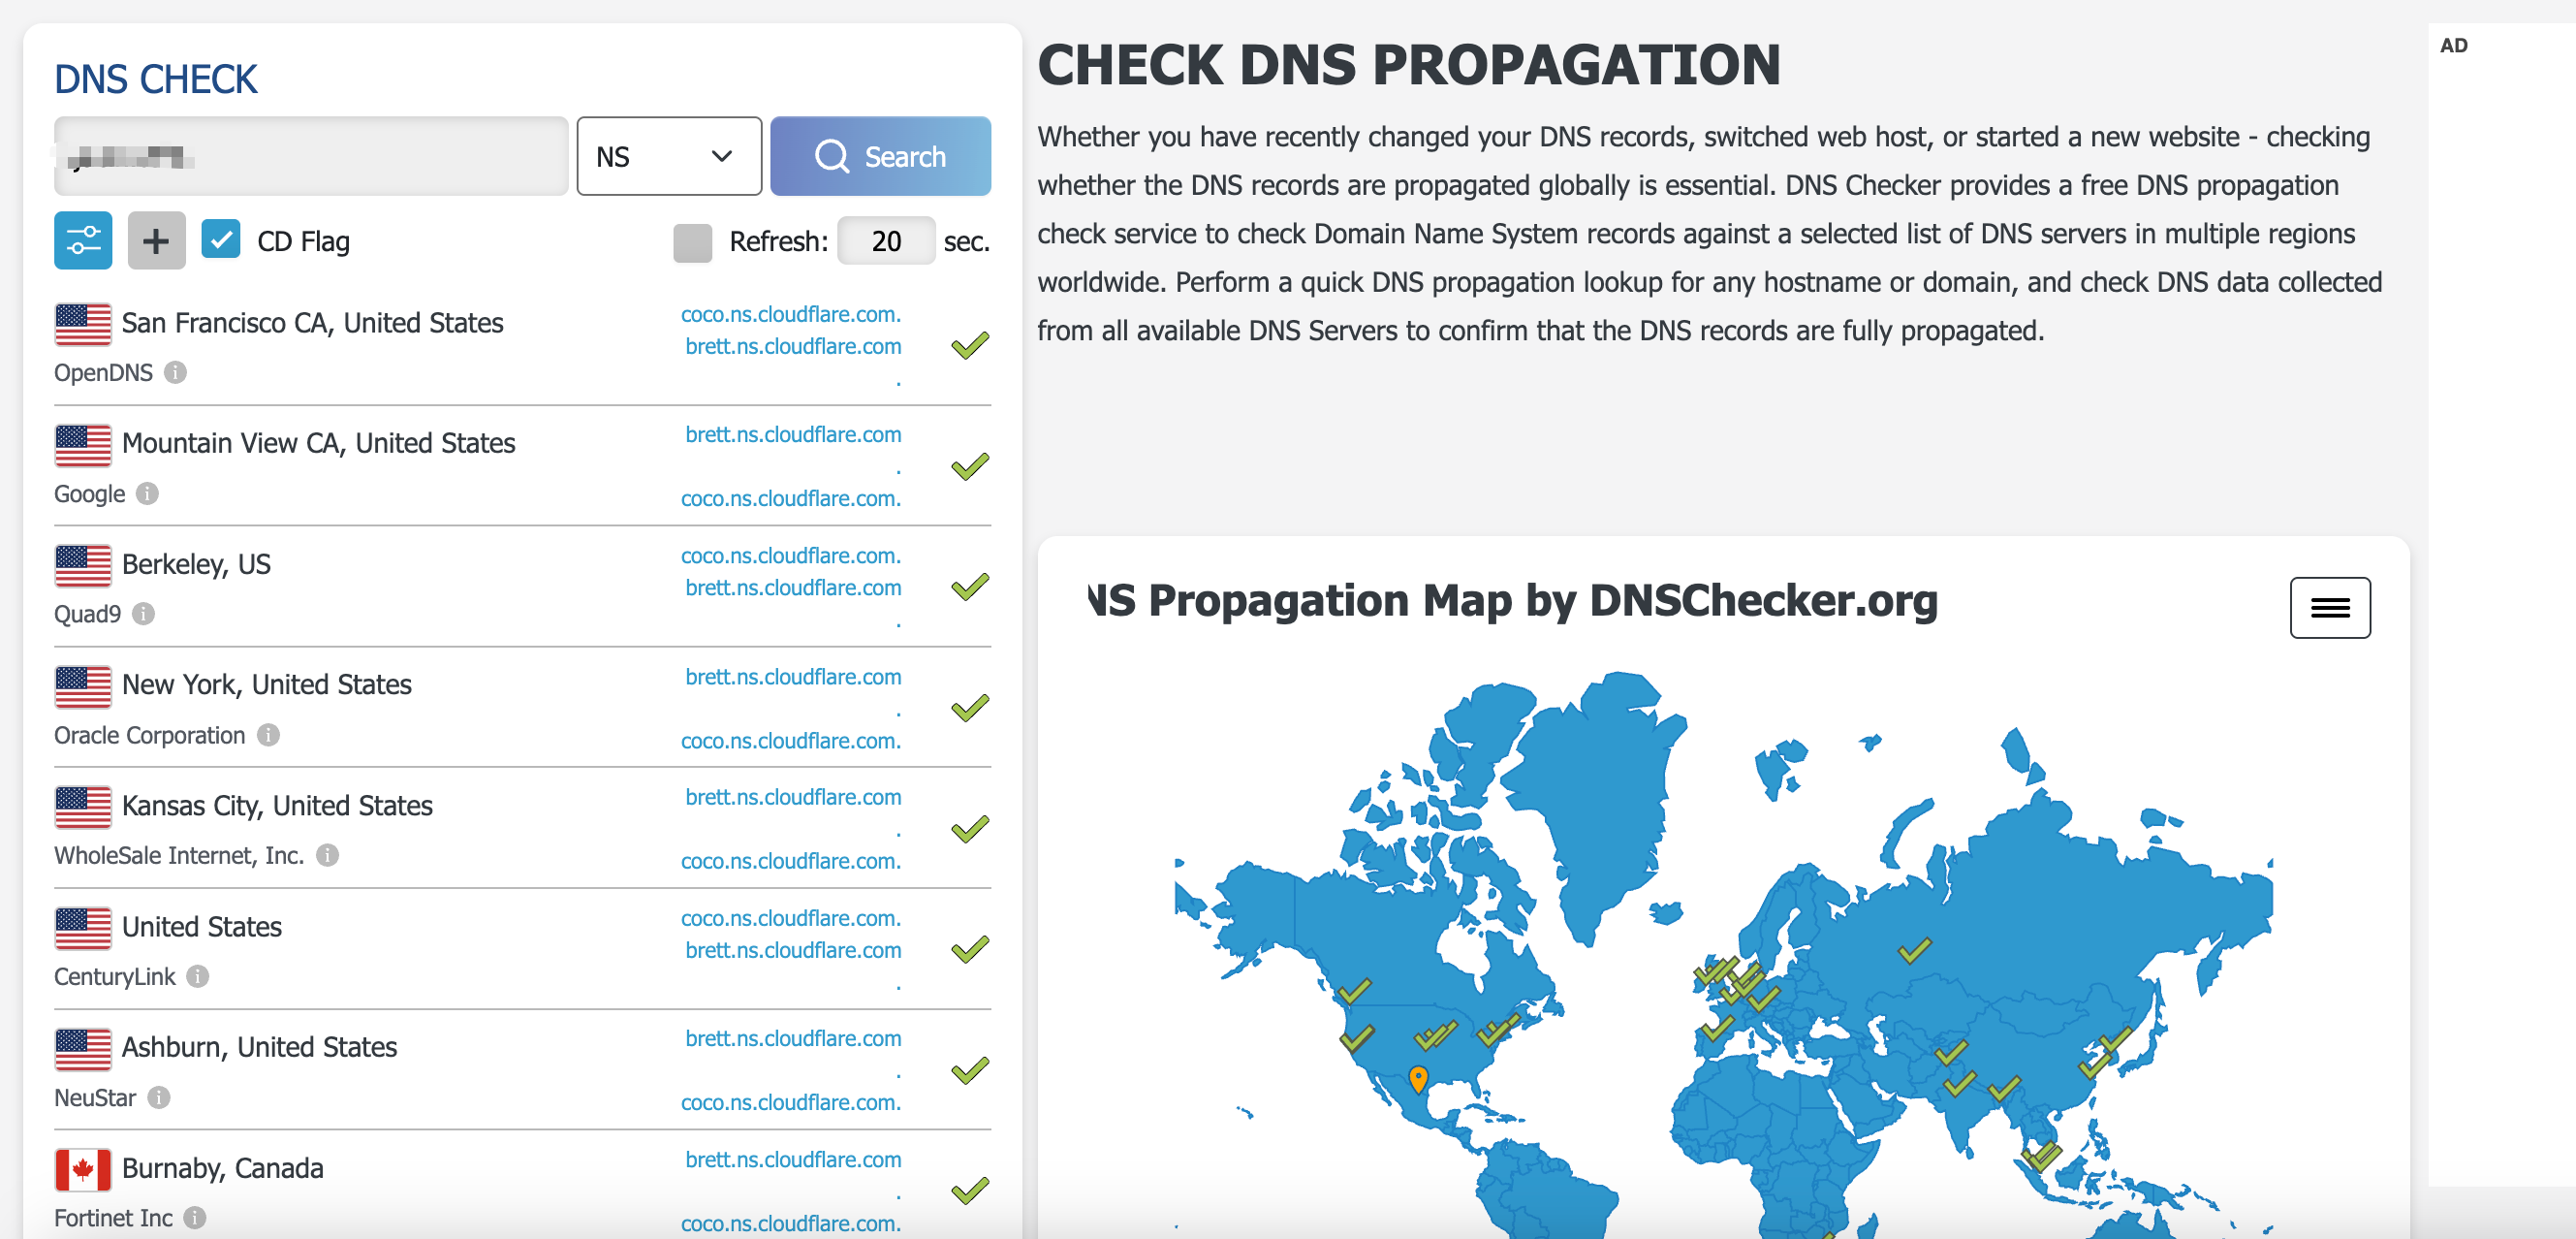
👉 https://dnschecker.org/#NS/jacin.tech
只要显示的是 Cloudflare 的两个 NS,就表示验证成功 ✅
这样就表示添加成功了:
一般类型就是:
| NS | x.cloudflare.com |
|---|---|
| NS | x.cloudflare.com |
然后搜索cloudflared 便可以下载对应的链接。
注意:
🧪 Cloudflare 验证方式是基于:
Cloudflare 并不像其他平台要求你添加 TXT 验证记录,它是 通过你是否成功更换 NS 到他们那边 来确认你是该域名的管理员。
实现内网穿透
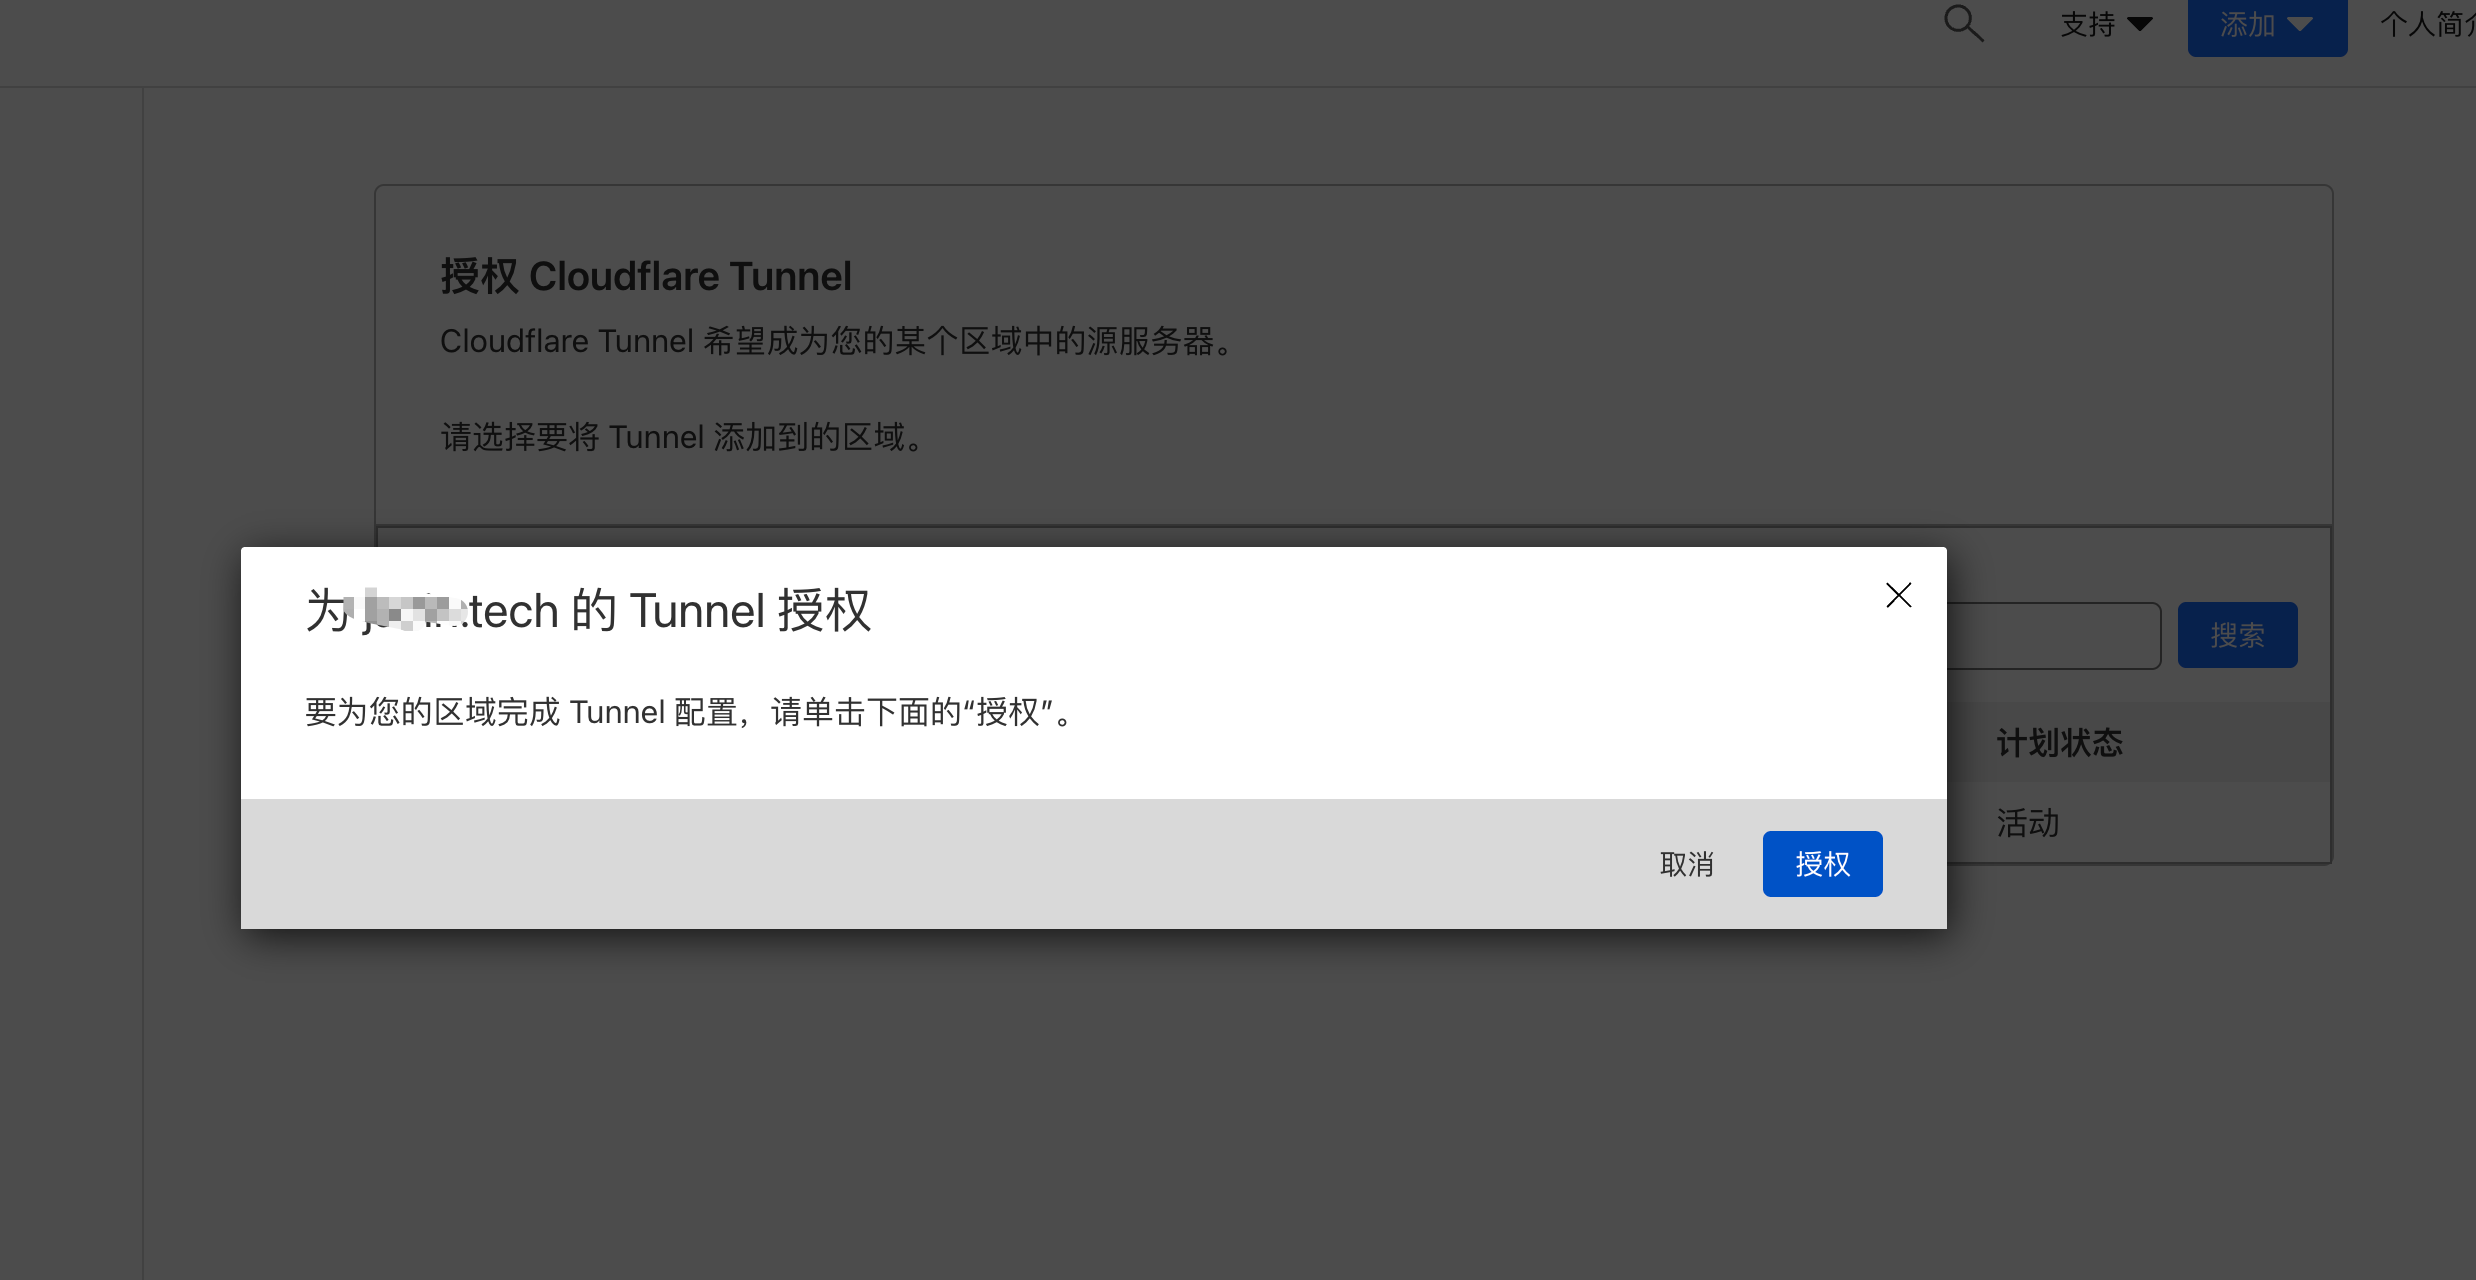
Cloudflare 提供了一个叫做 Cloudflare Tunnel(原名 Argo Tunnel) 的服务,可以让你将本地服务暴露到公网,无需公网 IP,也不用配置路由器端口映射。
下载完cloudflared后,验证即表示成功
➜  ~ cloudflared --version
cloudflared version 2025.2.1 (built 2025-02-27-1123 UTC)
登录 Cloudflare(建立认证)
cloudflared tunnel login
跳转后就表示成功:
If the browser failed to open, please visit the URL above directly in your browser.
2025-03-23T07:09:21Z INF You have successfully logged in.
If you wish to copy your credentials to a server, they have been saved to:
/Users/jacinlee/.cloudflared/cert.pem
创建Tunnel
这会创建一个 tunnel 并生成对应的 tunnel ID 和本地配置文件。
cloudflared tunnel create my-tunnel
这条命令的作用是:
创建一个隧道资源(Tunnel)
这个 Tunnel 就像是你的一根“管道”或“VPN 隧道”通往 Cloudflare 网络。
| 场景 | 推荐方式 |
|---|---|
| 一个服务(比如 FastAPI) | 一个 tunnel(my-tunnel)就够 |
| 多个服务要暴露多个端口/子域名 | 可以复用一个 tunnel,配多个路由 |
| 每个服务独立、安全隔离 | 建议每个服务一个 tunnel |
可以创建多个tunnel:
cloudflared tunnel create mac-tunnel
然后配置多个服务的入口,比如用 config:
# ~/.cloudflared/config.yml
tunnel: mac-tunnel
credentials-file: ~/.cloudflared/<uuid>.json

ingress:
  - hostname: api.jacin.tech
    service: http://localhost:8000
  - hostname: admin.jacin.tech
    service: http://localhost:9000
  - hostname: web.jacin.tech
    service: http://localhost:5173
  - service: http_status:404  # 兜底规则
只需要运行:
cloudflared tunnel run mac-tunnel
Cloudflare 会自动为你生成一个 tunnel ID,并在本地生成一个凭证文件(例如:~/.cloudflared/xxxxxxxx.json)
DNS 记录信息,在控制台操作
| 类型 | 名称(Name) | 内容(Target) | 代理状态 |
|---|---|---|---|
| CNAME | api(或其它) | mac-tunnel.cfargotunnel.com | ✅ 开启代理 |
命令行操作
cloudflared tunnel route dns <tunnel-name> <hostname>

cloudflared tunnel route dns mac-tunnel tunnel.jacin.tech

2025-03-23T07:26:22Z INF Added CNAME mac.jacin.tech which will route to this tunnel tunnelID=cebe0d
把某个 tunnel 绑定到一个具体的 DNS 记录(Cloudflare 会帮你自动创建 CNAME,指向 uuid.cfargotunnel.com)。
Cloudflare Tunnel 本质上是 “一条隧道 → 多个服务” 的映射,关键控制点是 config.yml 中的 ingress 配置。
你可以只创建一个 tunnel,比如 mac-tunnel,然后:
不过要分别绑定:
cloudflared tunnel route dns mac-tunnel api.jacin.tech
cloudflared tunnel route dns mac-tunnel admin.jacin.tech
🌟 每一个 hostname 都是你 tunnel 的一个入口,Cloudflare 会自动帮你创建对应的 DNS(CNAME 记录)。
有个好处是证书确实是 Cloudflare 自动签发的!
Cloudflare 提供了一项默认服务叫:
Universal SSL(通用 SSL)
它会在你把域名接入 Cloudflare(即 DNS 在 Cloudflare 管理)之后,自动为你签发并配置一张有效的 TLS 证书。
| 字段 | 含义 |
|---|---|
| Issuer (颁发者) | Google Trust Services |
| Common Name (CN) | jacin.tech |
| 签发给你的是 jacin.tech 的有效证书 | ✅ |
| 没有 O、OU | 因为 Universal SSL 是为域名而非企业单位申请的 |
Cloudflare 会在后台用 Let’s Encrypt / Google Trust / Sectigo 等 CA 机构签发证书给你的域名。
运行的就直接:
cloudflared tunnel run mac-tunnel
90 天有效期,会自动续期
| 内容 | 描述 |
|---|---|
| 证书有效期 | 通常是 90 天 |
| 续期方式 | Cloudflare 自动在后台完成续期 |
| 是否中断服务 | 不会中断,续期过程中用户访问无感知 |
| 证书来源 | 通常由 Google Trust Services、Let’s Encrypt、Sectigo 等 CA 签发 |
| 无需手动操作 | 除非你关闭 Universal SSL,或上传自定义证书 |
openssl s_client -connect jacin.tech:443 -servername jacin.tech
注意run 后不一定就立马可以了,需要一会才生效:
Cloudflared 日志说明了它在一开始尝试使用 **QUIC 协议(UDP 7844端口)**连接 Cloudflare 网络时失败了,最终自动降级使用了 HTTP/2 协议(TCP)连接成功。
ERR Failed to dial a quic connection error="failed to dial to edge with quic: timeout: no recent network activity"
...
WRN If this log occurs persistently... then most likely your machine/network is getting its egress UDP to port 7844 ... blocked or dropped.
成功连接:
INF Switching to fallback protocol http2
INF Registered tunnel connection connIndex=0 ... protocol=http2
原因:
| 原因 | 解释 |
|---|---|
| 网络屏蔽 UDP | 学校、公司或家庭路由器/ISP 防火墙限制了 UDP 出口流量(常见) |
| DNS 与无关 | 你的配置 mac.jacin.tech 已生效,问题不是 DNS |
| tunnel 正常运行 | 你最后看到的 Registered tunnel connection 说明 tunnel 已正常工作 |
手动开启:
cloudflared tunnel run mac-tunnel --protocol http2
Cloudflare Tunnel 成功运行了,但你本地的服务(比如 localhost:8000)没有运行,或者被关闭了。
Cloudflare 能找到你的 tunnel(隧道),但是 tunnel 内部连不到服务,就返回 502。
重启你的服务(FastAPI、Flask 等)监听在 localhost:8000 上:即可。
cloudflared tunnel run 是前台运行命令,你关闭终端、Ctrl + C、关机,它就断了。
• 所以当你关闭了终端,Cloudflare 就无法继续穿透你本地网络了,自然也就无法访问页面。
使用:
使用系统服务(推荐长期运行)使用管理员权限
cloudflared service install

sudo cloudflared service start
brew services start cloudflared

net start Cloudflared (win)
使用
nohup cloudflared tunnel run mac-tunnel --protocol http2 > tunnel.log 2>&1 &
更改了config.yml文件:
net stop Cloudflared
net start Cloudflared
你就必须 重启 cloudflared 服务 或重新执行 cloudflared tunnel run 才会让新端口生效!


 4688
4688

 被折叠的 条评论
为什么被折叠?
被折叠的 条评论
为什么被折叠?
 到【灌水乐园】发言


