还记得那个凌晨3点被电话叫醒的夜晚吗?生产环境的20台服务器需要紧急更新配置,你不得不一台一台手动SSH登录,重复执行相同的命令。两个小时后,当你拖着疲惫的身躯完成任务时,心里暗暗发誓:"一定要找个自动化工具!"
如果你有过类似的经历,那么恭喜你,今天这篇文章将彻底改变你的运维生涯。我将带你从零开始掌握Ansible,通过一个实际的Web服务器批量部署项目,让你体验自动化运维的魅力。读完这篇文章,你将能够:
-
10分钟内完成50台服务器的Nginx部署
-
一键实现应用的滚动更新和回滚
-
构建可复用的自动化部署流程
-
将重复性工作时间缩短90%以上
一、Ansible 是什么?它能解决什么问题?
1.1 传统运维的痛点
在深入Ansible之前,让我们先看看传统运维面临的挑战:
场景一:配置漂移问题你管理着100台服务器,理论上它们的配置应该完全一致。但随着时间推移,因为各种临时修改、紧急补丁,服务器配置开始出现差异。某天一个看似简单的更新,却因为配置不一致导致部分服务器故障。
场景二:规模化挑战公司业务快速增长,服务器数量从10台增长到100台。原本30分钟能完成的部署任务,现在需要5个小时。而且随着操作复杂度增加,人为错误的概率也在上升。
场景三:知识传承困难资深运维离职了,留下的只有一堆零散的Shell脚本和简单的文档。新人接手后发现,每个脚本的执行顺序、参数含义都需要猜测和试错。
1.2 Ansible 的优势
Ansible 是一个开源的IT自动化工具,它通过简单的YAML语法描述系统配置,实现:
-
无代理架构(Agentless):不需要在被管理节点安装任何客户端,通过SSH即可管理
-
声明式配置:描述"想要达到的状态",而不是"如何达到"
-
幂等性保证:多次执行产生相同结果,避免重复操作带来的问题
-
易学易用:YAML语法简单直观,降低学习门槛
-
强大的模块库:3000+内置模块,覆盖各种运维场景
二、快速上手:15分钟搭建 Ansible 环境
2.1 环境准备
我们将搭建一个实验环境,包含1台控制节点和3台被管理节点:
ounter(lineounter(lineounter(lineounter(lineounter(lineounter(lineounter(line# 控制节点(安装Ansible的机器)control-node: 192.168.1.10# 被管理节点(目标服务器)web-01: 192.168.1.11web-02: 192.168.1.12web-03: 192.168.1.13
2.2 安装 Ansible
在控制节点上执行:
ounter(lineounter(lineounter(lineounter(lineounter(lineounter(lineounter(lineounter(lineounter(lineounter(lineounter(lineounter(lineounter(line# CentOS/RHEL 系统sudo yum install -y epel-releasesudo yum install -y ansible# Ubuntu/Debian 系统sudo apt updatesudo apt install -y ansible# 使用 pip 安装(推荐,获取最新版本)sudo pip3 install ansible# 验证安装ansible --version
2.3 配置 SSH 免密登录
自动化的前提是控制节点能够无密码访问被管理节点:
ounter(lineounter(lineounter(lineounter(lineounter(lineounter(lineounter(lineounter(lineounter(lineounter(line# 生成SSH密钥对(如果还没有)ssh-keygen -t rsa -b 2048# 将公钥复制到所有被管理节点for ip in 192.168.1.11 192.168.1.12 192.168.1.13; dossh-copy-id -i ~/.ssh/id_rsa.pub root@$ipdone# 测试连接ssh root@192.168.1.11 'hostname'
2.4 创建 Inventory 文件
Inventory文件定义了Ansible要管理的主机清单:
ounter(lineounter(lineounter(lineounter(lineounter(lineounter(lineounter(lineounter(lineounter(lineounter(lineounter(lineounter(line# 创建 inventory.ini 文件[webservers]web-01 ansible_host=192.168.1.11web-02 ansible_host=192.168.1.12web-03 ansible_host=192.168.1.13[webservers:vars]ansible_user=rootansible_python_interpreter=/usr/bin/python3[all:vars]ansible_connection=ssh
测试连接所有主机:
ounter(lineansible -i inventory.ini all -m ping
如果看到所有主机返回 "pong",恭喜你,环境搭建成功!
三、实战项目:批量部署 Nginx Web 服务器
现在让我们通过一个实际项目,深入理解Ansible的强大功能。我们将实现:
-
批量安装Nginx
-
部署自定义配置
-
部署静态网站
-
实现滚动更新
3.1 项目结构设计
ounter(lineounter(lineounter(lineounter(lineounter(lineounter(lineounter(lineounter(lineounter(lineounter(lineounter(lineounter(lineounter(lineounter(lineounter(lineounter(lineounter(linenginx-deployment/├── inventory.ini # 主机清单├── ansible.cfg # Ansible配置文件├── site.yml # 主Playbook├── roles/ # 角色目录│ └── nginx/│ ├── tasks/ # 任务定义│ │ └── main.yml│ ├── templates/ # 模板文件│ │ ├── nginx.conf.j2│ │ └── index.html.j2│ ├── handlers/ # 触发器│ │ └── main.yml│ └── vars/ # 变量定义│ └── main.yml└── group_vars/ # 组变量└── webservers.yml
3.2 编写 Playbook
创建主Playbook site.yml:
ounter(lineounter(lineounter(lineounter(lineounter(lineounter(lineounter(lineounter(lineounter(lineounter(lineounter(lineounter(lineounter(lineounter(lineounter(lineounter(lineounter(lineounter(lineounter(lineounter(lineounter(lineounter(lineounter(lineounter(lineounter(lineounter(lineounter(lineounter(lineounter(lineounter(lineounter(lineounter(lineounter(lineounter(lineounter(lineounter(lineounter(lineounter(lineounter(lineounter(lineounter(lineounter(lineounter(lineounter(lineounter(lineounter(lineounter(lineounter(lineounter(lineounter(lineounter(lineounter(lineounter(lineounter(lineounter(lineounter(lineounter(lineounter(lineounter(lineounter(line---- name: Deploy Nginx Web Servershosts: webserversbecome: yesgather_facts: yesvars:nginx_port: 80nginx_worker_processes: "{{ ansible_processor_vcpus }}"nginx_worker_connections: 1024website_title: "Ansible自动化部署演示"tasks:- name: 更新系统包缓存apt:update_cache: yeswhen: ansible_os_family == "Debian"- name: 安装Nginxpackage:name: nginxstate: present- name: 创建网站目录file:path: /var/www/htmlstate: directorymode: '0755'- name: 部署Nginx配置文件template:src: nginx.conf.j2dest: /etc/nginx/nginx.confbackup: yesnotify: restart nginx- name: 部署网站首页template:src: index.html.j2dest: /var/www/html/index.htmlmode: '0644'- name: 确保Nginx服务运行service:name: nginxstate: startedenabled: yes- name: 等待端口就绪wait_for:port: "{{ nginx_port }}"host: "{{ ansible_default_ipv4.address }}"delay: 5timeout: 30handlers:- name: restart nginxservice:name: nginxstate: restarted
3.3 创建配置模板
创建 templates/nginx.conf.j2:
ounter(lineounter(lineounter(lineounter(lineounter(lineounter(lineounter(lineounter(lineounter(lineounter(lineounter(lineounter(lineounter(lineounter(lineounter(lineounter(lineounter(lineounter(lineounter(lineounter(lineounter(lineounter(lineounter(lineounter(lineounter(lineounter(lineounter(lineounter(lineounter(lineounter(lineounter(lineounter(lineounter(lineounter(lineounter(lineounter(lineounter(lineounter(lineounter(lineounter(lineounter(lineounter(lineounter(lineounter(lineounter(lineounter(lineounter(lineounter(lineounter(lineounter(lineounter(lineuser www-data;worker_processes {{ nginx_worker_processes }};pid /run/nginx.pid;events {worker_connections {{ nginx_worker_connections }};multi_accept on;use epoll;}http {# 基础配置sendfile on;tcp_nopush on;tcp_nodelay on;keepalive_timeout 65;types_hash_max_size 2048;# 日志配置access_log /var/log/nginx/access.log;error_log /var/log/nginx/error.log;# Gzip压缩gzip on;gzip_vary on;gzip_proxied any;gzip_comp_level 6;gzip_types text/plain text/css text/xml application/json application/javascript;# 虚拟主机配置server {listen {{ nginx_port }} default_server;listen [::]:{{ nginx_port }} default_server;root /var/www/html;index index.html index.htm;server_name {{ ansible_hostname }}.example.com;location / {try_files $uri $uri/ =404;}# 健康检查端点location /health {access_log off;return 200 "healthy\n";add_header Content-Type text/plain;}}}
创建 templates/index.html.j2:
ounter(lineounter(lineounter(lineounter(lineounter(lineounter(lineounter(lineounter(lineounter(lineounter(lineounter(lineounter(lineounter(lineounter(lineounter(lineounter(lineounter(lineounter(lineounter(lineounter(lineounter(lineounter(lineounter(lineounter(lineounter(lineounter(lineounter(lineounter(lineounter(lineounter(lineounter(lineounter(lineounter(lineounter(lineounter(lineounter(lineounter(lineounter(lineounter(lineounter(lineounter(lineounter(lineounter(lineounter(lineounter(lineounter(lineounter(line<!DOCTYPE html><html lang="zh-CN"><head><meta charset="UTF-8"><meta name="viewport" content="width=device-width, initial-scale=1.0"><title>{{ website_title }}</title><style>body {font-family: -apple-system, BlinkMacSystemFont, "Segoe UI", Roboto, sans-serif;background: linear-gradient(135deg, #667eea 0%, #764ba2 100%);color: white;display: flex;justify-content: center;align-items: center;height: 100vh;margin: 0;}.container {text-align: center;padding: 2rem;background: rgba(255, 255, 255, 0.1);border-radius: 15px;backdrop-filter: blur(10px);}h1 { font-size: 3rem; margin-bottom: 1rem; }.info {background: rgba(255, 255, 255, 0.2);padding: 1rem;border-radius: 10px;margin-top: 2rem;}.info p { margin: 0.5rem 0; }</style></head><body><div class="container"><h1>🚀 {{ website_title }}</h1><p>恭喜!您已成功使用 Ansible 部署了这个页面</p><div class="info"><p><strong>服务器名称:</strong> {{ ansible_hostname }}</p><p><strong>IP地址:</strong> {{ ansible_default_ipv4.address }}</p><p><strong>操作系统:</strong> {{ ansible_distribution }} {{ ansible_distribution_version }}</p><p><strong>部署时间:</strong> {{ ansible_date_time.iso8601 }}</p></div></div></body></html>
3.4 执行部署
ounter(lineounter(lineounter(lineounter(lineounter(lineounter(lineounter(lineounter(lineounter(lineounter(lineounter(line# 语法检查ansible-playbook -i inventory.ini site.yml --syntax-check# 模拟执行(Dry Run)ansible-playbook -i inventory.ini site.yml --check# 正式部署ansible-playbook -i inventory.ini site.yml# 查看详细输出ansible-playbook -i inventory.ini site.yml -vvv
四、进阶技巧:让你的自动化更强大
4.1 滚动更新策略
在生产环境中,我们需要确保服务的持续可用性。Ansible支持滚动更新:
ounter(lineounter(lineounter(lineounter(lineounter(lineounter(lineounter(lineounter(lineounter(lineounter(lineounter(lineounter(lineounter(lineounter(lineounter(lineounter(lineounter(lineounter(lineounter(lineounter(lineounter(lineounter(lineounter(lineounter(lineounter(lineounter(lineounter(lineounter(lineounter(lineounter(lineounter(lineounter(lineounter(lineounter(lineounter(lineounter(lineounter(lineounter(lineounter(lineounter(lineounter(lineounter(lineounter(lineounter(lineounter(line---- name: 滚动更新Web服务器hosts: webserversbecome: yesserial: 1 # 每次更新1台服务器max_fail_percentage: 30 # 允许30%的失败率pre_tasks:- name: 从负载均衡器移除uri:url: "http://lb.example.com/api/remove"method: POSTbody_format: jsonbody:server: "{{ ansible_hostname }}"delegate_to: localhosttasks:- name: 更新应用代码git:repo: https://github.com/yourapp/webapp.gitdest: /var/www/htmlversion: "{{ app_version | default('master') }}"- name: 重启服务service:name: nginxstate: restartedpost_tasks:- name: 健康检查uri:url: "http://{{ ansible_default_ipv4.address }}/health"status_code: 200retries: 5delay: 10- name: 重新加入负载均衡器uri:url: "http://lb.example.com/api/add"method: POSTbody_format: jsonbody:server: "{{ ansible_hostname }}"delegate_to: localhost
4.2 使用 Ansible Vault 保护敏感信息
生产环境中,密码和密钥需要加密存储:
ounter(lineounter(lineounter(lineounter(lineounter(lineounter(lineounter(lineounter(lineounter(lineounter(lineounter(lineounter(line# 创建加密文件ansible-vault create secrets.yml# 编辑加密文件ansible-vault edit secrets.yml# 在secrets.yml中添加:db_password: "SuperSecret123!"api_key: "sk-1234567890abcdef"# 使用加密变量运行playbookansible-playbook -i inventory.ini site.yml --ask-vault-pass
4.3 动态 Inventory
当服务器数量众多或经常变化时,可以使用动态Inventory:
ounter(lineounter(lineounter(lineounter(lineounter(lineounter(lineounter(lineounter(lineounter(lineounter(lineounter(lineounter(lineounter(lineounter(lineounter(lineounter(lineounter(lineounter(lineounter(lineounter(lineounter(lineounter(lineounter(lineounter(lineounter(lineounter(lineounter(lineounter(lineounter(lineounter(lineounter(lineounter(lineounter(lineounter(line#!/usr/bin/env python3# dynamic_inventory.pyimport jsonimport boto3def get_inventory():ec2 = boto3.client('ec2', region_name='us-west-2')response = ec2.describe_instances(Filters=[{'Name': 'tag:Environment', 'Values': ['production']},{'Name': 'instance-state-name', 'Values': ['running']}])inventory = {'webservers': {'hosts': [],'vars': {'ansible_user': 'ubuntu','ansible_ssh_private_key_file': '~/.ssh/aws-key.pem'}}}for reservation in response['Reservations']:for instance in reservation['Instances']:inventory['webservers']['hosts'].append(instance['PublicIpAddress'])return inventoryif __name__ == '__main__':print(json.dumps(get_inventory()))
4.4 性能优化技巧
当管理大规模基础设施时,性能优化至关重要:
ounter(lineounter(lineounter(lineounter(lineounter(lineounter(lineounter(lineounter(lineounter(lineounter(lineounter(lineounter(lineounter(line# ansible.cfg[defaults]host_key_checking = Falsegathering = smartfact_caching = jsonfilefact_caching_connection = /tmp/ansible_cachefact_caching_timeout = 86400pipelining = Trueforks = 50[ssh_connection]ssh_args = -o ControlMaster=auto -o ControlPersist=60scontrol_path = /tmp/ansible-%%h-%%p-%%r
五、实战案例:构建完整的 CI/CD 流程
让我们通过一个完整的案例,展示如何将Ansible集成到CI/CD流程中:
ounter(lineounter(lineounter(lineounter(lineounter(lineounter(lineounter(lineounter(lineounter(lineounter(lineounter(lineounter(lineounter(lineounter(lineounter(lineounter(lineounter(lineounter(lineounter(lineounter(lineounter(lineounter(lineounter(lineounter(lineounter(lineounter(lineounter(lineounter(lineounter(lineounter(lineounter(lineounter(lineounter(lineounter(lineounter(lineounter(lineounter(lineounter(lineounter(lineounter(lineounter(lineounter(lineounter(lineounter(lineounter(lineounter(lineounter(lineounter(lineounter(lineounter(lineounter(lineounter(lineounter(lineounter(lineounter(lineounter(lineounter(lineounter(lineounter(lineounter(lineounter(lineounter(lineounter(lineounter(lineounter(lineounter(lineounter(lineounter(lineounter(lineounter(lineounter(lineounter(lineounter(lineounter(lineounter(lineounter(lineounter(lineounter(lineounter(lineounter(lineounter(lineounter(lineounter(lineounter(lineounter(lineounter(lineounter(lineounter(lineounter(lineounter(lineounter(lineounter(lineounter(lineounter(lineounter(lineounter(lineounter(lineounter(lineounter(lineounter(lineounter(lineounter(lineounter(lineounter(lineounter(lineounter(lineounter(lineounter(lineounter(lineounter(lineounter(lineounter(line---# deploy_pipeline.yml- name: 完整的部署流程hosts: webserversbecome: yesvars:app_name: mywebappapp_version: "{{ lookup('env', 'BUILD_NUMBER') | default('latest') }}"deploy_user: webappdeploy_dir: /opt/{{ app_name }}backup_dir: /opt/backups/{{ app_name }}tasks:- name: 创建部署用户user:name: "{{ deploy_user }}"shell: /bin/bashgroups: www-dataappend: yes- name: 创建必要的目录file:path: "{{ item }}"state: directoryowner: "{{ deploy_user }}"group: "{{ deploy_user }}"mode: '0755'loop:- "{{ deploy_dir }}"- "{{ backup_dir }}"- /var/log/{{ app_name }}- name: 备份当前版本archive:path: "{{ deploy_dir }}"dest: "{{ backup_dir }}/backup-{{ ansible_date_time.epoch }}.tar.gz"when: deploy_dir is directory- name: 拉取最新代码git:repo: "https://github.com/company/{{ app_name }}.git"dest: "{{ deploy_dir }}"version: "{{ app_version }}"force: yesbecome_user: "{{ deploy_user }}"- name: 安装应用依赖pip:requirements: "{{ deploy_dir }}/requirements.txt"virtualenv: "{{ deploy_dir }}/venv"virtualenv_python: python3become_user: "{{ deploy_user }}"- name: 运行数据库迁移command: |{{ deploy_dir }}/venv/bin/python manage.py migrateargs:chdir: "{{ deploy_dir }}"become_user: "{{ deploy_user }}"run_once: true- name: 收集静态文件command: |{{ deploy_dir }}/venv/bin/python manage.py collectstatic --noinputargs:chdir: "{{ deploy_dir }}"become_user: "{{ deploy_user }}"- name: 配置Systemd服务template:src: app.service.j2dest: /etc/systemd/system/{{ app_name }}.servicenotify:- reload systemd- restart app- name: 配置Nginx反向代理template:src: nginx_app.conf.j2dest: /etc/nginx/sites-available/{{ app_name }}notify: reload nginx- name: 启用站点file:src: /etc/nginx/sites-available/{{ app_name }}dest: /etc/nginx/sites-enabled/{{ app_name }}state: linknotify: reload nginx- name: 运行冒烟测试uri:url: "http://localhost/api/health"status_code: 200retries: 5delay: 10handlers:- name: reload systemdsystemd:daemon_reload: yes- name: restart appsystemd:name: "{{ app_name }}"state: restartedenabled: yes- name: reload nginxservice:name: nginxstate: reloaded
六、监控与日志:确保自动化的可观测性
自动化不是"一劳永逸",我们需要持续监控:
ounter(lineounter(lineounter(lineounter(lineounter(lineounter(lineounter(lineounter(lineounter(lineounter(lineounter(lineounter(lineounter(lineounter(lineounter(lineounter(lineounter(lineounter(lineounter(lineounter(lineounter(lineounter(lineounter(lineounter(lineounter(lineounter(lineounter(lineounter(lineounter(lineounter(lineounter(lineounter(lineounter(lineounter(lineounter(lineounter(lineounter(lineounter(lineounter(lineounter(lineounter(lineounter(lineounter(lineounter(lineounter(lineounter(lineounter(lineounter(lineounter(lineounter(lineounter(lineounter(lineounter(lineounter(lineounter(line---# monitoring.yml- name: 配置监控和日志收集hosts: webserversbecome: yestasks:- name: 安装监控代理package:name:- prometheus-node-exporter- filebeatstate: present- name: 配置Prometheus Node Exporterlineinfile:path: /etc/default/prometheus-node-exporterregexp: '^ARGS='line: 'ARGS="--collector.filesystem.ignored-mount-points=^/(sys|proc|dev|run)($|/)"'notify: restart node-exporter- name: 配置Filebeattemplate:src: filebeat.yml.j2dest: /etc/filebeat/filebeat.ymlmode: '0600'notify: restart filebeat- name: 配置自定义指标收集脚本copy:content: |#!/bin/bash# 收集应用自定义指标echo "app_requests_total $(curl -s localhost/metrics | grep requests_total | awk '{print $2}')"echo "app_errors_total $(grep ERROR /var/log/{{ app_name }}/app.log | wc -l)"echo "app_response_time_seconds $(tail -n 100 /var/log/nginx/access.log | awk '{sum+=$10} END {print sum/NR}')"dest: /usr/local/bin/collect_metrics.shmode: '0755'- name: 添加指标收集定时任务cron:name: "收集应用指标"minute: "*/5"job: "/usr/local/bin/collect_metrics.sh > /var/lib/node_exporter/textfile_collector/app_metrics.prom"handlers:- name: restart node-exporterservice:name: prometheus-node-exporterstate: restarted- name: restart filebeatservice:name: filebeatstate: restarted
七、故障恢复:当事情出错时
即使是最完善的自动化,也可能出现问题。让我们准备一个快速回滚方案:
ounter(lineounter(lineounter(lineounter(lineounter(lineounter(lineounter(lineounter(lineounter(lineounter(lineounter(lineounter(lineounter(lineounter(lineounter(lineounter(lineounter(lineounter(lineounter(lineounter(lineounter(lineounter(lineounter(lineounter(lineounter(lineounter(lineounter(lineounter(lineounter(lineounter(lineounter(lineounter(lineounter(lineounter(lineounter(lineounter(lineounter(lineounter(lineounter(lineounter(lineounter(lineounter(lineounter(lineounter(lineounter(lineounter(lineounter(lineounter(lineounter(lineounter(lineounter(lineounter(lineounter(lineounter(lineounter(lineounter(lineounter(lineounter(lineounter(lineounter(lineounter(lineounter(lineounter(lineounter(lineounter(lineounter(lineounter(line---# rollback.yml- name: 紧急回滚程序hosts: webserversbecome: yesserial: 1vars_prompt:- name: confirm_rollbackprompt: "确认要回滚到上一个版本吗?(yes/no)"private: notasks:- name: 验证确认fail:msg: "回滚操作已取消"when: confirm_rollback != "yes"- name: 查找最新的备份find:paths: "{{ backup_dir }}"patterns: "backup-*.tar.gz"register: backup_files- name: 确保有可用备份fail:msg: "没有找到可用的备份文件"when: backup_files.files | length == 0- name: 获取最新备份set_fact:latest_backup: "{{ (backup_files.files | sort(attribute='mtime') | last).path }}"- name: 停止应用服务systemd:name: "{{ app_name }}"state: stopped- name: 清理当前版本file:path: "{{ deploy_dir }}"state: absent- name: 恢复备份unarchive:src: "{{ latest_backup }}"dest: /opt/remote_src: yes- name: 启动应用服务systemd:name: "{{ app_name }}"state: started- name: 验证服务状态uri:url: "http://localhost/api/health"status_code: 200retries: 3delay: 5- name: 发送回滚通知mail:to: ops-team@example.comsubject: "紧急回滚完成 - {{ ansible_hostname }}"body: "服务器 {{ ansible_hostname }} 已成功回滚到备份版本:{{ latest_backup }}"delegate_to: localhost
总结:从手动到自动的蜕变
通过这篇文章,我们一起经历了从传统手动运维到Ansible自动化的完整旅程。让我们回顾一下关键收获:
-
效率提升:原本需要数小时的部署任务,现在只需要几分钟
-
一致性保证:通过代码化的配置管理,消除了环境差异
-
可追溯性:每次变更都有记录,便于审计和问题排查
-
知识沉淀:运维经验转化为可复用的Playbook
-
降低风险:自动化减少人为错误,回滚机制保障业务连续性
但这仅仅是开始。Ansible的生态系统远比我们今天探索的要丰富:
-
Ansible Tower/AWX 提供企业级的管理界面
-
Ansible Galaxy 社区分享了数千个现成的角色
-
与Kubernetes、Docker、云平台的深度集成
-
网络设备、数据库、中间件的自动化配置
记住,自动化不是目的,而是让我们能够专注于更有价值工作的手段。当你不再被重复性任务束缚,你就有更多时间去思考架构优化、性能调优、安全加固这些真正体现运维价值的工作。
这两年,IT行业面临经济周期波动与AI产业结构调整的双重压力,确实有很多运维与网络工程师因企业缩编或技术迭代而暂时失业。
很多人都在提运维网工失业后就只能去跑滴滴送外卖了,但我想分享的是,对于运维人员来说,即便失业以后仍然有很多副业可以尝试。
运维,千万不要再错过这些副业机会!
第一个是知识付费类副业:输出经验打造个人IP
在线教育平台讲师
操作路径:在慕课网、极客时间等平台开设《CCNA实战》《Linux运维从入门到精通》等课程,或与培训机构合作录制专题课。
收益模式:课程销售分成、企业内训。
技术博客与公众号运营
操作路径:撰写网络协议解析、故障排查案例、设备评测等深度文章,通过公众号广告、付费专栏及企业合作变现。
收益关键:每周更新2-3篇原创,结合SEO优化与社群运营。
第二个是技术类副业:深耕专业领域变现
企业网络设备配置与优化服务
操作路径:为中小型企业提供路由器、交换机、防火墙等设备的配置调试、性能优化及故障排查服务。可通过本地IT服务公司合作或自建线上接单平台获客。
收益模式:按项目收费或签订年度维护合同。
远程IT基础设施代维
操作路径:通过承接服务器监控、日志分析、备份恢复等远程代维任务。适合熟悉Zabbix、ELK等技术栈的工程师。
收益模式:按工时计费或包月服务。
网络安全顾问与渗透测试
操作路径:利用OWASP Top 10漏洞分析、Nmap/BurpSuite等工具,为企业提供漏洞扫描、渗透测试及安全加固方案。需考取CISP等认证提升资质。
收益模式:单次渗透测试报告收费;长期安全顾问年费。
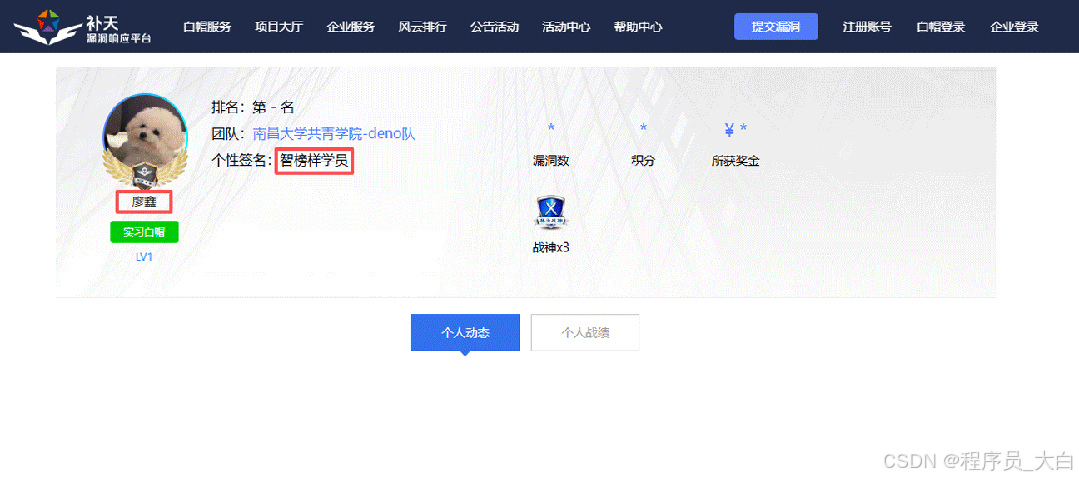
比如不久前跟我一起聊天的一个粉丝,他自己之前是大四实习的时候做的运维,发现运维7*24小时待命受不了,就准备转网安,学了差不多2个月,然后开始挖漏洞,光是补天的漏洞奖励也有个四五千,他说自己每个月的房租和饭钱就够了。

为什么我会推荐你网安是运维人员的绝佳副业&转型方向?
1.你的经验是巨大优势: 你比任何人都懂系统、网络和架构。漏洞挖掘、内网渗透、应急响应,这些核心安全能力本质上是“攻击视角下的运维”。你的运维背景不是从零开始,而是降维打击。
2.越老越吃香,规避年龄危机: 安全行业极度依赖经验。你的排查思路、风险意识和对复杂系统的理解能力,会随着项目积累而愈发珍贵,真正做到“姜还是老的辣”。
3.职业选择极其灵活: 你可以加入企业成为安全专家,可以兼职“挖洞“获取丰厚奖金,甚至可以成为自由顾问。这种多样性为你提供了前所未有的抗风险能力。
4.市场需求爆发,前景广阔: 在国家级政策的推动下,从一线城市到二三线地区,安全人才缺口正在急剧扩大。现在布局,正是抢占未来先机的黄金时刻。


1. 阶段目标
你已经有运维经验了,所以操作系统、网络协议这些你不是零基础。但要学安全,得重新过一遍——只不过这次我们是带着“安全视角”去学。
2. 学习内容
**操作系统强化:**你需要重点学习 Windows、Linux 操作系统安全配置,对比运维工作中常规配置与安全配置的差异,深化系统安全认知(比如说日志审计配置,为应急响应日志分析打基础)。
**网络协议深化:**结合过往网络协议应用经验,聚焦 TCP/IP 协议簇中的安全漏洞及防护机制,如 ARP 欺骗、TCP 三次握手漏洞等(为 SRC 漏扫中协议层漏洞识别铺垫)。
**Web 与数据库基础:**补充 Web 架构、HTTP 协议及 MySQL、SQL Server 等数据库安全相关知识,了解 Web 应用与数据库在网安中的作用。
**编程语言入门:**学习 Python 基础语法,掌握简单脚本编写,为后续 SRC 漏扫自动化脚本开发及应急响应工具使用打基础。
**工具实战:**集中训练抓包工具(Wireshark)、渗透测试工具(Nmap)、漏洞扫描工具(Nessus 基础版)的使用,结合模拟场景练习工具应用(掌握基础扫描逻辑,为 SRC 漏扫工具进阶做准备)。
1. 阶段目标
这阶段是真正开始“动手”了。信息收集、漏洞分析、工具联动,一样不能少。
熟练运用漏洞挖掘及 SRC 漏扫工具,具备独立挖掘常见漏洞及 SRC 平台漏扫实战能力,尝试通过 SRC 挖洞搞钱,不管是低危漏洞还是高危漏洞,先挖到一个。
2. 学习内容
信息收集实战:结合运维中对网络拓扑、设备信息的了解,强化基本信息收集、网络空间搜索引擎(Shodan、ZoomEye)、域名及端口信息收集技巧,针对企业级网络场景开展信息收集练习(为 SRC 漏扫目标筛选提供支撑)。
漏洞原理与分析:深入学习 SQL 注入、CSRF、文件上传等常见漏洞的原理、危害及利用方法,结合运维工作中遇到的类似问题进行关联分析(明确 SRC 漏扫重点漏洞类型)。
工具进阶与 SRC 漏扫应用:
-
系统学习 SQLMap、BurpSuite、AWVS 等工具的高级功能,开展工具联用实战训练;
-
专项学习 SRC 漏扫流程:包括 SRC 平台规则解读(如漏洞提交规范、奖励机制)、漏扫目标范围界定、漏扫策略制定(全量扫描 vs 定向扫描)、漏扫结果验证与复现;
-
实战训练:使用 AWVS+BurpSuite 组合开展 SRC 平台目标漏扫,练习 “扫描 - 验证 - 漏洞报告撰写 - 平台提交” 全流程。
SRC 实战演练:选择合适的 SRC 平台(如补天、CNVD)进行漏洞挖掘与漏扫实战,积累实战经验,尝试获取挖洞收益。
恭喜你,如果学到这里,你基本可以下班搞搞副业创收了,并且具备渗透测试工程师必备的「渗透技巧」、「溯源能力」,让你在黑客盛行的年代别背锅,工作实现升职加薪的同时也能开创副业创收!
如果你想要入坑黑客&网络安全,笔者给大家准备了一份:全网最全的网络安全资料包需要保存下方图片,微信扫码即可前往获取!
因篇幅有限,仅展示部分资料,需要点击下方链接即可前往获取
1. 阶段目标
全面掌握渗透测试理论与实战技能,能够独立完成渗透测试项目,编写规范的渗透测试报告,具备渗透测试工程师岗位能力,为护网红蓝对抗及应急响应提供技术支撑。
2. 学习内容
渗透测试核心理论:系统学习渗透测试流程、方法论及法律法规知识,明确渗透测试边界与规范(与红蓝对抗攻击边界要求一致)。
实战技能训练:开展漏洞扫描、漏洞利用、电商系统渗透测试、内网渗透、权限提升(Windows、Linux)、代码审计等实战训练,结合运维中熟悉的系统环境设计测试场景(强化红蓝对抗攻击端技术能力)。
工具开发实践:基于 Python 编程基础,学习渗透测试工具开发技巧,开发简单的自动化测试脚本(可拓展用于 SRC 漏扫自动化及应急响应辅助工具)。
报告编写指导:学习渗透测试报告的结构与编写规范,完成多个不同场景的渗透测试报告撰写练习(与 SRC 漏洞报告、应急响应报告撰写逻辑互通)。
1. 阶段目标
掌握企业级安全攻防、护网红蓝对抗及应急响应核心技能,考取网安行业相关证书。
2. 学习内容
护网红蓝对抗专项:
-
红蓝对抗基础:学习护网行动背景、红蓝对抗规则(攻击范围、禁止行为)、红蓝双方角色职责(红队:模拟攻击;蓝队:防御检测与应急处置);
-
红队实战技能:强化内网渗透、横向移动、权限维持、免杀攻击等高级技巧,模拟护网中常见攻击场景;
-
蓝队实战技能:学习安全设备(防火墙、IDS/IPS、WAF)联动防御配置、安全监控平台(SOC)使用、攻击行为研判与溯源方法;
-
模拟护网演练:参与团队式红蓝对抗演练,完整体验 “攻击 - 检测 - 防御 - 处置” 全流程。
应急响应专项: -
应急响应流程:学习应急响应 6 步流程(准备 - 检测 - 遏制 - 根除 - 恢复 - 总结),掌握各环节核心任务;
-
实战技能:开展操作系统入侵响应(如病毒木马清除、异常进程终止)、数据泄露应急处置、漏洞应急修补等实战训练;
-
工具应用:学习应急响应工具(如 Autoruns、Process Monitor、病毒分析工具)的使用,提升处置效率;
-
案例复盘:分析真实网络安全事件应急响应案例(如勒索病毒事件),总结处置经验。
其他企业级攻防技能:学习社工与钓鱼、CTF 夺旗赛解析等内容,结合运维中企业安全防护需求深化理解。
证书备考:针对网安行业相关证书考试内容(含红蓝对抗、应急响应考点)进行专项复习,参加模拟考试,查漏补缺。
网络安全这行,不是会几个工具就能搞定的。你得有体系,懂原理,能实战。尤其是从运维转过来的,别浪费你原来的经验——你比纯新人强多了。
但也要沉得住气,别学了两天Web安全就觉得自己是黑客了。内网、域渗透、代码审计、应急响应,要学的还多着呢。
如果你真的想转,按这个路子一步步走,没问题。如果你只是好奇,我劝你再想想——这行要持续学习,挺累的,但也是真有意思。
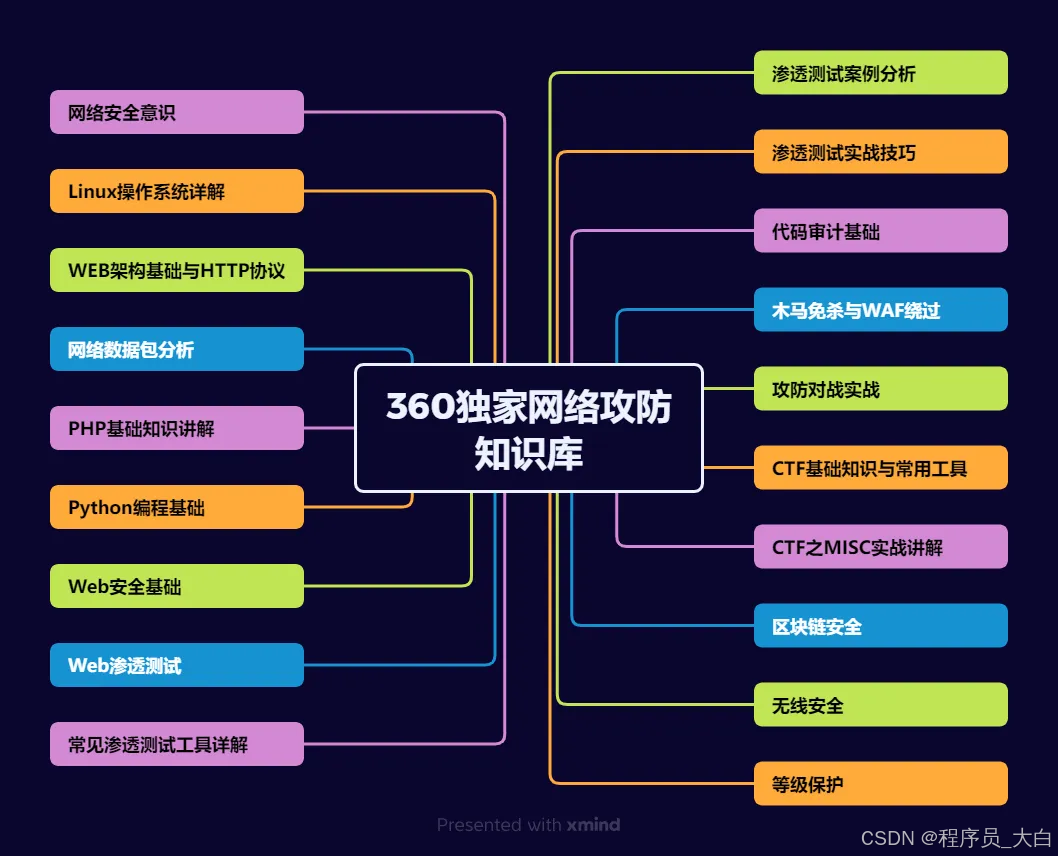
关于如何学习网络安全,笔者也给大家整理好了全套网络安全知识库,需要的可以扫码获取!
因篇幅有限,仅展示部分资料,需要点击下方链接即可前往获取
1、网络安全意识

2、Linux操作系统

3、WEB架构基础与HTTP协议

4、Web渗透测试

5、渗透测试案例分享

6、渗透测试实战技巧

7、攻防对战实战

8、CTF之MISC实战讲解

关于如何学习网络安全,笔者也给大家整理好了全套网络安全知识库,需要的可以扫码获取!
因篇幅有限,仅展示部分资料,需要点击下方链接即可前往获取
 Ansible批量部署Web服务器实战


 1753
1753

 被折叠的 条评论
为什么被折叠?


