


 该文章介绍了如何在SpringBoot项目中整合Swagger2,包括引入相关依赖、创建配置类以设定API文档的信息和扫描路径,以及如何通过http://localhost:xxxx/swagger-ui.html访问和测试API。文章提供了详细的步骤和代码示例,帮助开发者构建和测试RESTfulAPI。
Spring Boot 整合 Swagger2
第一步,引入相关依赖
<!--swagger-->
<dependency>
    <groupId>io.springfox</groupId>
    <artifactId>springfox-swagger2</artifactId>
    <version>2.7.0</version>
</dependency>
<dependency>
    <groupId>io.springfox</groupId>
    <artifactId>springfox-swagger-ui</artifactId>
    <version>2.7.0</version>
</dependency>
第二步,添加swagger2配置类
模仿 webApiConfig() 方法编写自己 Controller 对应 url 的 ApiConfig,如下编写 adminConfig。其中
PathSelectors.regex("/admin/.*") 必须修改成自己的 url,否则 swagger2 将扫描不到。
import com.google.common.base.Predicates;
import org.springframework.context.annotation.Bean;
import org.springframework.context.annotation.Configuration;
import springfox.documentation.builders.ApiInfoBuilder;
import springfox.documentation.builders.PathSelectors;
import springfox.documentation.service.ApiInfo;
import springfox.documentation.service.Contact;
import springfox.documentation.spi.DocumentationType;
import springfox.documentation.spring.web.plugins.Docket;
import springfox.documentation.swagger2.annotations.EnableSwagger2;

/**
 * Swagger2配置信息,通过 http://localhost:xxxx/swagger-ui.html 地址访问
 */
@Configuration
@EnableSwagger2
public class Swagger2Config {

    @Bean
    public Docket webApiConfig(){

        return new Docket(DocumentationType.SWAGGER_2)
                .groupName("webApi")
                .apiInfo(webApiInfo())
                .select()
                //只显示api路径下的页面
                .paths(Predicates.and(PathSelectors.regex("/api/.*")))
                .build();

    }

    @Bean
    public Docket adminApiConfig(){

        return new Docket(DocumentationType.SWAGGER_2)
                .groupName("adminApi")
                .apiInfo(adminApiInfo())
                .select()
                //只显示admin路径下的页面
                .paths(Predicates.and(PathSelectors.regex("/admin/.*"))) //这个地方记得修改为自己后端的url
                .build();

    }

    private ApiInfo webApiInfo(){

        return new ApiInfoBuilder()
                .title("网站-API文档")
                .description("本文档描述了网站微服务接口定义")
                .version("1.0")
                .contact(new Contact("parker", "web-site", "123@qq.com"))
                .build();
    }

    private ApiInfo adminApiInfo(){

        return new ApiInfoBuilder()
                .title("后台管理系统-API文档")
                .description("本文档描述了后台管理系统微服务接口定义")
                .version("1.0")
                .contact(new Contact("parker", "web-site", "123@qq.com"))
                .build();
    }


}
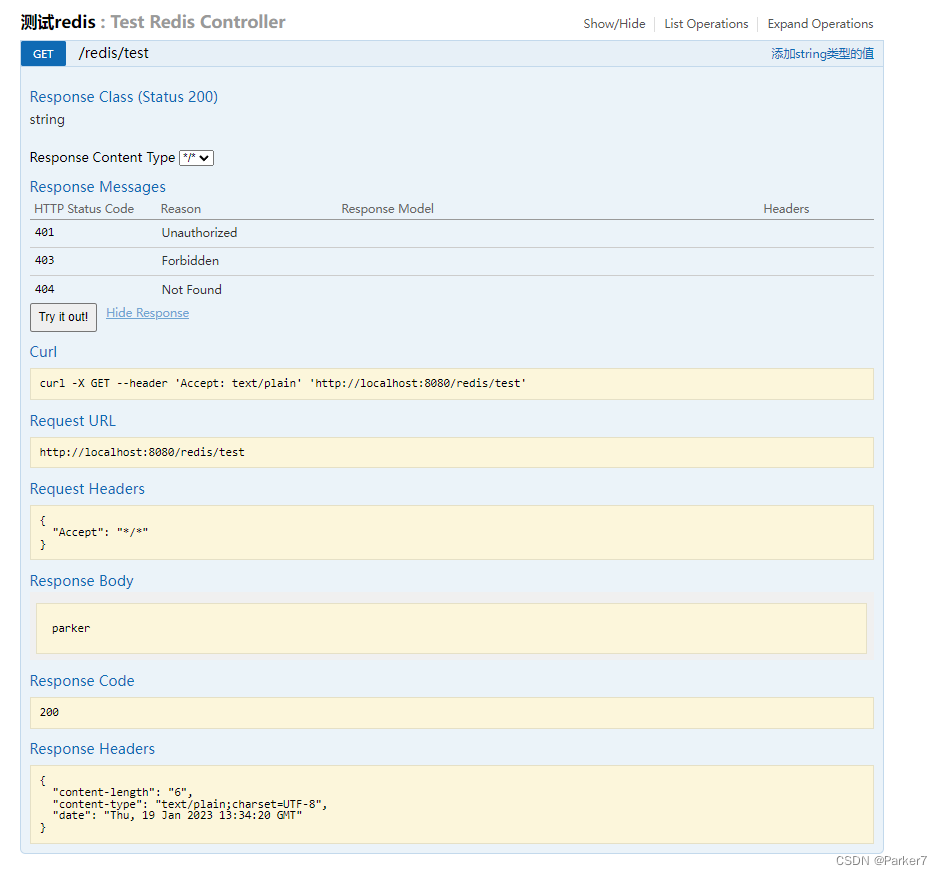
第三步,使用swagger2进行测试
在浏览器上通过 http://localhost:8080/swagger-ui.html 地址访问 swagger2 。
为了便于测试,避免后续controller方法增多,可以在类名上使用 @Api ,在方法名上使用 @ApiOperation 来区分各个方法。


 3278
3278

 被折叠的 条评论
为什么被折叠?
被折叠的 条评论
为什么被折叠?
 到【灌水乐园】发言


