


背景:标准屏幕增加自定义页签增强。
本文转载自 http://www.saptechnical.com/Tutorials/ABAP/XD01/XD01.htm
Creating Custom Screen in XD01
By Suresh Kumar Parvathaneni
Go to Transaction SPRO à Logistics – General à Business Partner à Customers à Control à Adoption of Customer’s own Master Data fields à Prepare Modification à Free enhancement of Customer Master Record.
Following screen appears:
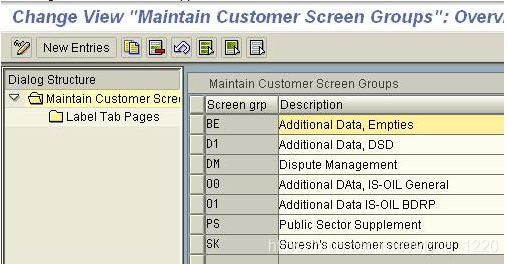
Go to CHANGE mode and Click ‘New Entries’ button. Then add a Screen Group (SK here)and meaningful description. Save the entry and then SELECT that entry and Click on ‘Label Tab Pages’.

Add a Label Tab Page i.e. enter a Screen Number, Function Code and Meaningful Description.
Save the entry and come back to the SPRO screen. Click Business Add-in: Processing Master Data Enhancements
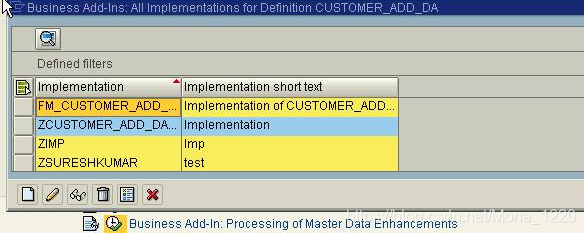
Create one Implementation by giving implementation name (must start with Z. ZSURESHKUMAR here). Give meaningful description and press enter. The following screen appears.
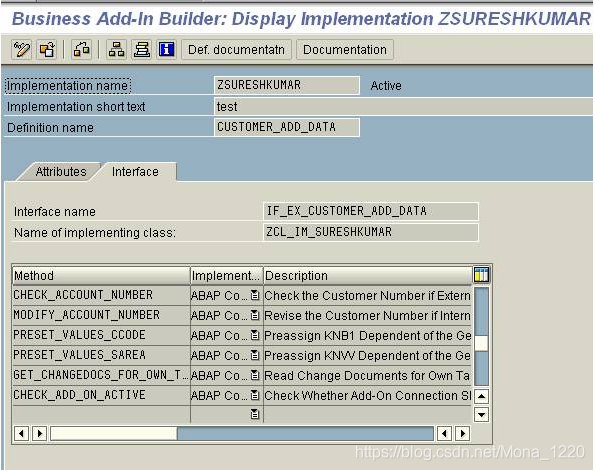
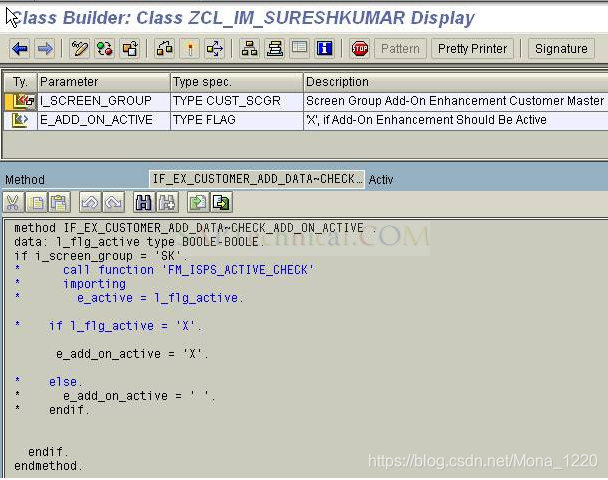
Go to Interface and Click on ‘CHECK_ADD_ON_ACTIVE’ method. Add the following code and save.
method IF_EX_CUSTOMER_ADD_DATA~CHECK_ADD_ON_ACTIVE .
data: l_flg_active type BOOLE-BOOLE.
if i_screen_group = 'SK'.
e_add_on_active = 'X'.
endif.
endmethod.
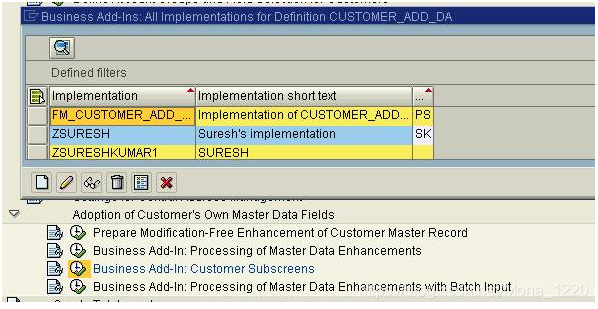
Activate that and come back to SPRO initial screen. Click Business Add-in: Customer Subscreens
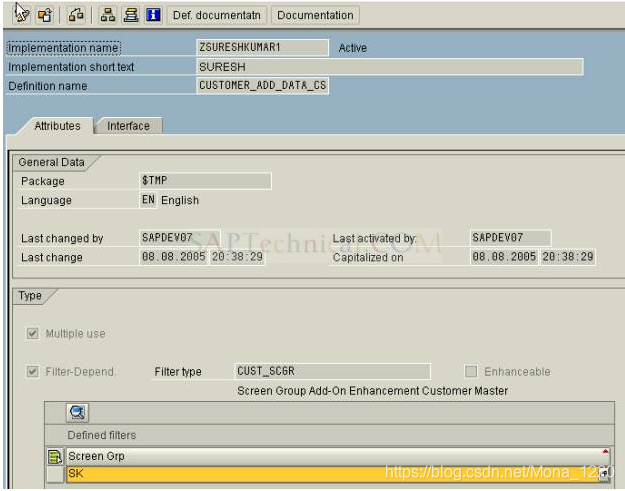
The following screen will appear. Create one implementation (ZSURESHKUMAR1 here).
Press enter. The following screen will come. Enter a meaningful Description and Screen Group (which we created earlier) as shown below.
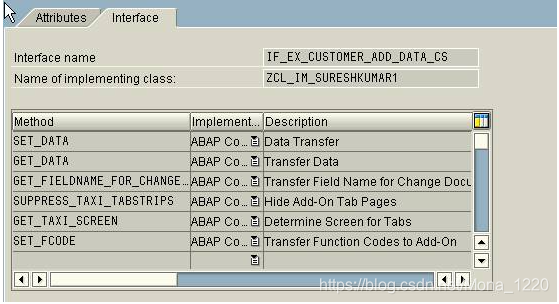
Then go to Interface
Create a Function Pool SAPLZSURESHKUMAR. (See the code of the program for other details). Create a Screen ‘1111’ with field old Customer Number – screen group PSK (SE51)
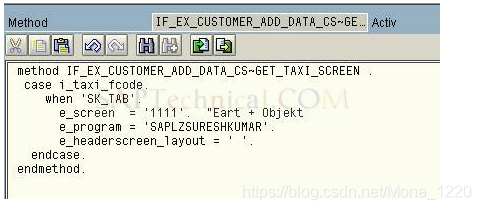
Click on GET_TAXI_SCREEN method and add the following code.
method IF_EX_CUSTOMER_ADD_DATA_CS~GET_TAXI_SCREEN .
case i_taxi_fcode.
when 'SK_TAB'.
e_screen = '1111'. "Eart + Objekt
e_program = 'SAPLZSURESHKUMAR'.
e_headerscreen_layout = ' '.
endcase.
endmethod.
Activate and leave the transaction.
Go to KNA1 (Customer Master) table and add a custom field as shown below. Activate the table.
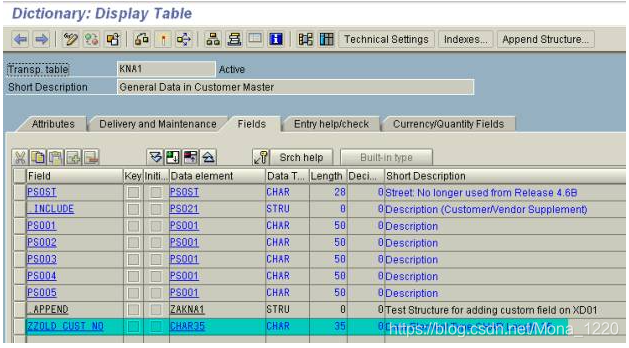
Now go to XD01 transaction.
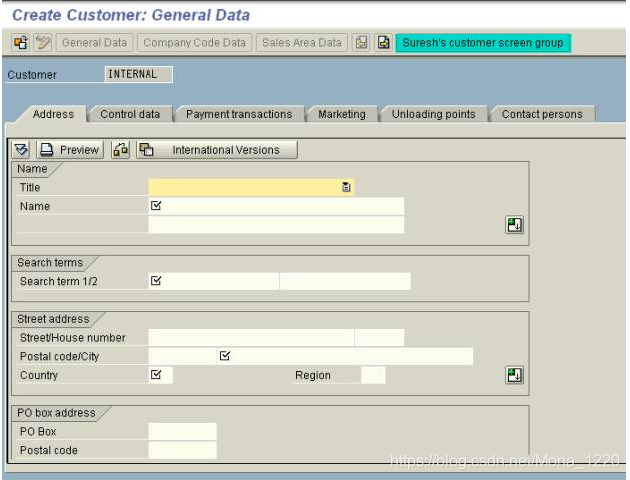
The screen we created will appear as shown in the above screen-shot. Click the button. The following screen will appear.
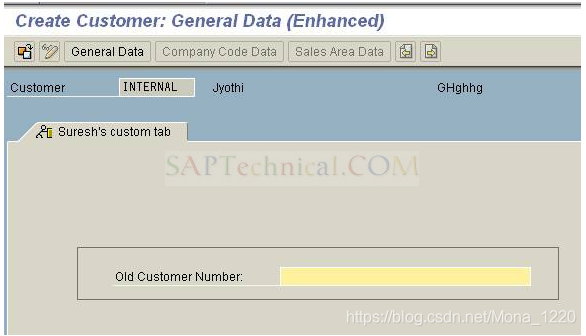
Enter a customer number and save the transaction. Now go to KNA1 table and check the value of the Old Customer Number field’s value. The value you entered in this screen will appear on there.
Until now, we have written code for creating the Custom field. Now we need to disable that field when we are opening the transaction in DISPLAY mode.
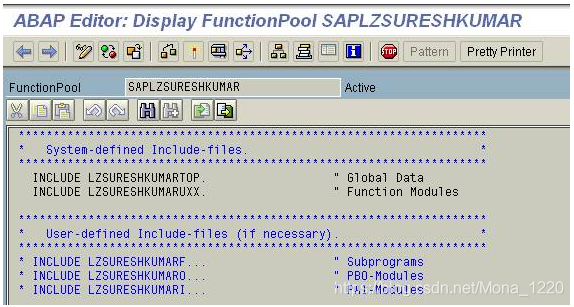
Go to include – LZSURESHKUMARTOP and enter the following code and activate the program.
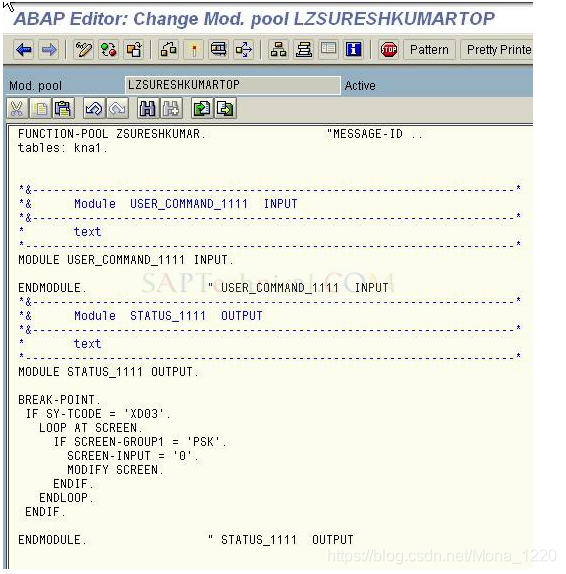
Now execute the Transaction in display mode and check the output.


 448
448

 被折叠的 条评论
为什么被折叠?
被折叠的 条评论
为什么被折叠?
 到【灌水乐园】发言


