


 本文详细解析了Linux系统中的clone系统调用,包括其参数意义、如何使用以及与CLONE_VM标志的关系。通过示例代码展示了当设置CLONE_VM标志时,子进程与父进程共享同一内存空间的情况。
references:
https://blog.youkuaiyun.com/gatieme/article/details/51417488 Linux中fork,vfork和clone详解(区别与联系)
int clone(int (fn)(void ), void *child_stack, int flags, void *arg);
fn是函数指针,这个就是指向程序的指针,就是所谓的“剧本”;
child_stack明显是为子进程分配系统堆栈空间;
flags就是标志用来描述你需要从父进程继承那些资源;
arg就是传给子进程的参数。
flags若为CLONE_VM,则表示子进程与父进程运行于相同的内存空间。
https://baike.baidu.com/item/SIGCHLD/1829827?fr=aladdin SIGCHLD
在一个进程终止或者停止时,将SIGCHLD信号发送给其父进程,按系统默认将忽略此信号,如果父进程希望被告知其子系统的这种状态,则应捕捉此信号。

vm.c
#define _GNU_SOURCE
#include <sched.h>
#include <sys/syscall.h>
#include <sys/wait.h>
#include <stdio.h>
#include <stdlib.h>
#include <string.h>
#include <unistd.h>
static int child_func(void *arg)
{
char *buf = (char *)arg;
printf("child sees buf = \"%s\"\n", buf);
strcpy(buf, "hello from child");
return 0;
}
int main(int argc, char **argv)
{
// allocate stack for child task
const int STACK_SIZE = 65536;
char *stack = malloc(STACK_SIZE);
if(!stack) {
perror("malloc");
exit(1);
}
// when called with the command-line argument "vm", set the CLONE_VM flag on.
unsigned long flags = 0;
if( argc > 1 && !strcmp(argv[1],"vm") ) {
flags |= CLONE_VM;
}
char buf[100];
strcpy(buf, "hello from parent");
if( clone(child_func, stack + STACK_SIZE, flags|SIGCHLD, buf) == -1 ) {
perror("clone");
exit(1);
}
int status;
if( wait(&status) == -1 ) {
perror("wait");
exit(1);
}
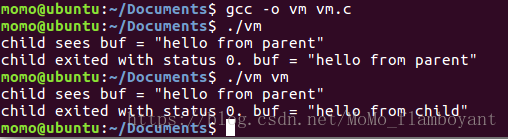
printf("child exited with status %d. buf = \"%s\"\n", status, buf);
return 0;
}
int clone(int (fn)(void ), void *child_stack, int flags, void *arg);
If flags is ORed with CLONE_VM, the child process and its parent process will share the same memory space. Under this case, if the child changes the content of buf, and then we go back to the parent process, we’ll see the change in buf done by the child.
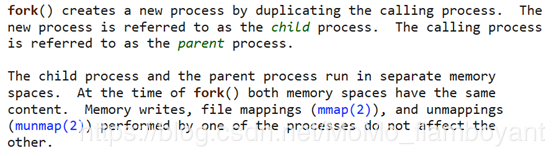
On the other hand, if flags is not ORed with CLONE_VM, the child process will run in a separate copy of the memory space of its parent. Therefore, even if the child changes the content of buf, the change won’t affect the parent’s memory space.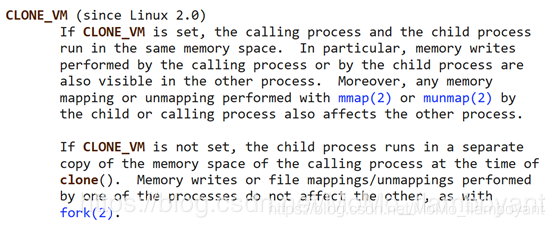


 2788
2788

 被折叠的 条评论
为什么被折叠?
被折叠的 条评论
为什么被折叠?
 到【灌水乐园】发言


