 使用EasyNetQ在C#中实现RabbitMQ的消息发送与接收


 该博客演示了如何在Visual Studio项目中通过NuGet安装EasyNetQ库,并创建一个MQHelp类来配置和操作RabbitMQ。MQHelp类支持设置MQ服务器的连接参数、交换机类型和路由键,提供了发送和接收消息的方法。示例代码展示了如何使用Direct、Fanout和Topic三种模式发送消息,以及如何订阅并接收消息。在主程序中,MQHelp类被用于发送和接收MQ消息。
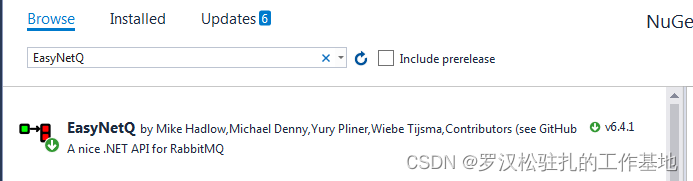
首先在visual studio项目里面用nuget工具加入 easyNetQ DLL
然后做一个help类
using System;
using System.Collections.Generic;
using System.Linq;
using System.Text;
using System.Threading.Tasks;
using EasyNetQ;
using EasyNetQ.Topology;

namespace ConsoleAppPublish
{
    public class MQHelp
    {
        public string IPAddress { get; set; }
        public string VirtualHost { get; set; }
        public string Username { get; set; }
        public string Password { get; set; }
        public string ExchangeName { get; set; }
        public string RouteName { get; set; }
        public string QueueName { get; set; }
        public MQSendEnum SendEnum { get; set; }

        private IBus bus = null;

        public MQHelp(string ip, string vHost, string user, string pwd, string exchange, string rout, string queue, MQSendEnum em)
        {
            this.IPAddress = ip;
            this.VirtualHost = vHost;
            this.Username = user;
            this.Password = pwd;
            this.ExchangeName = exchange;
            this.RouteName = rout;
            this.QueueName = queue;
            this.SendEnum = em;

            try
            {
                this.bus = RabbitHutch.CreateBus(GetMqConnection());

                if (string.IsNullOrEmpty(queue) == false)
                {
                    bus.Advanced.QueueDeclare(queue);
                }
            }
            catch (Exception ex)
            {
                Console.WriteLine(ex.Message);
            }
        }

        private string GetMqConnection()
        {
            string conn = string.Format("host={0};virtualHost={1};username={2};password={3}",
                IPAddress, VirtualHost, Username, Password);

            return conn;
        }

        public void SendMsg(string msg)
        {
            try
            {
                //MyMessage msgOBJ = new MyMessage() { Text=msg };
                var message = new EasyNetQ.Message<object>(msg);

                IExchange ex = null;
                //判断推送模式
                if (this.SendEnum == MQSendEnum.Direct)
                {
                    ex = bus.Advanced.ExchangeDeclare(this.ExchangeName, ExchangeType.Direct);
                }
                if (this.SendEnum == MQSendEnum.Fanout)
                {
                    //广播订阅模式
                    ex = bus.Advanced.ExchangeDeclare(this.ExchangeName, ExchangeType.Fanout);
                }
                if (this.SendEnum == MQSendEnum.Topic)
                {
                    //主题路由模式
                    ex = bus.Advanced.ExchangeDeclare(this.ExchangeName, ExchangeType.Topic);
                }

                //发送
                this.bus.Advanced.Publish(ex, this.RouteName, false, message);
            }
            catch (Exception ex)
            {
                Console.WriteLine(ex.Message);
            }
        }

        public void ReceiveMsg()
        {
            try
            {
                this.bus.PubSub.Subscribe<object>("", m => {
                    Console.WriteLine(m.ToString());
                    //LogHelp.Info(m.ToString());
                } ,f => {
                    f.WithQueueName(this.QueueName);
                } );
            }
            catch (Exception ex)
            {
                Console.WriteLine(ex.Message);
            }
        }


    }

    public enum MQSendEnum
    {
        Direct = 1,   //推送模式
        Fanout = 2,   //订阅模式
        Topic = 3     //主题路由模式
    }


}
然后在控制台里面发送 或者 接收MQ 消息:
   class Program
    {
        static void Main(string[] args)
        {
            Console.WriteLine("MQ test");


            MQHelp mq = new MQHelp("10.10.10.10", "testhost", "admin", "adminPWD", "amq.topic", "orderTEST", "qTEST", MQSendEnum.Topic);
            mq.SendMsg("hello123");
            mq.ReceiveMsg();


            Console.WriteLine("end Program");
            Console.ReadLine();
        }
    }


 1234
1234

 被折叠的 条评论
为什么被折叠?
被折叠的 条评论
为什么被折叠?
 到【灌水乐园】发言


